

About the Partner Portal
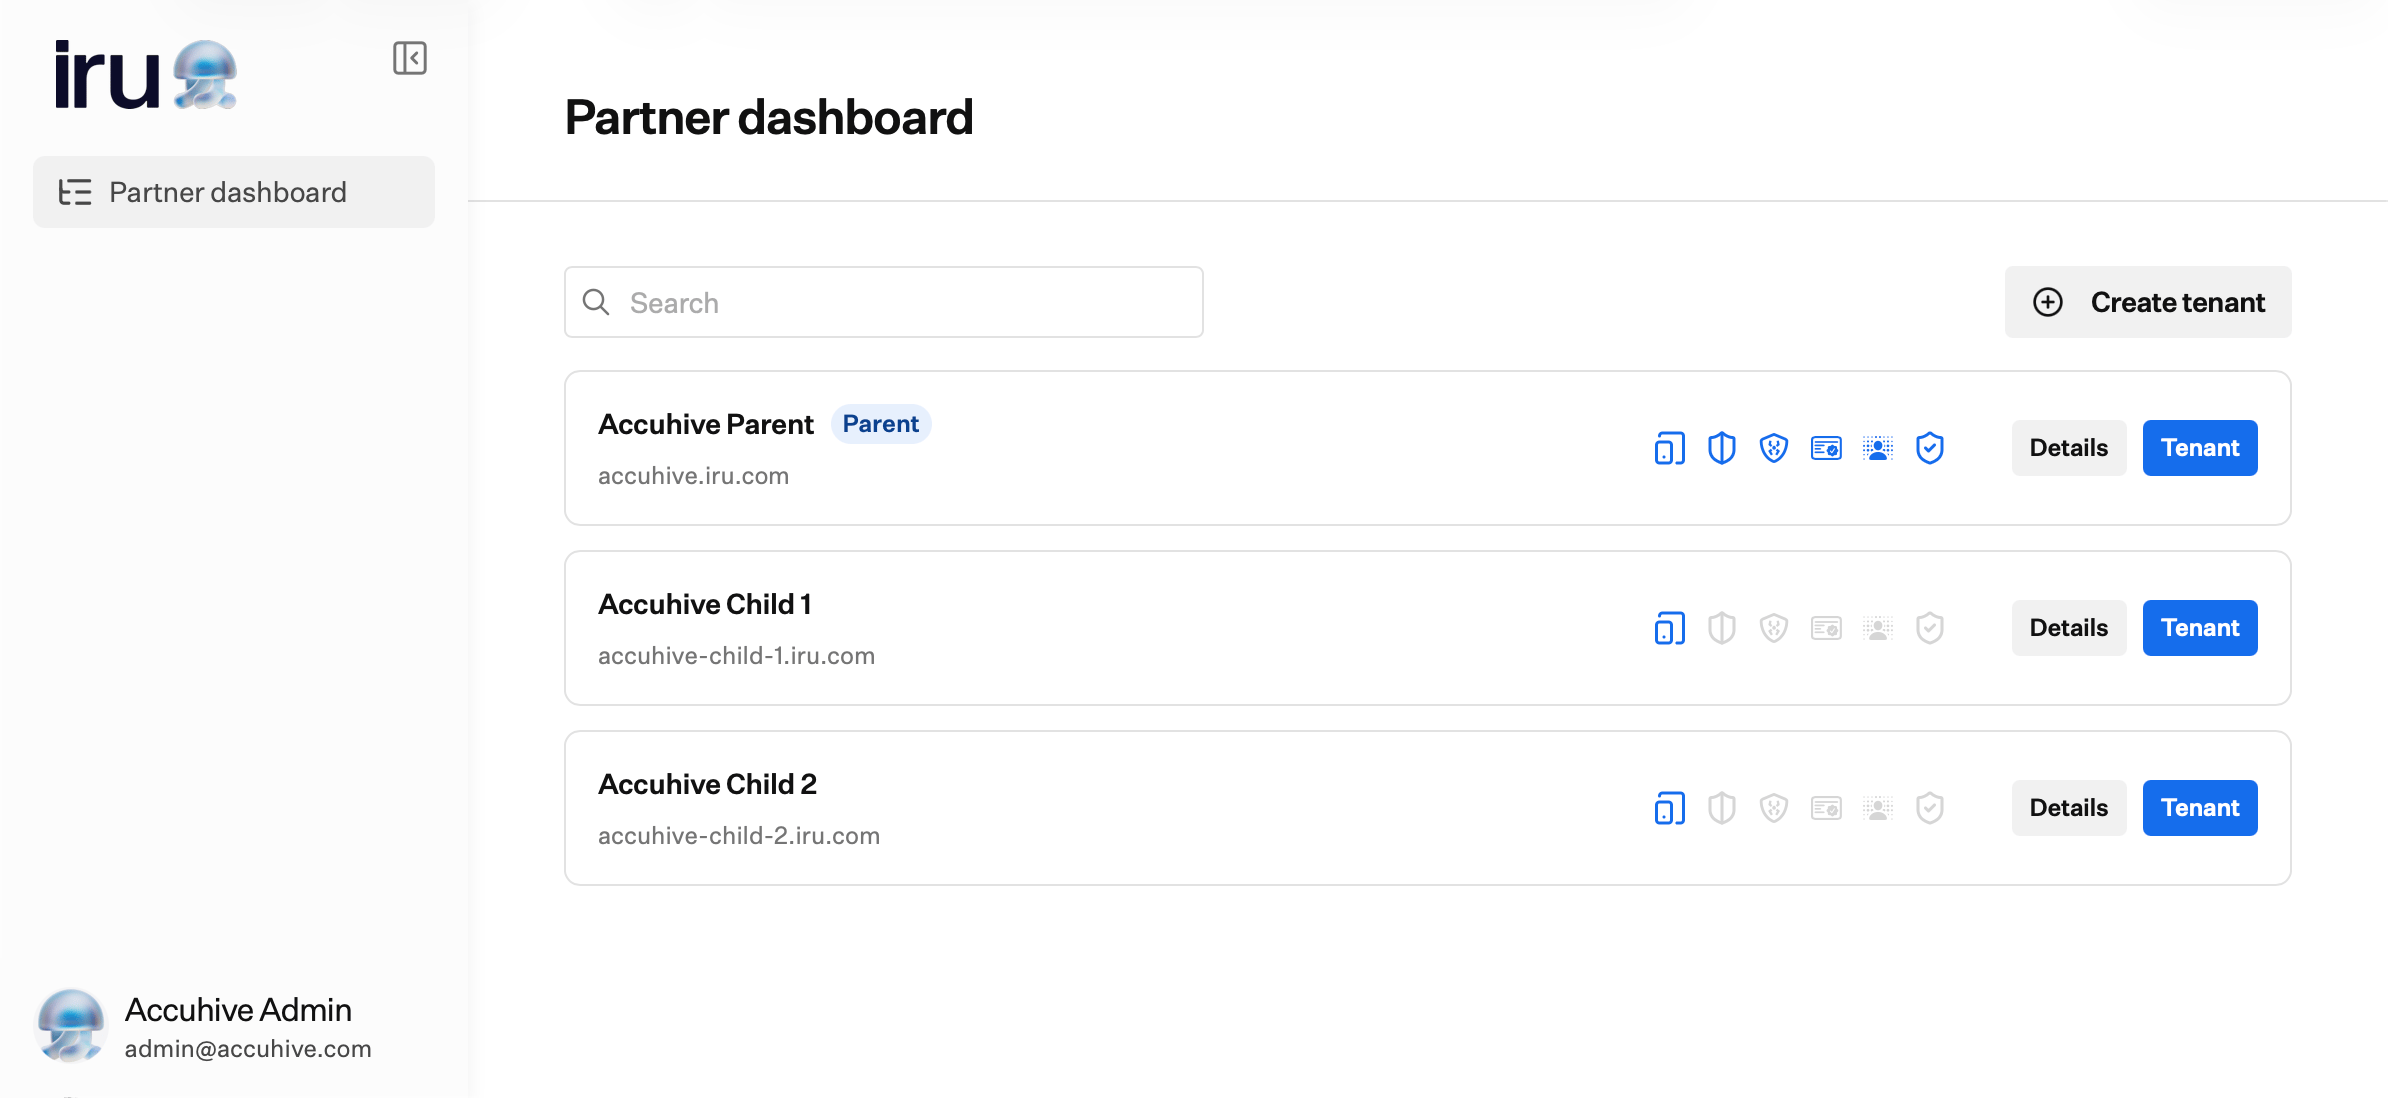
If your organization is an MSP parent tenant, the Partner portal is where you view and manage child customer tenants from one place. You can see which products are enabled per tenant, adjust provisioning, create new tenants, and open a child tenant to work in that environment. Child tenants still use separate sign-in. Opening a child tenant takes you to that tenant’s URL; you authenticate there like any other Iru tenant.Partner portal appears in the Account Menu only for Account Owners and Administrators on an MSP parent tenant. Other roles do not see it. See Team Member Role Permissions.
How to Open the Partner Portal
1
Open the Account Menu Button
In the sidebar, click the Account Menu Button.
2
Select Partner portal
Click Partner portal.
Return to the Parent Tenant
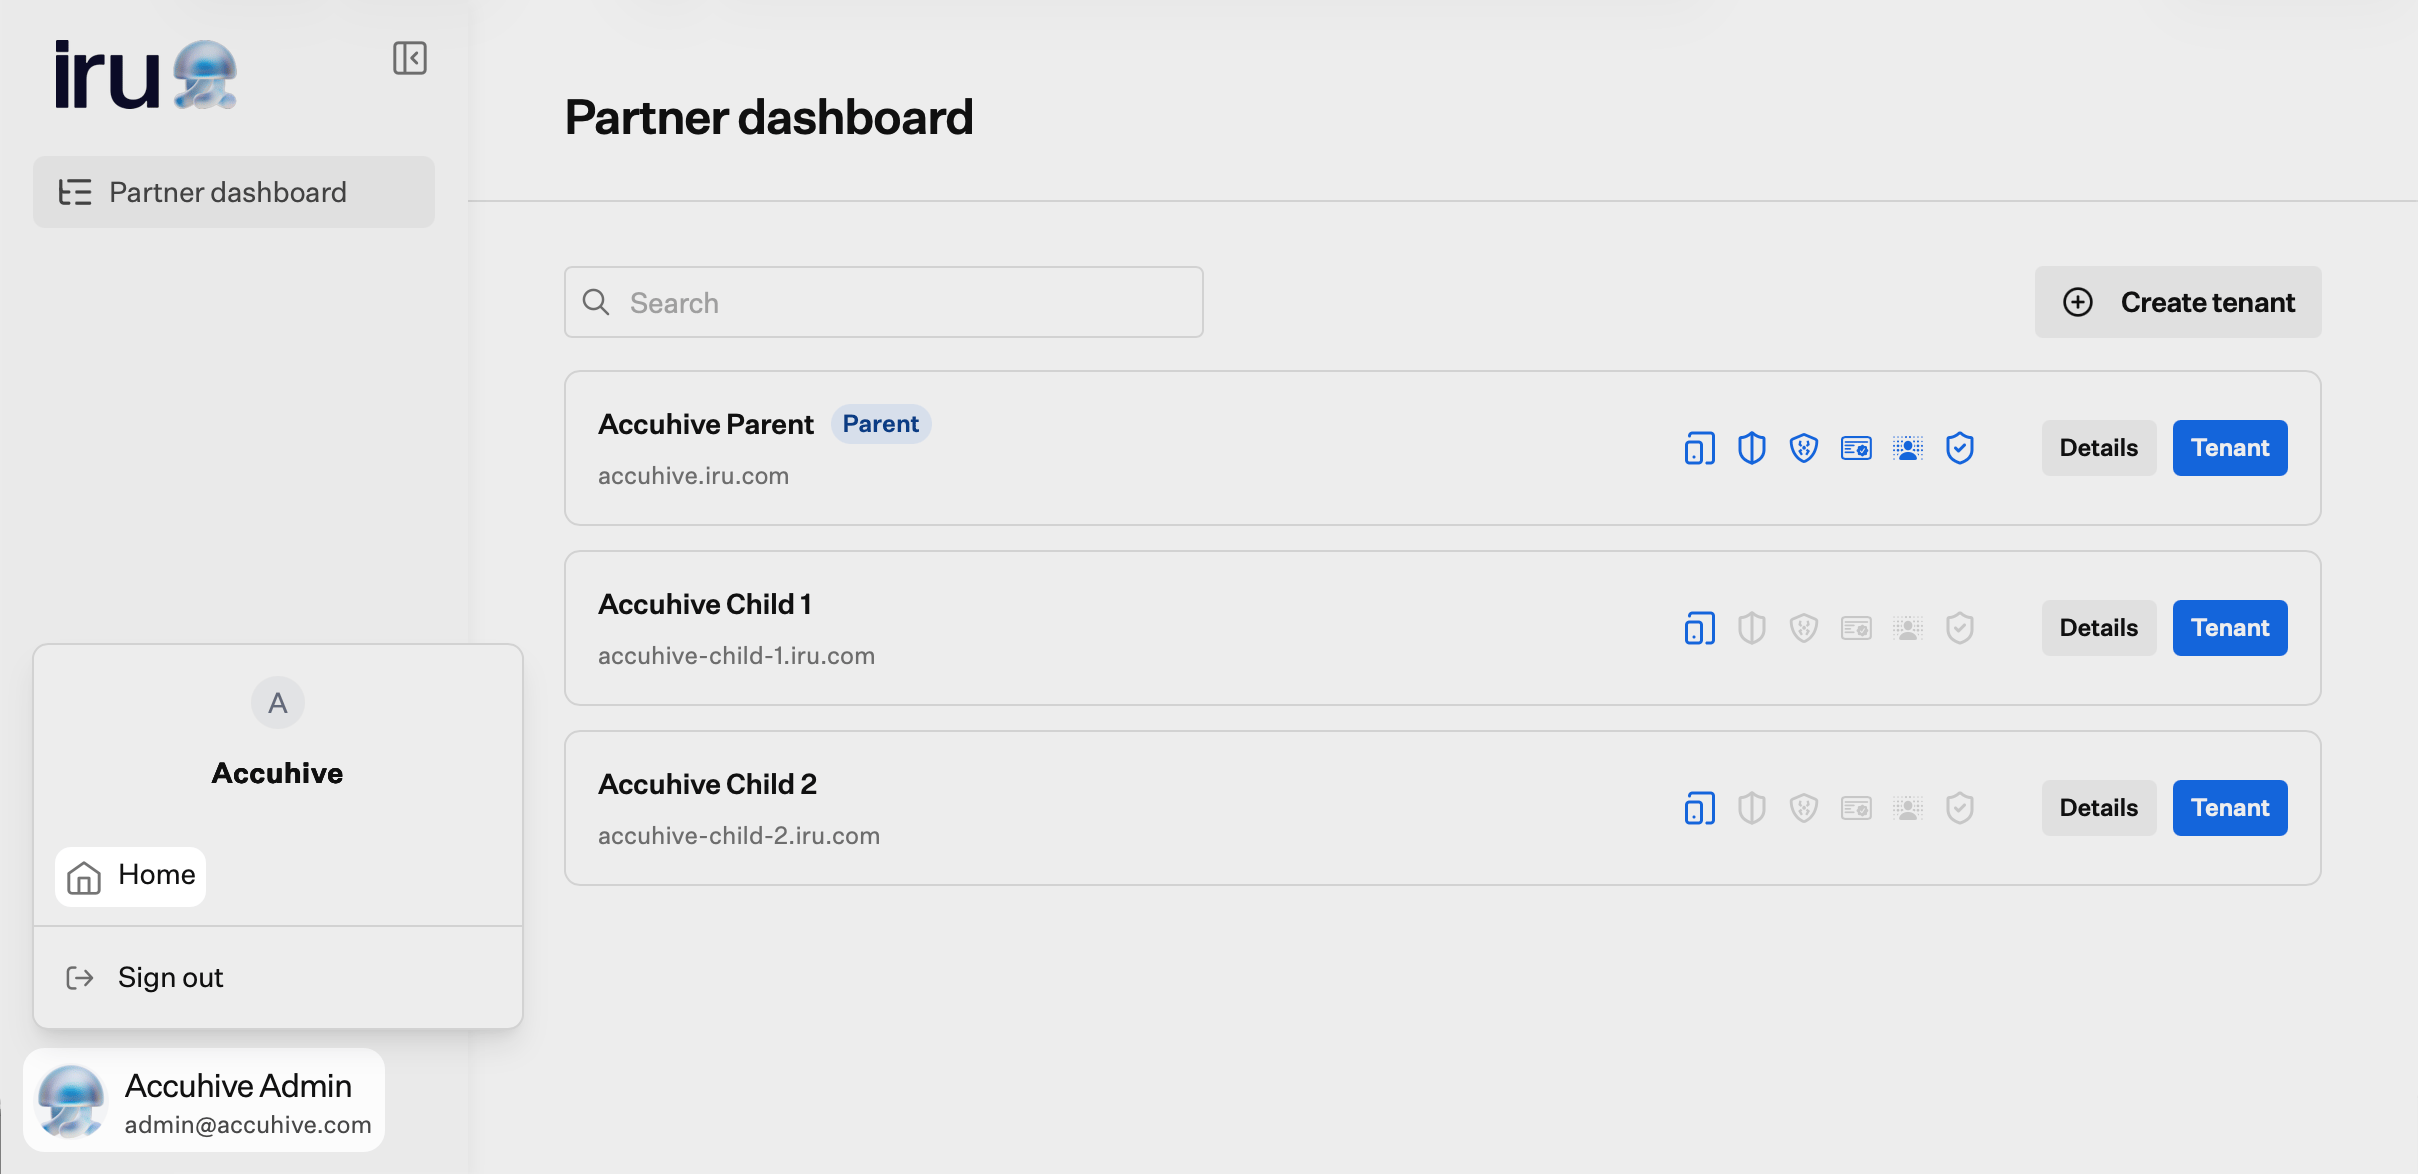
While you are in the Partner portal, use Home in the Account Menu to return to your MSP parent tenant.1
Open the Account Menu Button
In the sidebar, click the Account Menu Button.
2
Select Home
Click Home.
Partner Dashboard
The Partner dashboard is the main view in the Partner portal. Use Search to filter tenants by name. Each row shows:- Tenant name and subdomain URL (for example,
customer.iru.com) - Parent label on your MSP parent tenant row
- Product icons for provisioned products. Icons appear in color when a product is enabled for that tenant and grey when it is off:
- Details and Tenant buttons
Open a Child Tenant
1
Find the tenant
On the Partner dashboard, locate the child tenant you want to open.
2
Click Tenant
Click Tenant on that row.
View and Edit Tenant Details
1
Open Organization details
On the Partner dashboard, click Details on a tenant row.
2
Review tenant fields
The Organization details drawer shows: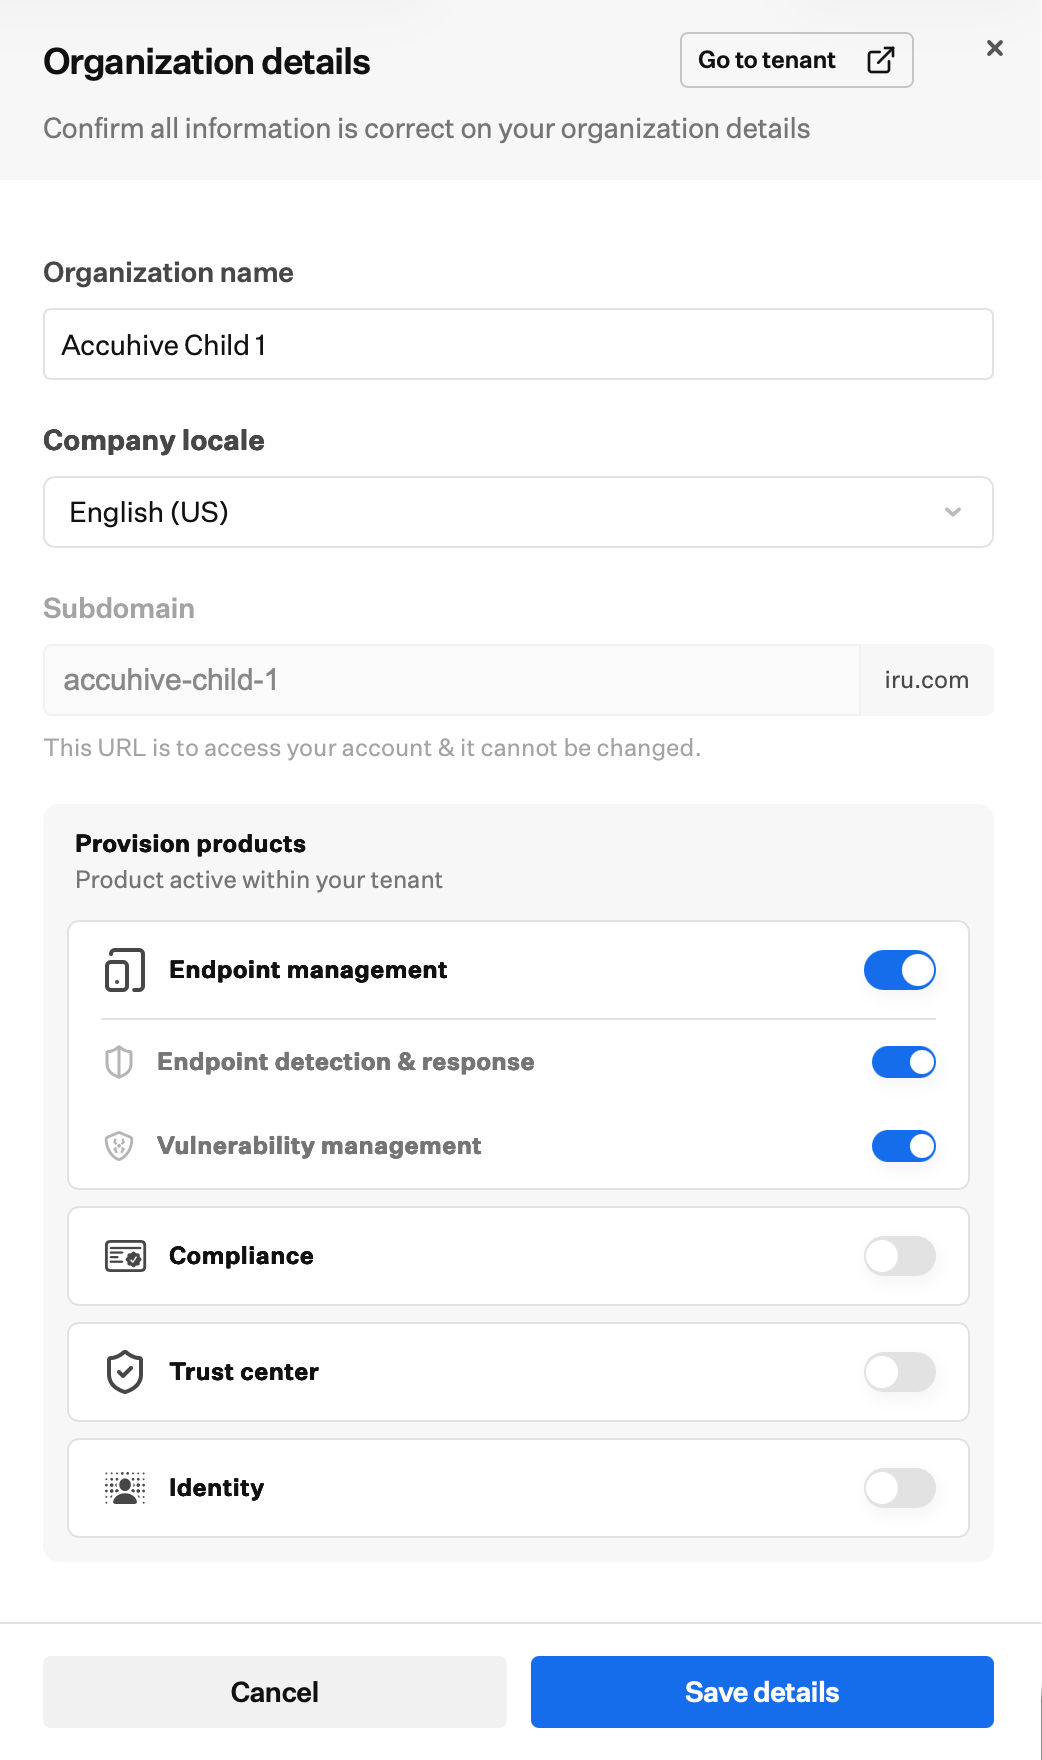
- Organization name
- Company locale (editable dropdown)
- Subdomain (read-only; this URL is how users access the tenant and cannot be changed)
- Provision products: Toggles for products your parent tenant has available:
3
Save changes
Adjust Organization details toggles as needed, then click Save details.
4
Confirm changes
On Confirm changes, review the summary of added and removed products. Type the tenant’s subdomain into the Enter tenant subdomain field.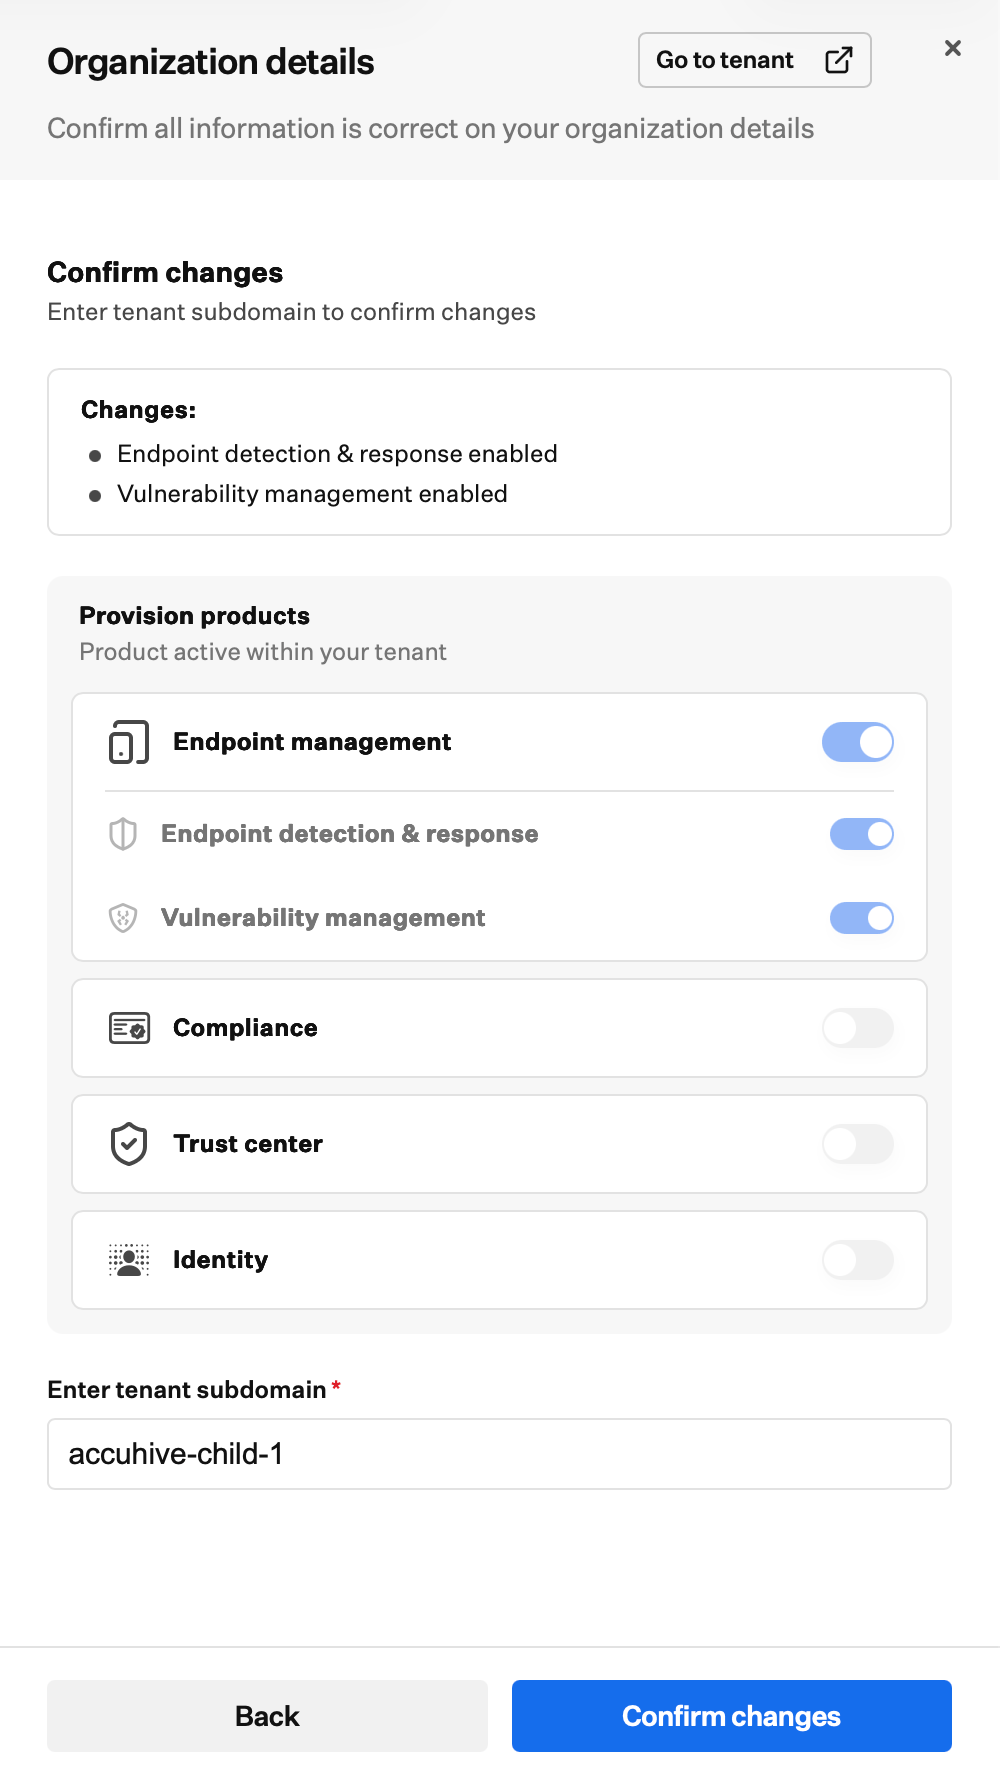
5
Confirm changes
Click Confirm changes.
Create a Tenant
1
Start tenant creation
On the Partner dashboard, click + Create tenant.
2
Complete tenant information
In Tenant information, fill in: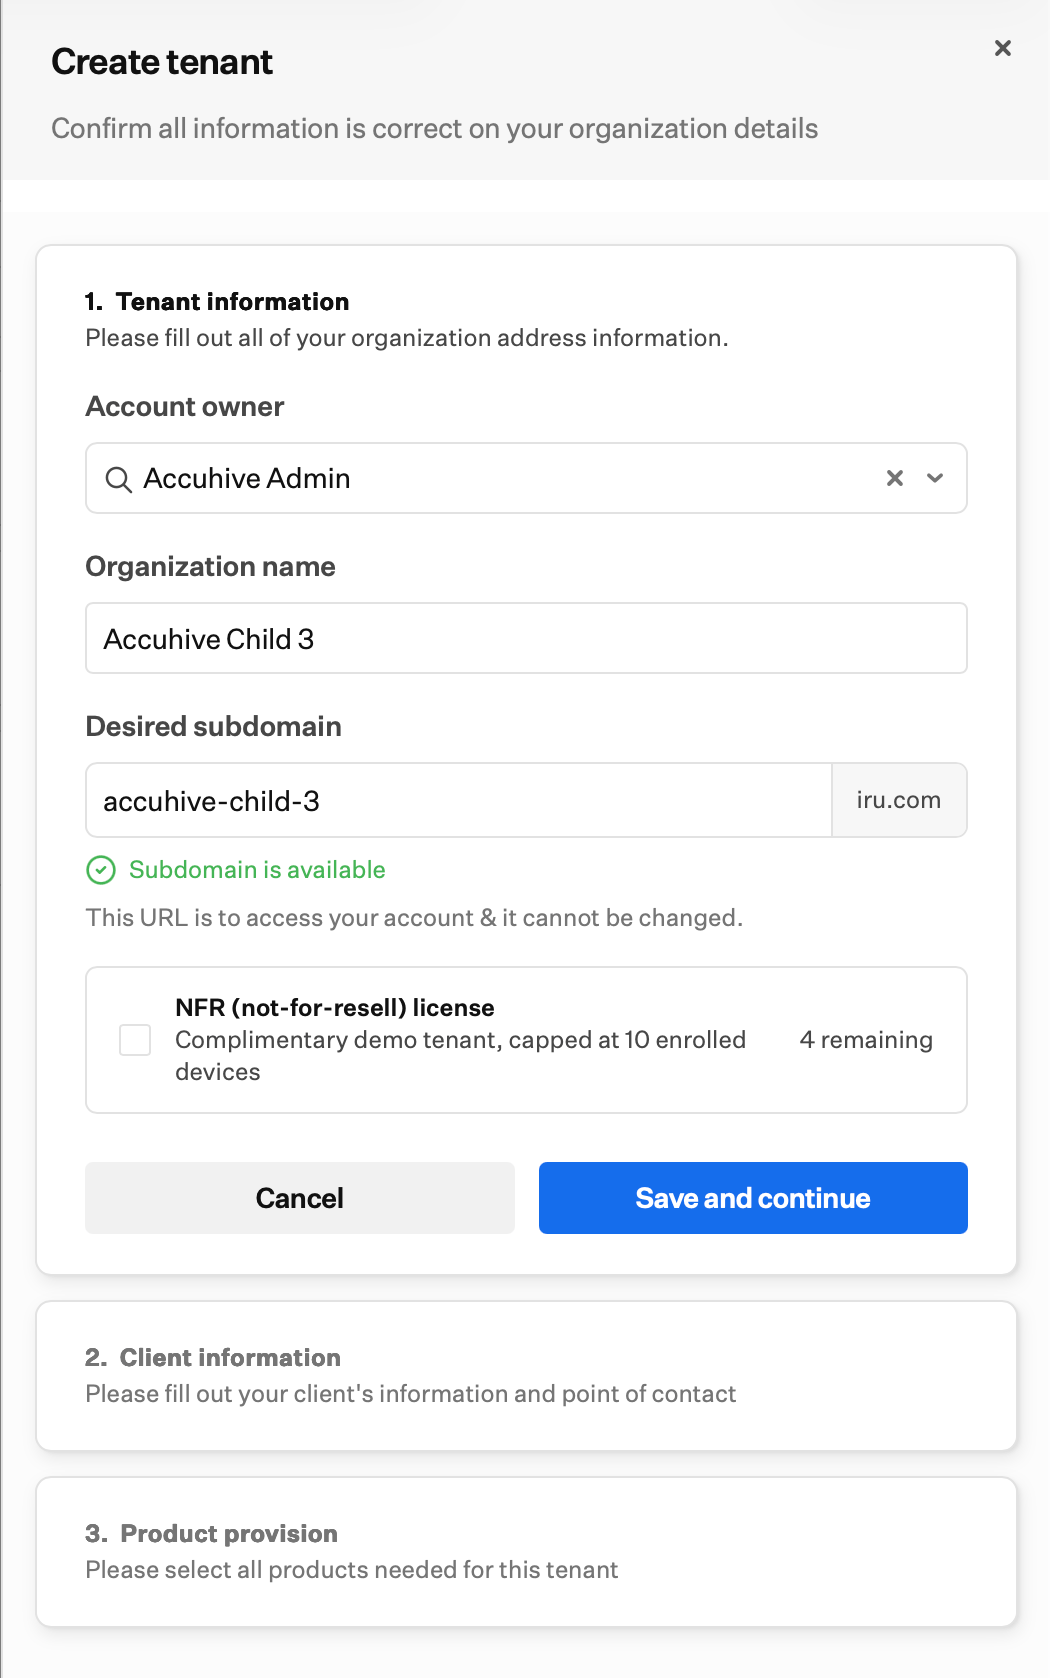
- Account owner: Select an administrator from your parent tenant
- Organization name
- Desired subdomain: The tenant URL uses this value with
.iru.com. It cannot be changed after creation. - NFR (not-for-resale) license (optional): Creates a complimentary demo tenant capped at 10 enrolled devices. Your parent tenant has a limited number of NFR licenses. When no NFR licenses remain, this option is disabled.
3
Save and continue
Click Save and continue.
4
Complete client information
In Client information, enter the client’s details: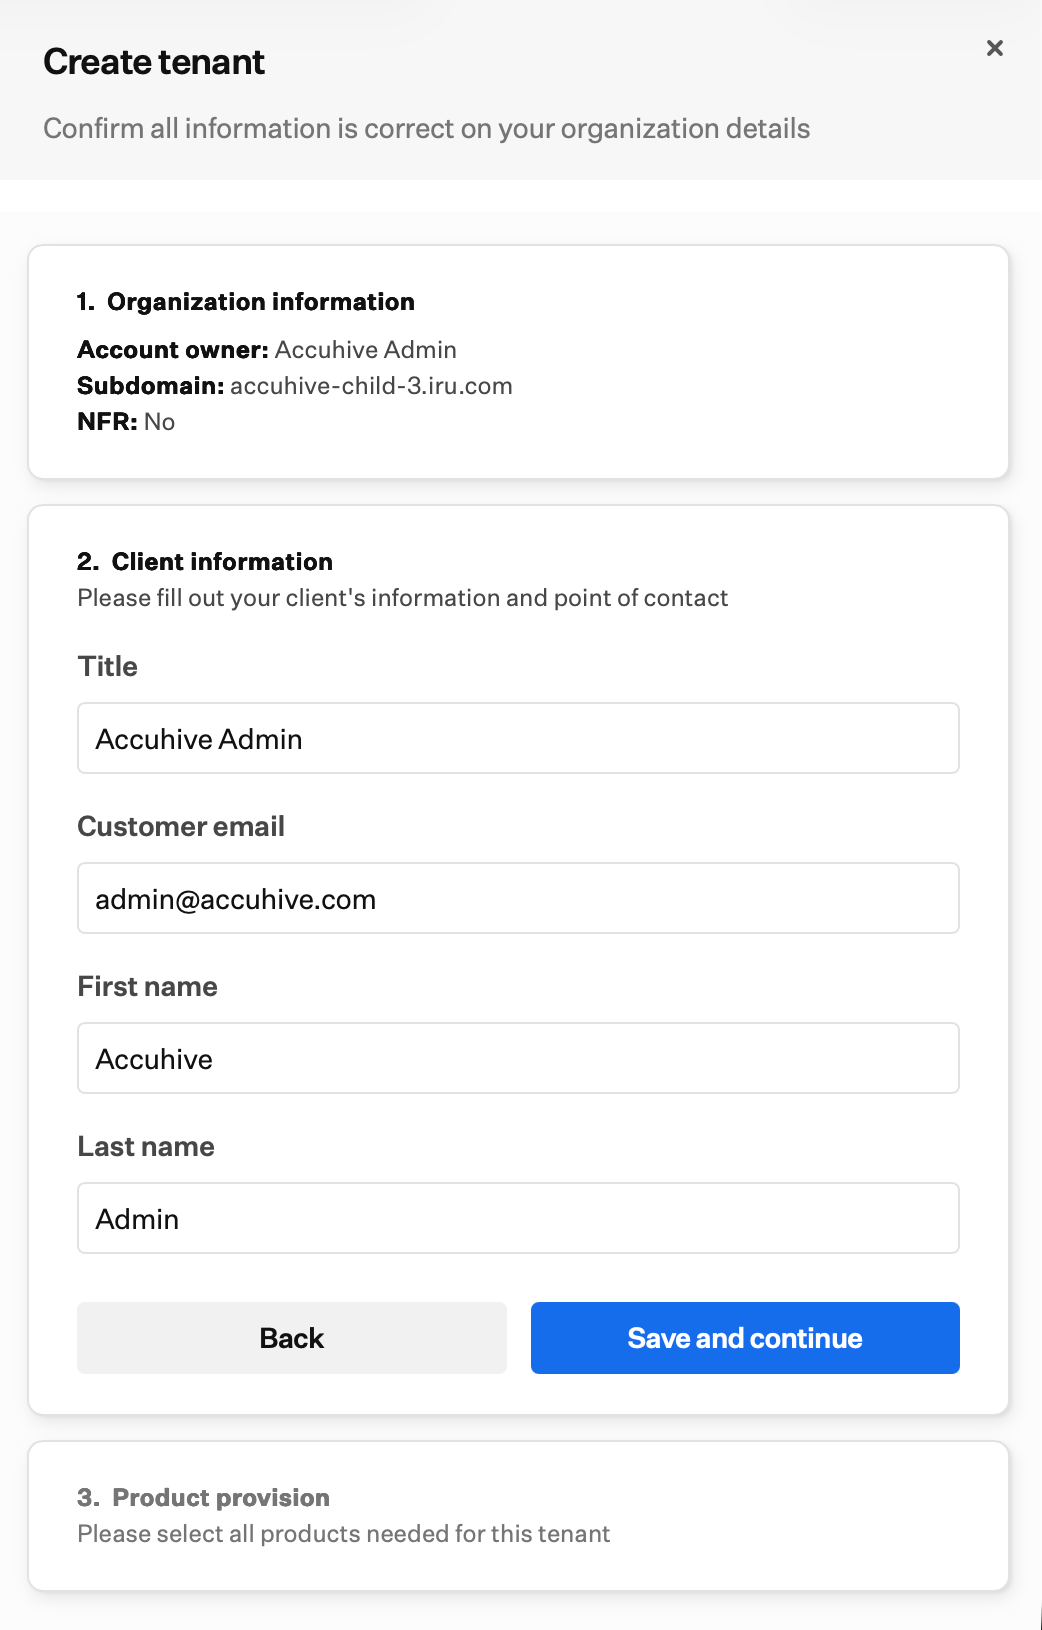
- Title
- Customer email
- First name
- Last name
5
Save and continue
Click Save and continue.
6
Select products
In Product provision, turn on the products this tenant needs. Available toggles match the products provisioned on your parent tenant: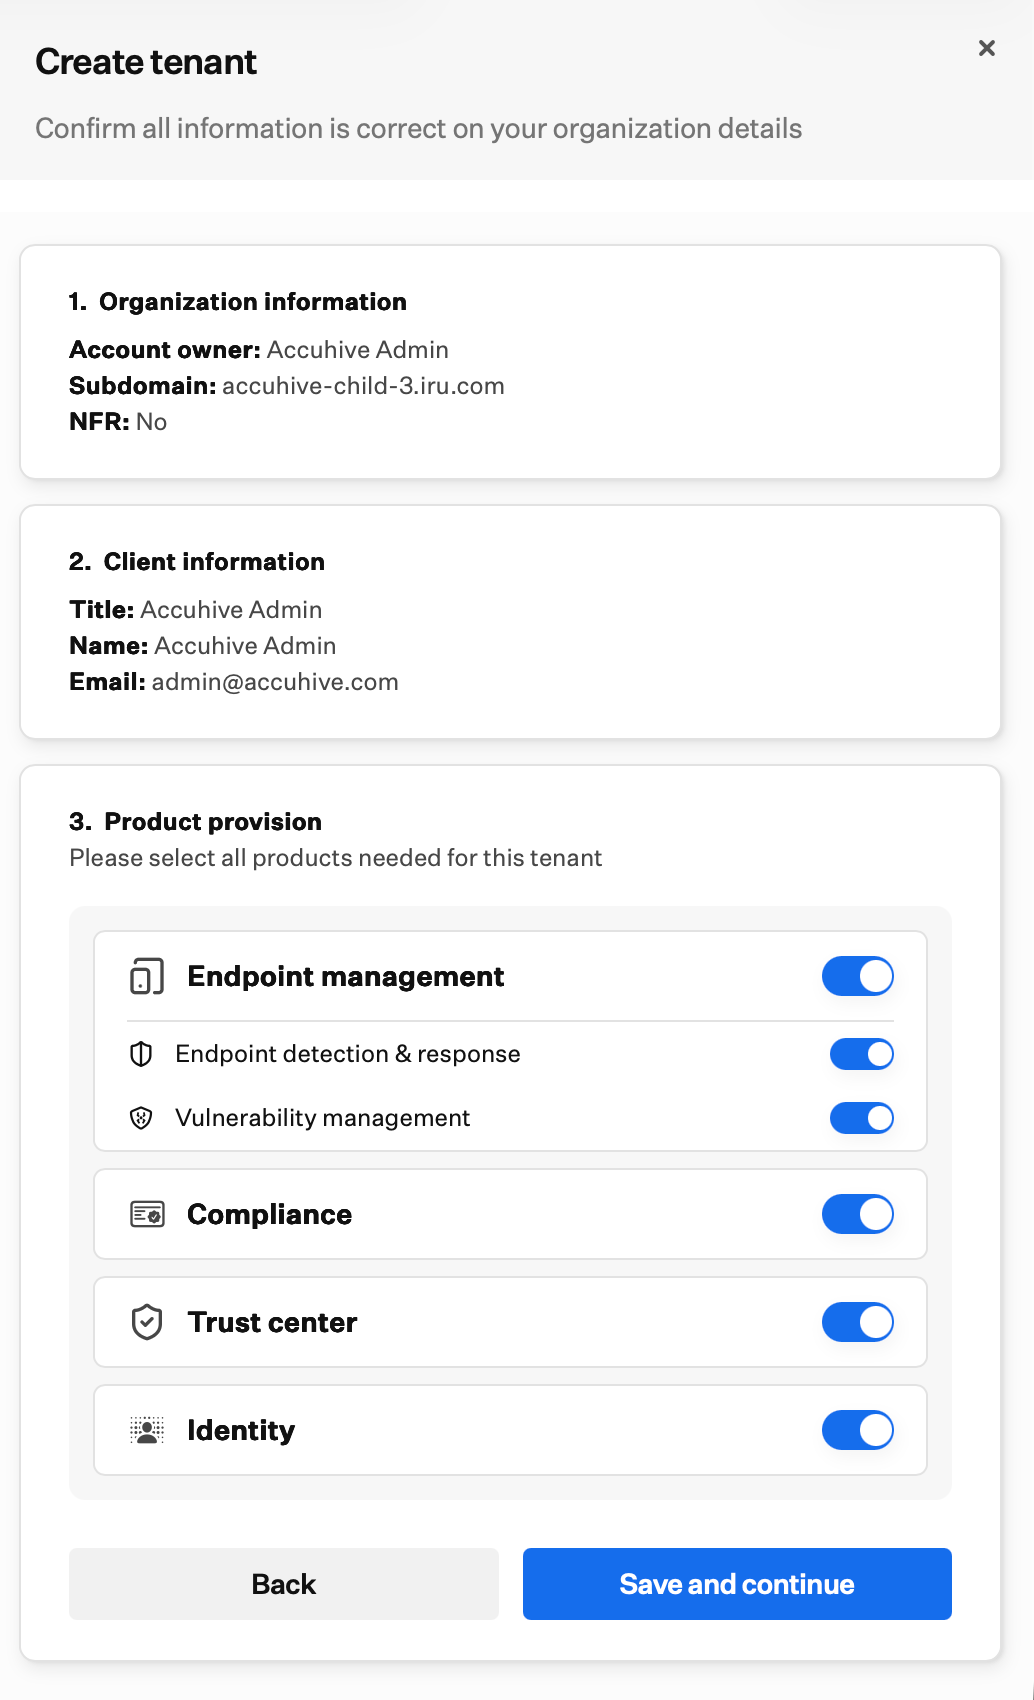
- Endpoint management
- Endpoint detection & response
- Vulnerability management
- Compliance
- Trust Center
- Identity
7
Save and continue
Click Save and continue.
8
Review and create
Confirm the summary for Organization information, Client information, and Product provision. Use Edit on any section to go back and change it.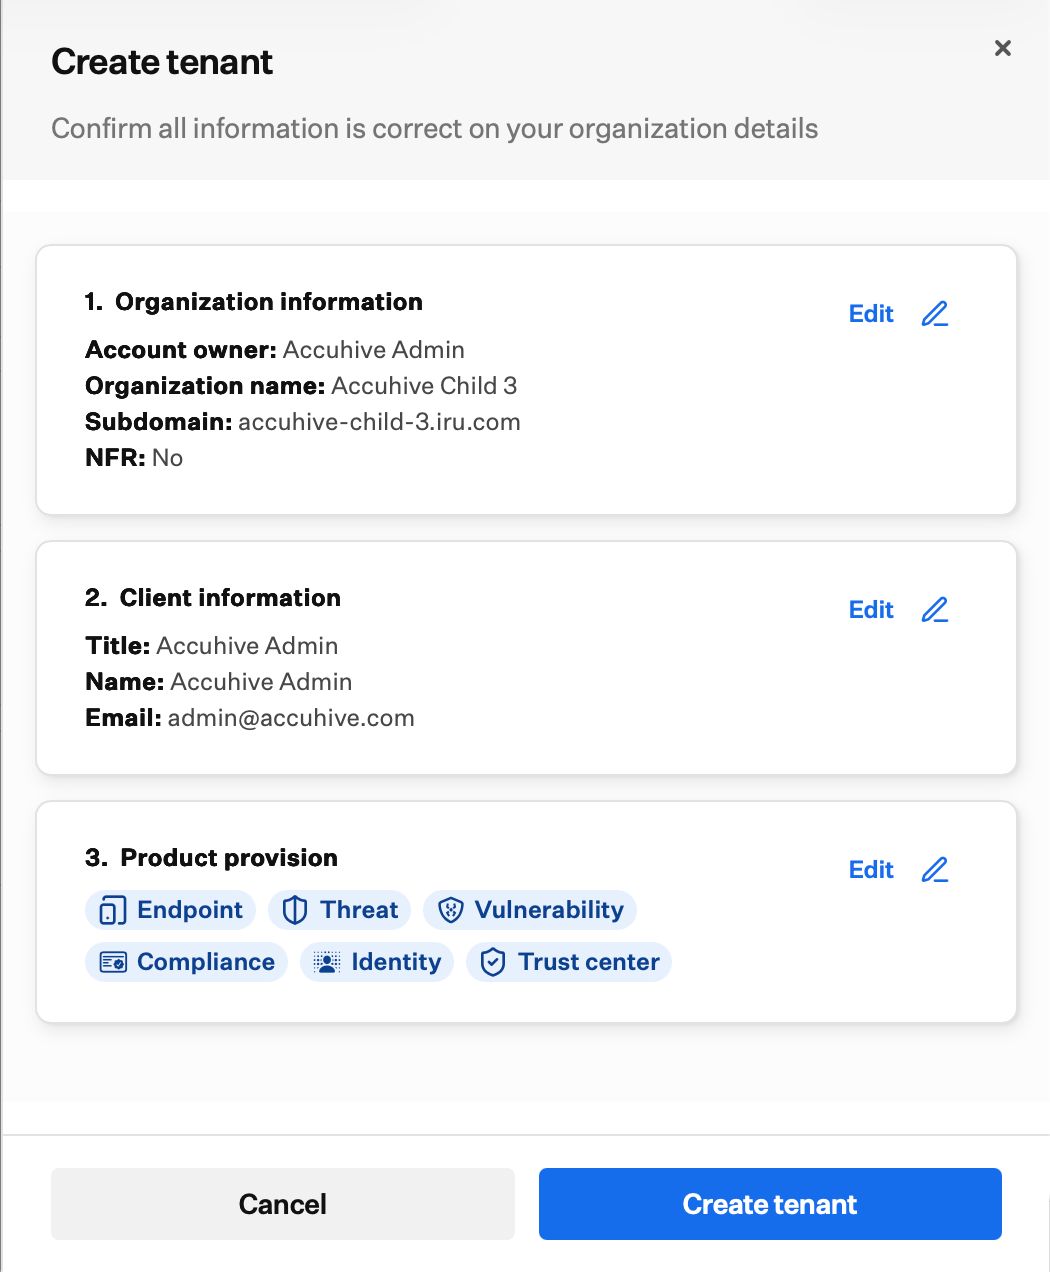
9
Create tenant
Click Create tenant to provision the child tenant, or Cancel to discard.
Considerations
Parent tenant access only
Parent tenant access only
The Partner portal is available only from your MSP parent tenant. You cannot open it from a child tenant’s account menu.
Separate authentication per tenant
Separate authentication per tenant
Each child tenant has its own sign-in. The Partner portal links you to child tenant URLs; it does not share a single session across tenants.
Product provisioning limits
Product provisioning limits
You can enable only products that your parent tenant has provisioned. Child tenant toggles cannot exceed what the parent tenant supports.
NFR demo tenants
NFR demo tenants
NFR tenants are for demonstration use and are limited to 10 enrolled devices. Your parent tenant receives five NFR licenses in total. The create-tenant form shows how many you have left.
Related Articles
Account Menu
Open Partner portal or return to your parent tenant with Home.
Team Member Role Permissions
Which roles can access the Partner portal and manage tenants.
Admins and Access
Add administrators who can be assigned as account owners for new tenants.
Billing Page
Review license usage on your parent tenant.