

This guide applies to Mac computers
The maximum file upload size for a Mac Custom App is 30 GB.
Prepare Your Fonts
Select your font files or folders, right-click (or Control-click) them, then choose Compress. Optionally, give the new ZIP archive a descriptive name.Add a Custom App
To add this Library Item to your Iru Endpoint Library, follow the steps outlined in the Library Overview article.Configure the Custom App
1
Name the Custom App
Give your Custom App a descriptive name.
2
Assign to Blueprints
Assign your Custom App to the desired Blueprints.
3
Set Execution Frequency
Select Install once per device as the execution frequency.
4
Configure Self Service
Optionally, toggle the option to make the Library Item available in Self Service, choosing any desired customizations.
5
Select Installation Method
Select ZIP File.
6
Configure Unzip Location
To ensure the fonts are accessible to all users of a computer, specify an Unzip Location of /Library/Fonts.
7
Upload ZIP File
Upload your ZIP File.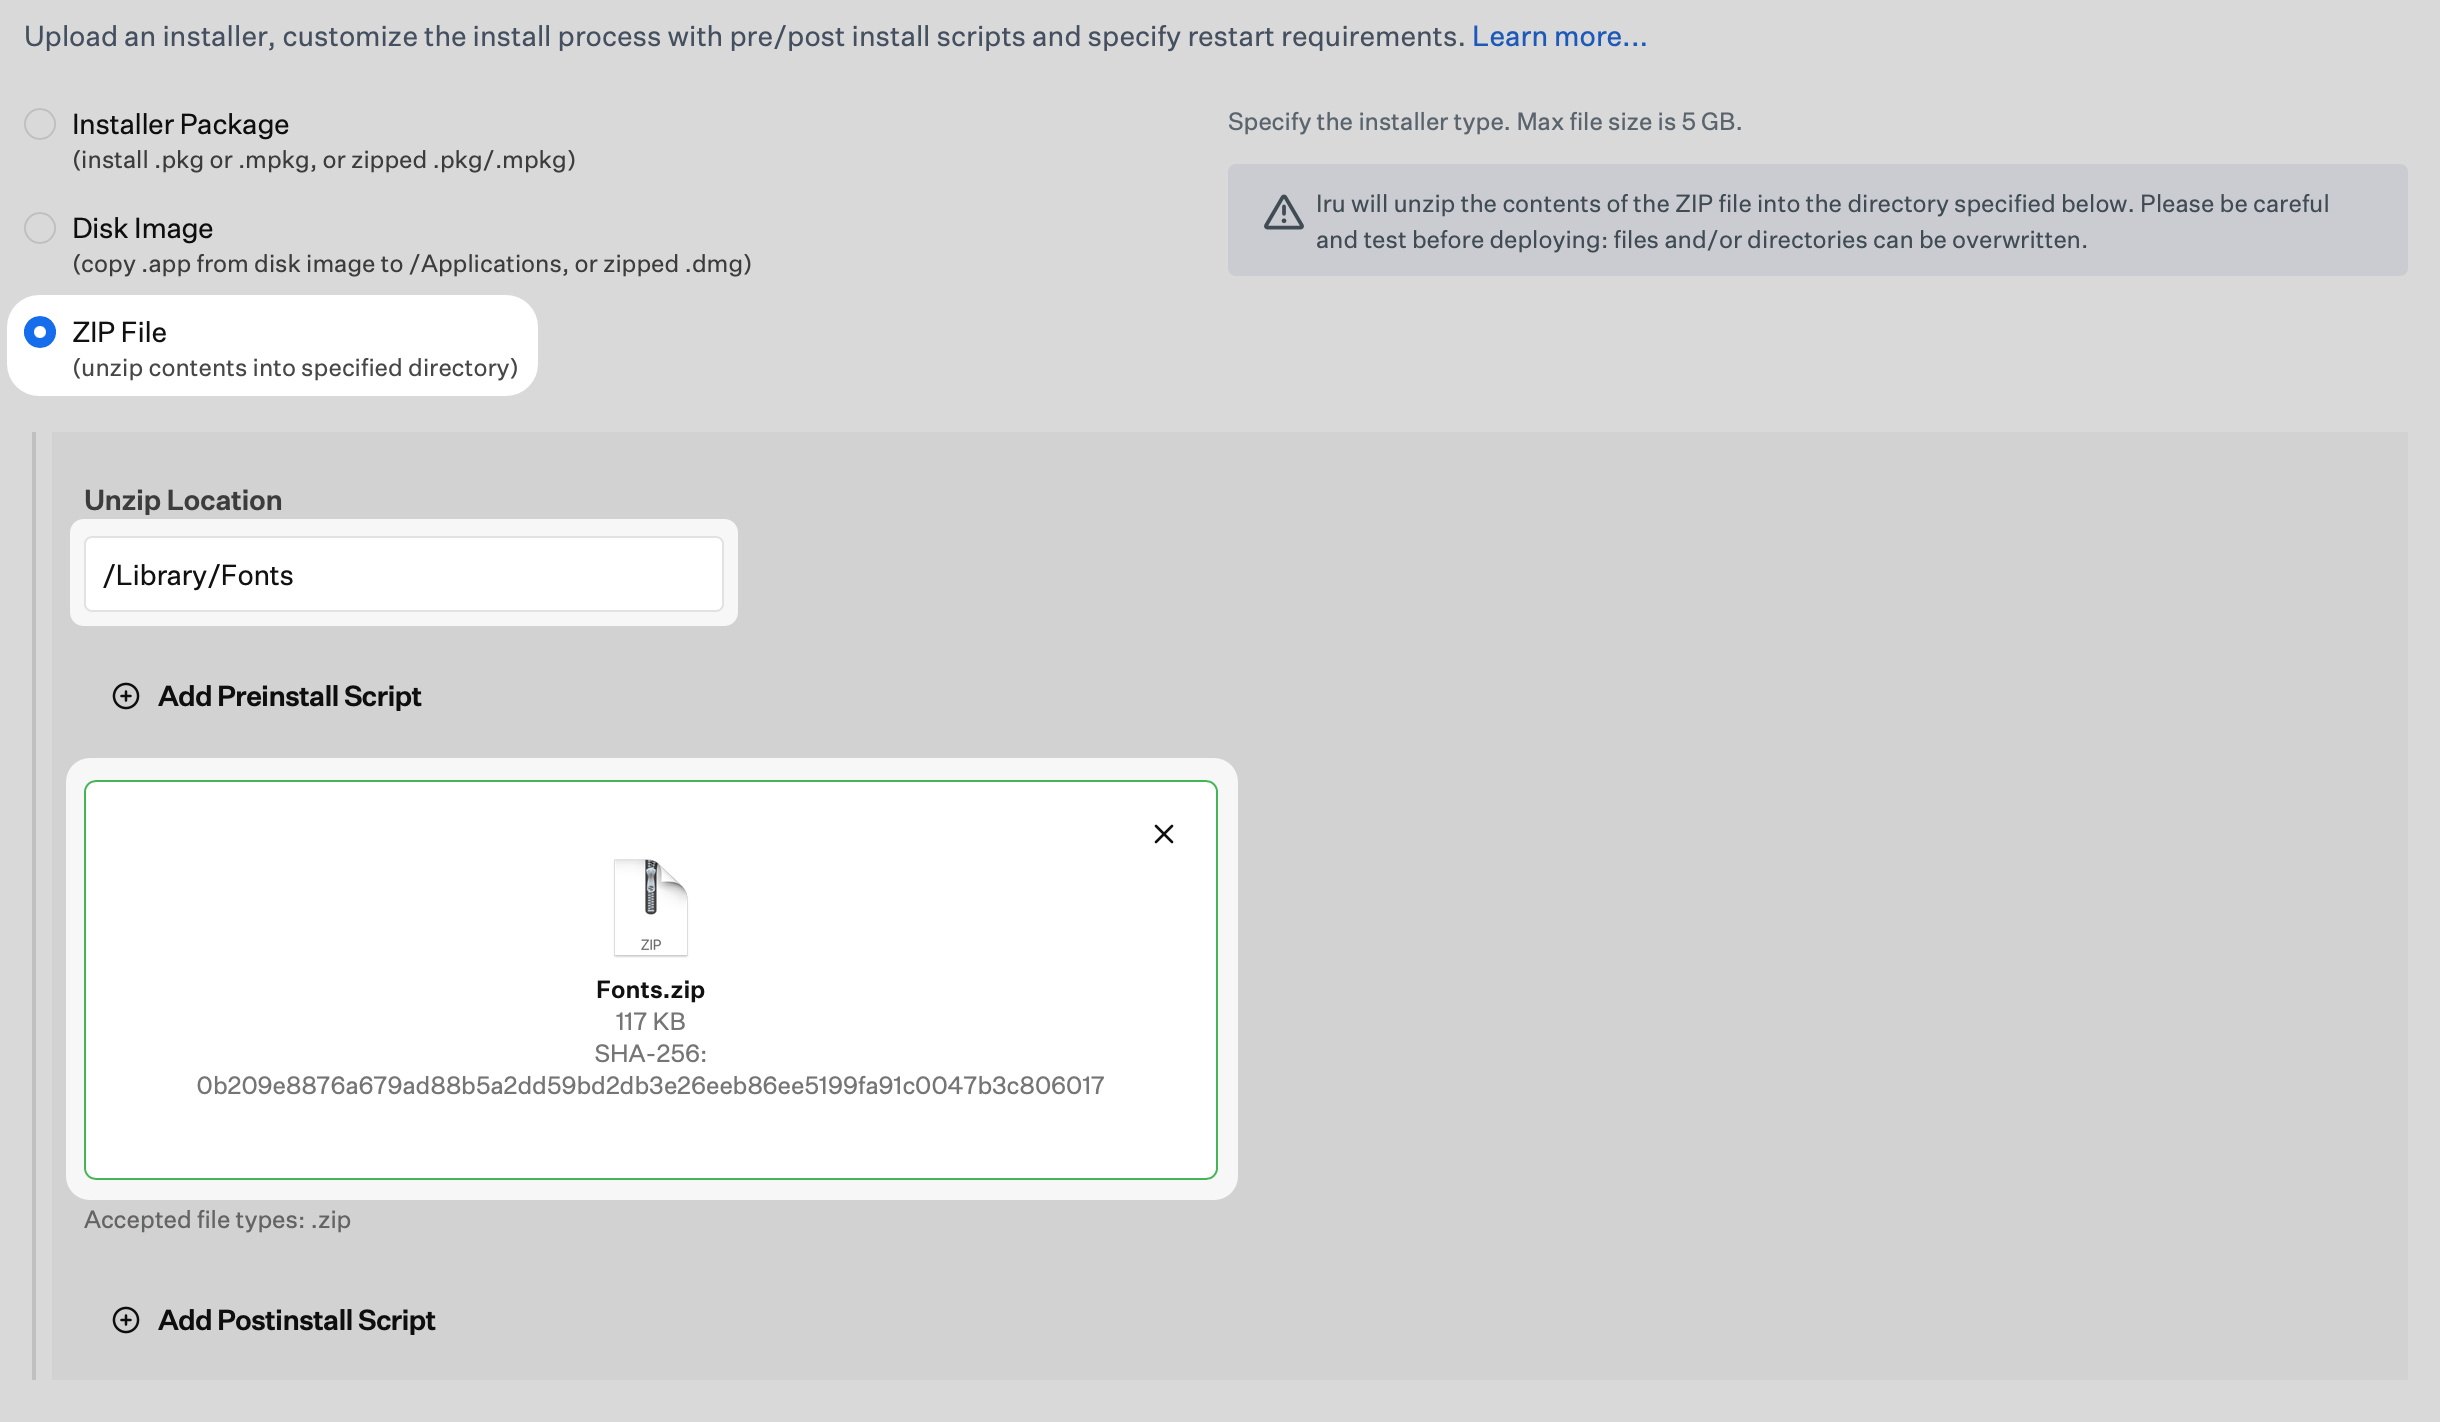
8
Save Configuration
Select Save to complete the Custom App setup.
Related Articles
Library Overview
Overview of the Iru Endpoint Library for managing apps, profiles, scripts, and configurations. Curate Library Items and assign them to device Blueprints.
Configuring Blueprints
Create and configure Blueprints in Iru Endpoint to group devices and assign management policies. Define Assignment Maps and Library Item assignments.