Setting Up the SAML Connection
You’ll need to complete the initial setup in Iru Endpoint first to get the configuration information required for JumpCloud. After copying the Entity ID and ACS URL, switch to the JumpCloud Application Configuration tab to continue.
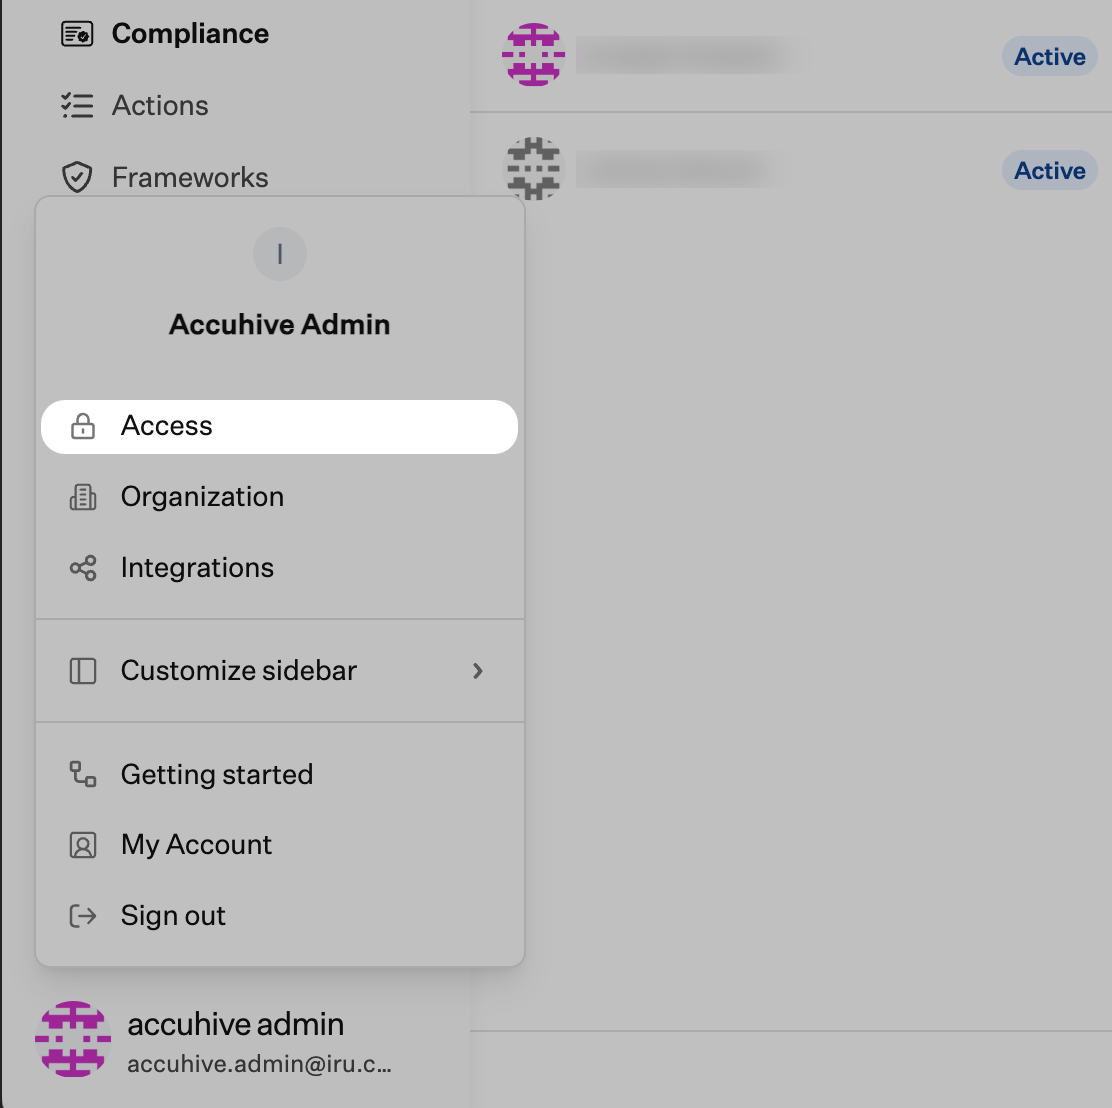
Navigate to the Account Menu Button
In Iru Endpoint, in the sidebar, click the Account Menu Button.
Access Authentication Settings
Click the Access option in the menu. Select Admin and Authentication
Select the Admin and authentication tab (selected by default) and scroll down to Authentication methods.
Add Authentication Method
Click + Authentication method.
Enter Display Name
Enter a display name for the SSO Connection.
Select Authentication Method
Select SAML for the Authentication method.
Create Connection
Click Create.
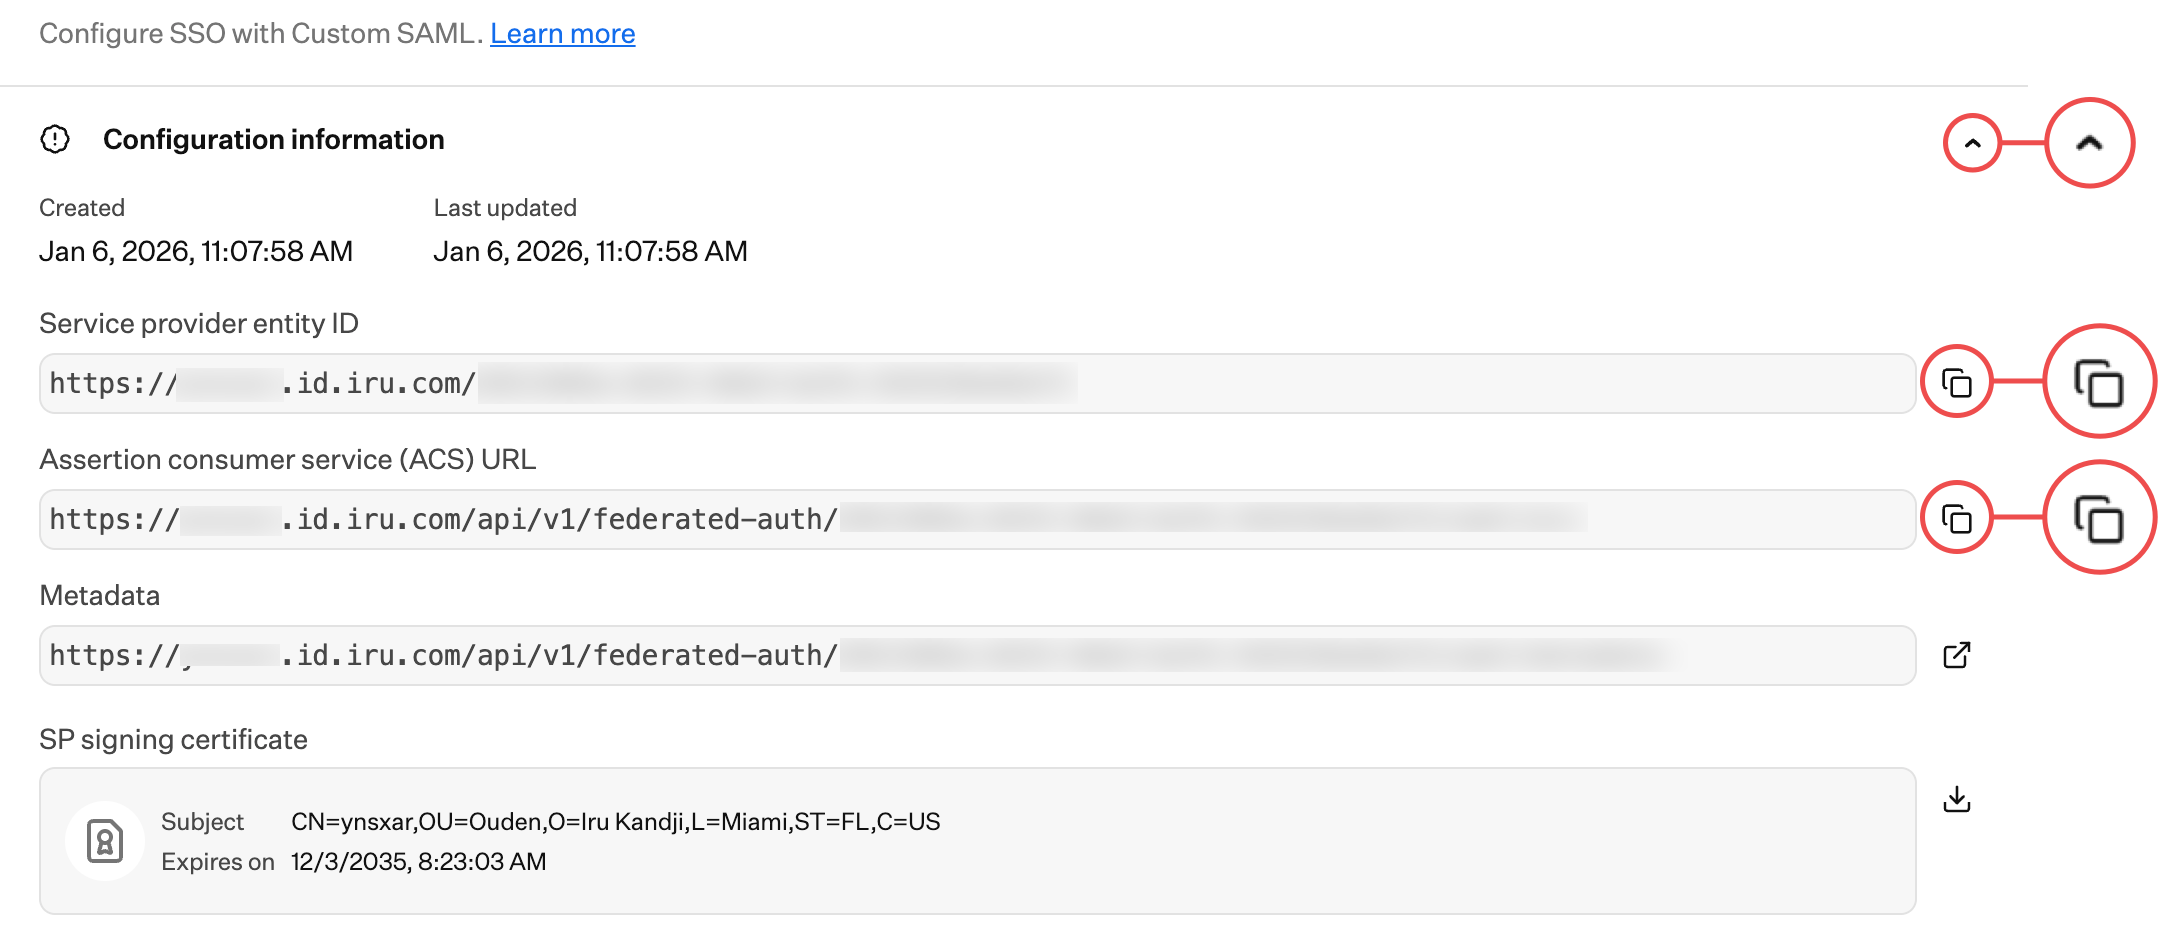
Configuration Information
Click Configuration information if that section is not already expanded.
Copy Service Provider Entity ID
Copy the Service provider entity ID into a text document for later use. You’ll need this for the JumpCloud configuration.
Copy ACS URL
Copy the Assertion consumer service (ACS) URL into a text document for later use. You’ll need this for the JumpCloud configuration. Keep Tab Open
Keep the Iru Endpoint configuration modal open, then switch to the JumpCloud Application Configuration tab to continue.
Configuring Iru Endpoint SAML Connection
After completing the JumpCloud Application Configuration, return here to finish setting up the SAML connection in Iru Endpoint. You’ll need the Sign-in URL, IdP Entity ID, and certificate from JumpCloud.
Return to Iru Endpoint
Go back to the Custom SAML modal in Iru Endpoint.
Configure IdP Attribute
Keep the IdP attribute setting as Subject.
Configure Attribute Name
Leave the Attribute name blank.
Configure User Attributes
Set User attribute to User Principal Name (UPN). Add IdP Entity ID
Paste the unique IdP Entity ID you created earlier in JumpCloud into the IdP Entity ID field in Iru Endpoint.
Upload Certificate
Upload the certificate you downloaded from JumpCloud. Set Request Binding
Set the Request Binding to HTTP-POST.
Set Request Signature Algorithm
Ensure that Request Signature Algorithm is set to RSA-SHA256.
Set Request Digest Algorithm
Ensure that Request Digest Algorithm is set to SHA256.
Enable Request Signing
Ensure that Sign SAML Authentication Request is enabled. Set Response Signature Verification
Set Response Signature Verification to Assertion.
Set Destination
Leave the optional Destination blank.
Set Allowed Signature Algorithm
Set Allowed Signature Algorithm to RSA-SHA256.
Set Allowed Digest Algorithm
Set Allowed Digest Algorithmn to SHA-256.
Allow for Tenant Authentication
Once you have configured the SAML connection in Iru Endpoint and your identity provider, you can allow its use for tenant authentication. For step-by-step instructions, please refer to the Allowing Tenant Authentication and Managing Connections section in our Single Sign-on support article.Limit Authentication to Domain
When configuring the SAML connection, you can optionally limit authentication to one or more domains. This can be useful when the SSO connection could authenticate to multiple domains. You can limit the authentication to your Iru tenant to a subset of the available domains.Enforcing Single Sign-On
Once you have configured at least one Single Sign-on connection, you can disable Passkey, Google Social, and Microsoft Social connections. Disabling these connections will disable the ability for Iru Endpoint administrators in your tenant to authenticate via those methods. Please refer to our Single Sign-on support article for step-by-step instructions.Testing the Integration
Add User to Admin Team
Add a user to the Admin Team in Iru Endpoint by clicking New User.
Fill User Information
Fill in all of the corresponding user information. This user must exist in JumpCloud and must be assigned to the Iru Endpoint SSO app in your JumpCloud tenant.
Close Invite Window
Once the invite is submitted, close the Invite User window.
Refresh Access Page
Refresh the Access page in Iru Endpoint. You should see the user you just added.
Test SSO Login
Check the user’s email to accept the invitation and log into Iru Endpoint with the new SAML SSO connection.
Considerations
Security: Ensure that your JumpCloud tenant has appropriate security policies configured for SAML authentication.User Management: Users must exist in both JumpCloud and Iru Endpoint to successfully authenticate via SSO.Testing: Always test the SSO integration with a small group of users before rolling out to your entire organization.Certificate Management: Keep track of certificate expiration dates and ensure timely renewal to maintain SSO functionality.Before starting the JumpCloud configuration, complete the initial setup in the Iru Web App Configuration tab to get the Service Provider Entity ID and ACS URL. You’ll need these values to configure the JumpCloud application.
Configuring JumpCloud Application
Select SSO Applications
In the lefthand navigation bar’s Access section, select SSO Applications. Create New Application
Click on the + Add New Application button, or, if this is your first application, click Get Started. Select Custom Application
At the bottom of the screen, click Select in the Custom Application tile. Configure SSO Options
Select Manage Single Sign-On (SSO).
Select Configure SSO with SAML
Select Configure SSO with SAML.
Configure General Information
On the Enter General Info tab:
- Add a name for the Display Label.
- Add a Description if desired.
- Choose either a color Indicator or upload a logo for the Display Portal Image.
- Optionally, choose to show the application in the User Portal.
- Expand the disclosure triangle beside Advanced Settings.
- In the SSO IdP URL field, enter iru. The full URL should read https://sso.jumpcloud.com/saml2/iru.
- Click Save Application.
Configure Application
After your application is saved, click Configure Application. Configure SSO Settings
On the SSO tab of the configuration modal:
- For the IdP Entity ID, create a unique Entity ID (e.g.
iru-saml-jumpcloud) and enter it in the IdP Entity ID field. Save this unique IdP Entity ID for use in Iru Endpoint later.
- Copy the Entity ID from Iru Endpoint that you saved earlier and paste it into the SP Entity ID field in JumpCloud only (do not paste it into the IdP Entity ID field).
- Copy the Assertion Consumer Service URL from Iru Endpoint that you saved earlier and paste it into the ACS URL field.
- Leave the SAML Subject NameID set to email.
- In the SAMLSubject NameID-Format field, select urn:oasis:names:tc:SAML:1.1:nameid-format:emailAddress from the dropdown menu.
- Set the Signature Algorithm to RSA-SHA256.
- SelectAssertion in the Sign section.
- Ensure the IDP URL is https://sso.jumpcloud.com/saml2/iru. If it is not, you will need to delete the integration and create a new one. Copy this URL and save it for use in Iru Endpoint later.
- Click Save.
Open Action Menu
Click Action at the top right.
Download Certificate
Click Download Certificate. It will be used in Iru Endpoint later.
Click User Groups
Click on the User Groups tab. Assign User Groups
Add a user group to the SSO application. If you want to restrict who can access the SSO app, create another user group in your JumpCloud console and assign it to the SSO app. After completing the JumpCloud Application Configuration, return to the Iru Web App Configuration tab to finish setting up the SAML connection using the Single Sign-on URL, IdP Entity ID, and certificate you copied from JumpCloud.


