


This guide applies to Apple devices
What to Expect
When you enroll your Apple device, it will be connected to your organization’s management system through Apple’s MDM framework. Iru Endpoint’s macOS agent will be installed to handle advanced management tasks. This allows your IT team to:- Deploy, upgrade, and uninstall company applications and software
- Apply security policies and settings
- Configure network access (Wi-Fi, VPN)
- Monitor device compliance and gather system information
Prerequisites
Before starting, make sure you have:- Enrollment Portal link - provided by your IT team
- Enrollment code - provided by your IT team
- Work or school account - your organization email and password
- Apple device - iPhone, iPad, Mac, or Apple TV
Make sure your Apple device is running a supported version of iOS, iPadOS, macOS, or tvOS. Contact your IT team if you’re unsure about compatibility.
Apple Enrollment Process
Access enrollment portal
On your Apple device, open Safari and go to the Enrollment Portal link provided by your IT team.
Enter Enrollment code
Enter the Enrollment code provided by your IT team. If you have issues with your code, see Troubleshooting.
Sign in with work or school account
If prompted, sign in with your work or school account. You may be redirected to your company’s sign-in page. Use the same email and password you use for work.
Install the profile
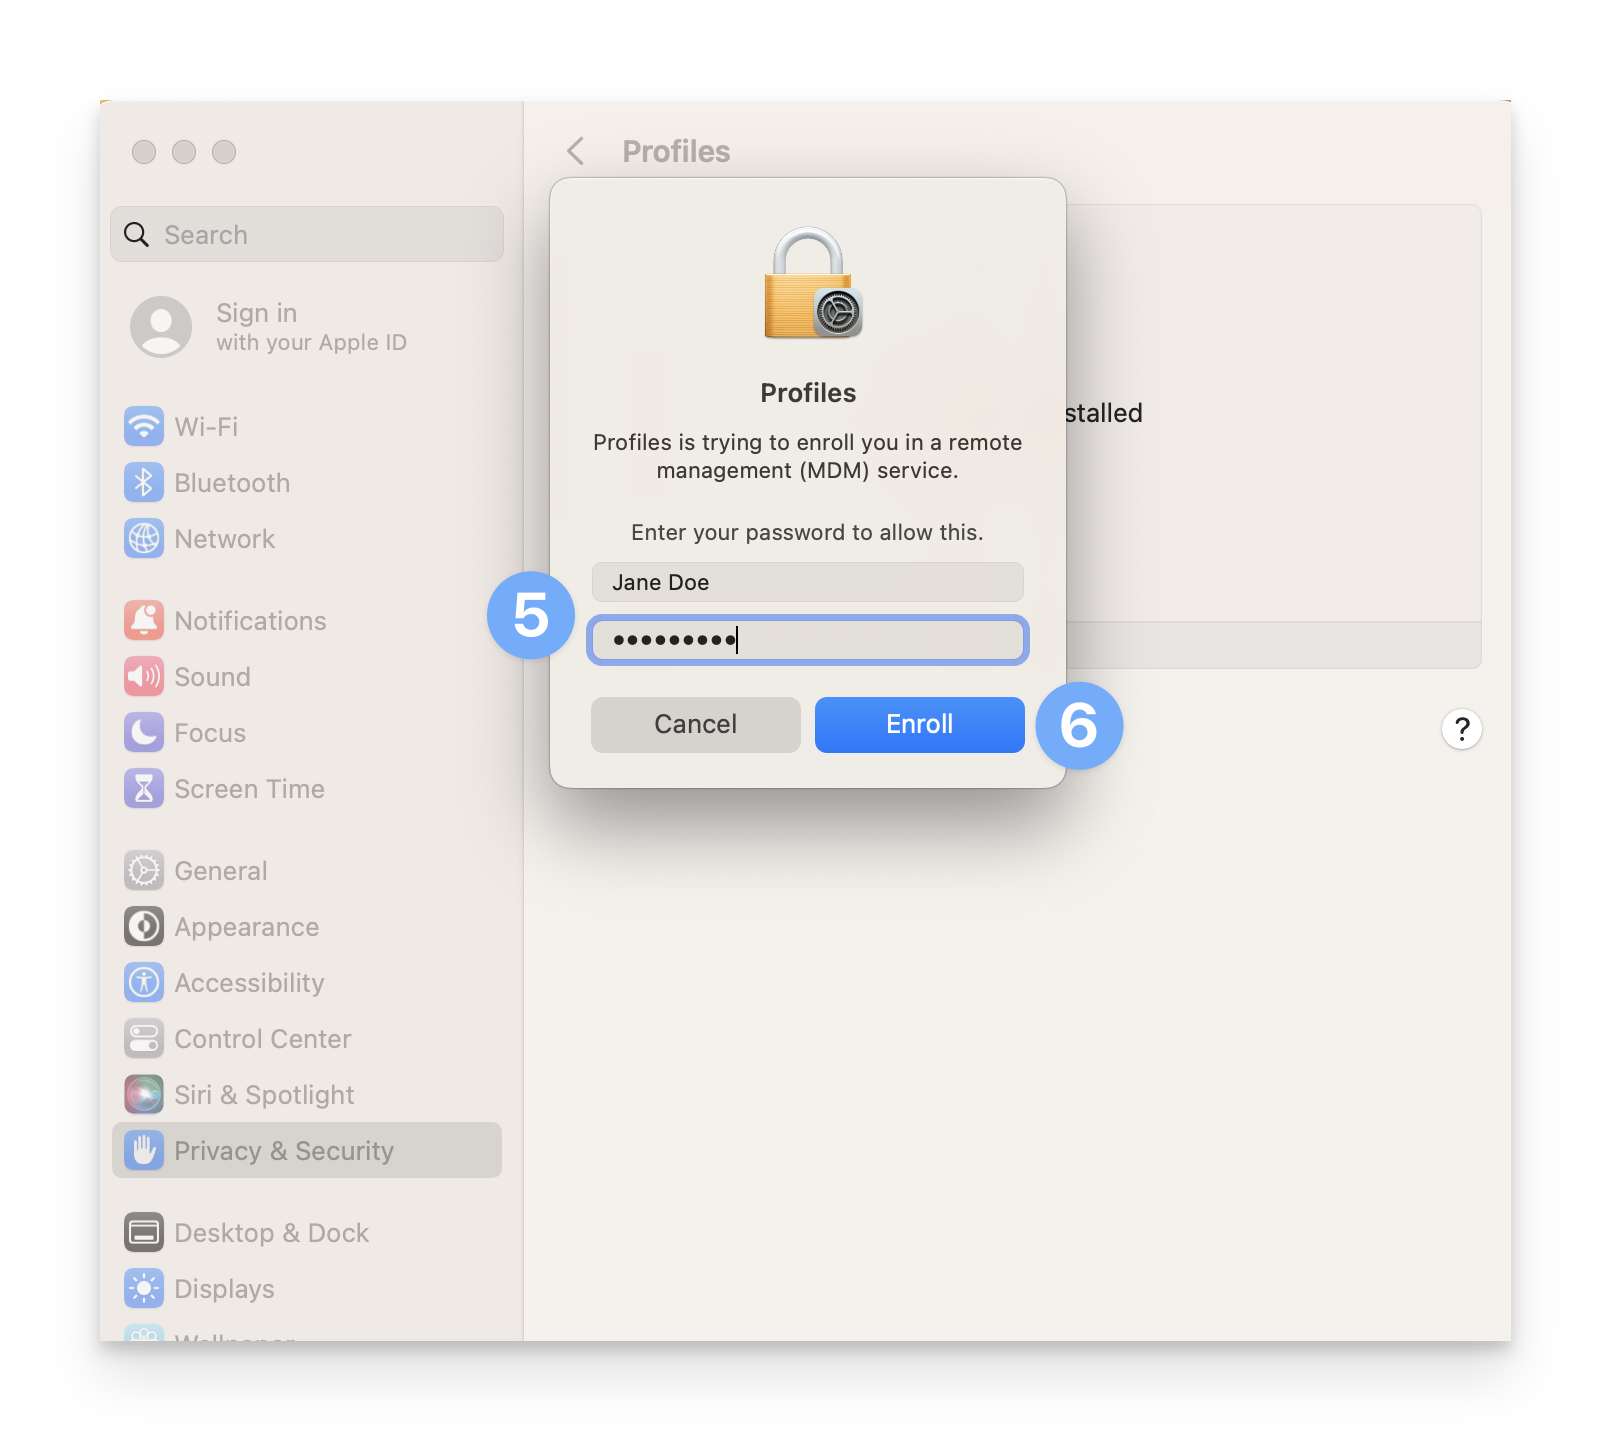
Open your device settings and install the management profile so it can take effect. Follow the steps for your device:
- iPhone or iPad
- Mac
a. Open Settingsb. Tap General, then VPN & Device Managementc. Install the management profile and enter the device Passcode if requested.
After Enrollment
Once enrollment is complete:- Company applications will begin installing automatically via the Iru Endpoint macOS agent
- Security policies will be applied to your device through Apple’s MDM framework
- Network settings (Wi-Fi, VPN) will be configured
- Device sync happens every 24 hours to keep settings current, with agent check-ins for advanced management tasks
It may take several minutes for all company applications and settings to appear on your device. If something doesn’t appear immediately, wait a few more minutes and check again.
Automated Device Enrollment (ADE) After Setup
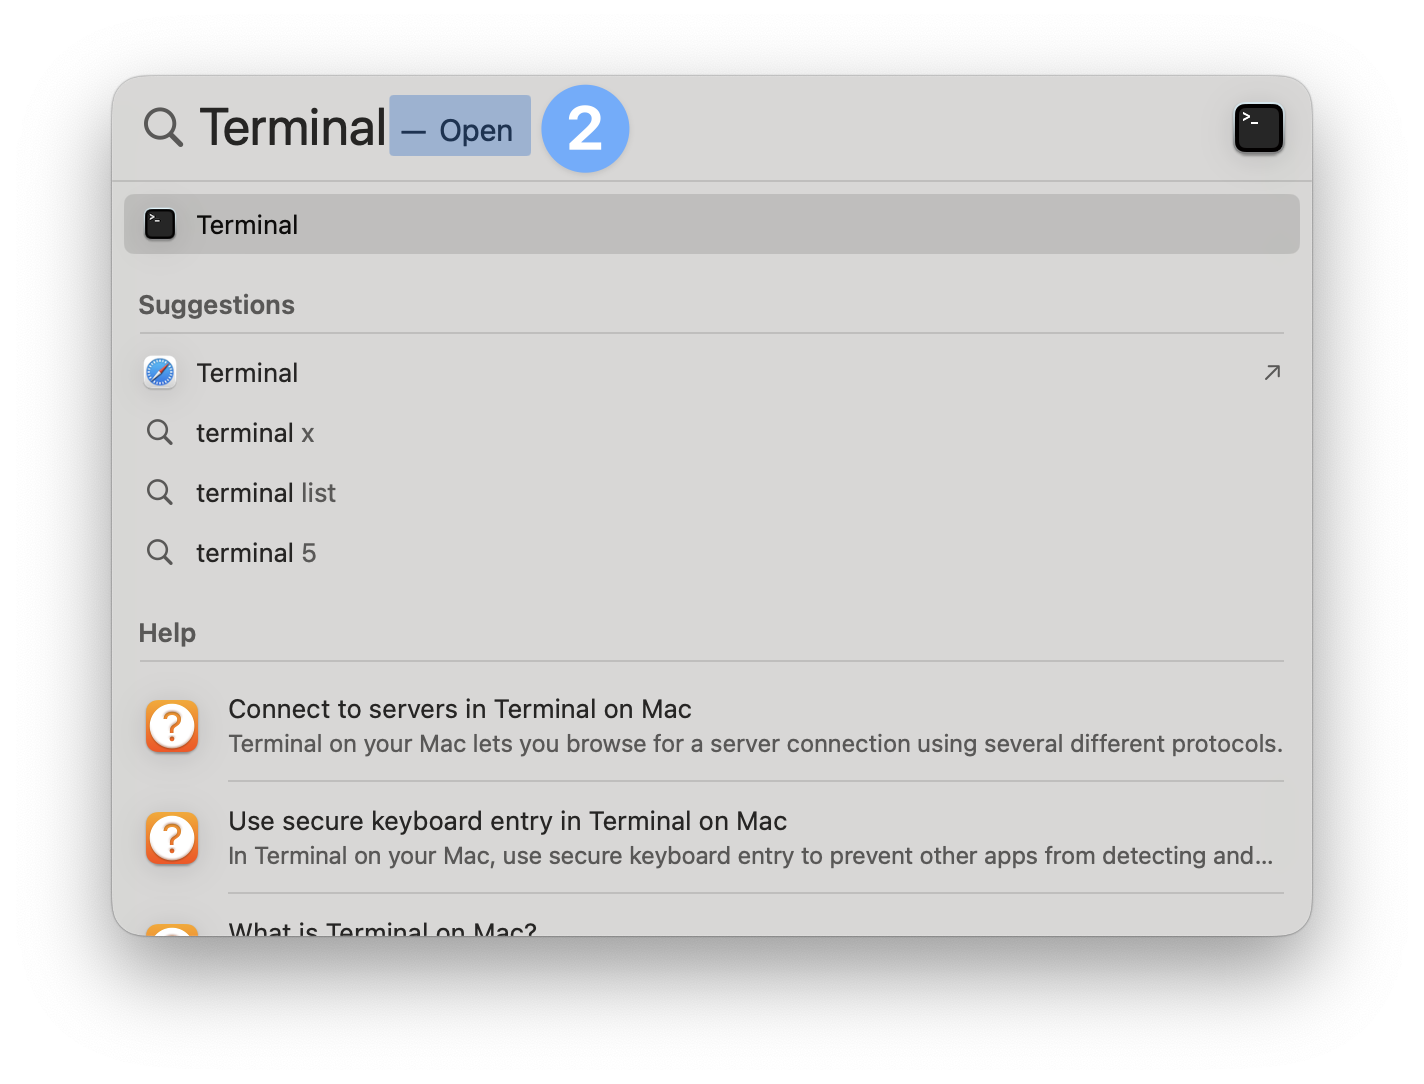
If a Mac has already passed through Setup Assistant without enrolling, it is still possible to enroll it into Iru Endpoint. Please follow the steps below to enroll your device.Open Terminal
Run Command in Terminal
Run enrollment command
Run the following command in Terminal by copying and pasting it into Terminal and pressing Enter on your keyboard: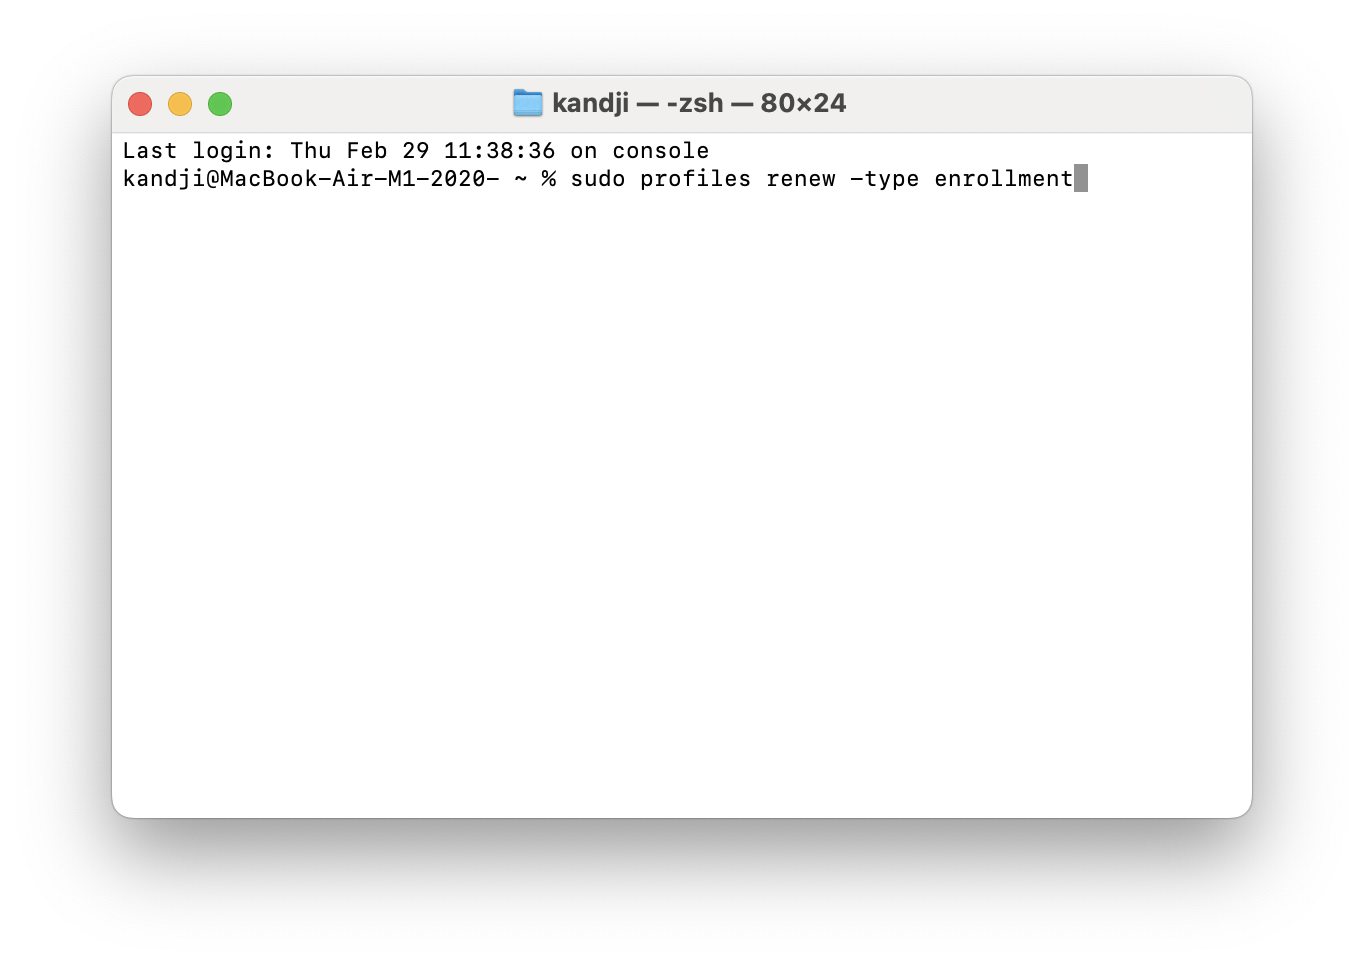
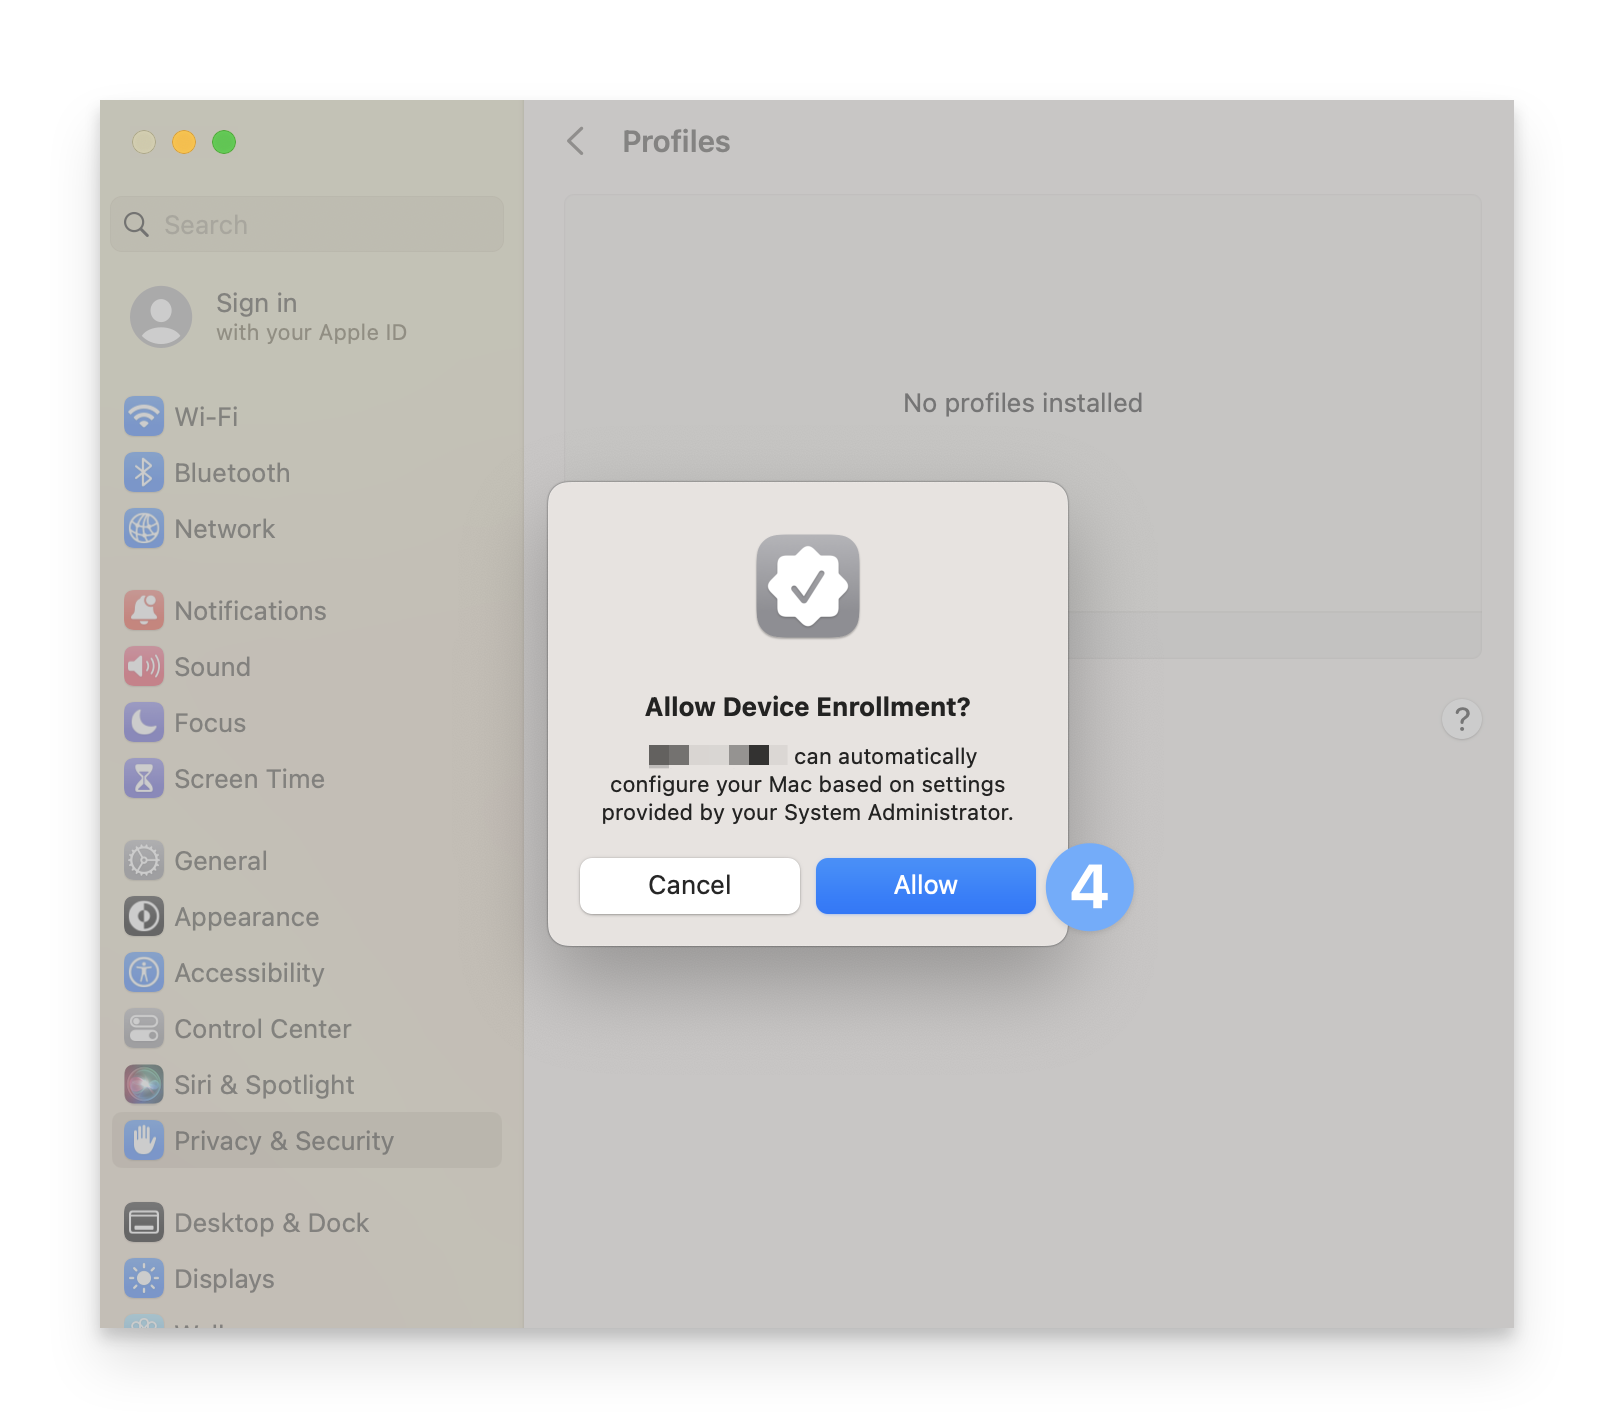
Click banner notification
The Mac will display a banner notification in the top-right corner prompting you to enroll the device into Iru Endpoint. Click on the banner notification.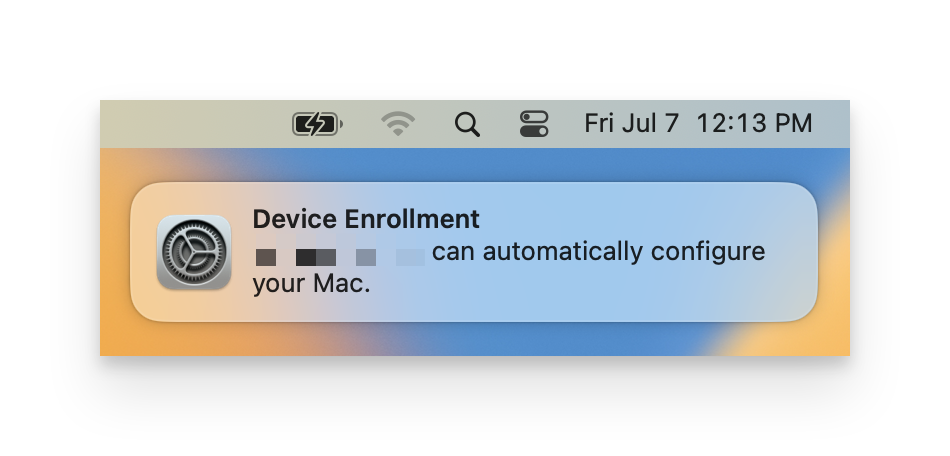
Troubleshooting
Can't access the Enrollment Portal link
Can't access the Enrollment Portal link
Possible causes:
- Incorrect Enrollment Portal link
- Network connectivity issues
- Firewall blocking access
- Double-check the Enrollment Portal link provided by your IT team
- Try using Safari (recommended for Apple devices)
- Check your internet connection
- Contact your IT team if the problem persists
Authentication fails
Authentication fails
Possible causes:
- Incorrect email or password
- Account not set up for enrollment
- Issues with your company’s sign-in page
- Make sure you’re using your work or school email and password
- Try signing out and signing back in
- Contact your IT team if you still can’t sign in
Enrollment code not working
Enrollment code not working
Possible causes:
- Incorrect Enrollment code entered
- Enrollment code expired or changed
- Double-check the Enrollment code provided by your IT team
- Contact your IT team for a new Enrollment code if needed
Management profile won't install
Management profile won't install
Possible causes:
- Device restrictions preventing profile installation
- Insufficient storage space
- Network connectivity issues
- Check that you have enough storage space on your device
- Ensure you have a stable internet connection
- Try restarting your device and attempting enrollment again
- Contact your IT team if the problem persists
Company apps not appearing
Company apps not appearing
Possible causes:
- Enrollment still in progress
- Network connectivity issues
- Device sync hasn’t completed
- Wait 5–10 minutes for your device to finish setting up
- Check your internet connection
- Restart your device and wait a few more minutes
- Contact your IT team if apps still don’t appear after 30 minutes
Additional Considerations
Automated Device Enrollment (ADE)
If your organization uses Automated Device Enrollment, your device may be automatically enrolled during the initial setup process. In this case, you won’t need to manually enroll through the portal - the enrollment will happen automatically when you first set up your device.Bring Your Own Device (BYOD) Considerations
If you’re enrolling a personal device (BYOD), be aware that:- Your personal data and applications remain private
- Only work-related configurations and applications will be managed
- You can remove the management profile if you leave the organization