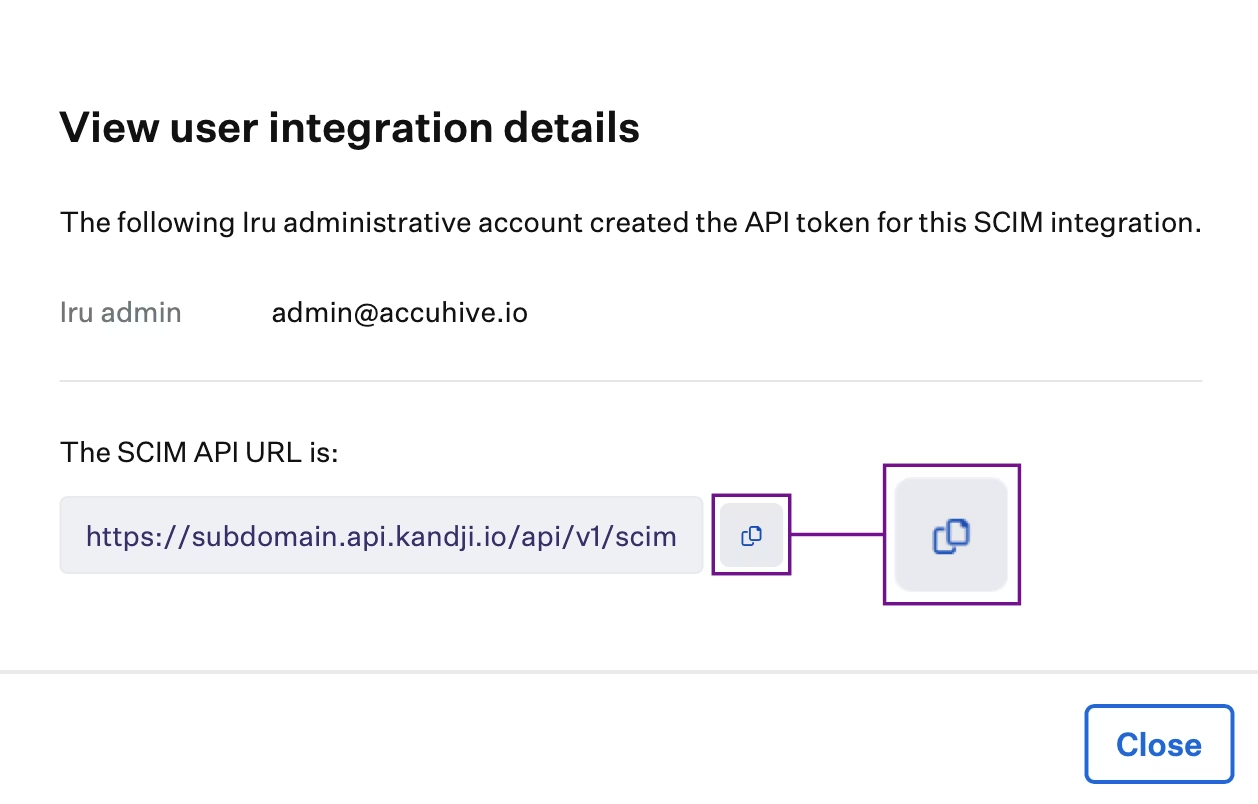
Complete the Iru Endpoint tab first to obtain the SCIM token and API URL. You will enter these in the steps below.
Creating the SCIM Integration in Okta
The Iru Endpoint application available in the Okta Integration Network (OIN) cannot be provisioned for SCIM. A new Application Integration must be created to leverage SCIM. This new app integration will not interfere with any existing Okta SSO integration leveraging the OIN Iru Endpoint application.
Access Okta Tenant
Log into your Admin console for your Okta tenant via login.okta.com
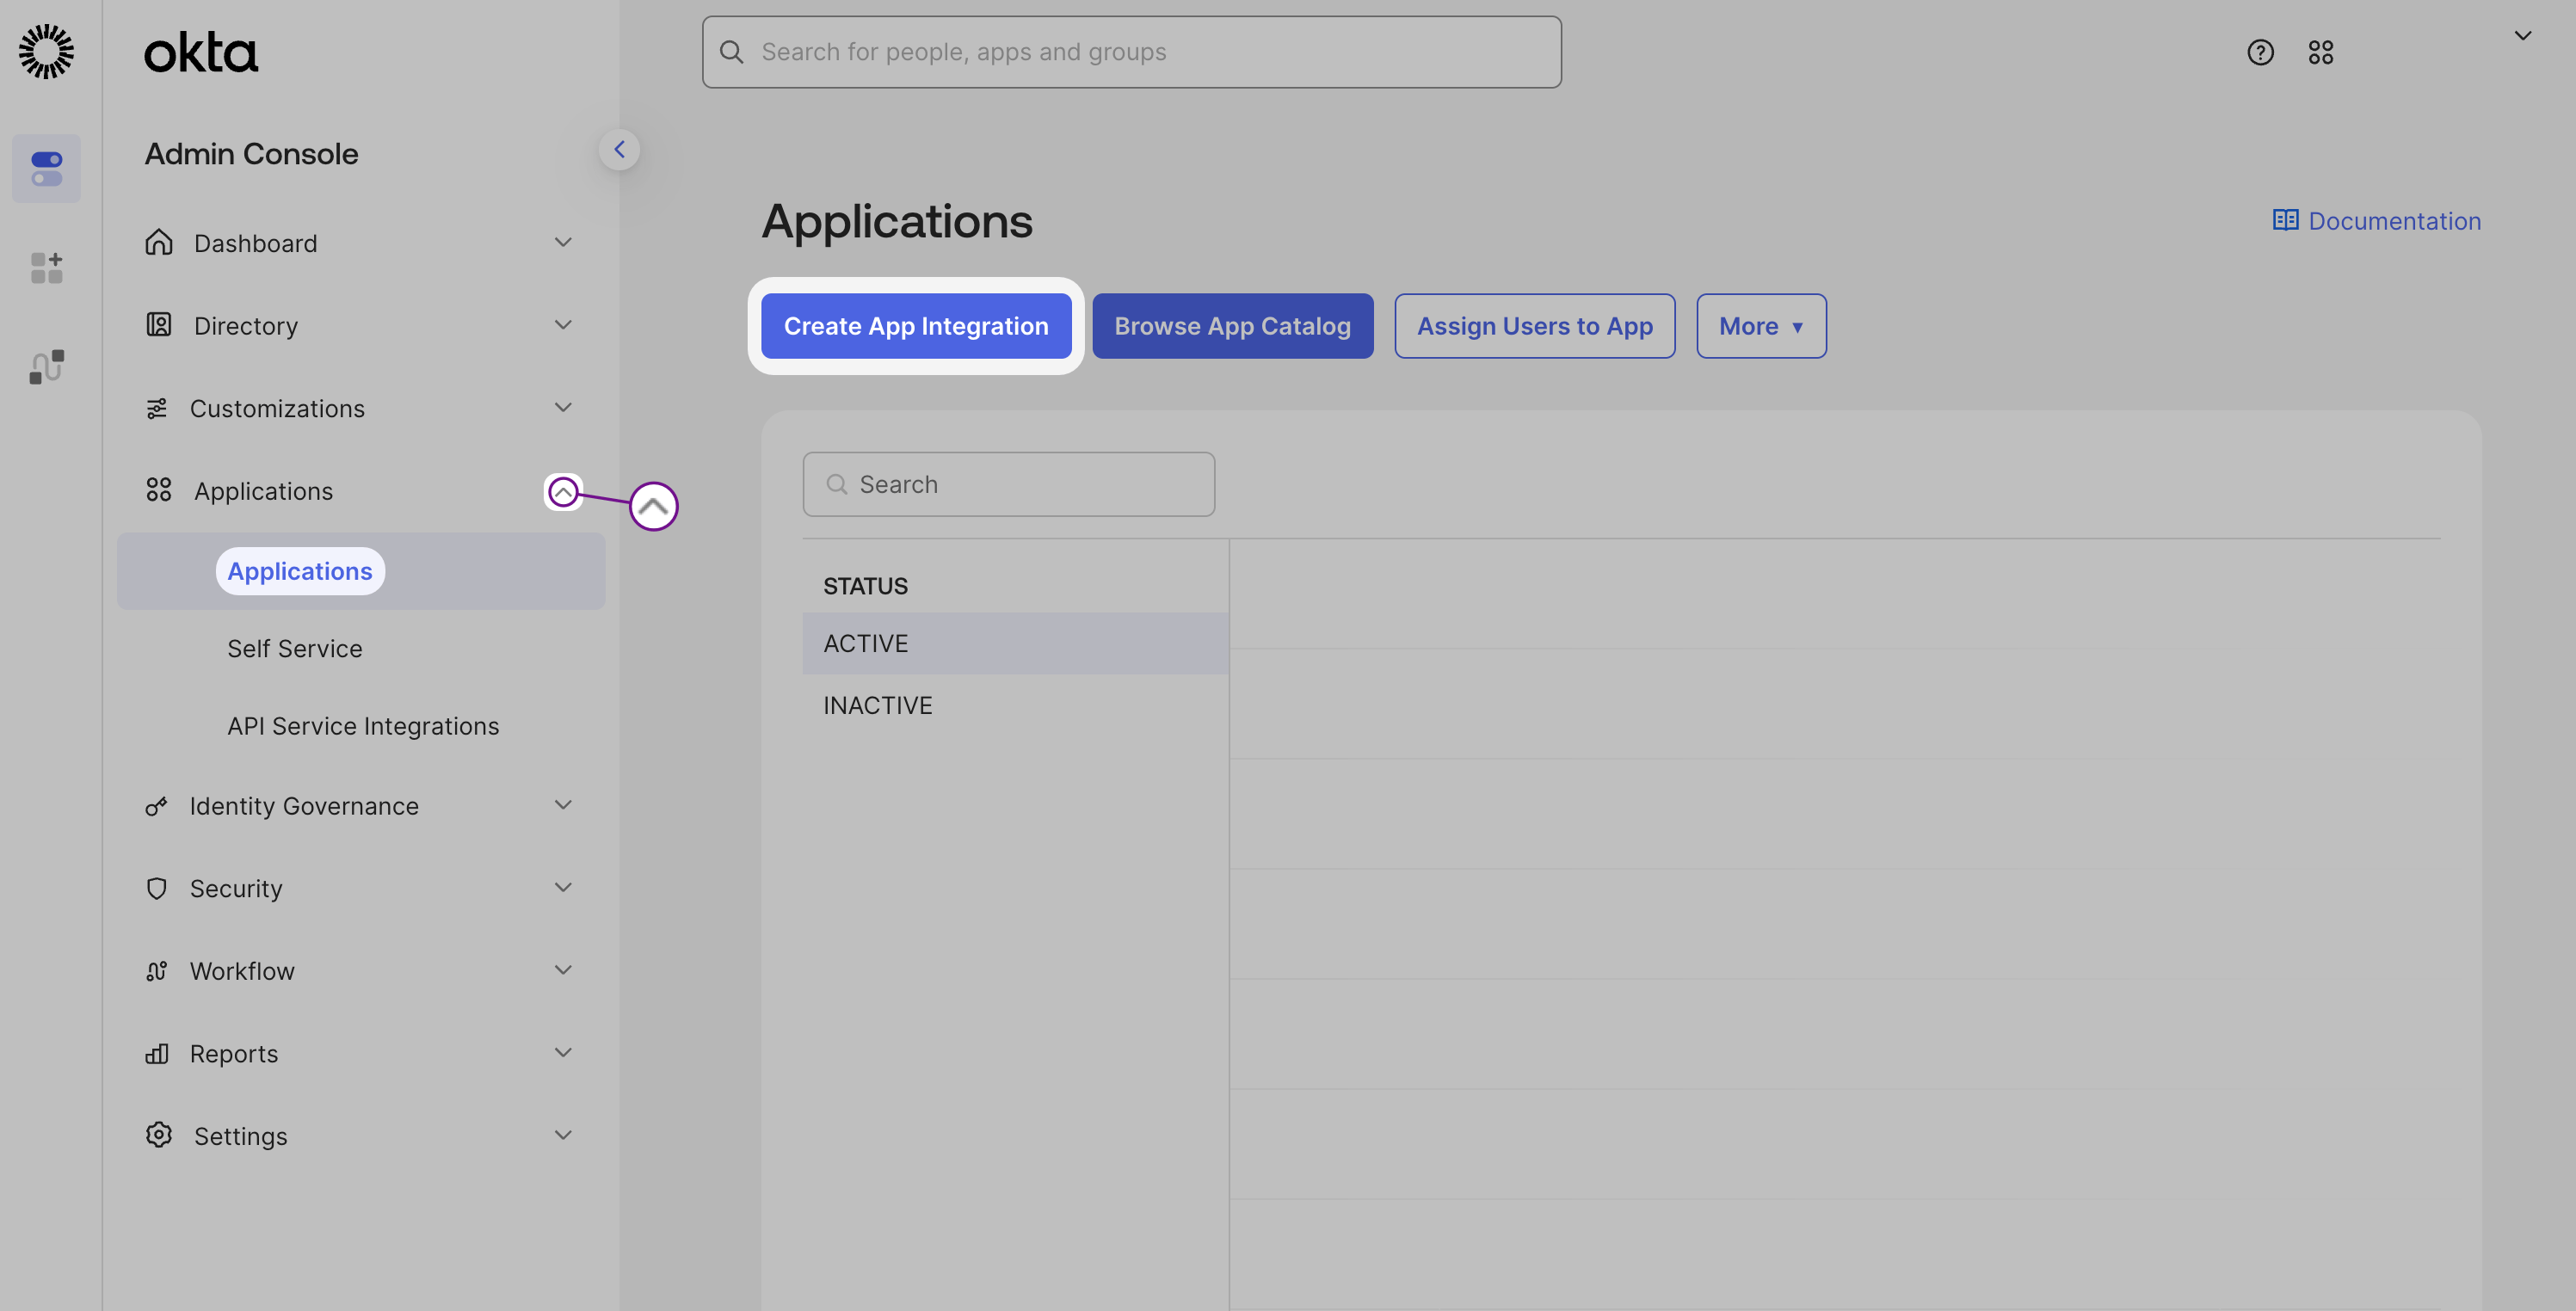
Navigate to Applications
Once logged in, in the left-hand navigation, expand the Applications section and choose Applications
Create App Integration
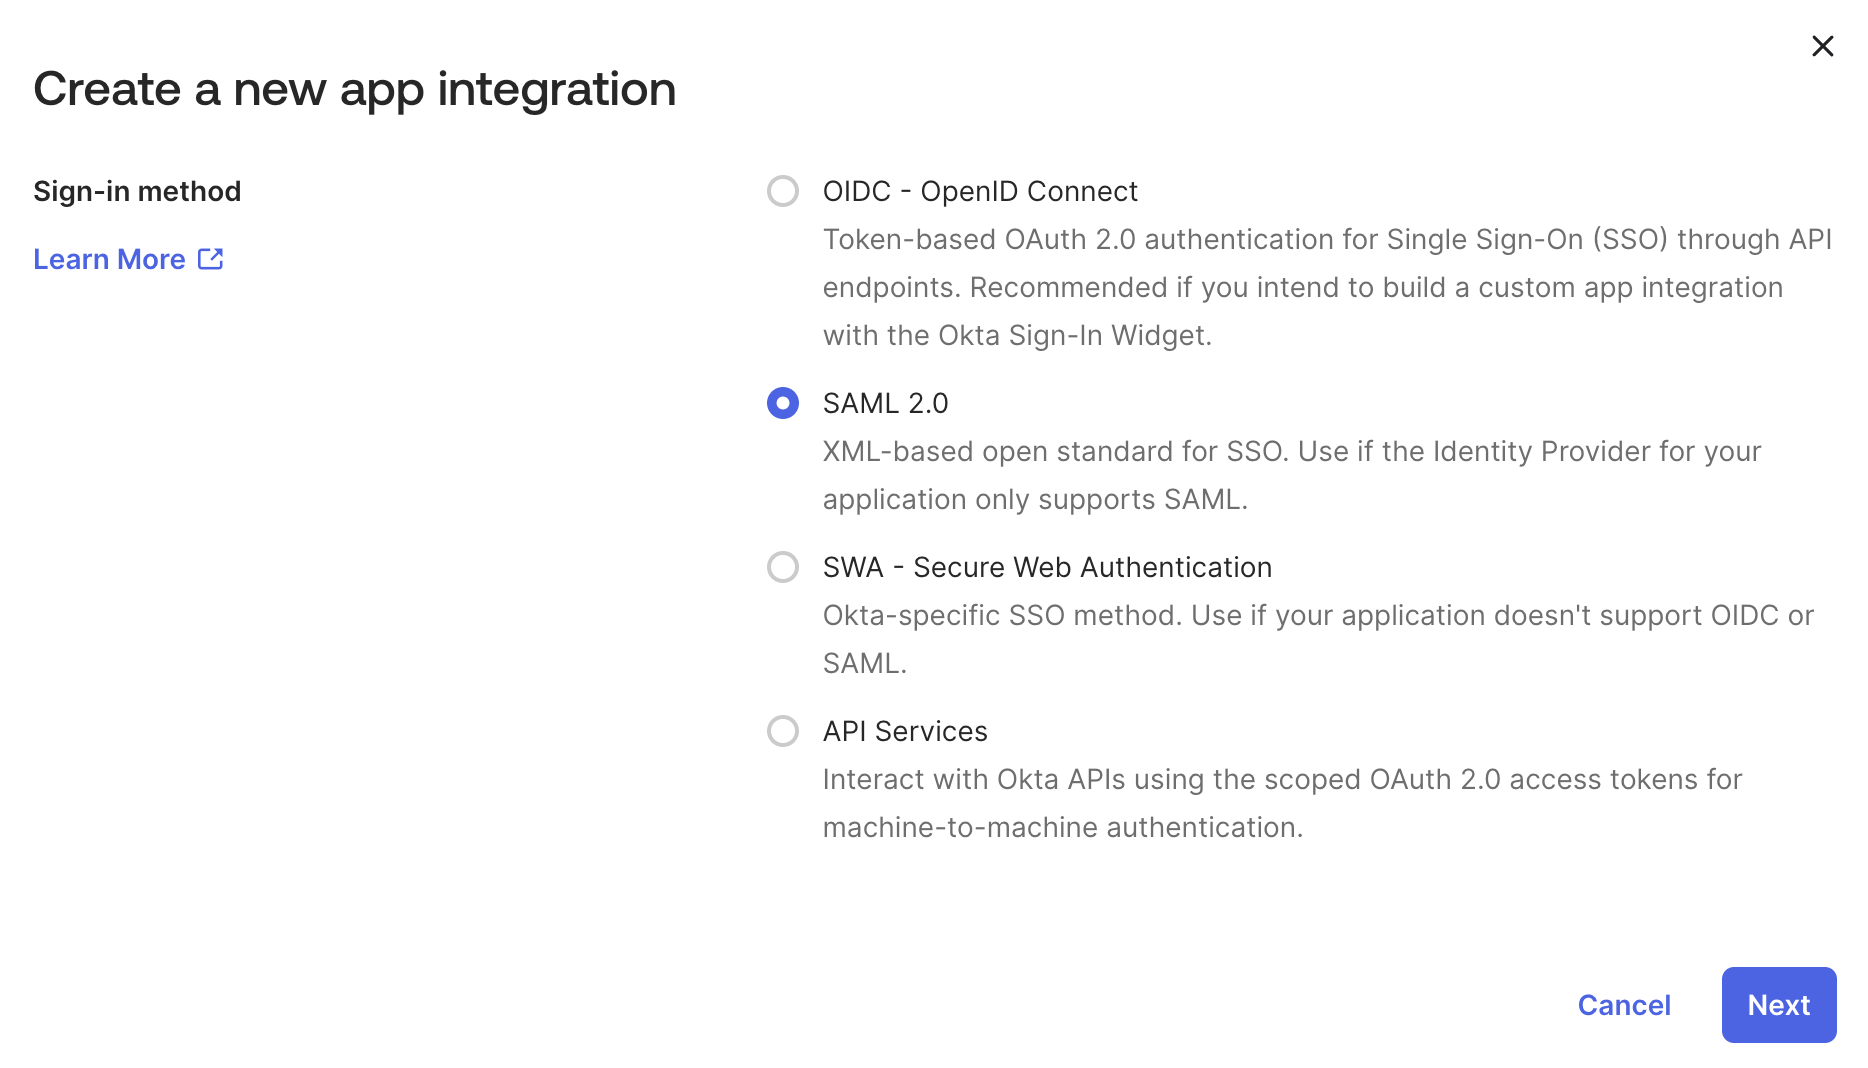
Click Create App Integration. Select Application Type
Select SAML 2.0 as the application type and click Next. Configure General Settings
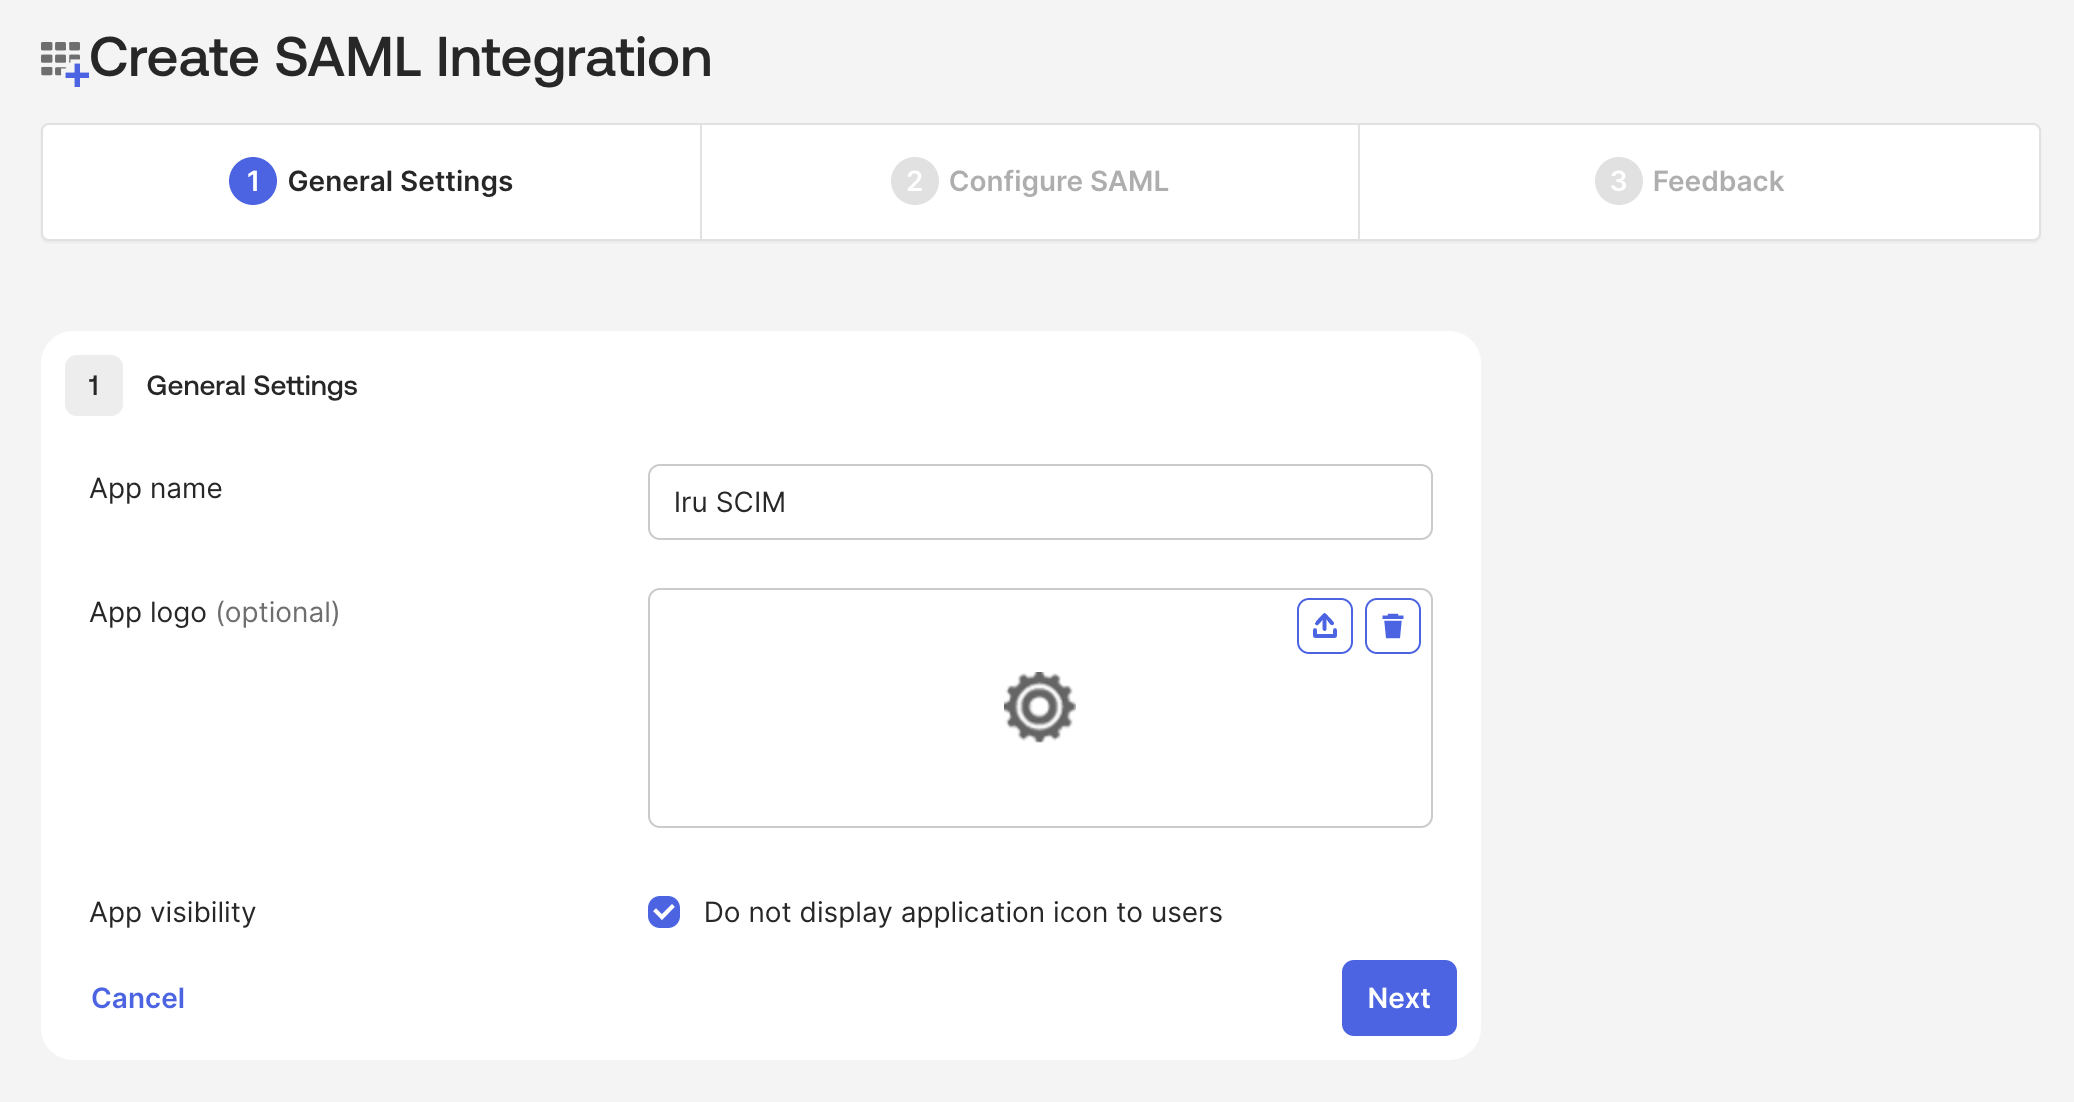
In General Settings, give the App a name and check the box within the App visibility section. Then, click Next. Configure SAML Settings
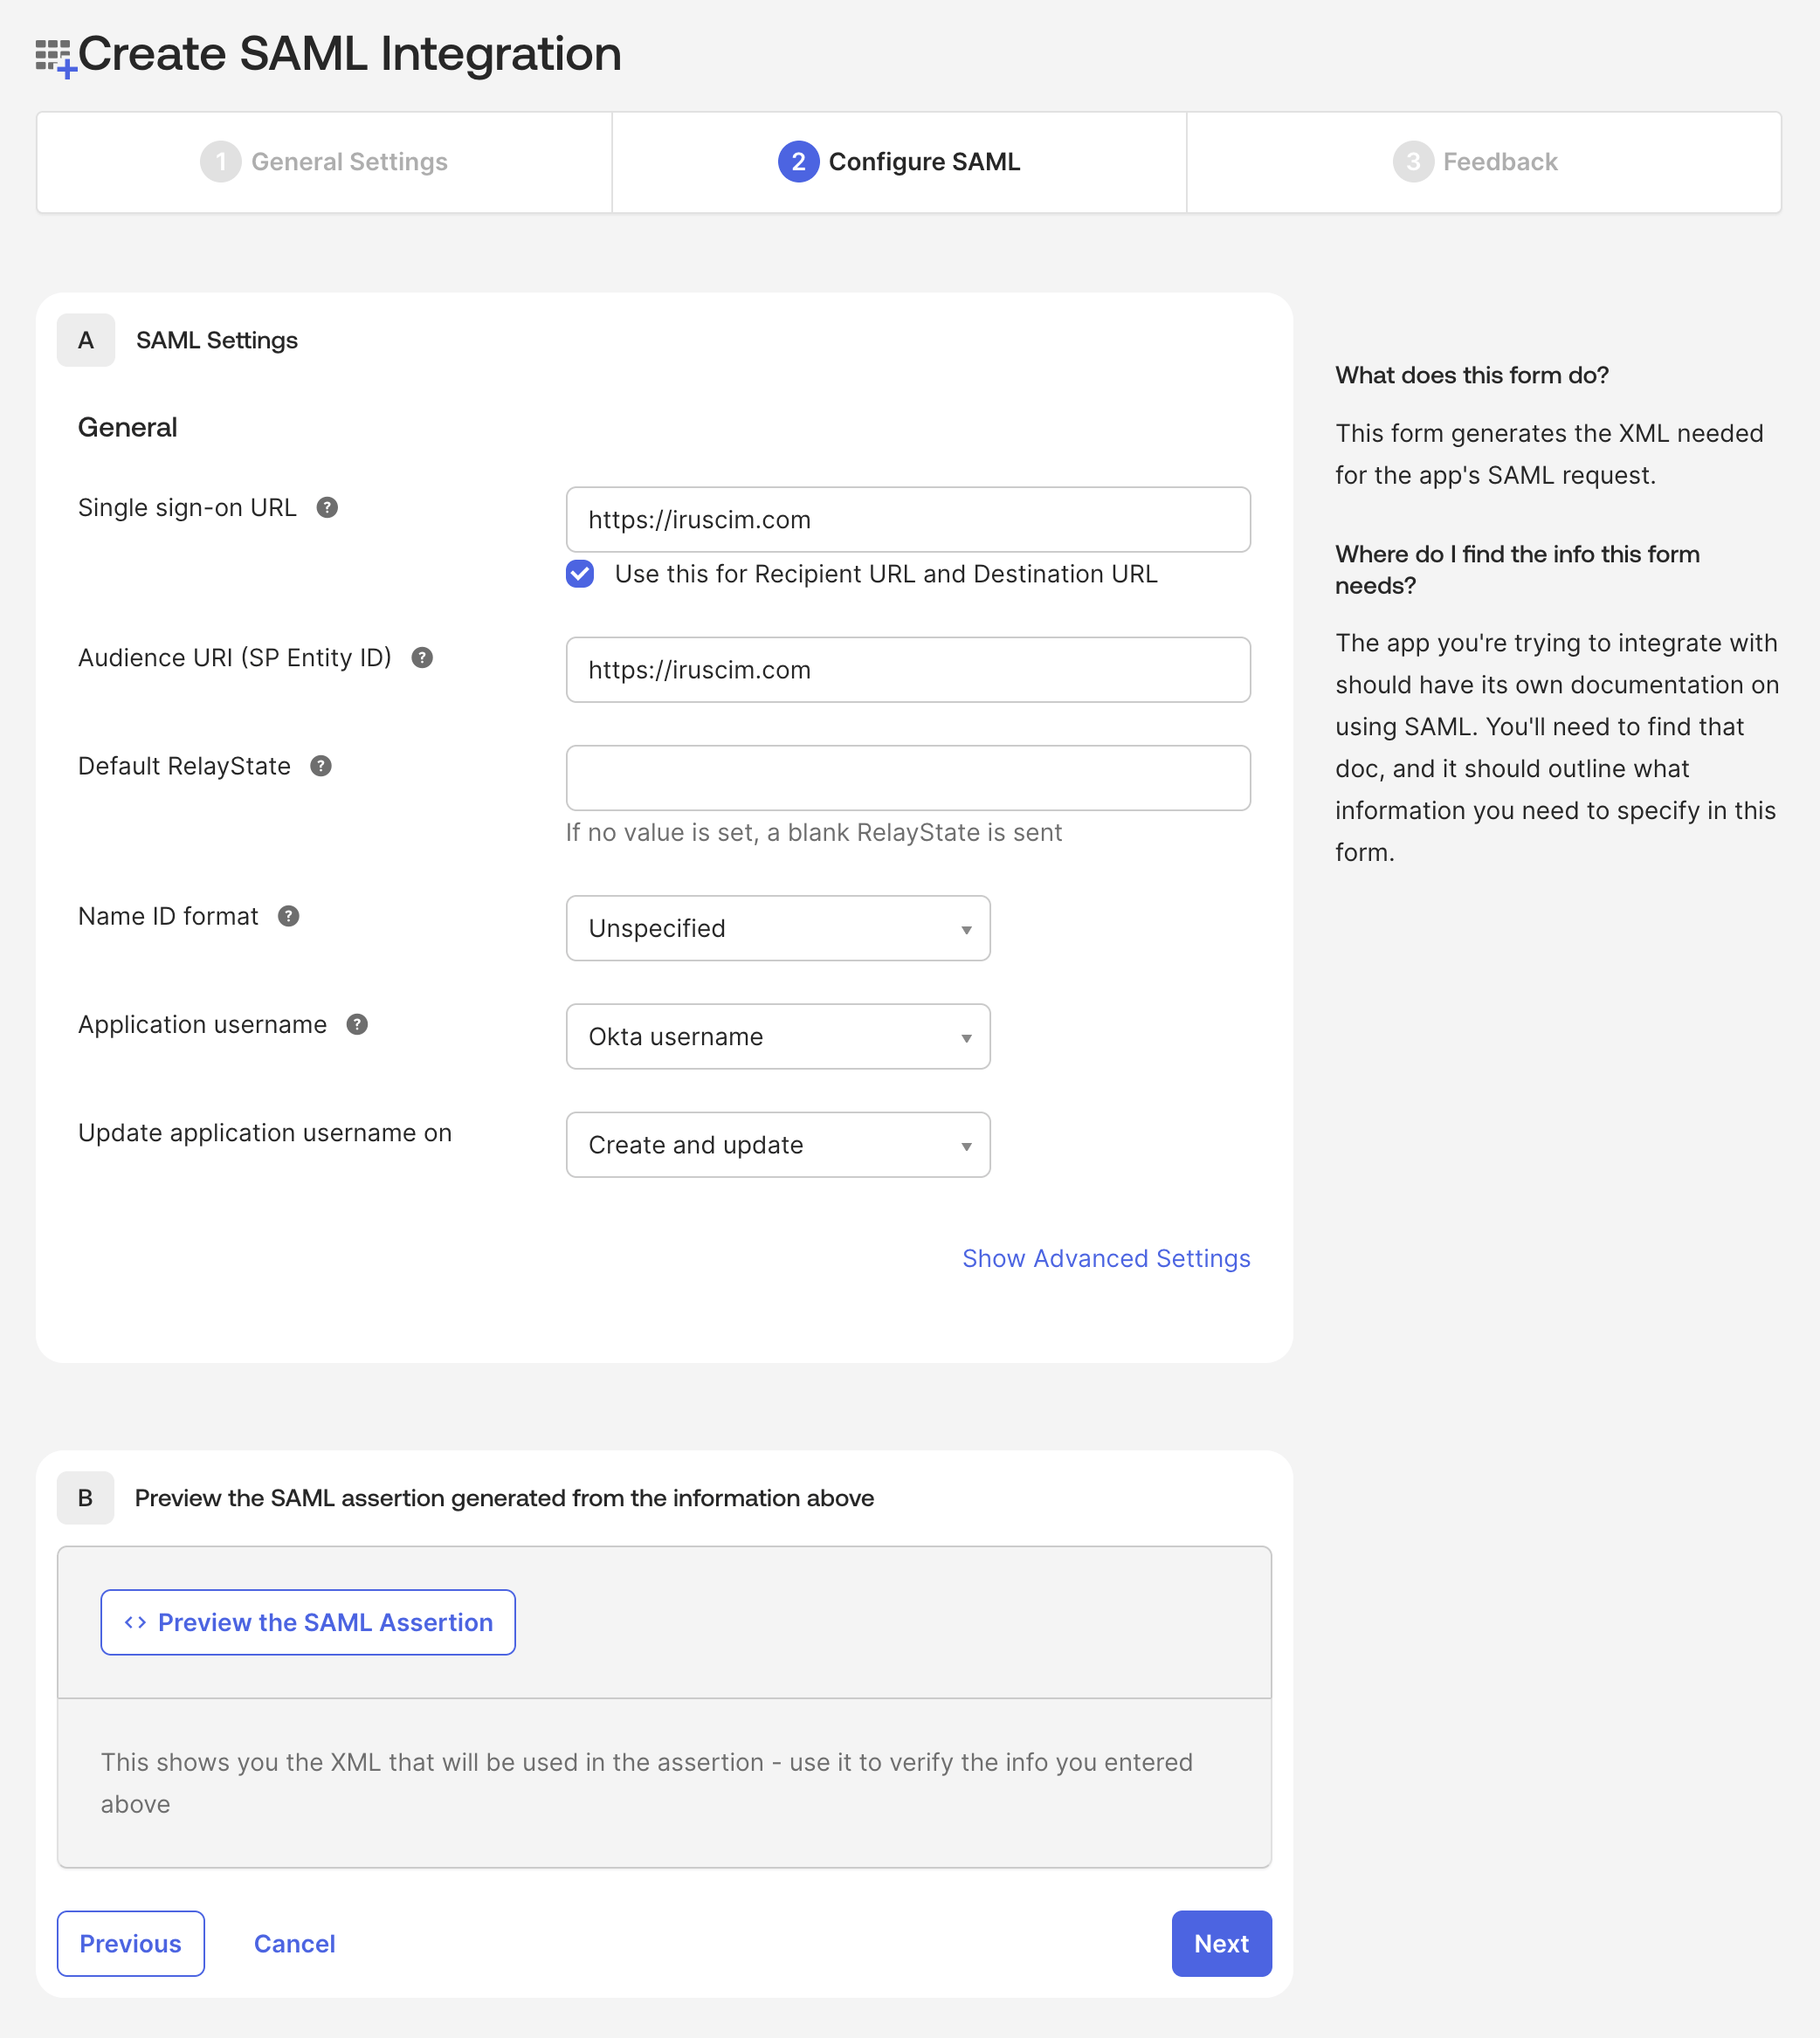
In SAML Settings, enter a dummy URL in the Single sign-on URL and Audience URI (SP Entity ID) fields. Do not change any other settings. Continue Configuration
Click Next.
Complete Setup
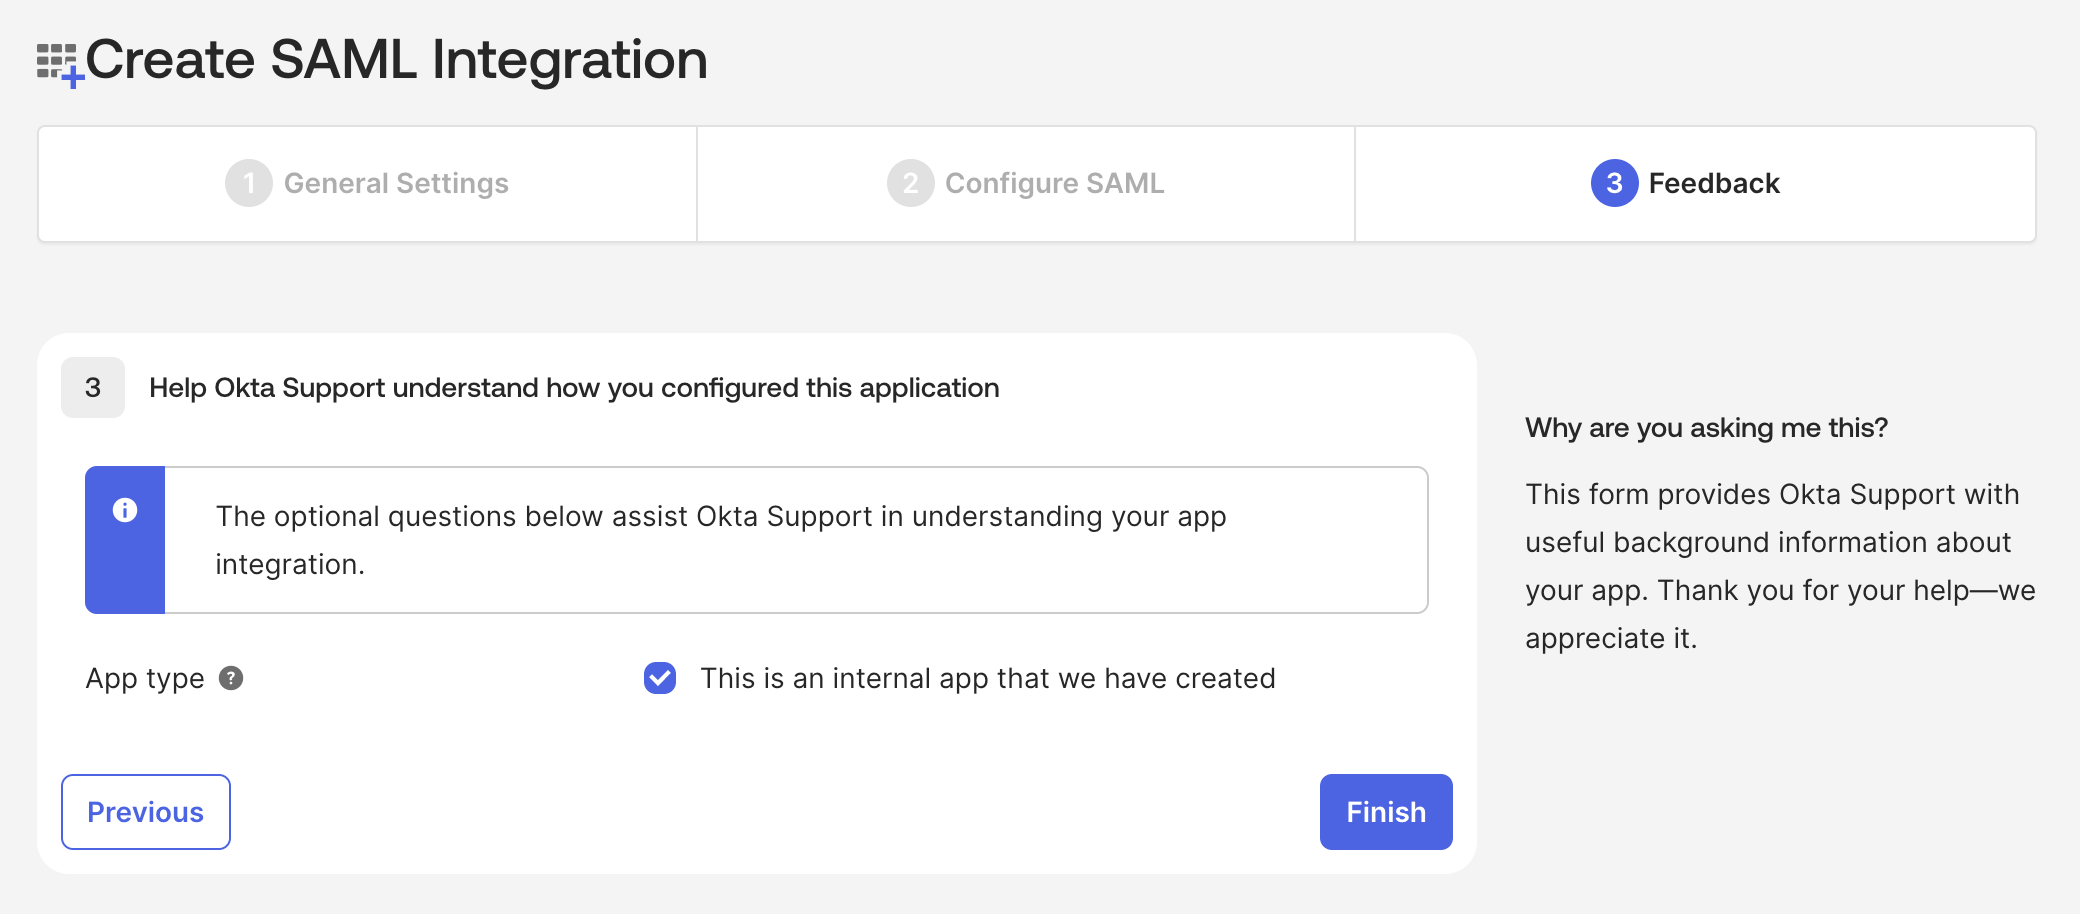
In Help Okta Support understand how you configured this application, select the checkbox for This is an internal app that we have created, and click Finish. Since we will not be using this application integration for SSO, the URLs do not need to be valid; however, you must enter URLs in these fields in order to proceed. If you decide to enable SAML SSO in Iru Endpoint, you can use this same app to do so.
Configuring SCIM Settings
Access General Tab
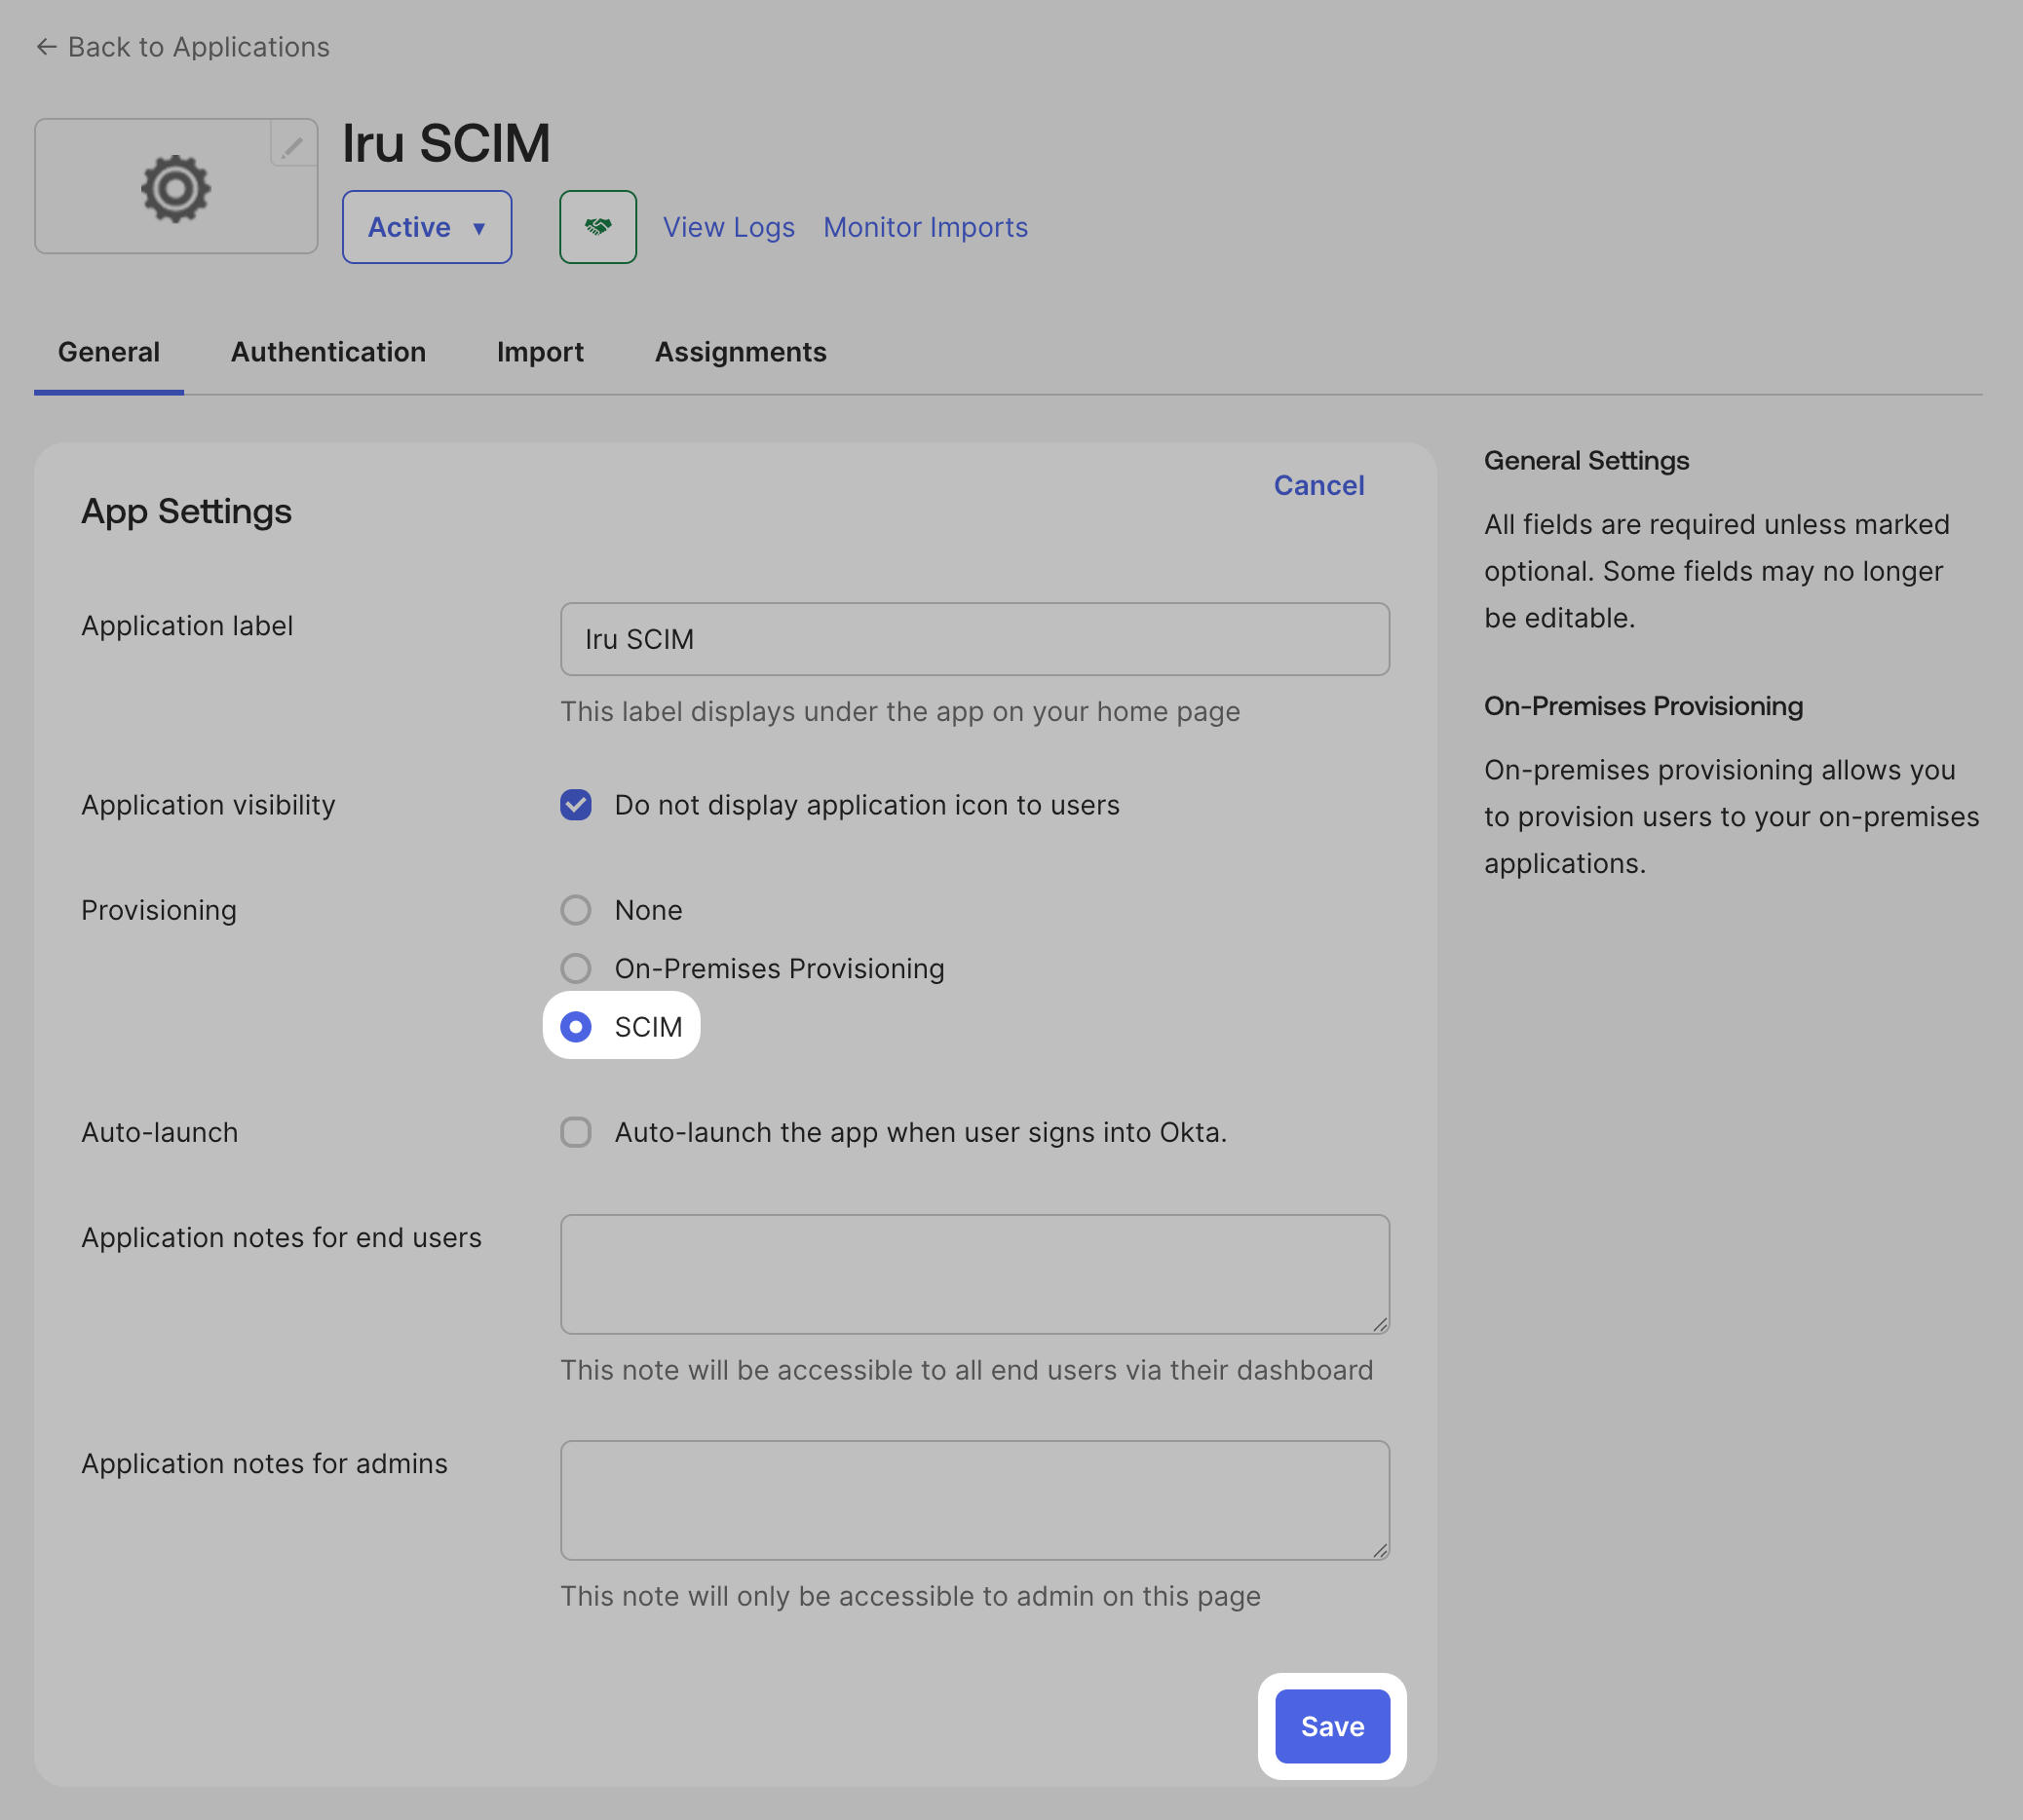
In the Okta SCIM app you just created, navigate to the General tab.
Edit Settings
In the Settings section, click Edit.
Select SCIM Provisioning
Select SCIM in the Provisioning setting.
Save General Settings
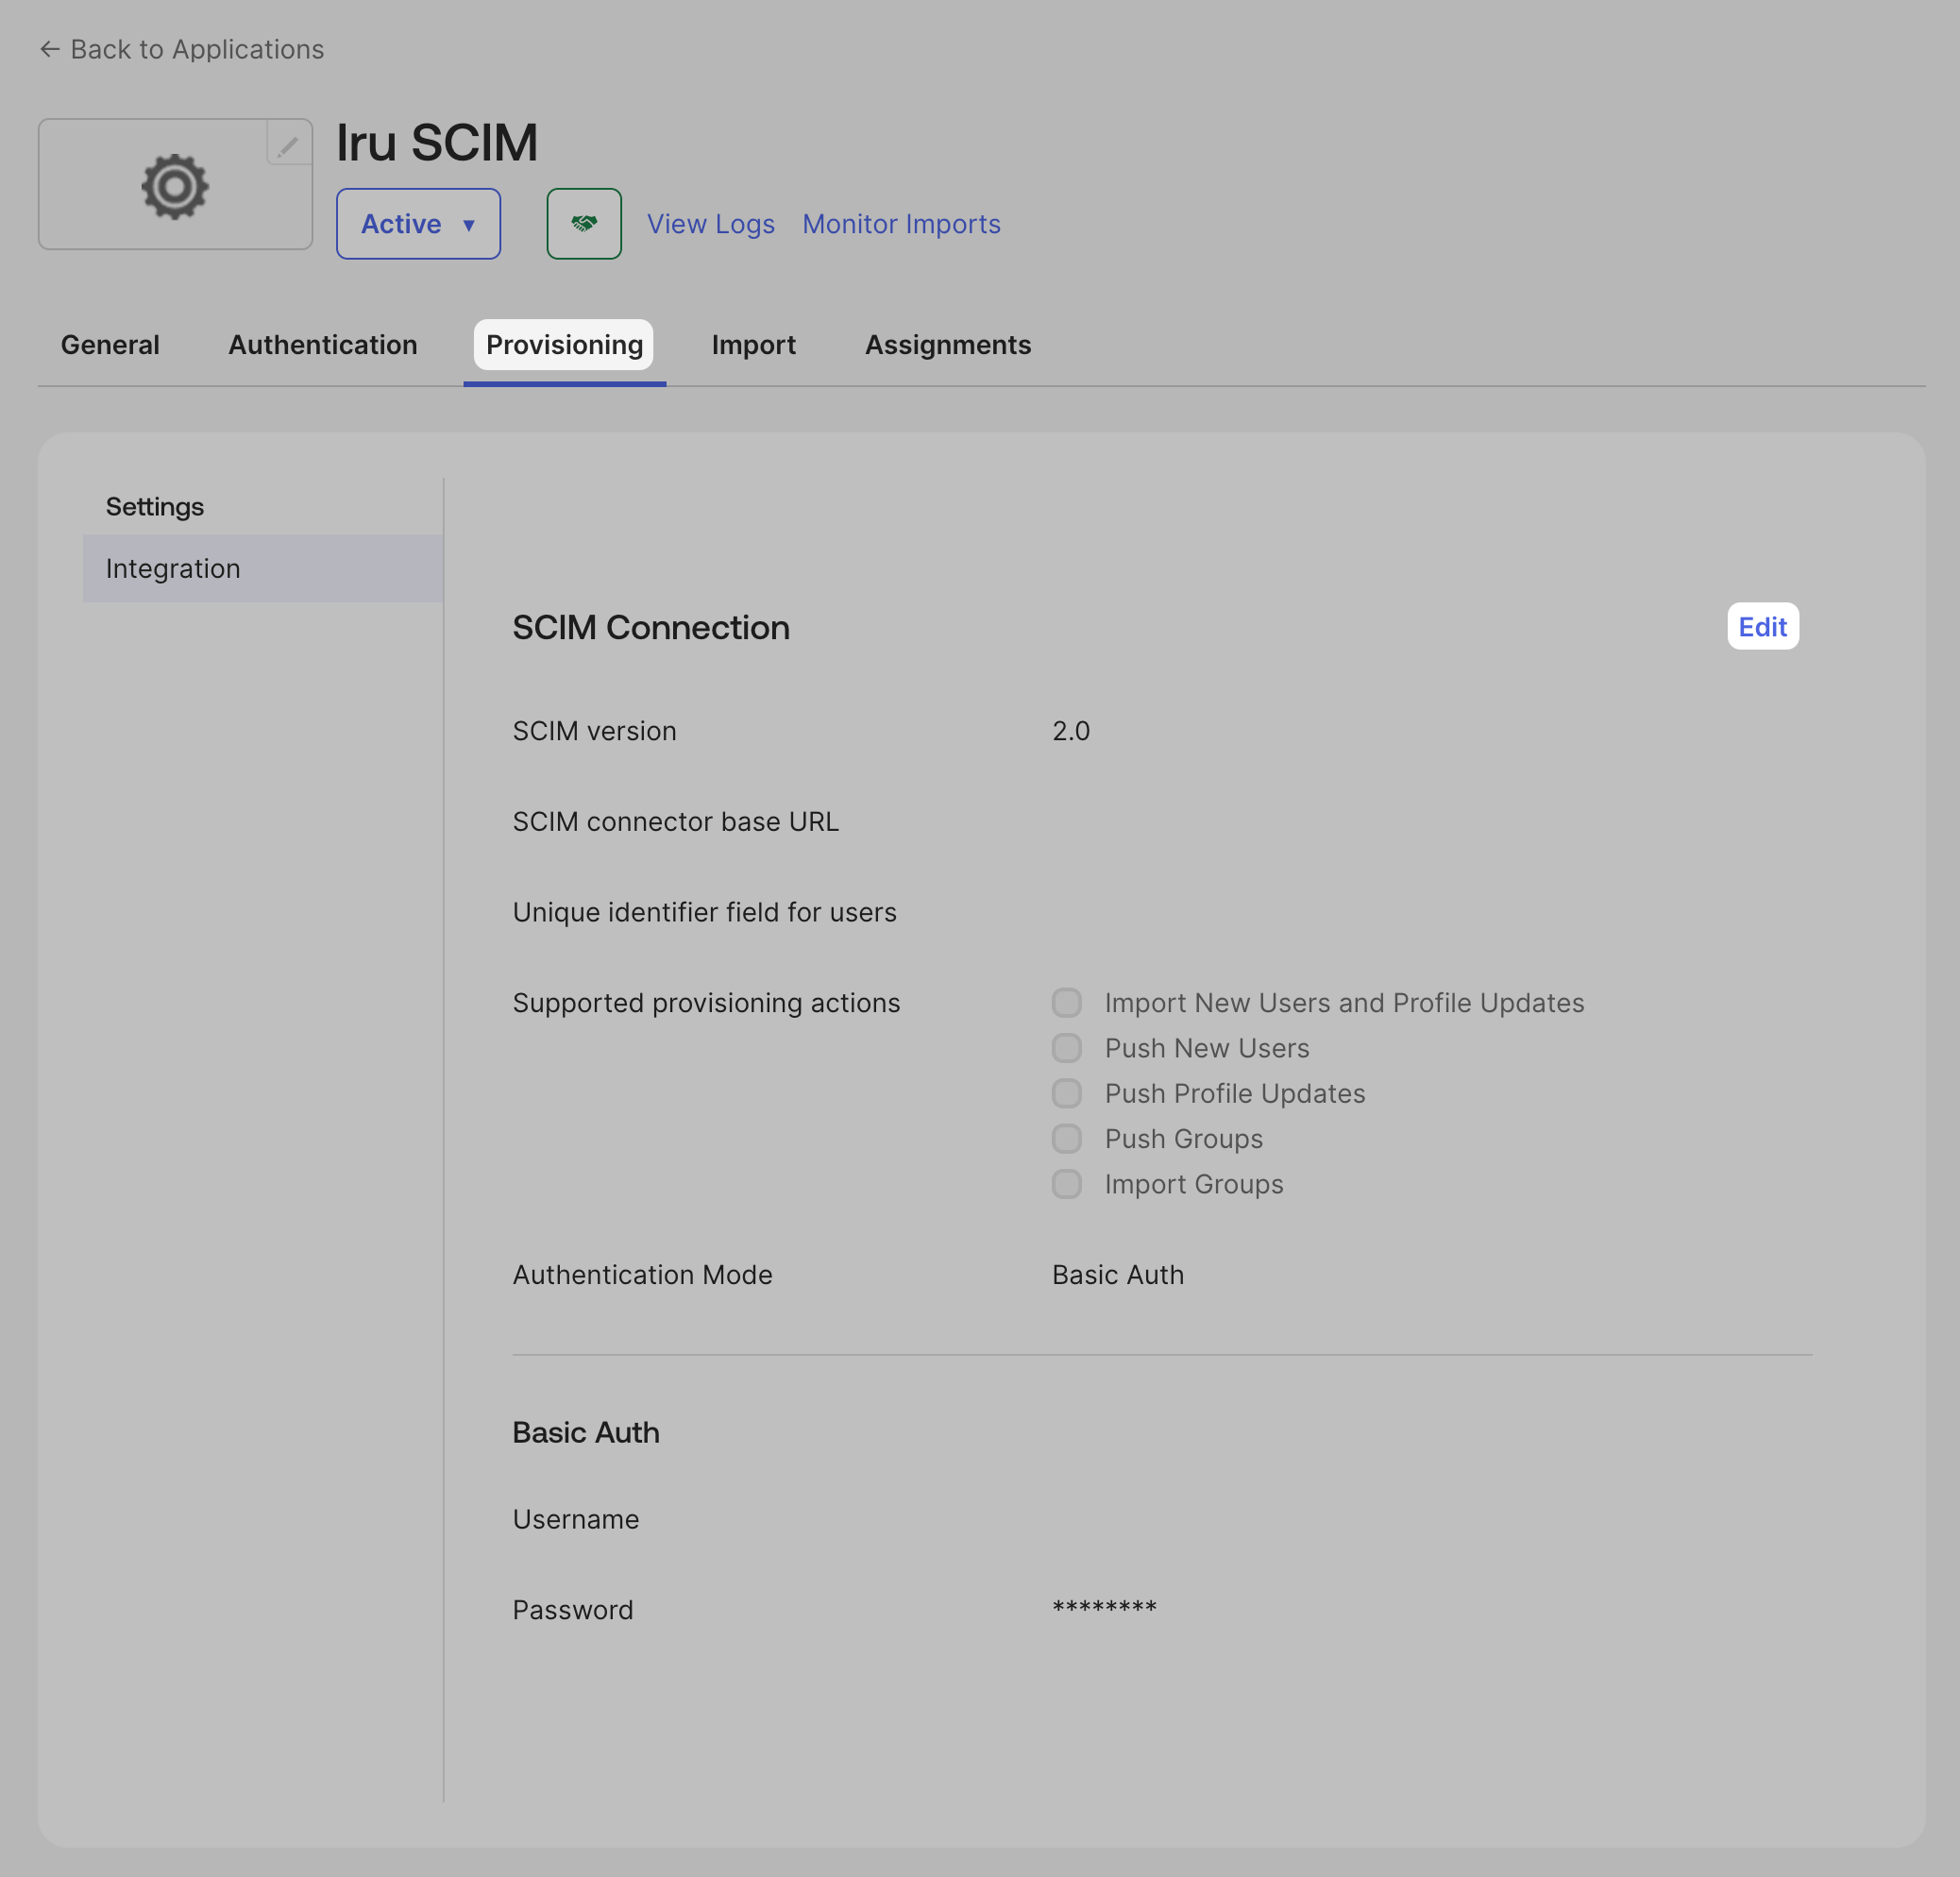
Do not modify any other settings, and click Save. Access Provisioning Tab
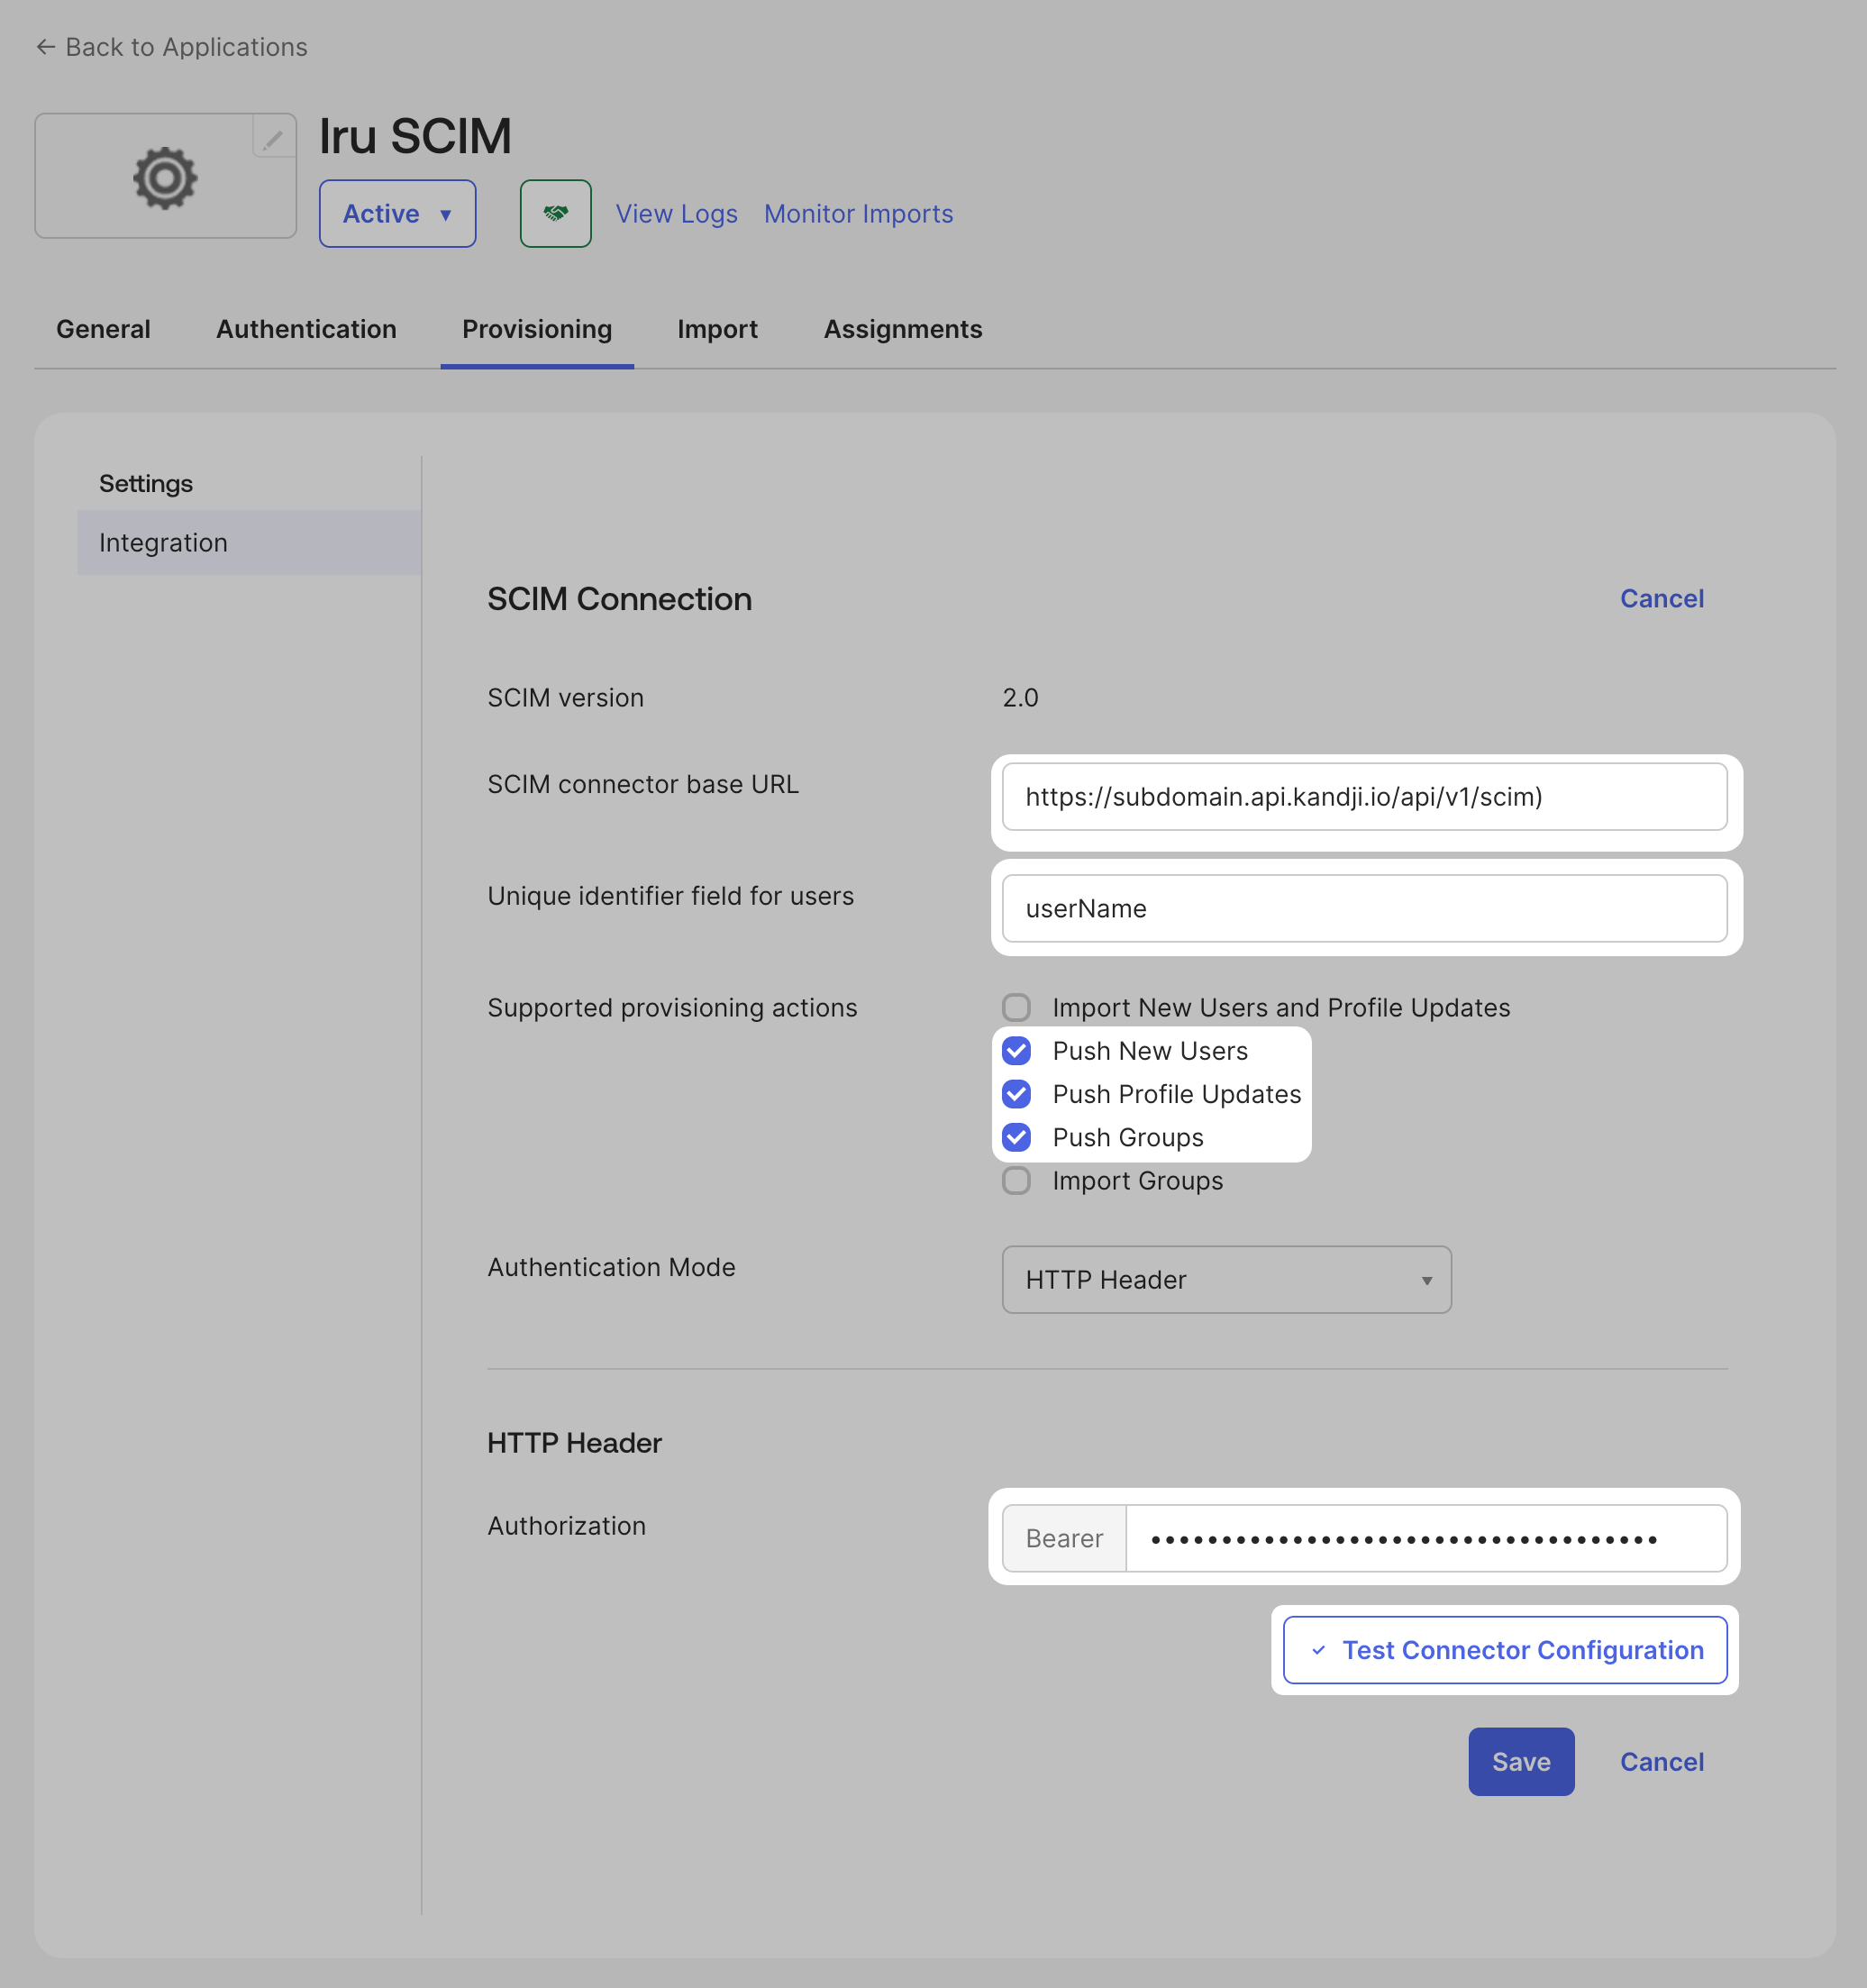
In the Provisioning tab, click Edit in the Integration section. Set User Identifier
For Unique identifier field for users, enter userName.
Select Provisioning Actions
For Supported provisioning actions, select Push New Users, Push Profile Updates, and Push Groups.
Configure Authentication
For Authentication Mode, select HTTP Header.
Enter Authorization Token
For Authorization, enter the Bearer Token you obtained in the Iru Endpoint tab.
Test Configuration
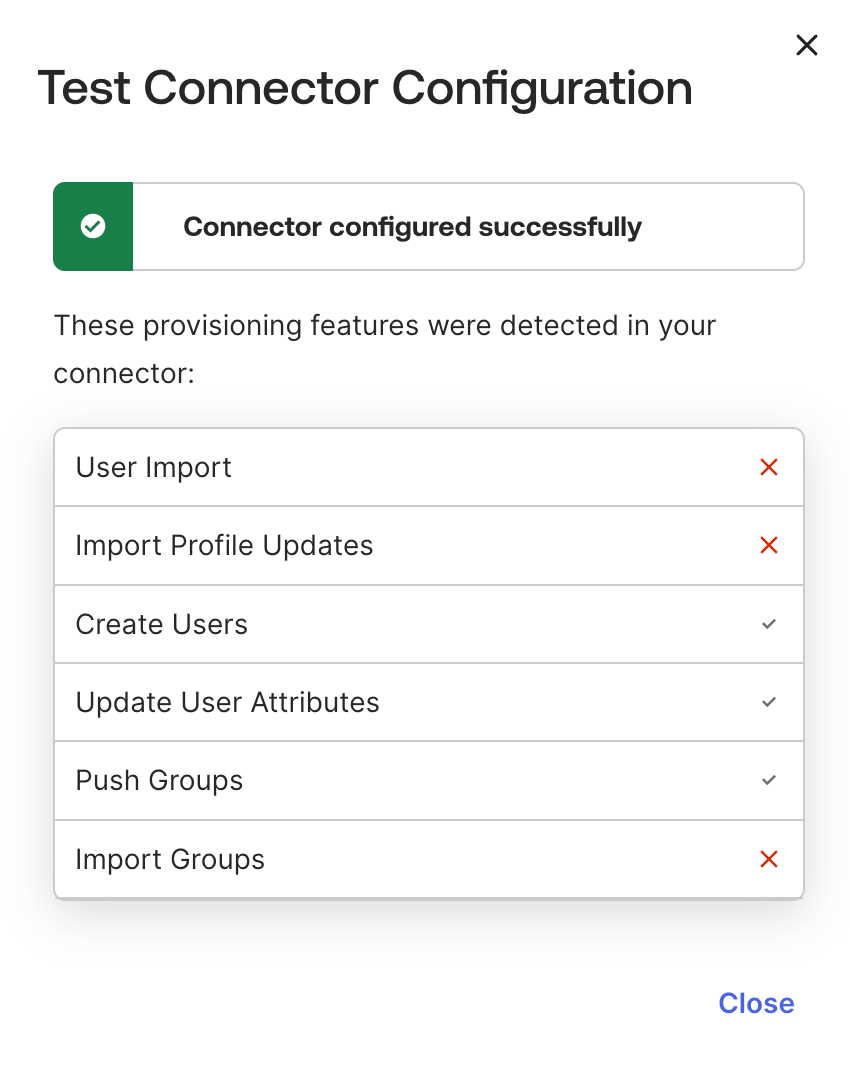
Click Test Connector Configuration to test the integration. Verify Test Results
In the list of detected features, confirm that only the following items display a checkmark to indicate success:
- Create Users
- Update User Attributes
- Push Groups
Save Integration Settings
Click Save.
Configure App Provisioning
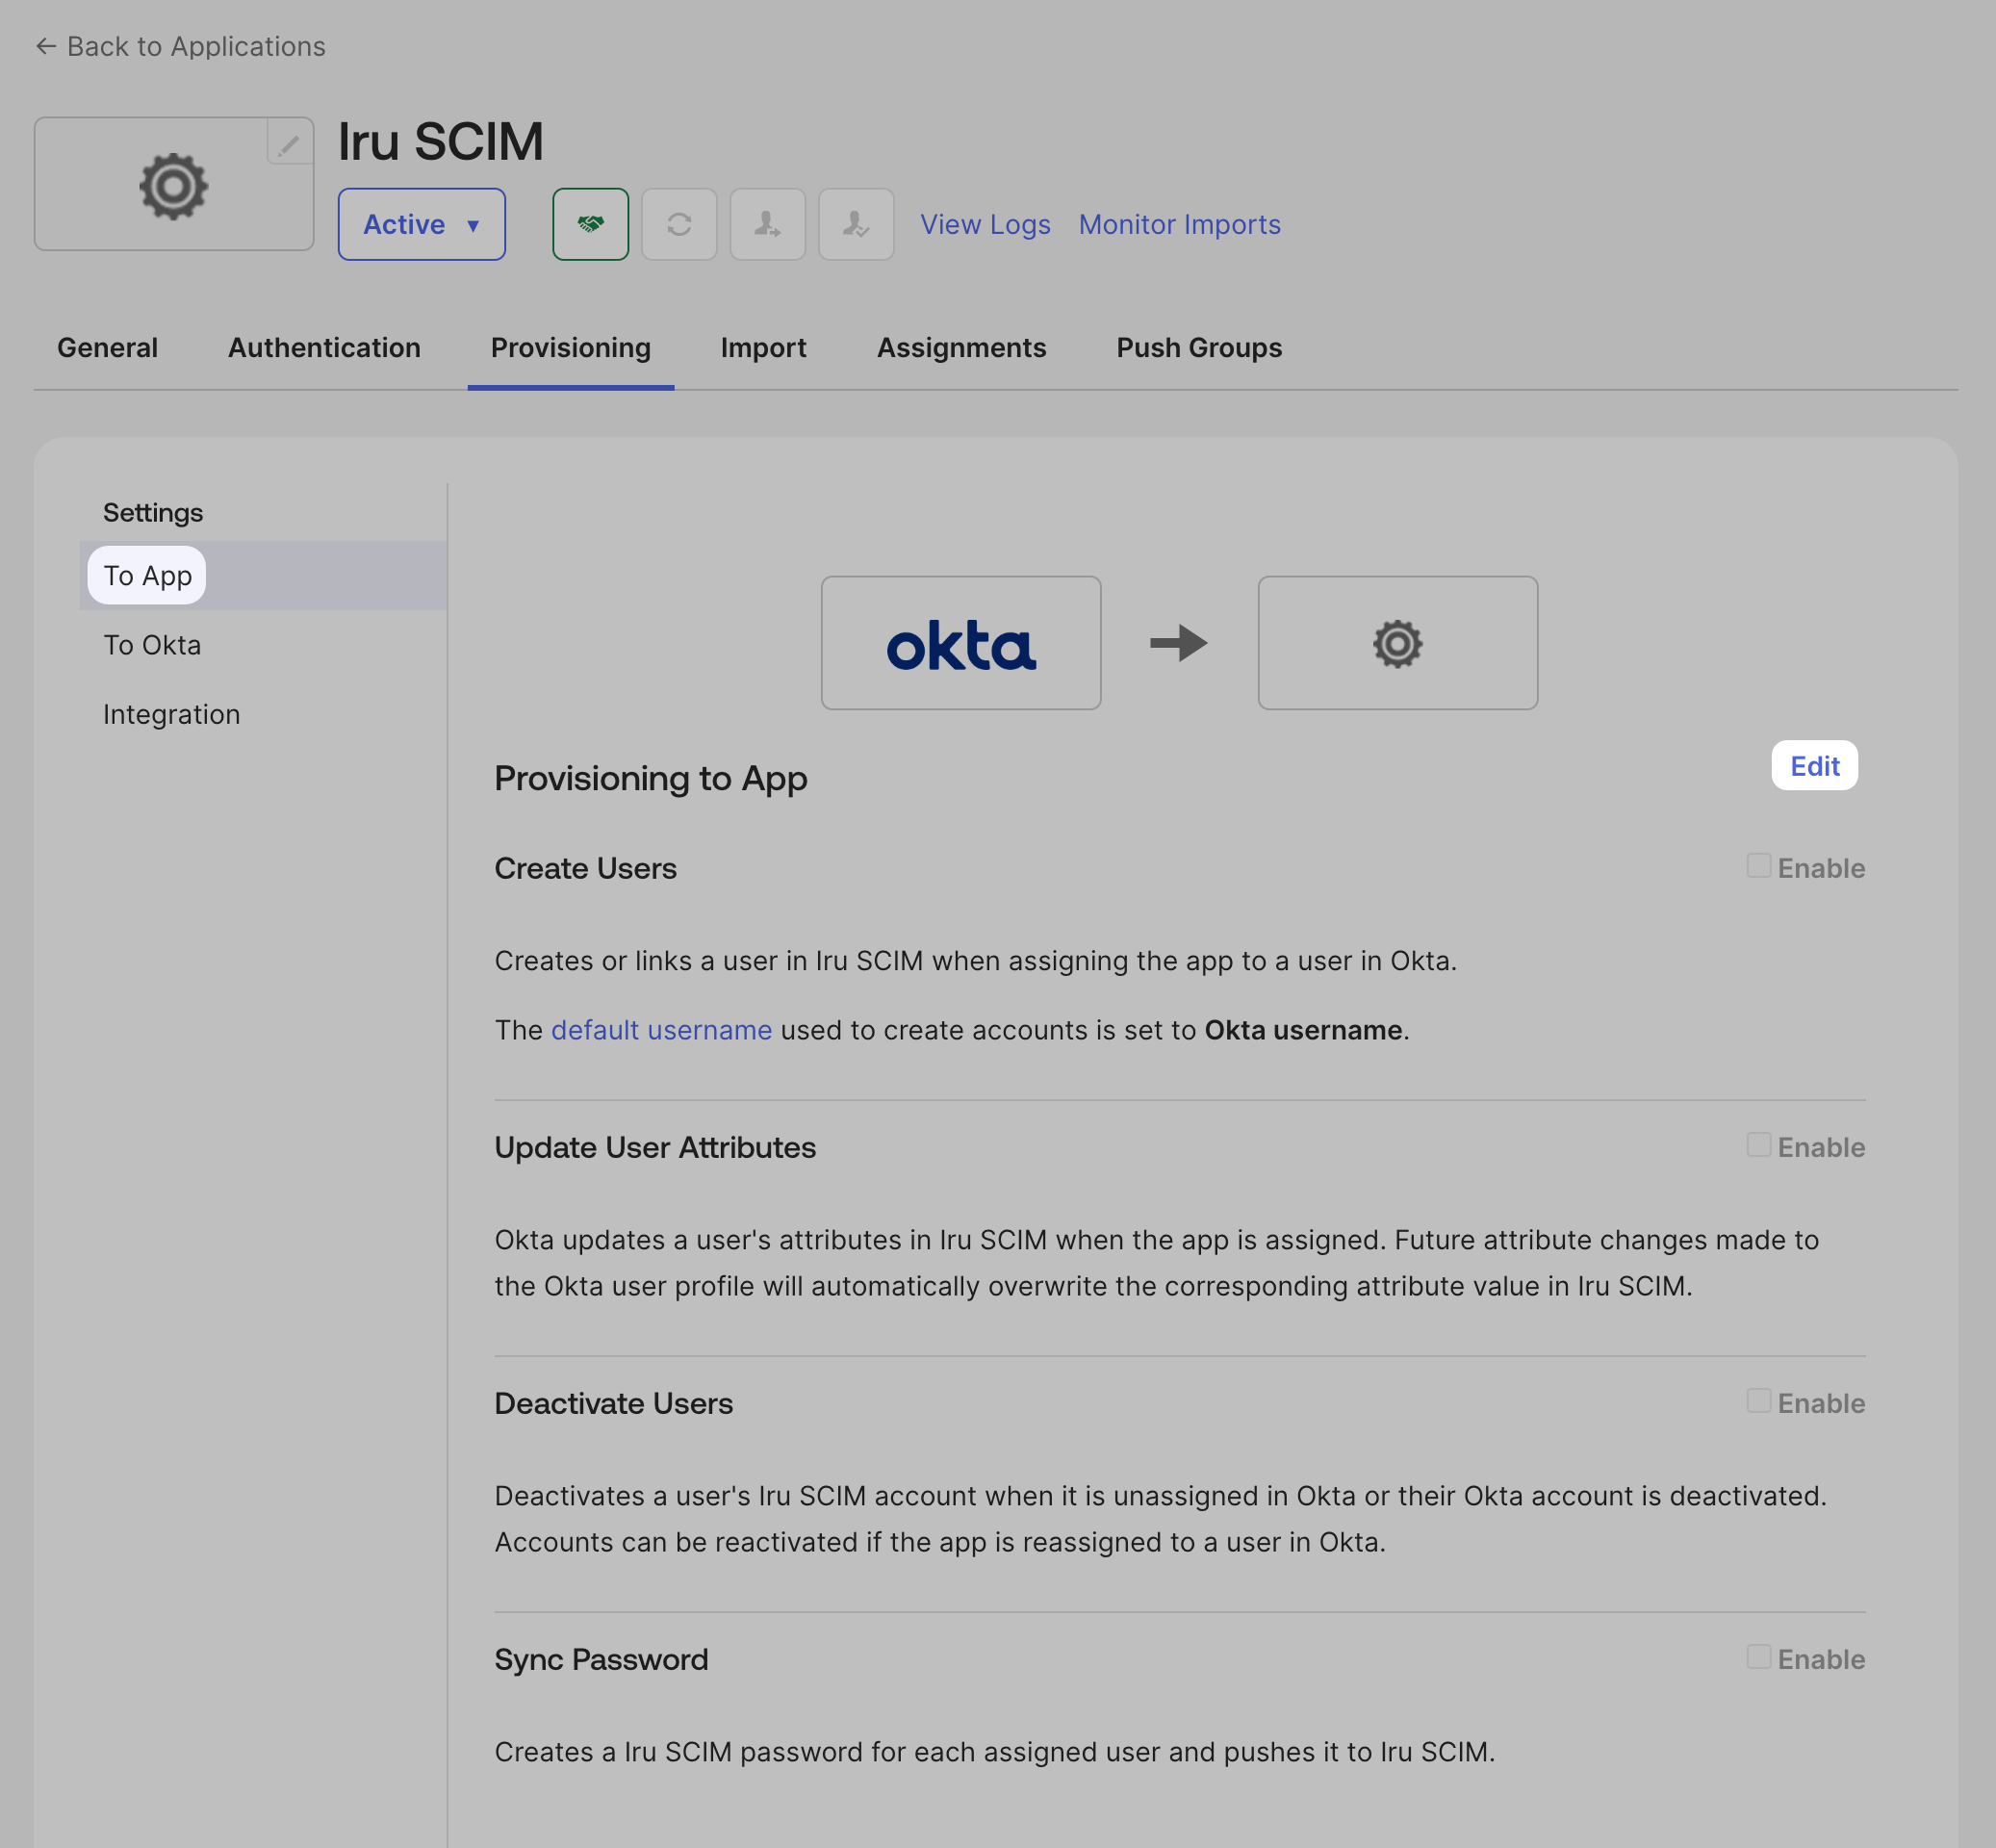
While still on the Provisioning tab, go to the To App section and click Edit. Enable User Operations
In the Provisioning to App section, enable Create Users, Update User Attributes, and Deactivate Users. Save App Settings
Click Save.
Configure Attribute Mappings
(optional) In the Attribute Mappings, edit the user attributes to send to Iru Endpoint. Iru Endpoint will only store and use the attributes mentioned in the SCIM Directory Integration article. Users and Groups
Assigning Users to Iru Endpoint
This section covers assigning users to Iru Endpoint by creating an Okta user group called iru_endpoint_users. This group will be added to the Assignment tab in the Okta SCIM app.This method is just one example showing how to assign users to Iru Endpoint via Okta SCIM.
Navigate to Groups
In a new browser tab, navigate to Directory > Groups and click Add Group.
Create User Group
Give the group a meaningful name like iru_endpoint_users and click Save.
Add Users to Group
Search for the group you just created and add one or more test users.
Return to SCIM App
Navigate back to the browser tab where the Okta SCIM app is open.
Access Assignments
Go to the Assignments tab, click Assign > Assign to Groups.
Assign Group
Search for the newly created group and click Assign > Save and Go Back.
Confirm Assignment
Confirm that the group was assigned and click Done. The group should now appear in the Assignments tab’s Groups section.
Refresh if Needed
If the group does not display, try refreshing the browser tab.
Pushing Groups to Iru Endpoint
In this section, learn how to push user groups to Iru Endpoint.When planning to push Okta groups to Iru Endpoint for use in Assignment rules, for each group that you would like to push, add it to the Push Groups tab in the SCIM app.Per this Okta article, groups used to assign users in the Assignment tab cannot be used in the Push Groups tab. Okta recommends creating additional groups containing the same users and adding the new groups to the Push Groups tab for consistent group membership. Access Push Groups
In the Push Groups tab, select Push Groups > Find groups by name. (If preferred, you can also use Find groups by rule)
Select Group
Search for a group and select it.
Configure Group Creation
Ensure that Create Group is chosen.
Save and Add Another
Click Save & Add Another.
Add Additional Groups
Search for and add additional groups that you would like to push to Iru Endpoint.
For the user-group association to work, the members of the pushed groups must also be members of the Iru Endpoint users group assigned to the SCIM app.
Automatically Updating Membership for the Iru Endpoint Users Group
Okta group rules can be used to automatically update the iru_endpoint_users group when adding someone to one of your existing groups used as push groups. For example, if you add someone to the developers group, a rule can be created such that when you add new users to the developer group, they will also be added to the iru_endpoint_users group. The new users will be assigned to the SCIM app, and sent to Iru Endpoint via the SCIM integration, and group associations will be updated.Access Group Rules
Click on Directory > Groups > Rules > Add Rule.
Name the Rule
Give the rule a name. Example: “update iru_endpoint_users group membership”
Set Condition
Choose Group membership as the condition.
Configure Group Names
Enter the names of the groups used as push groups.
Set Assignment Target
For Assign to enter iru_endpoint_users.
Activate Rule
Back on the group rules page, next to the rule, select the Actions dropdown and then Activate.
Pushing Group Updates
User and group syncing is one-way, meaning the SCIM app will send user information to Iru Endpoint only when there is new or updated information to be sent. For this reason, a “Sync Now” option is not needed in the Iru Endpoint web app.
- If you add additional users to the group assigned to the SCIM app in Okta, be sure to also update the groups that you’ve added as the Push groups.
- Updates should be seen in Iru Endpoint fairly quickly, but if you would like to push group updates immediately, you can choose the option to Push Now from the Push Groups tab in the Okta app. More information can be found in the Okta article.
Deleting Pushed Groups
Use the following steps to stop pushing group updates or optionally delete a pushed group from Iru Endpoint.Access Push Groups Tab
Go to the Push Groups tab for the app in Okta.
Unlink Push Group
In the Push Status column, select Unlink push group.
Configure Deletion
Select the option to Delete the group in the target app (recommended). This will DELETE the group in the target app, and user accounts will NOT be deleted. The user accounts are tied to the assignment group on the Provisioning tab.
Confirm Unlink
Click Unlink.