Prerequisites
Confirm the following before you run the AD CS integration wizard in the Iru Endpoint web app.Computer certificate template in AD CS
Computer certificate template in AD CS
Access to the Connector Windows Server
Access to the Connector Windows Server
Network paths and firewall rules
Network paths and firewall rules
subdomain.gateway.iru.com, subdomain.gateway.eu.iru.com, subdomain.clients.*), and adcsconn as documented there. Your network must allow traffic between Iru Endpoint, the Connector host, and AD CS, including HTTPS from the Connector to Iru Endpoint without SSL inspection breaking that path when inspection is in use.Legacy Connector still on the network
Legacy Connector still on the network
Connector host: OS, .NET, TPM, WebView, domain
Connector host: OS, .NET, TPM, WebView, domain
Windows Server ready for the wizard
Windows Server ready for the wizard
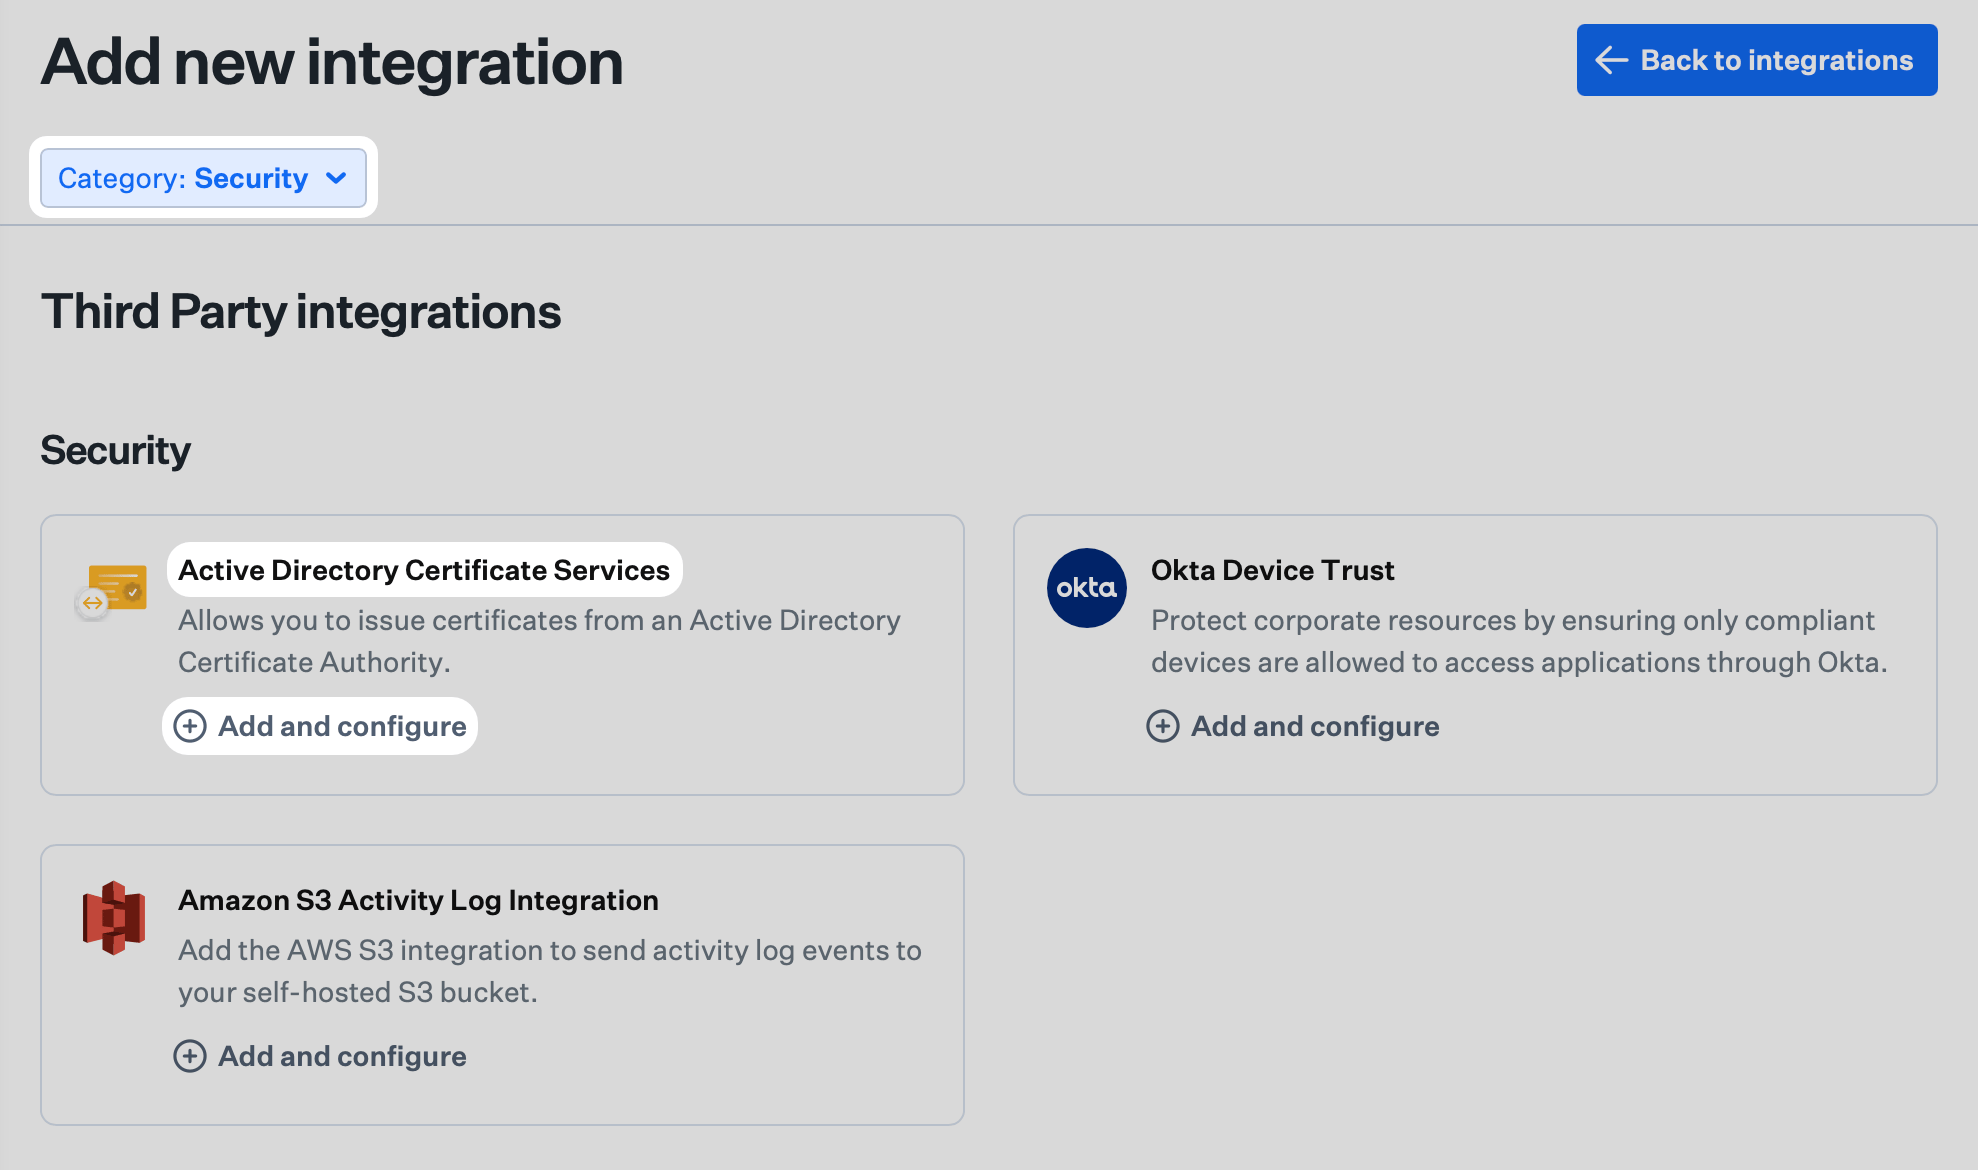
AD CS Integration Setup
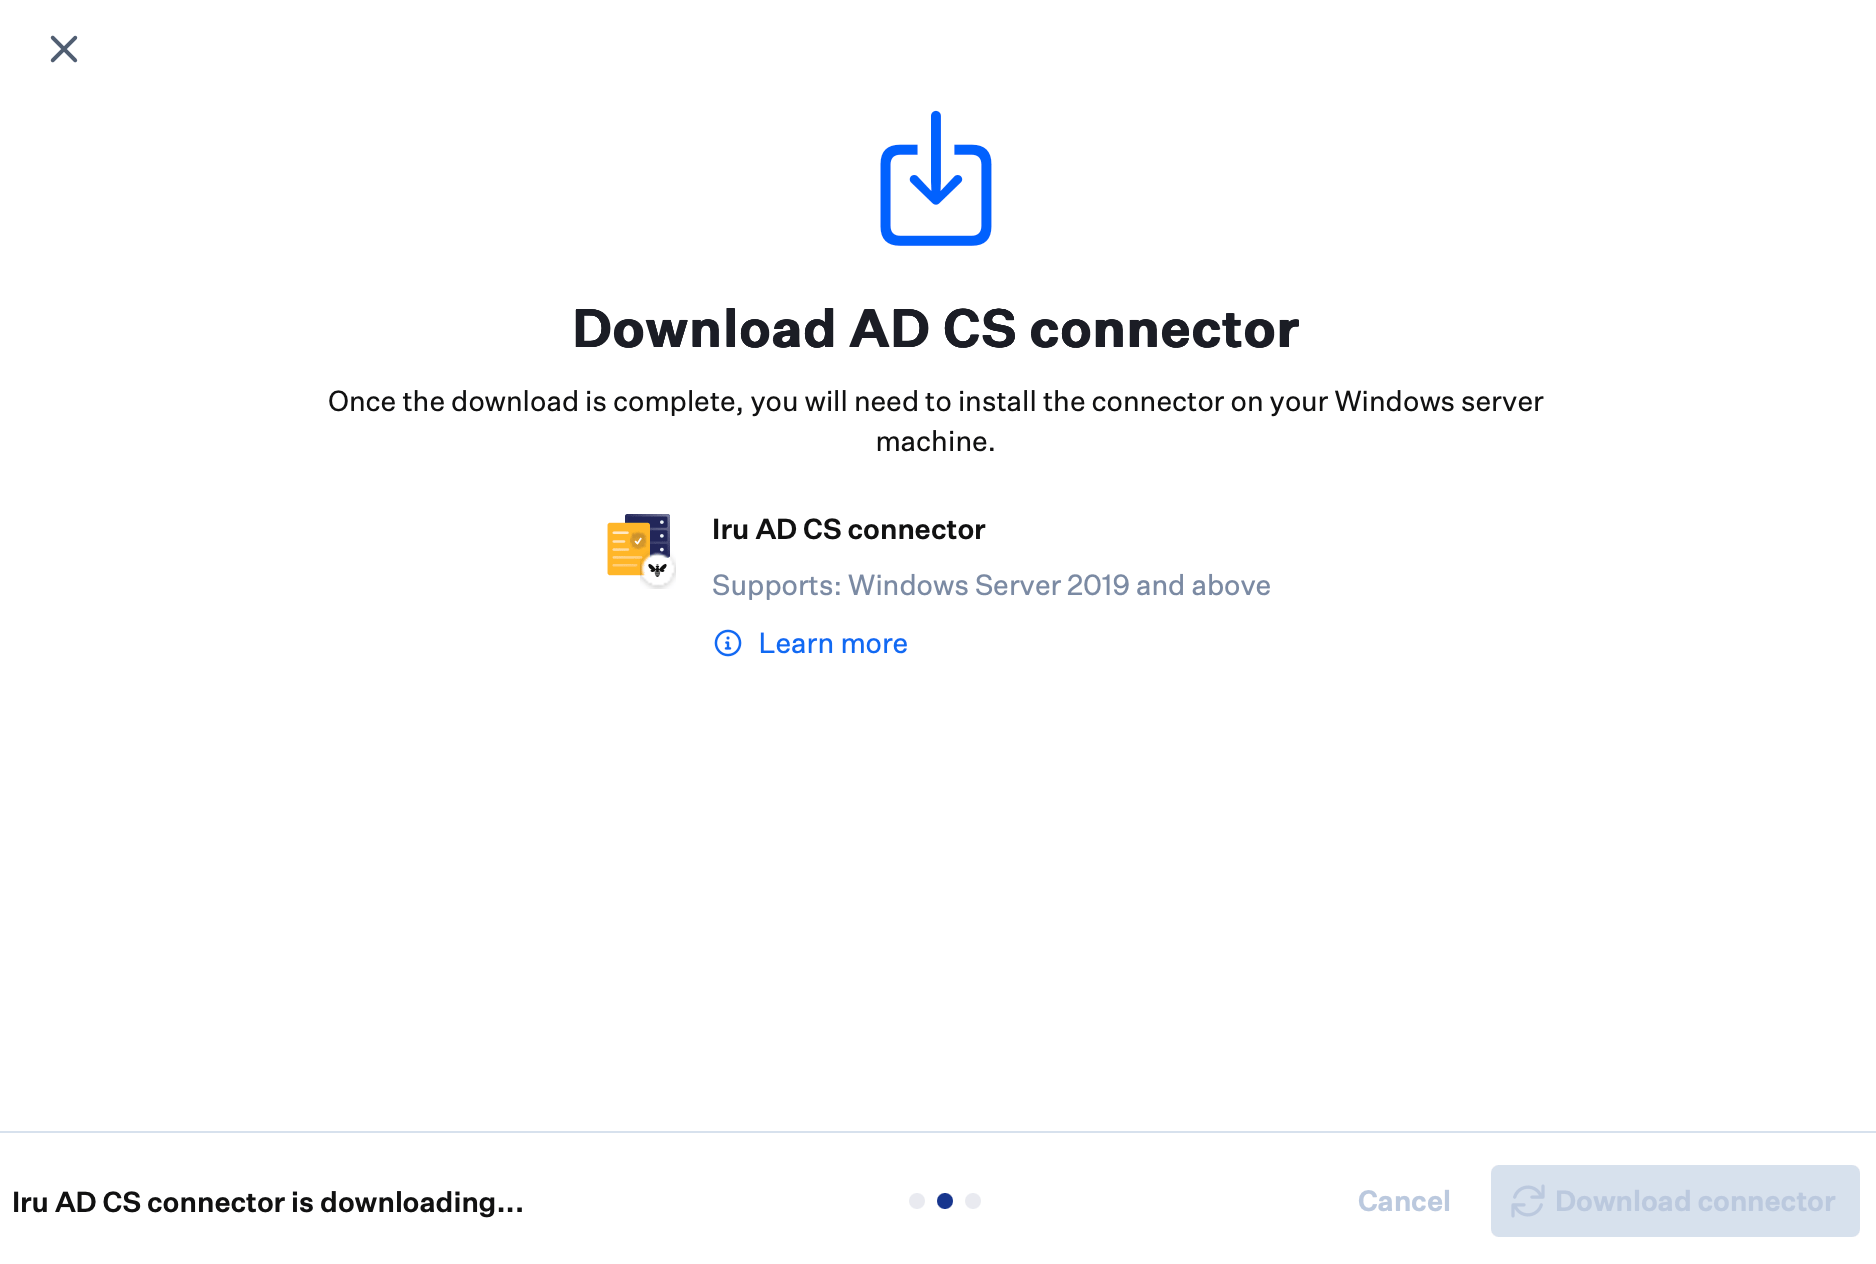
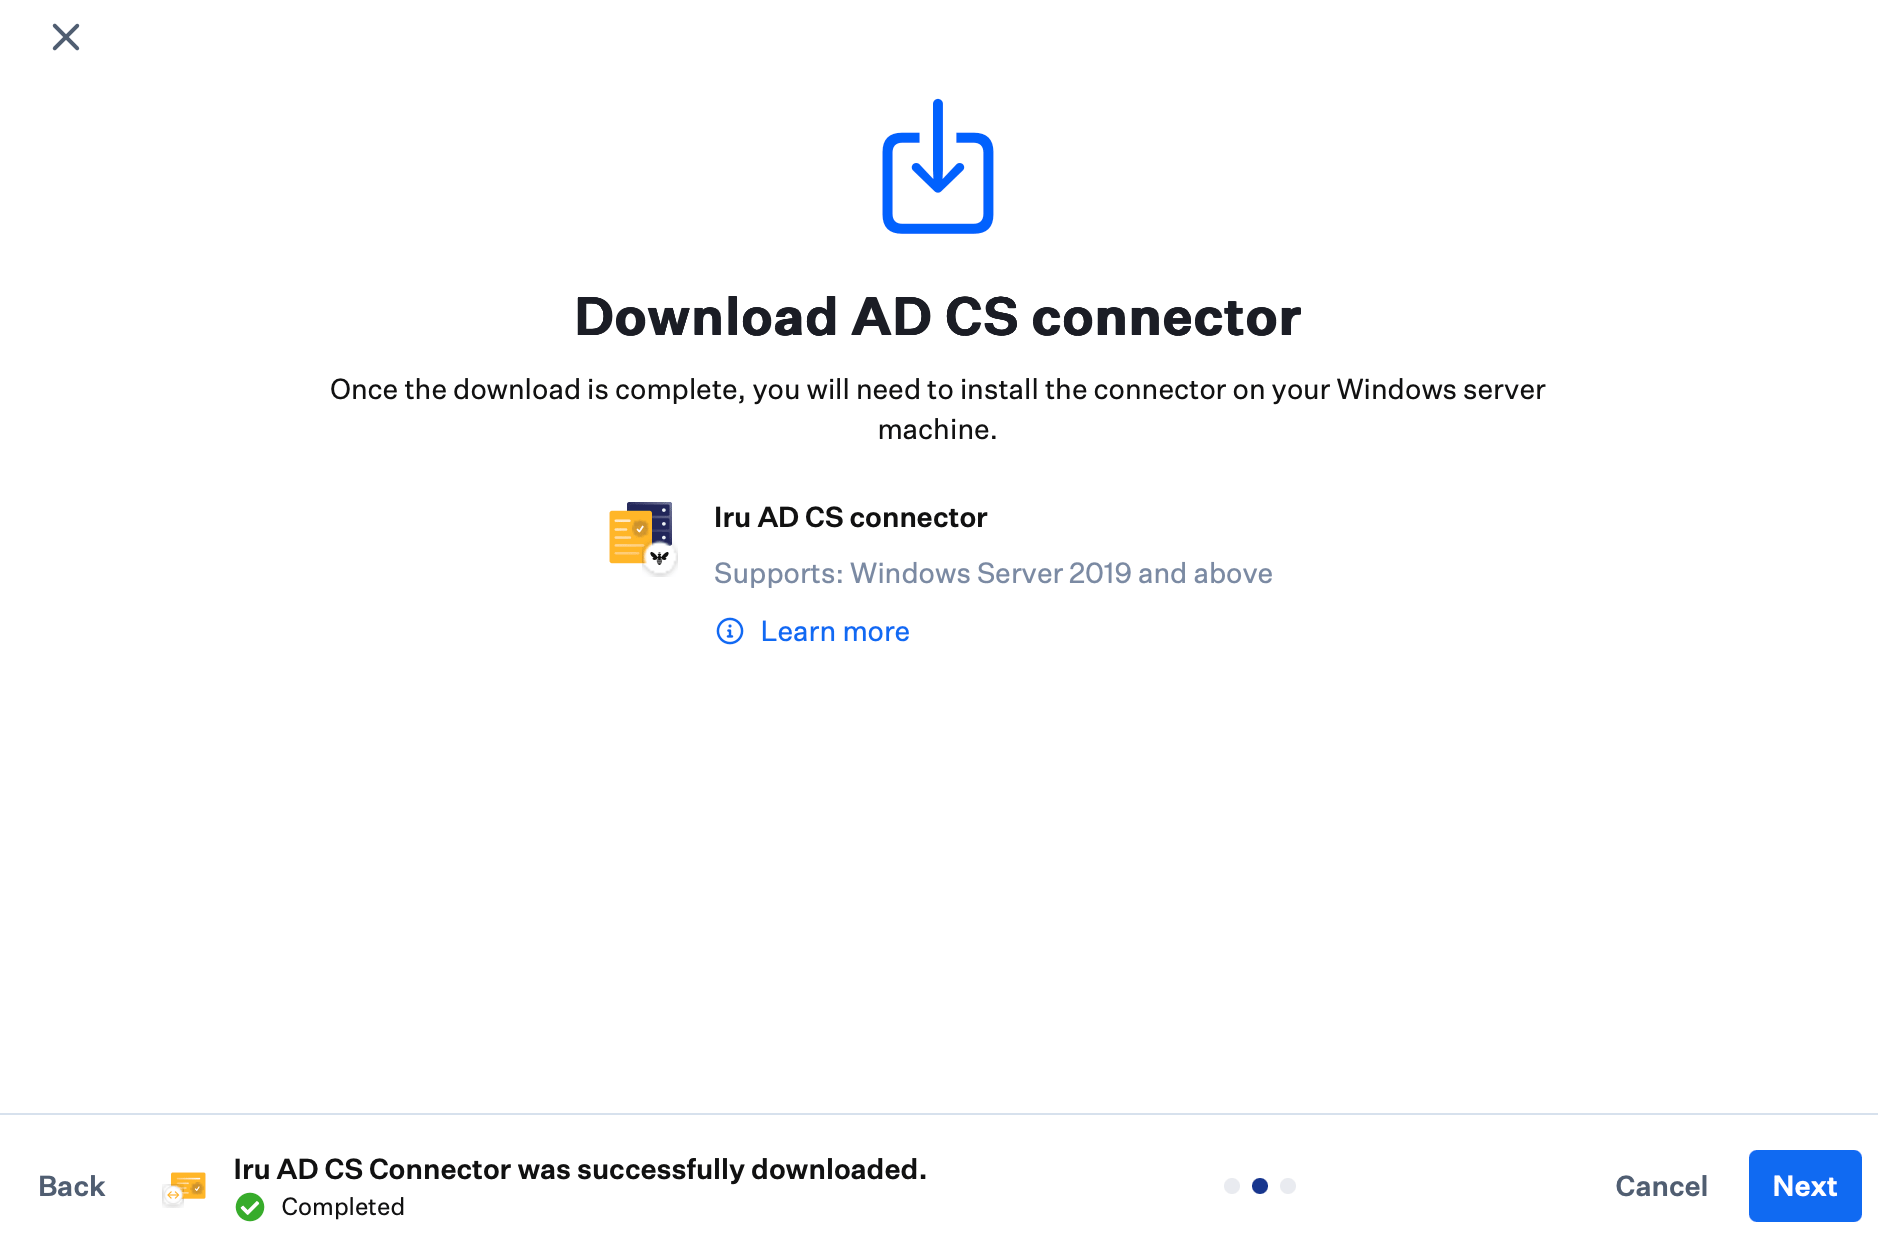
Add Active Directory Certificate Services

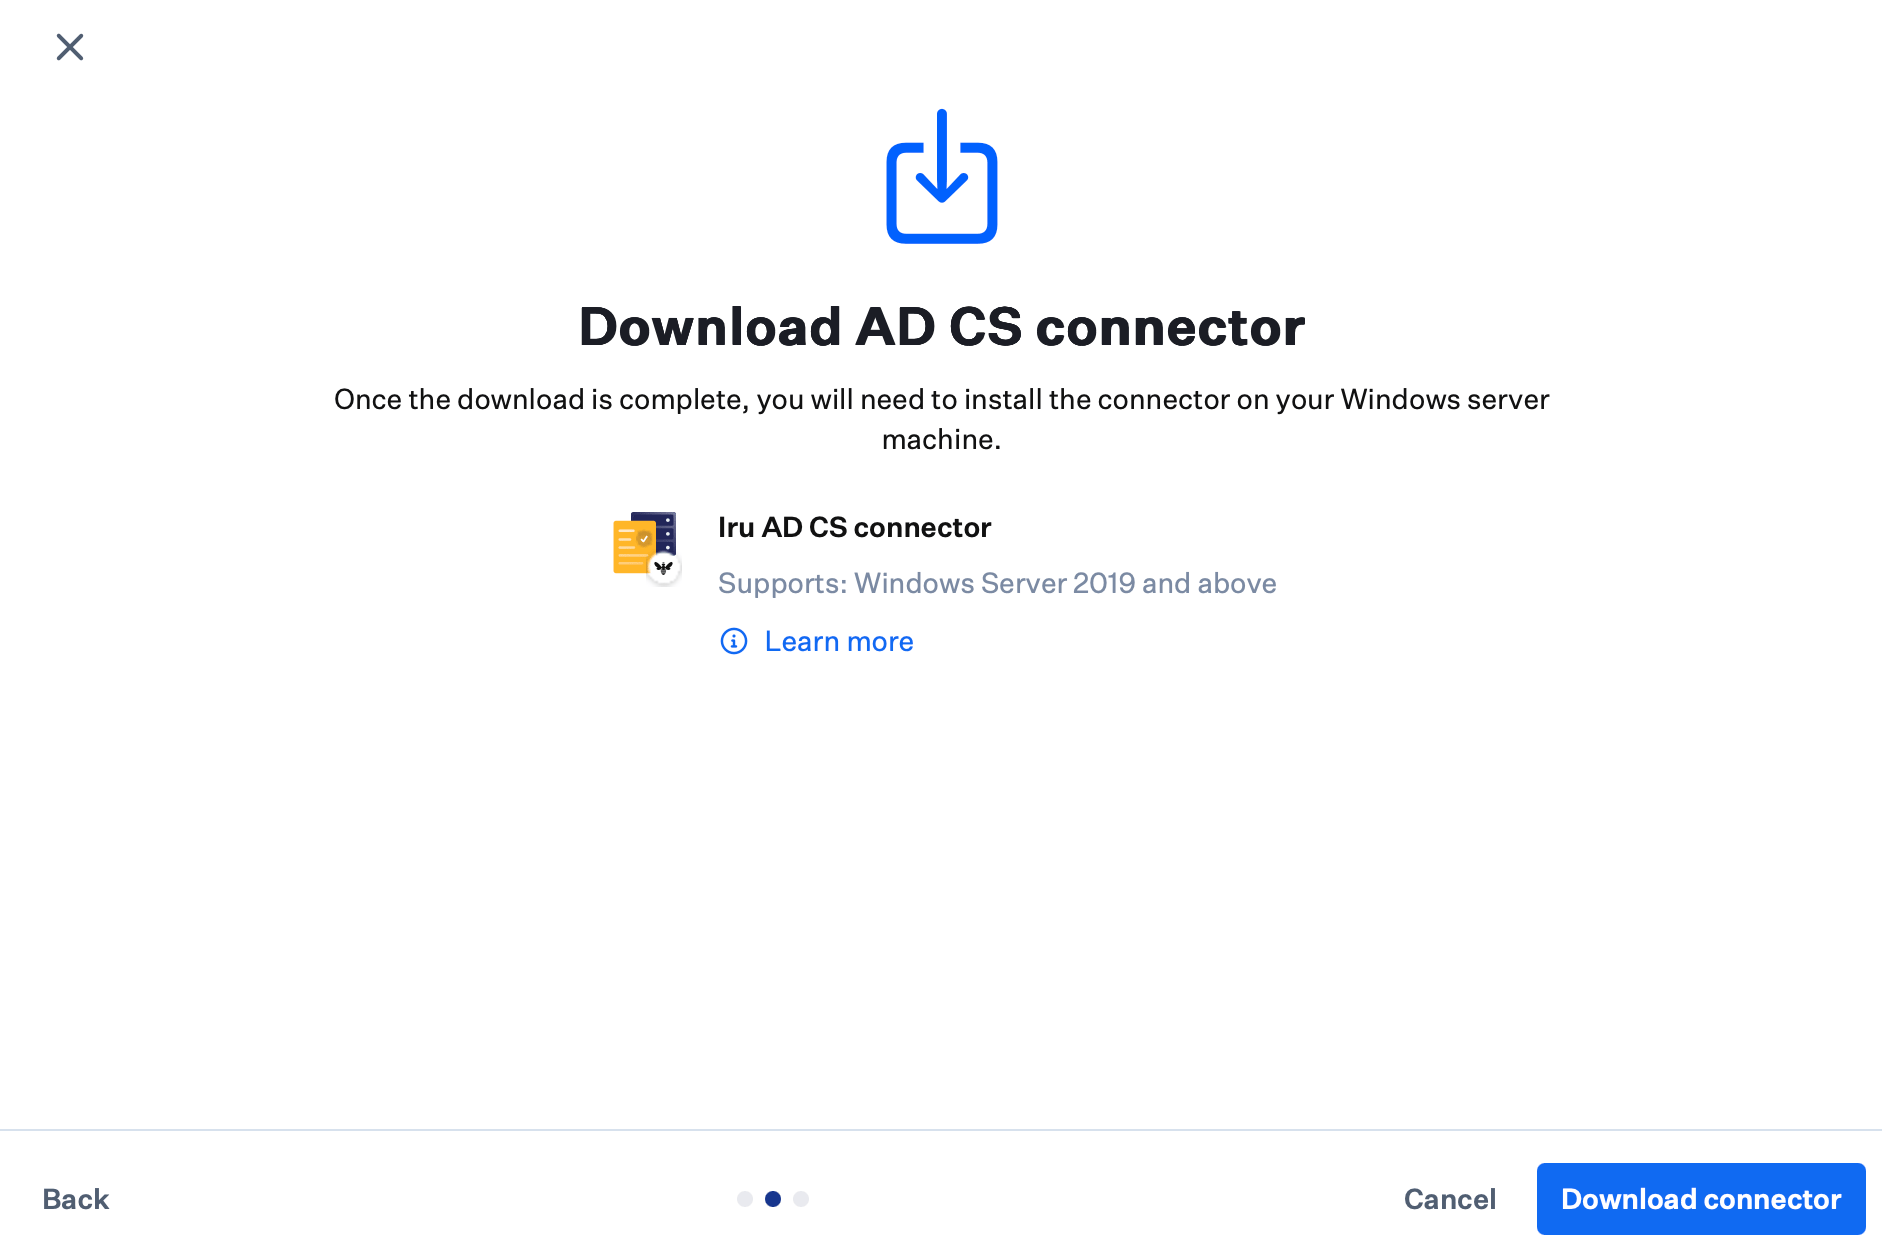
Wait for download completion
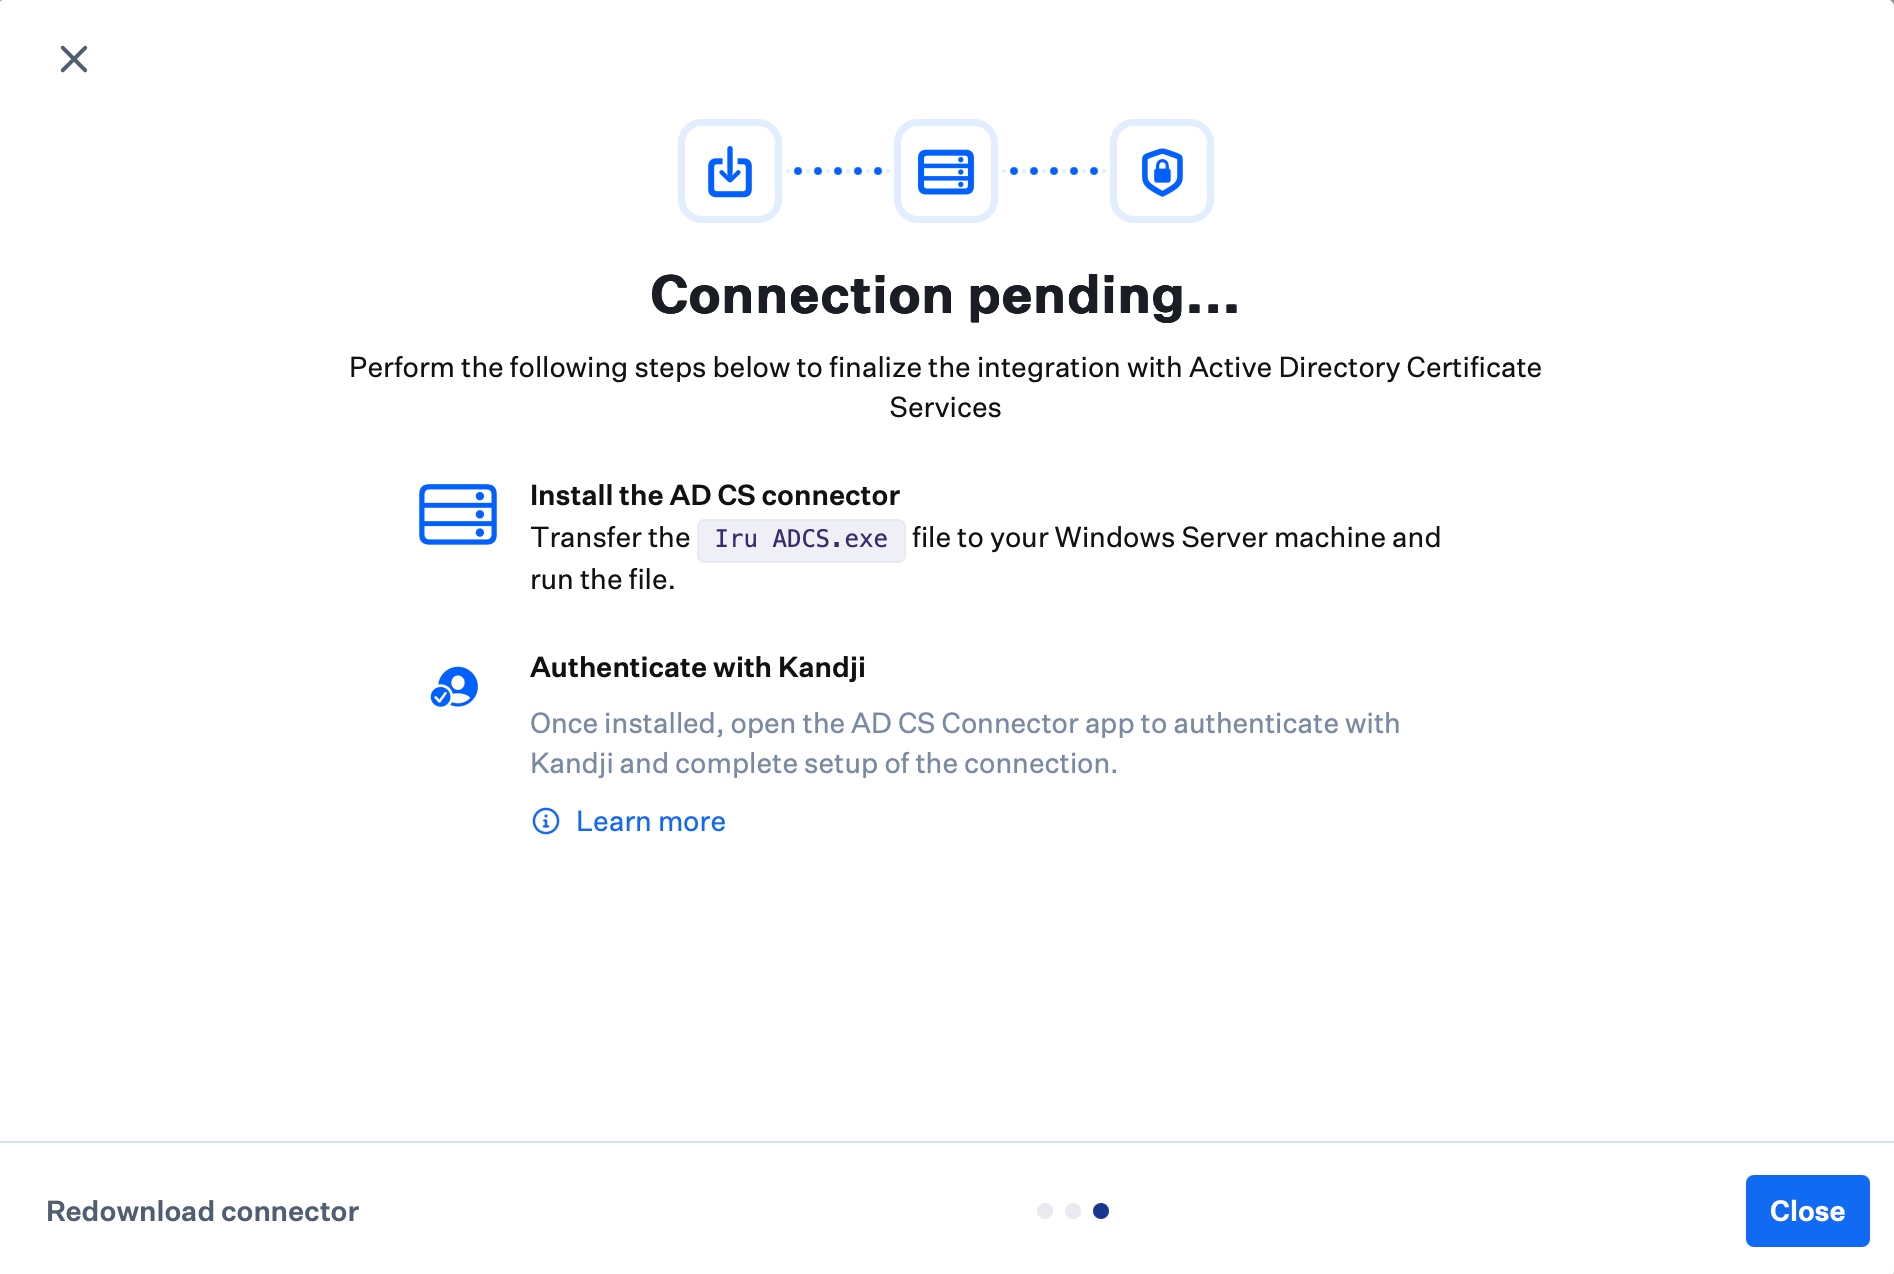
Review connection pending instructions
Locate AD CS integration card
Confirm pending installation status
Install the AD CS Connector on Windows Server
Next Steps
After you close the setup wizard with the installer downloaded:Install and register the Connector on Windows Server
Add issuing CAs and assign them in Iru Endpoint
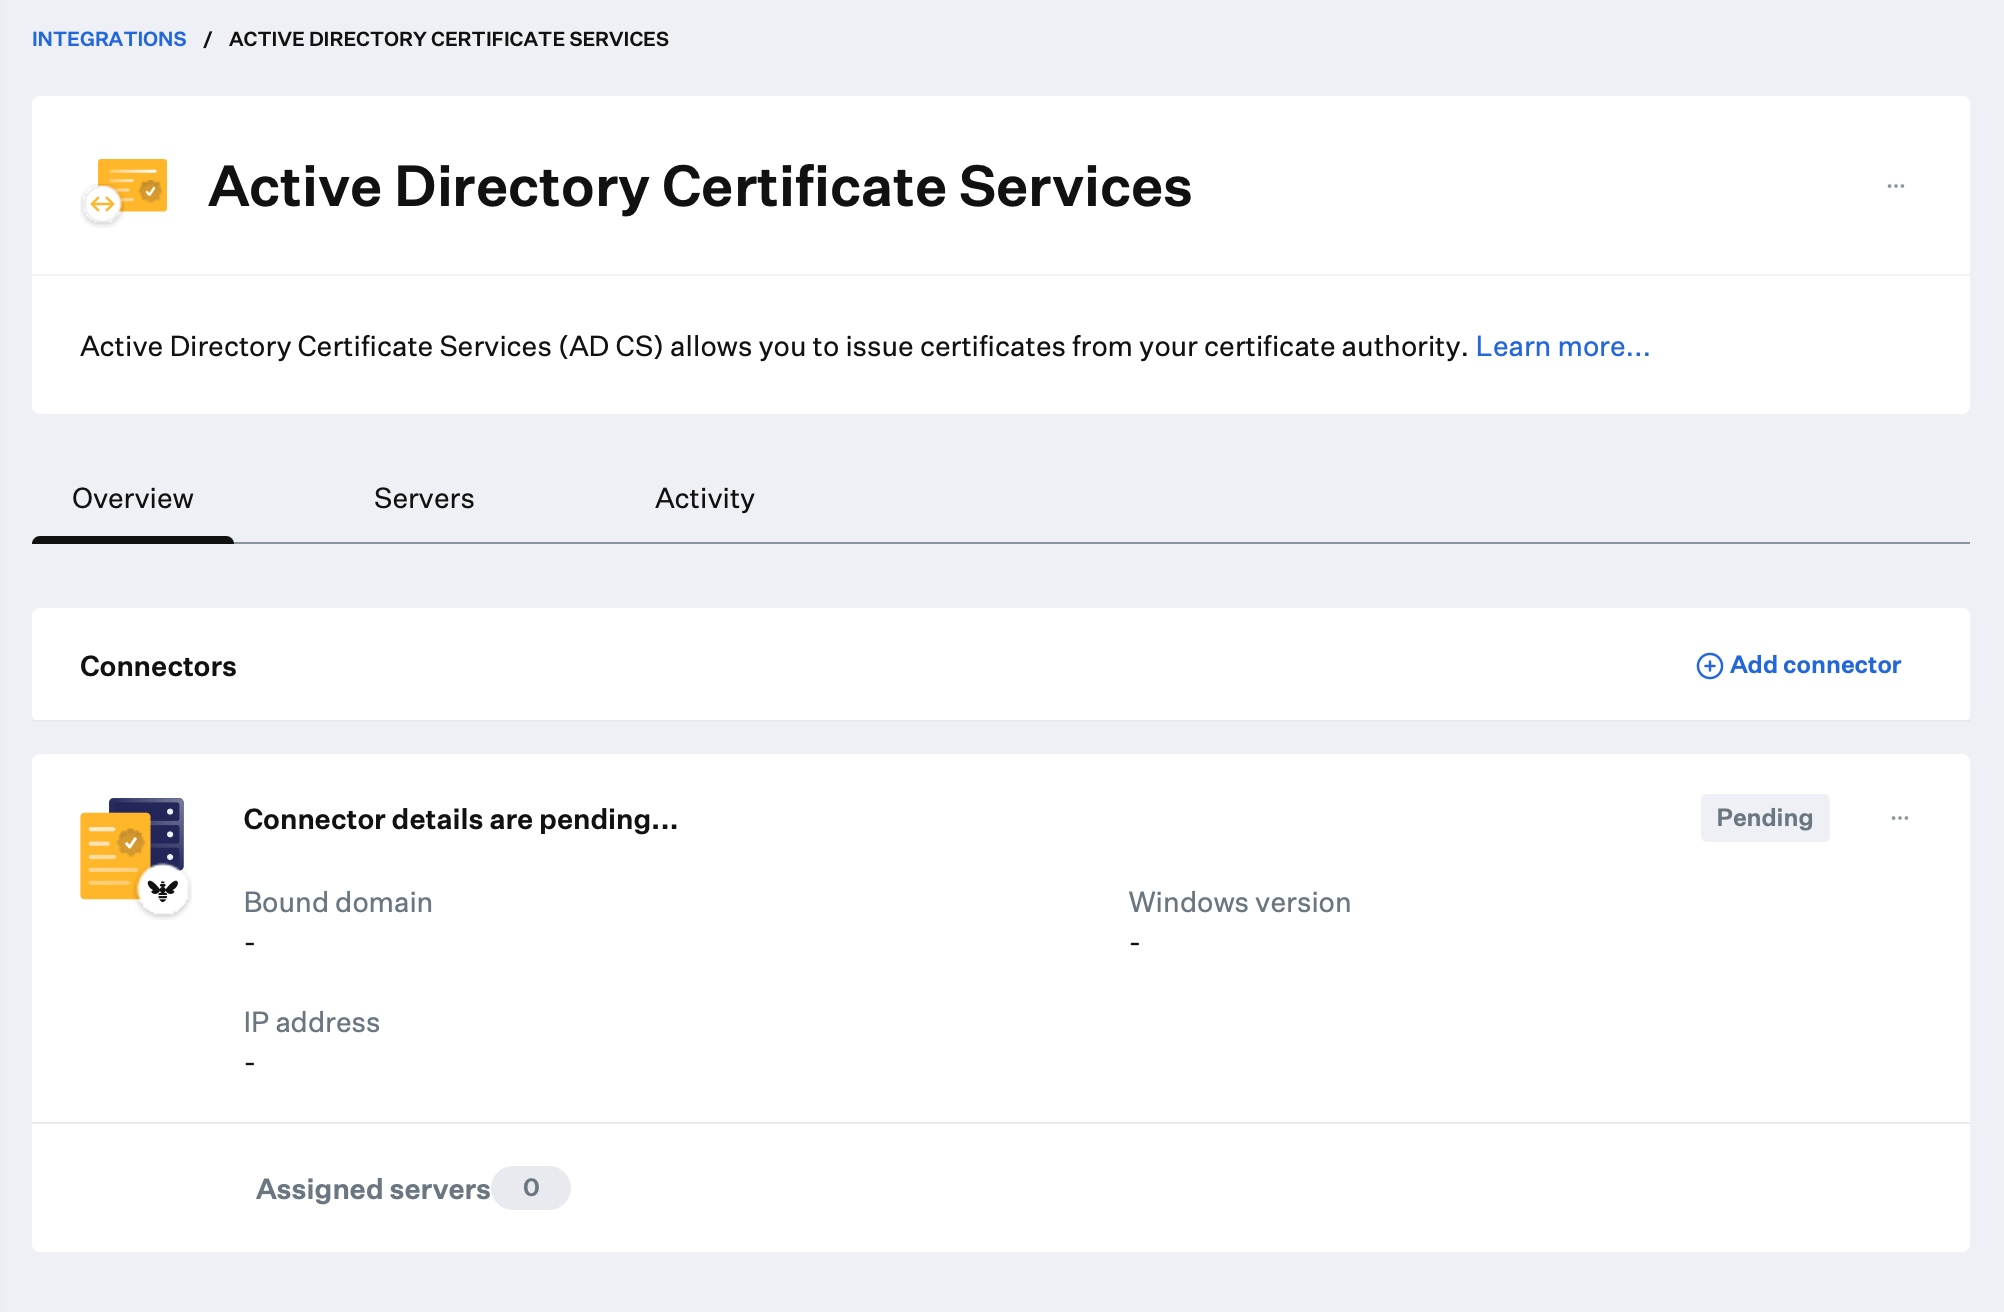
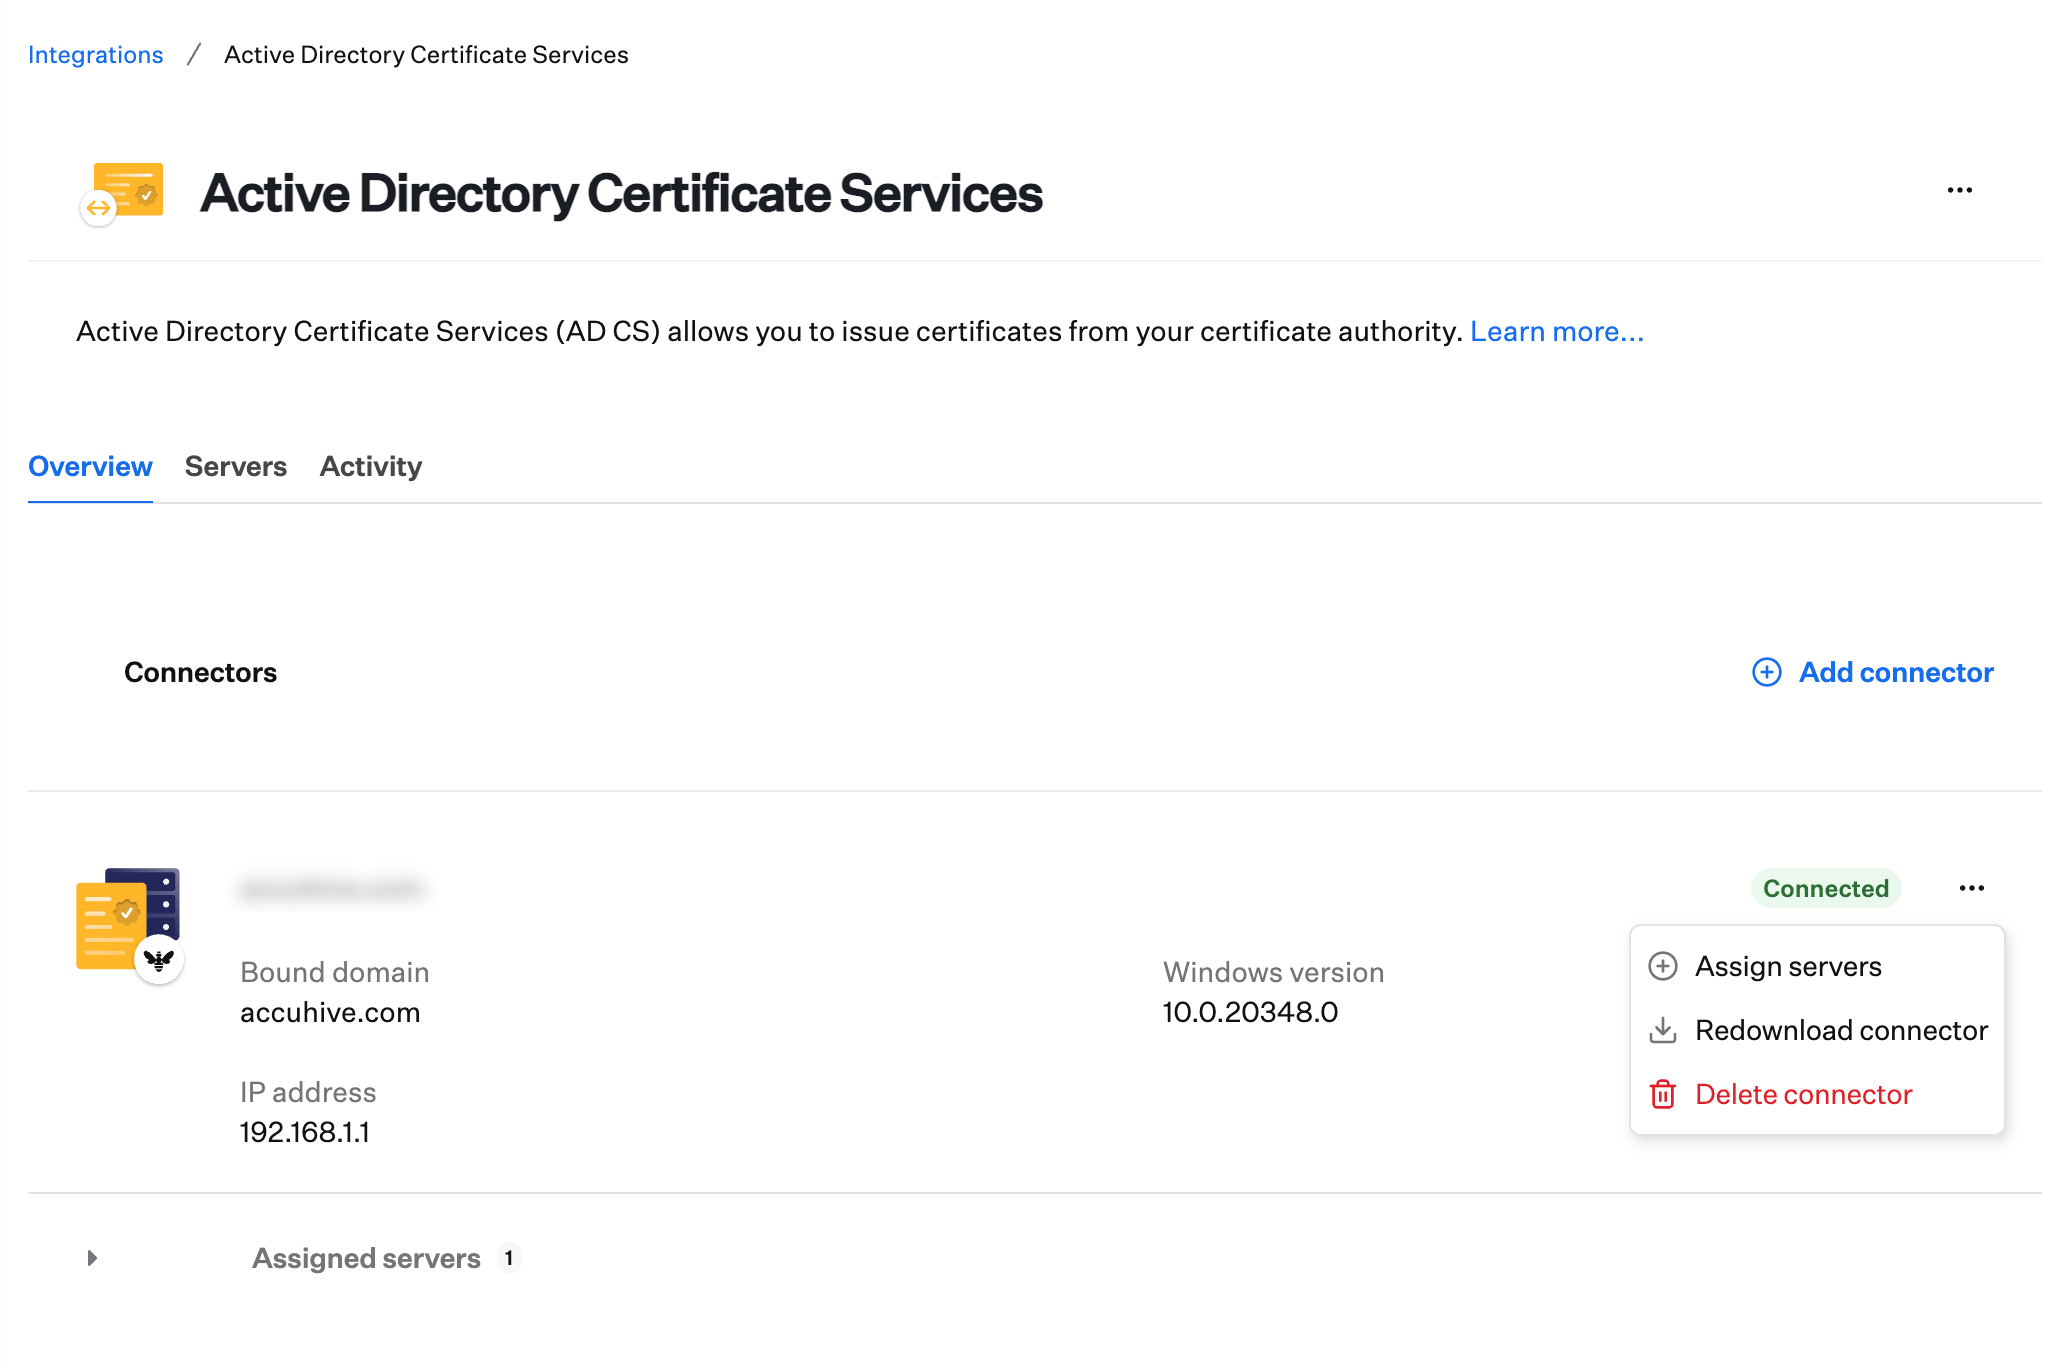
Overview of the AD CS integration page
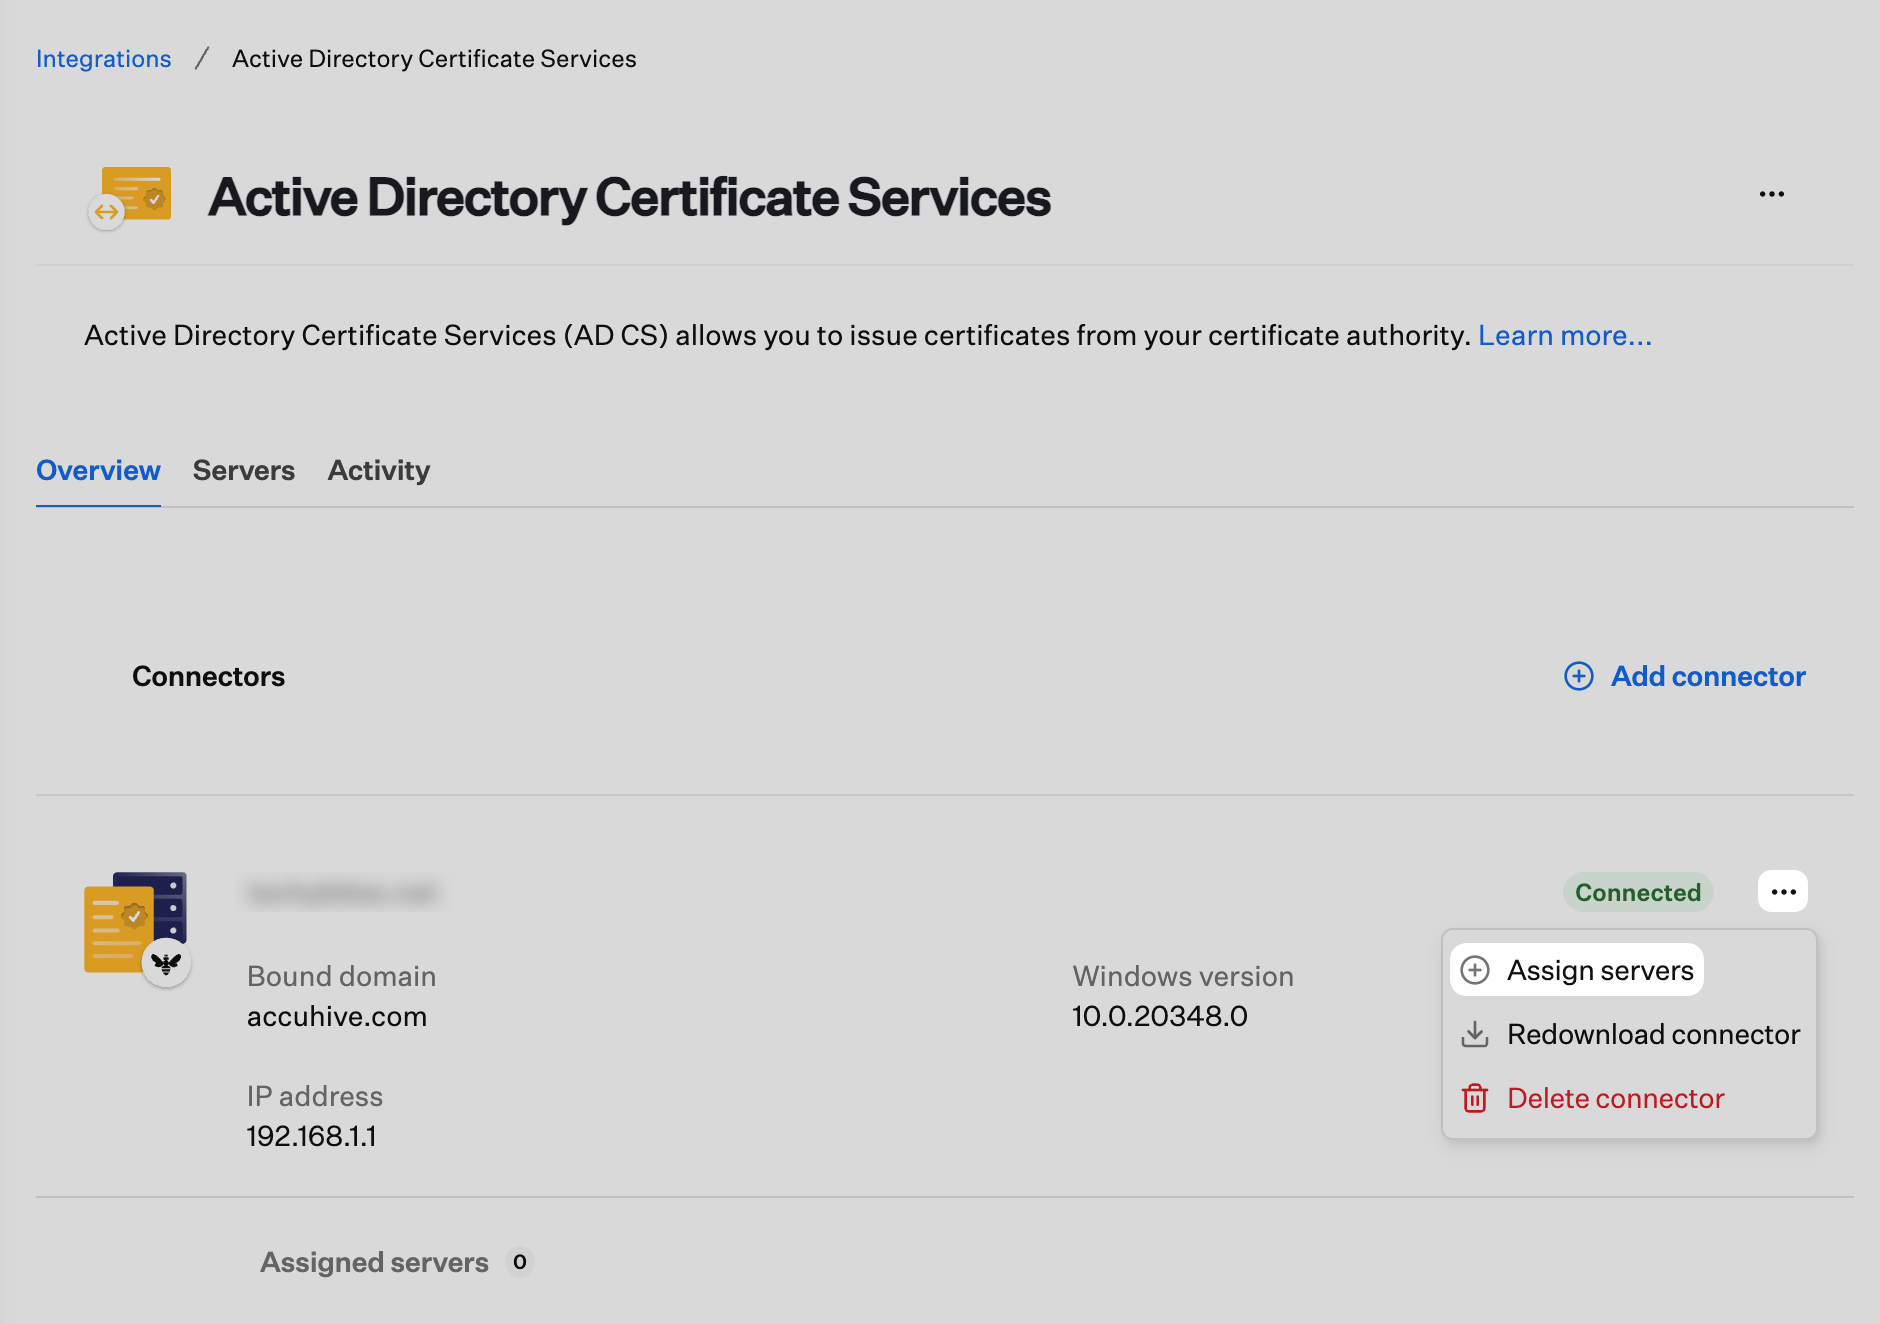
Use the Overview page to review Connector status and open actions such as install instructions, Redownload Connector, or delete a Connector row.Review connector details
- The domain to which the AD CS Connector server is bound.
- The Connector’s IP address.
- Assigned AD CS servers. Servers can be assigned once the AD CS Connector is connected back to Iru Endpoint.
- The version of the Windows server where the AD CS Connector is installed.
- Status on the connection between Iru Endpoint and the Iru Endpoint AD CS Connector. The status will remain in a Pending state until the Connector is installed on the Windows server and a connection is made back to Iru Endpoint.
- In the Connector action menu (…), you can view the installation instructions, redownload the connector installer, or delete the connector.
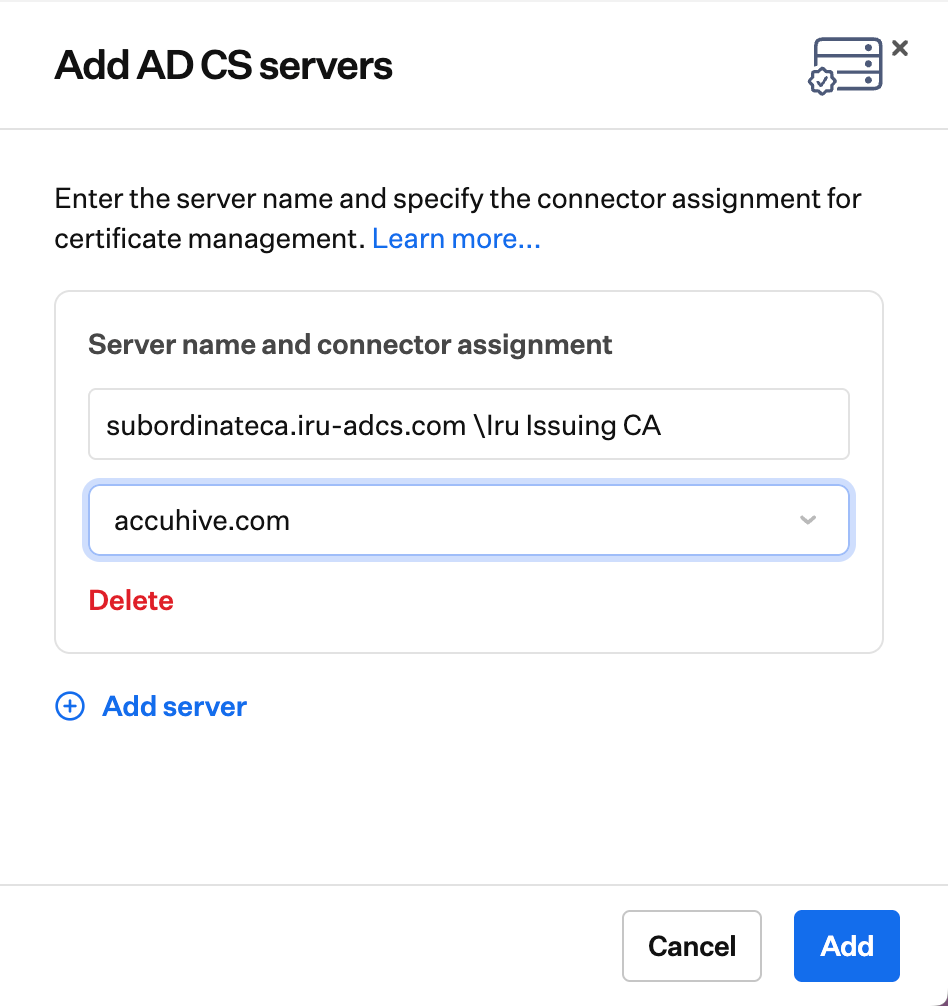
Adding AD CS Certificate Authority Servers
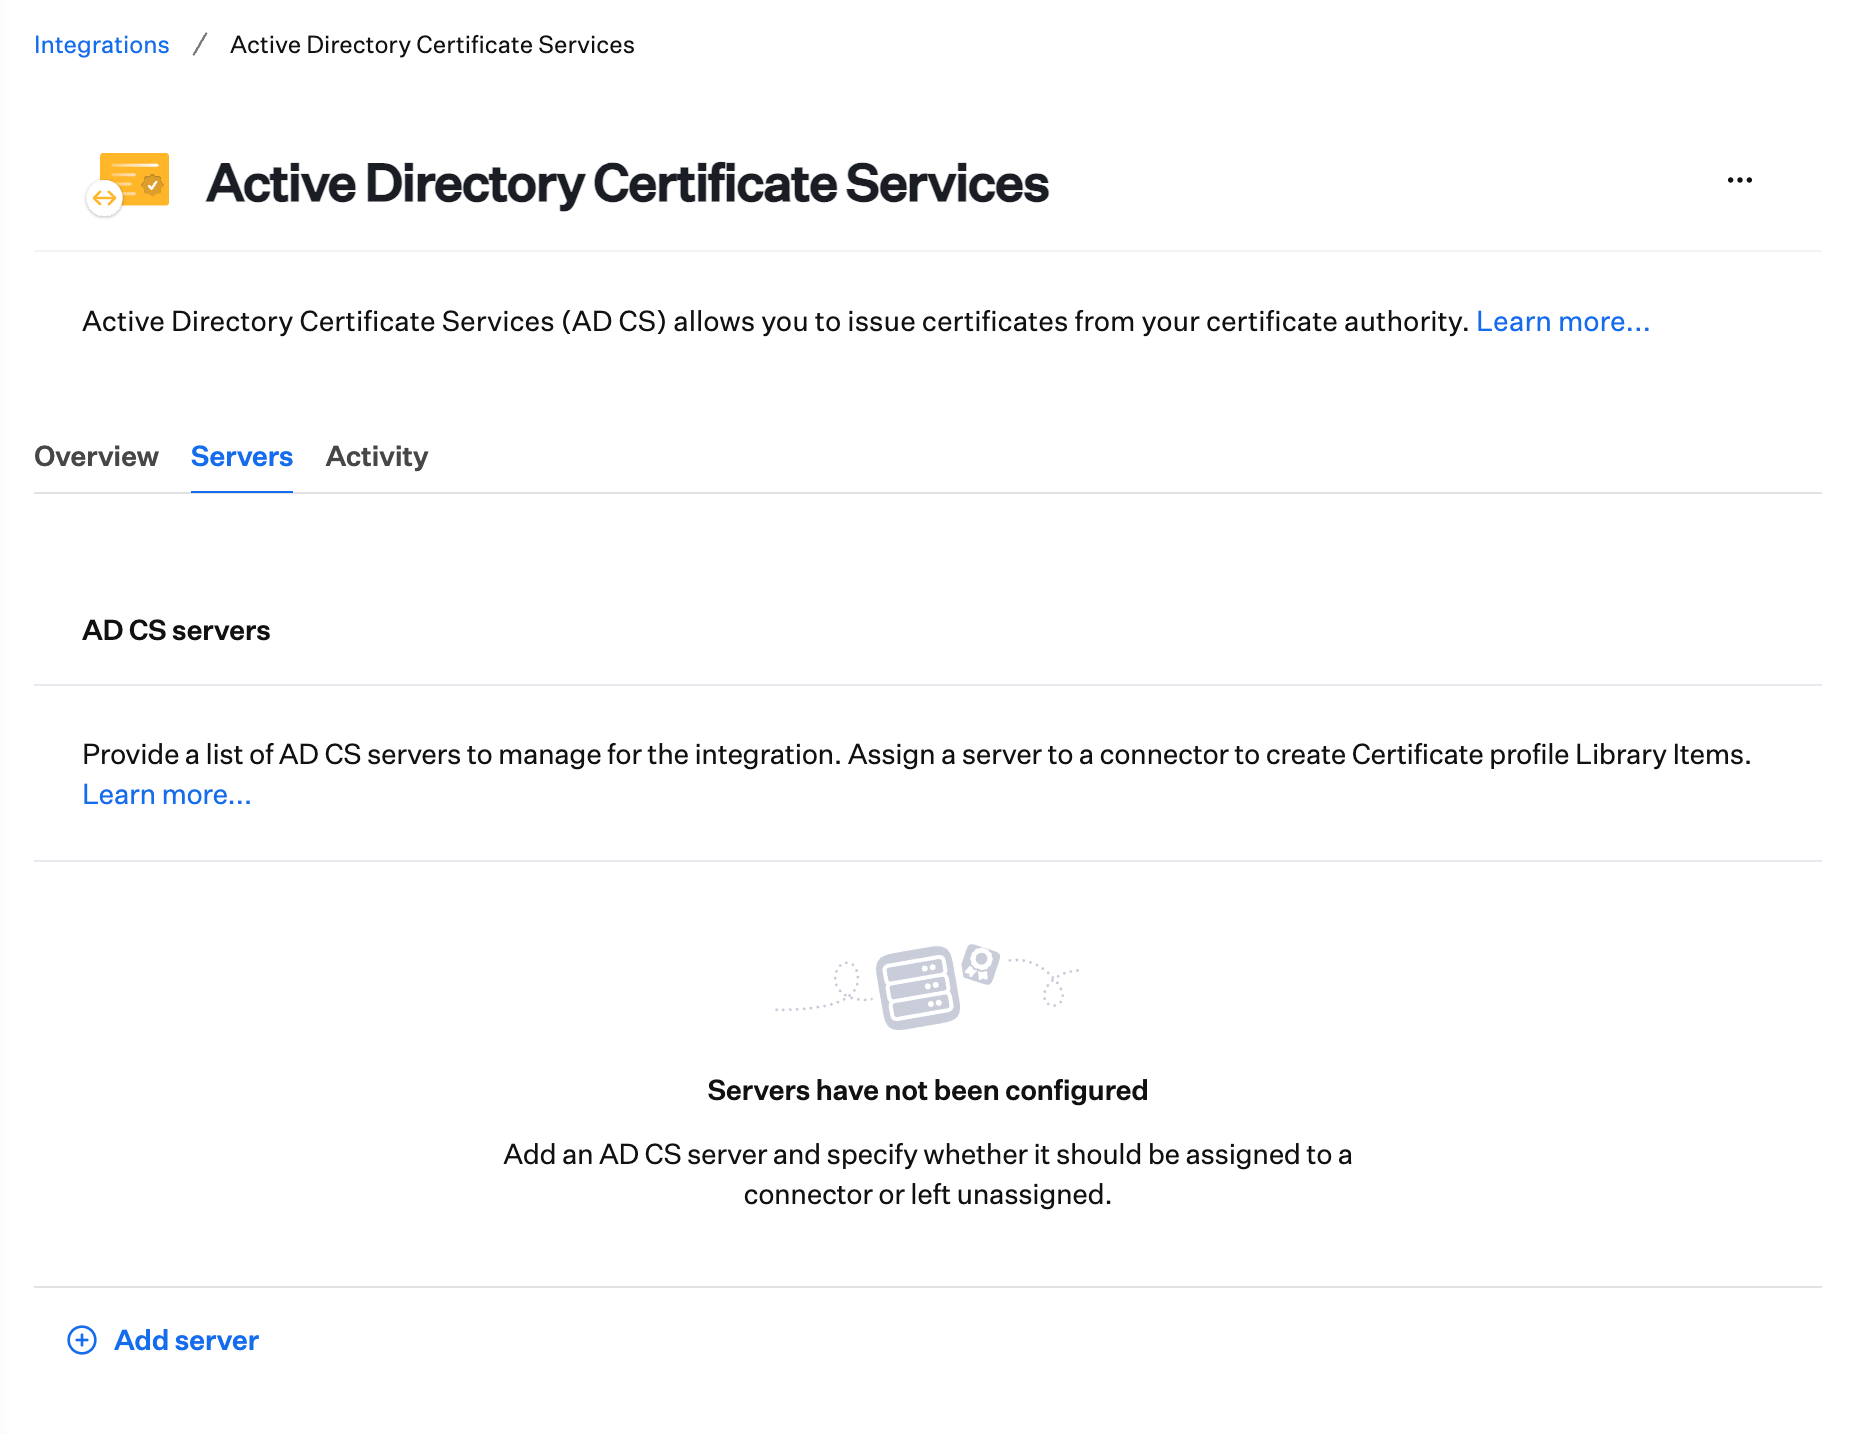
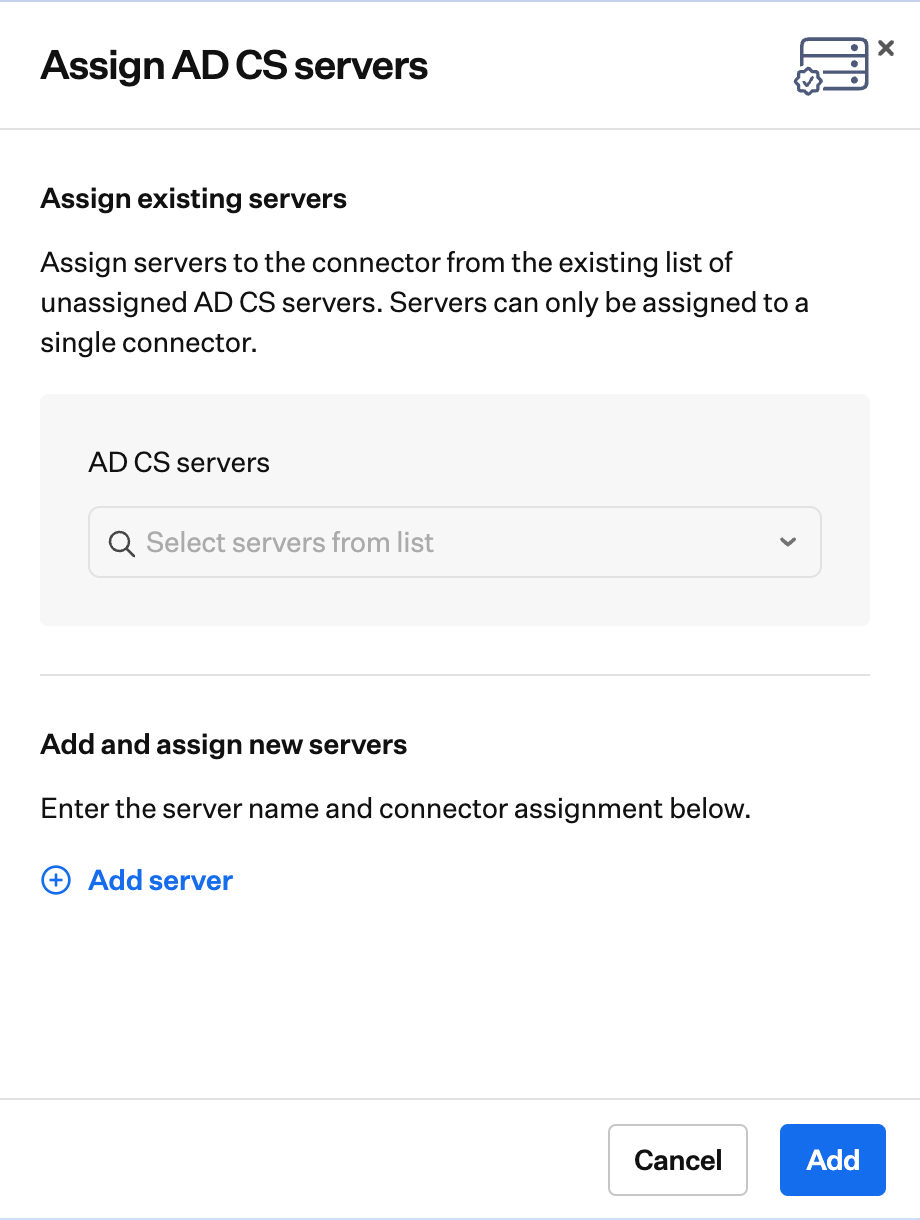
Enter AD CS server details
ca_server_fqdn\issuing_ca_name (Example: subordinateca.example.com\QueenBee Issuing CA). The issuing_ca_name is found in the Certificate Authority Snap-in on the issuing CA Windows server. You will be able to assign the server once the Connector shows a status of Connected.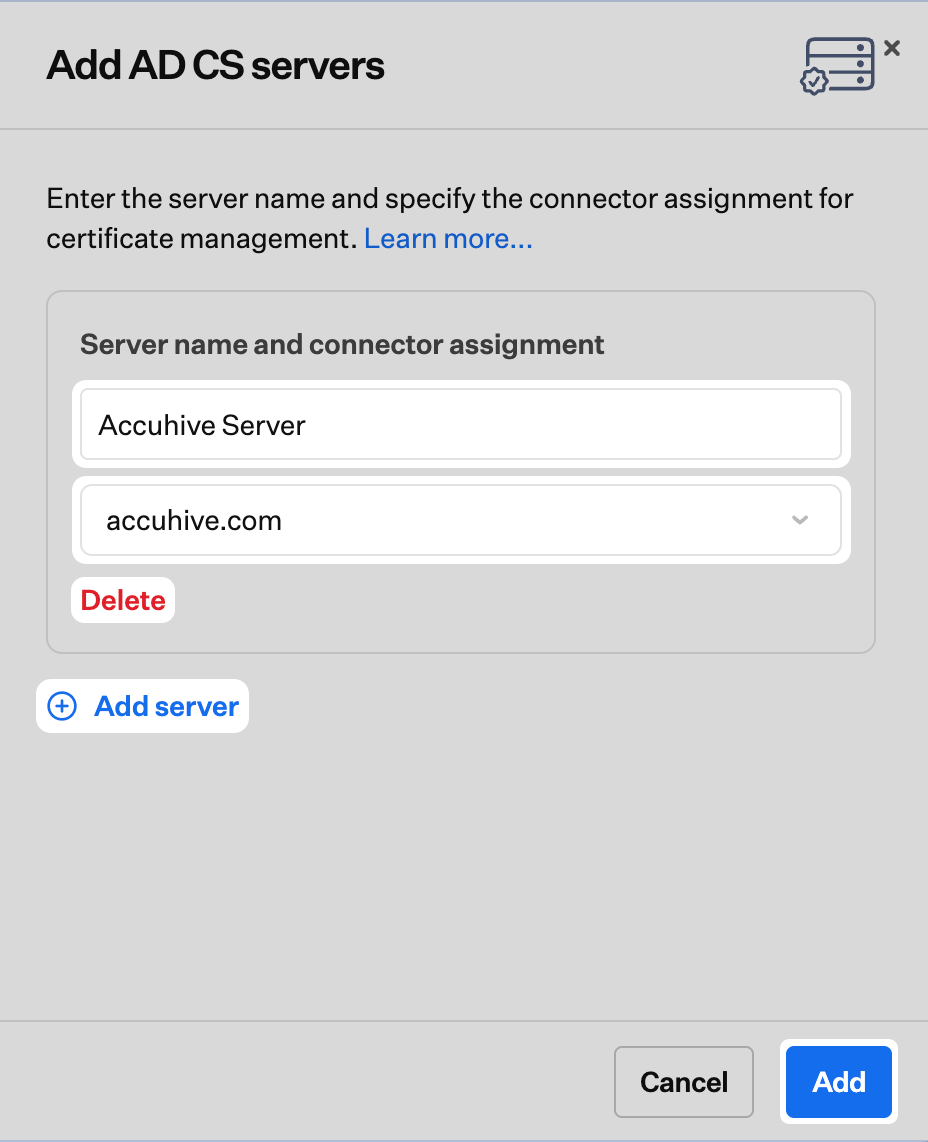
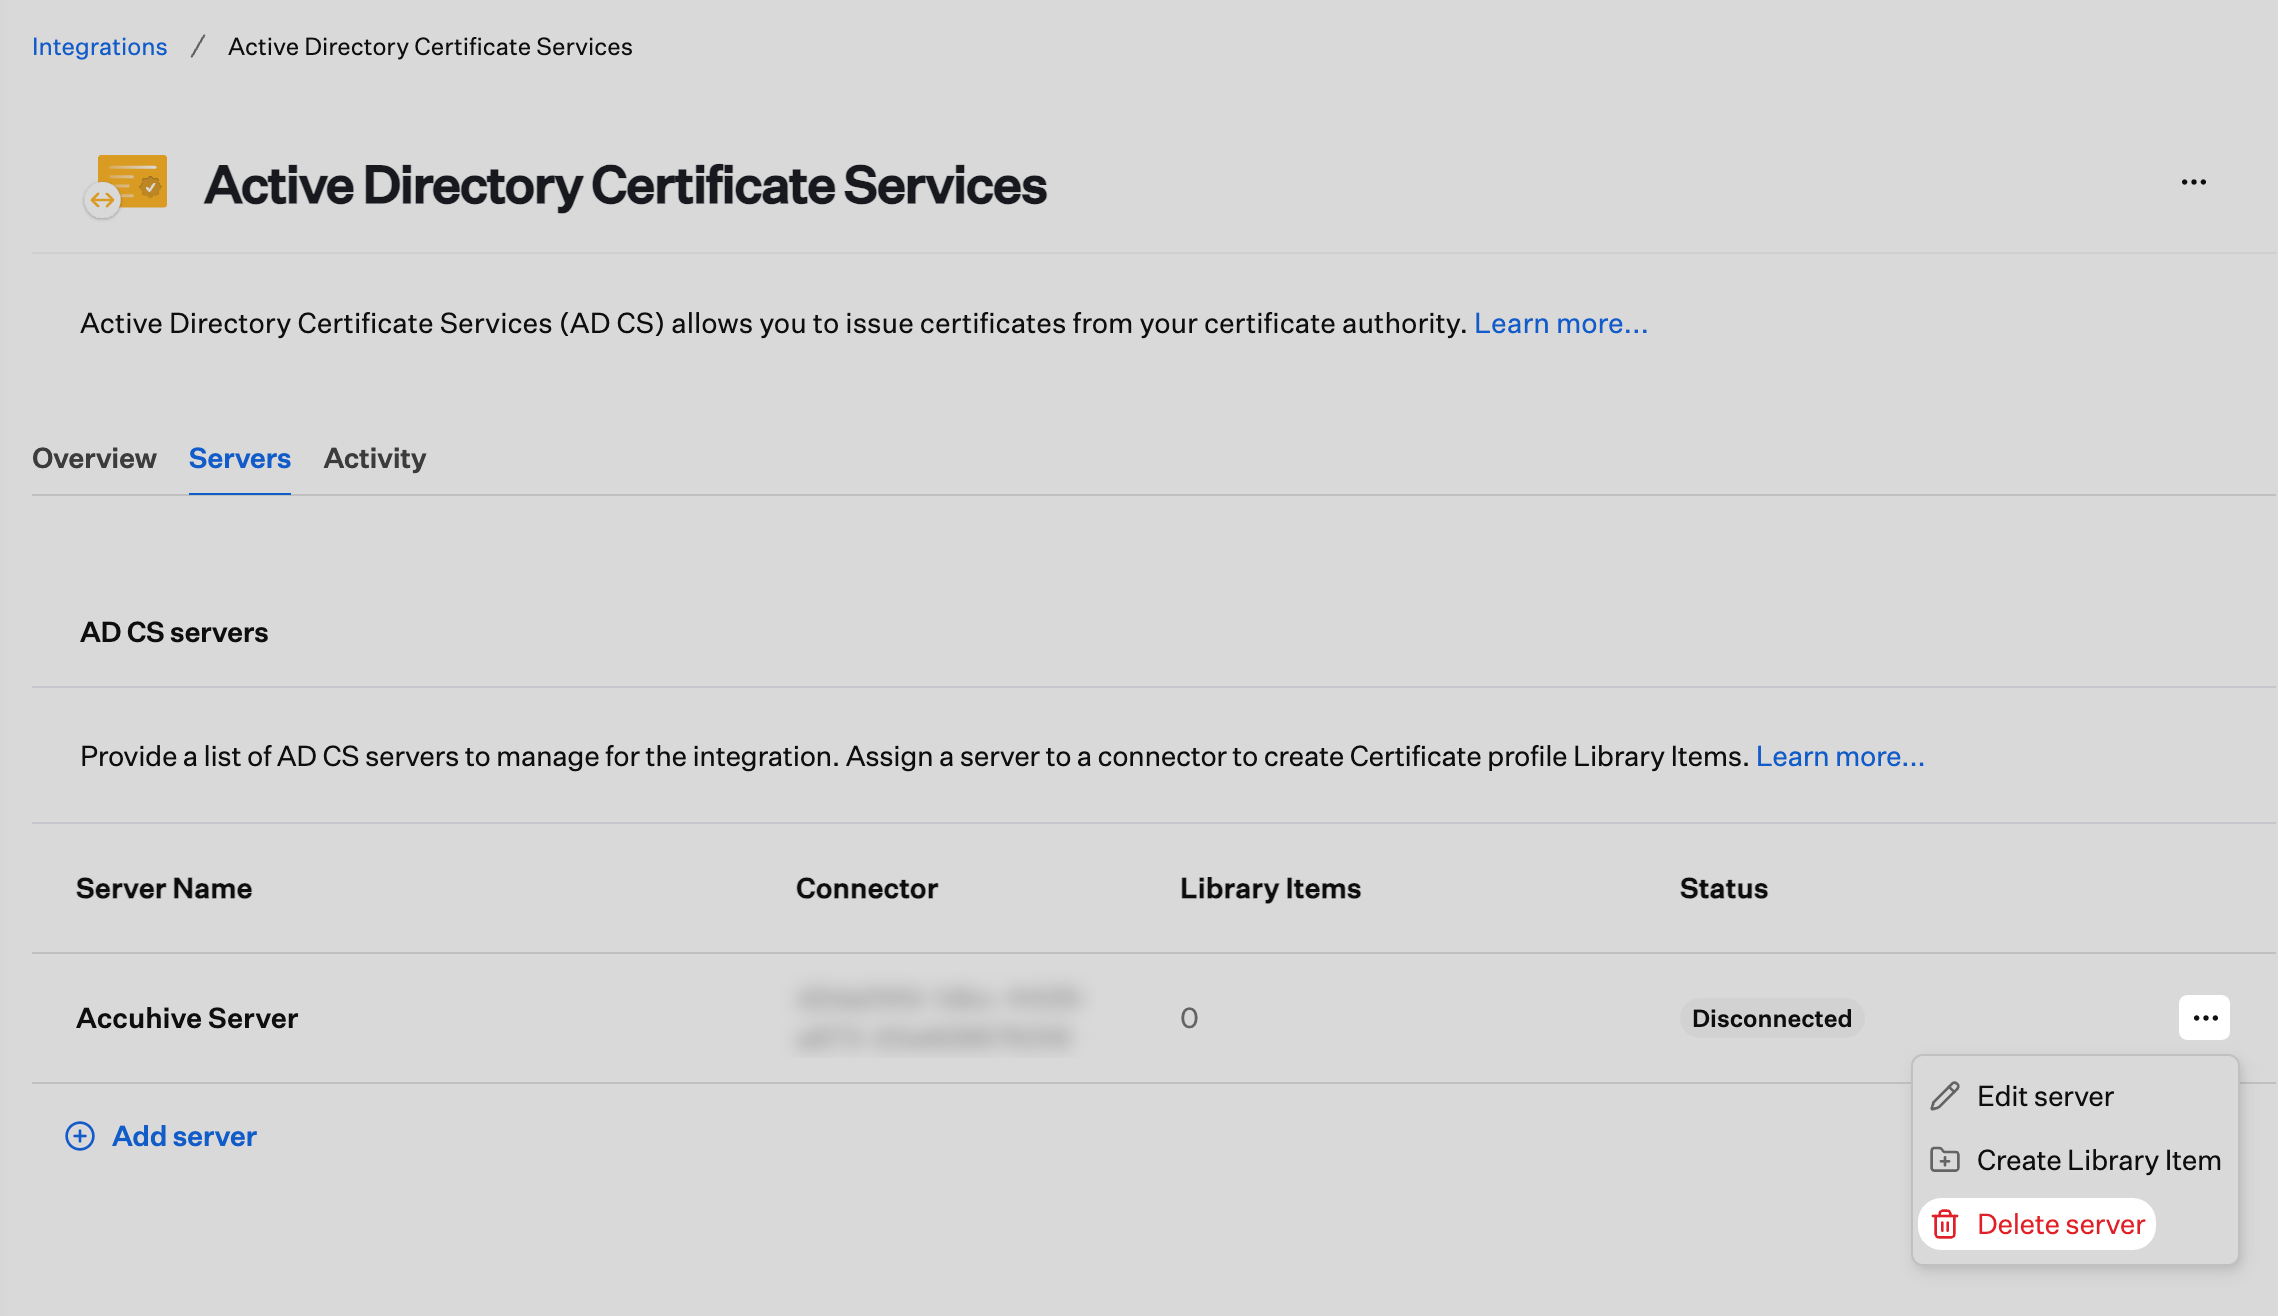
Review server status and management options
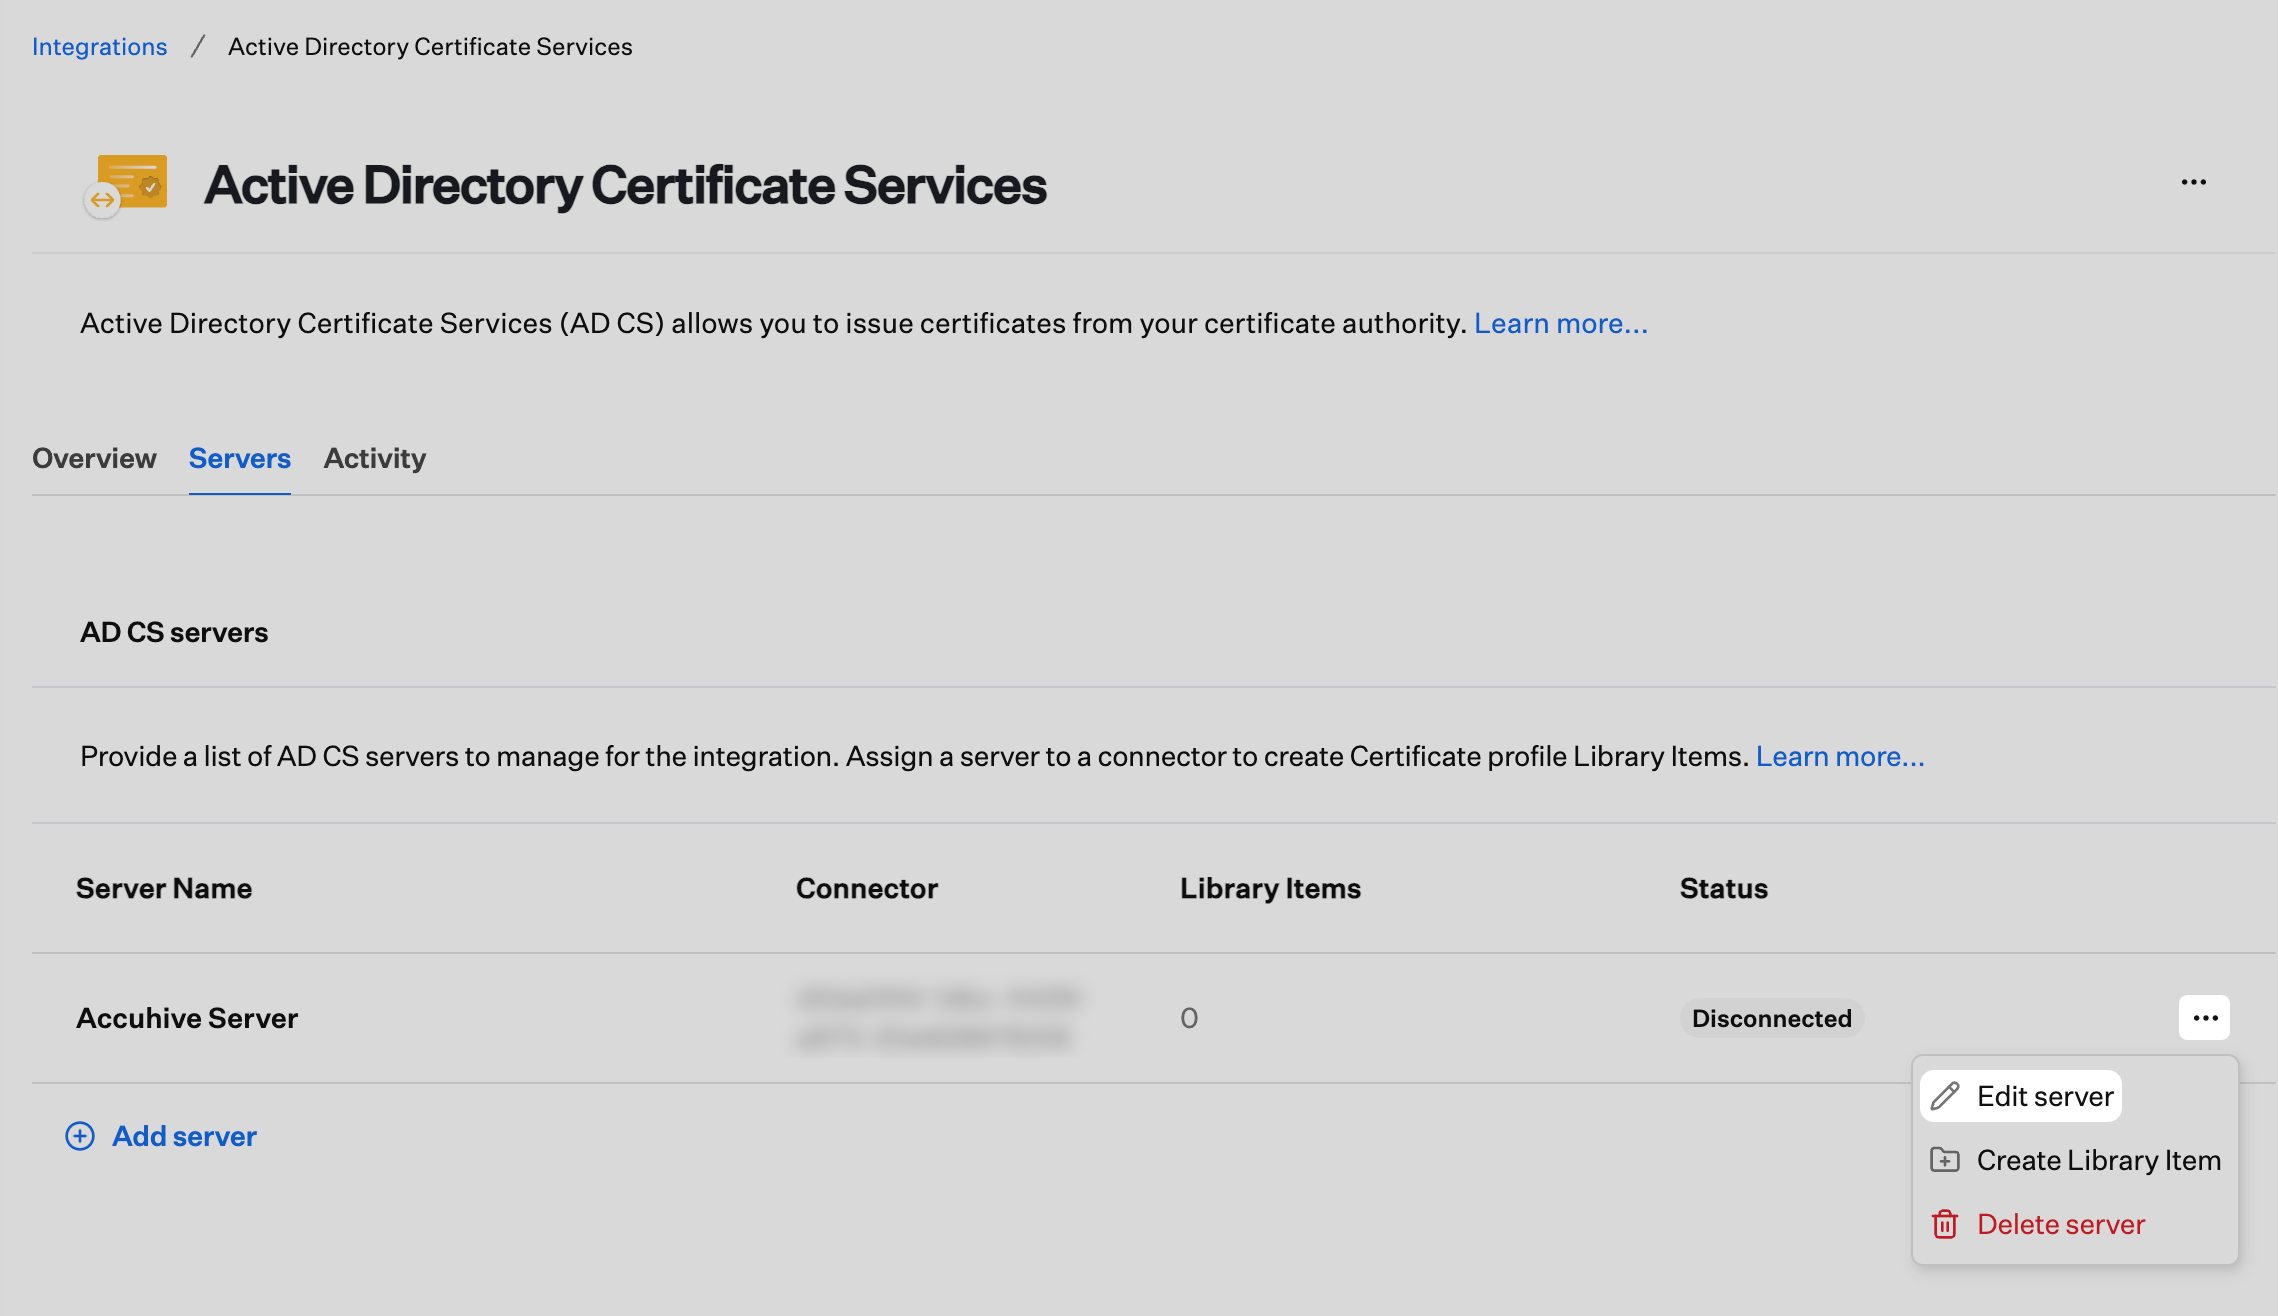
Assigning an AD CS server to a Connector
Once the AD CS Connector status shows as Connected, you can assign an AD CS server to the Connector.Open connector actions
Adding Additional Connectors
If needed, additional AD CS Connectors can be added to the AD CS integration.Open AD CS integration
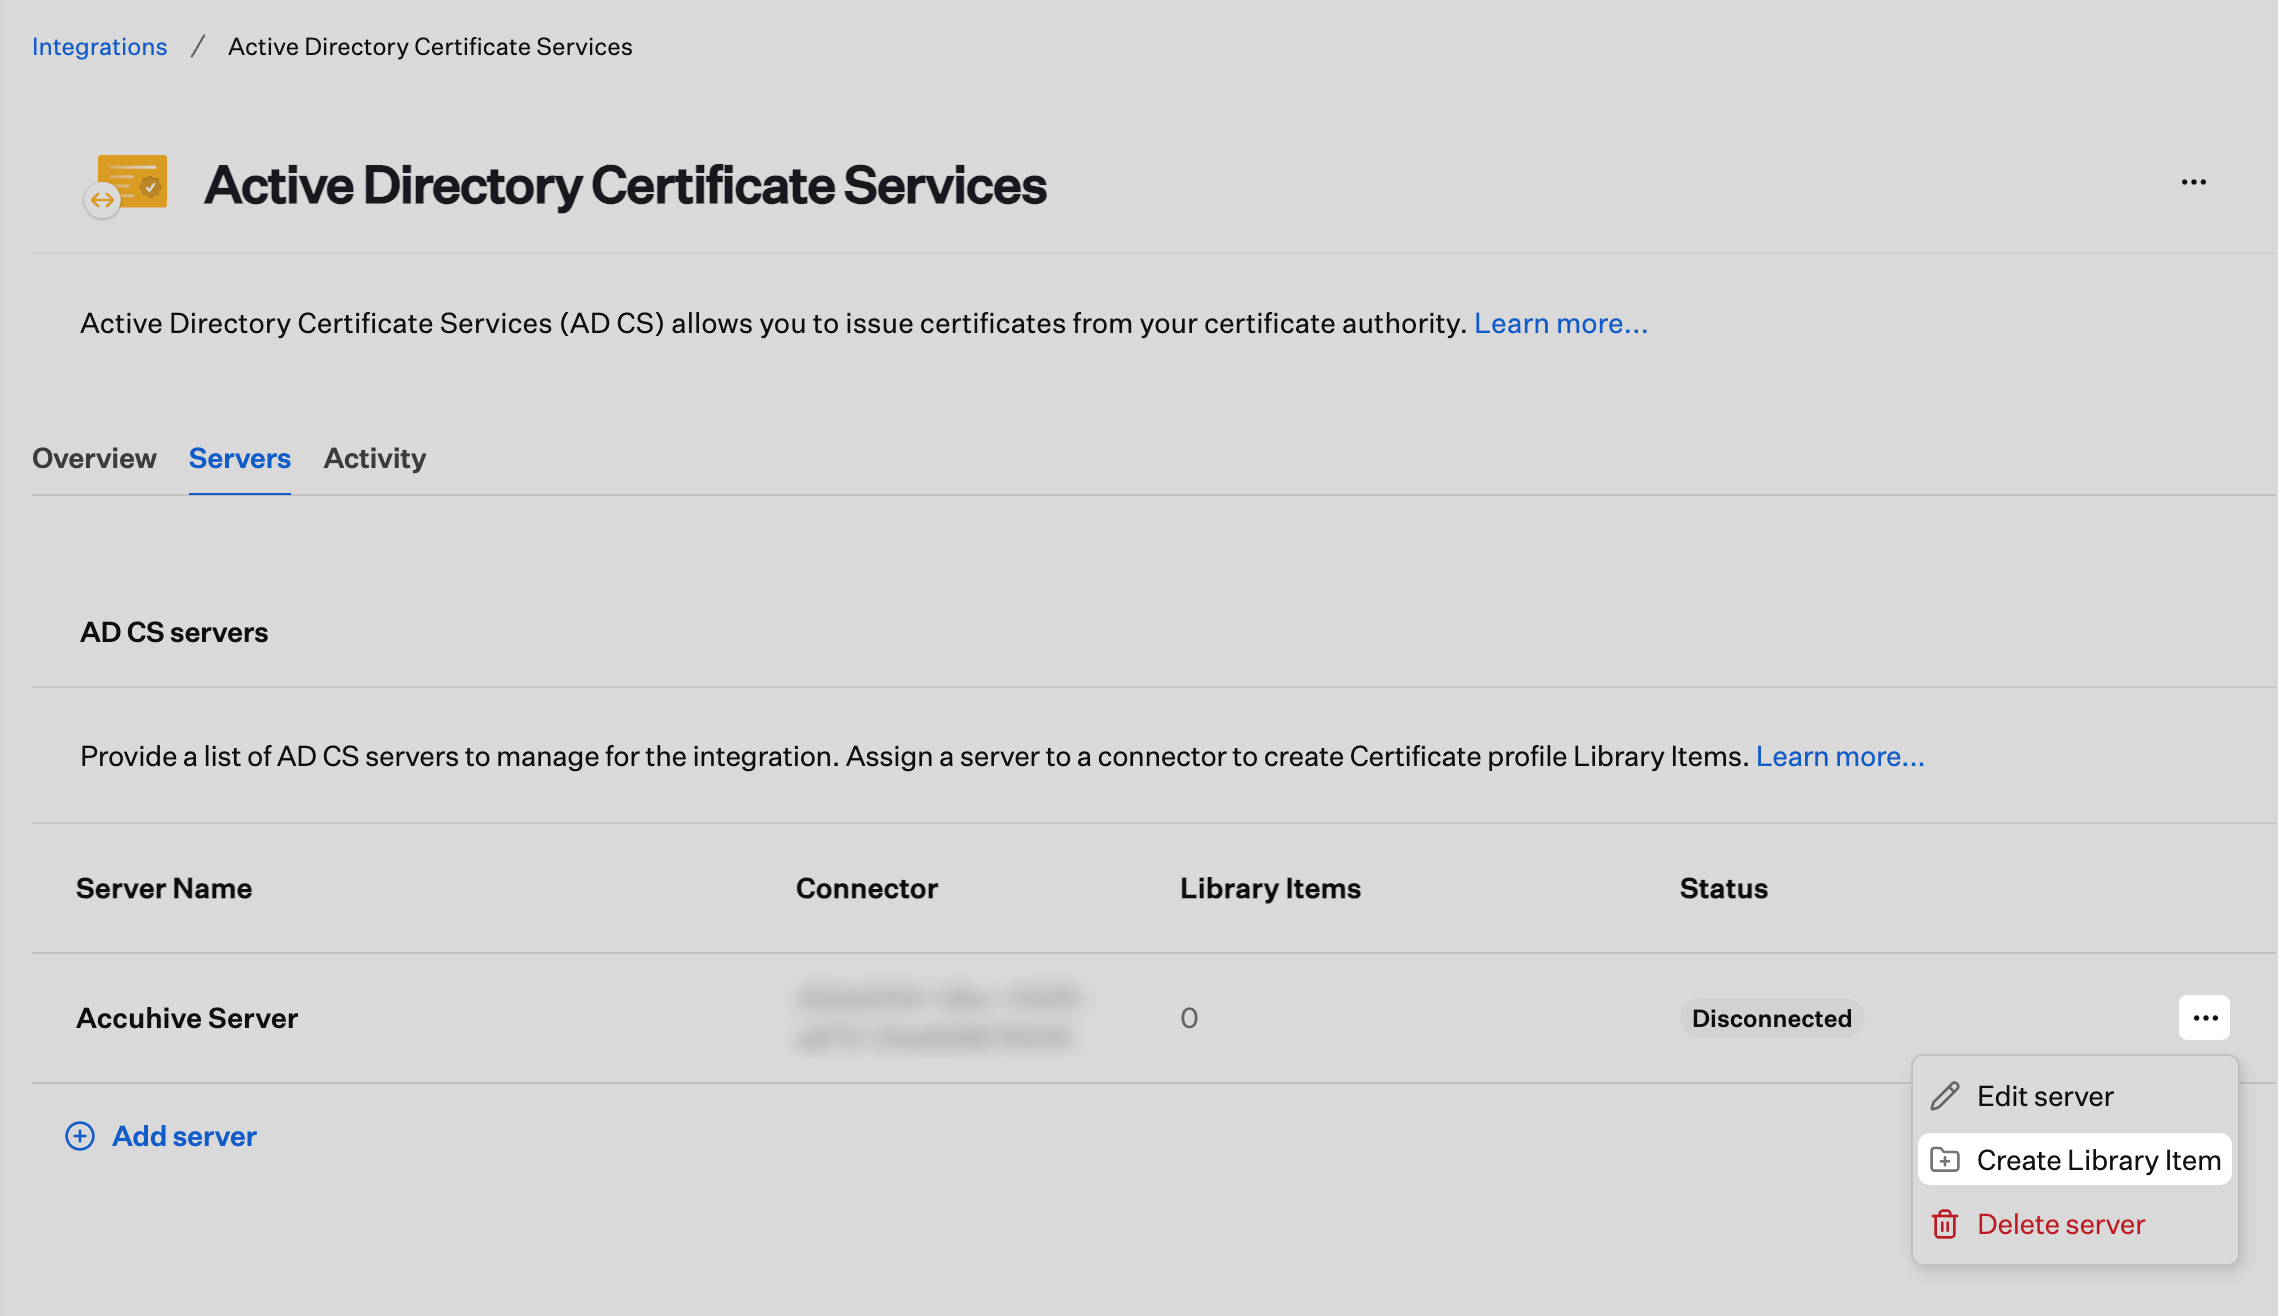
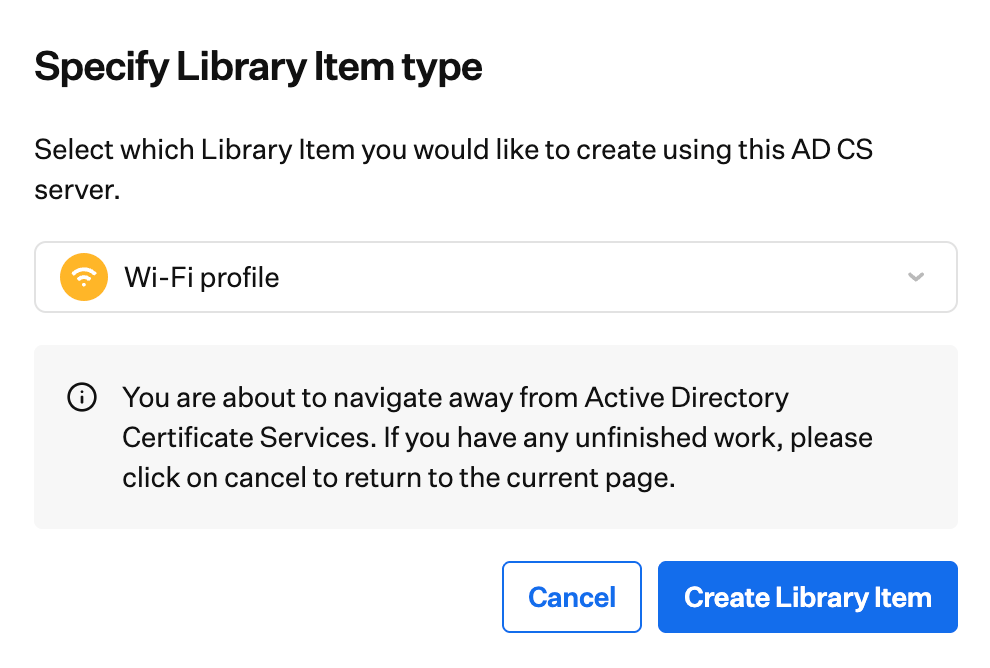
Create a Library Item from an AD CS server
When the AD CS Servers tab lists at least one issuing CA, you can start a certificate-related Library Item from the server row instead of starting only from Library.Open the server row menu
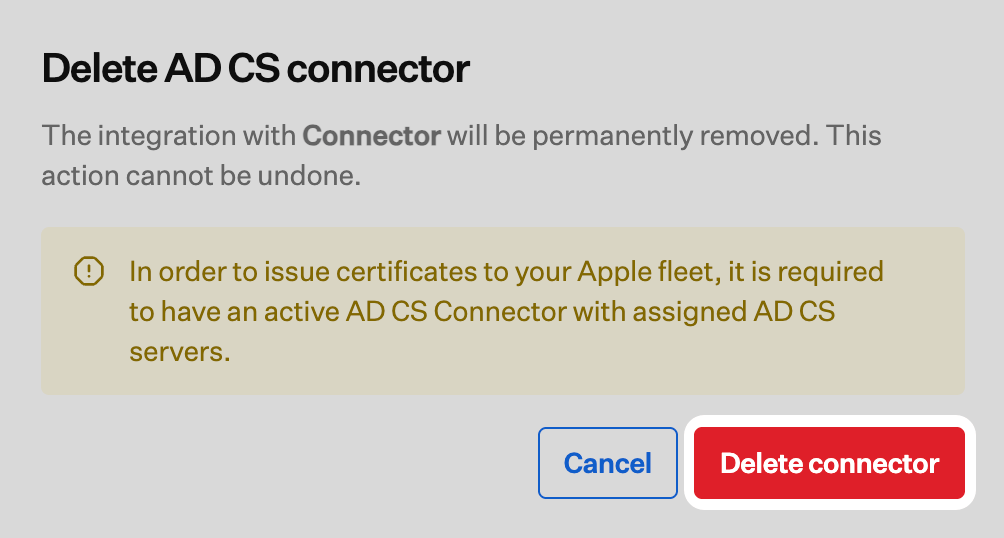
Remove a Connector from the Integration
Removing a single Connector row is different from Removing the Integration below. Use this when you want to retire one Windows Server registration while keeping the AD CS integration enabled.Open the AD CS Overview
Delete the connector row

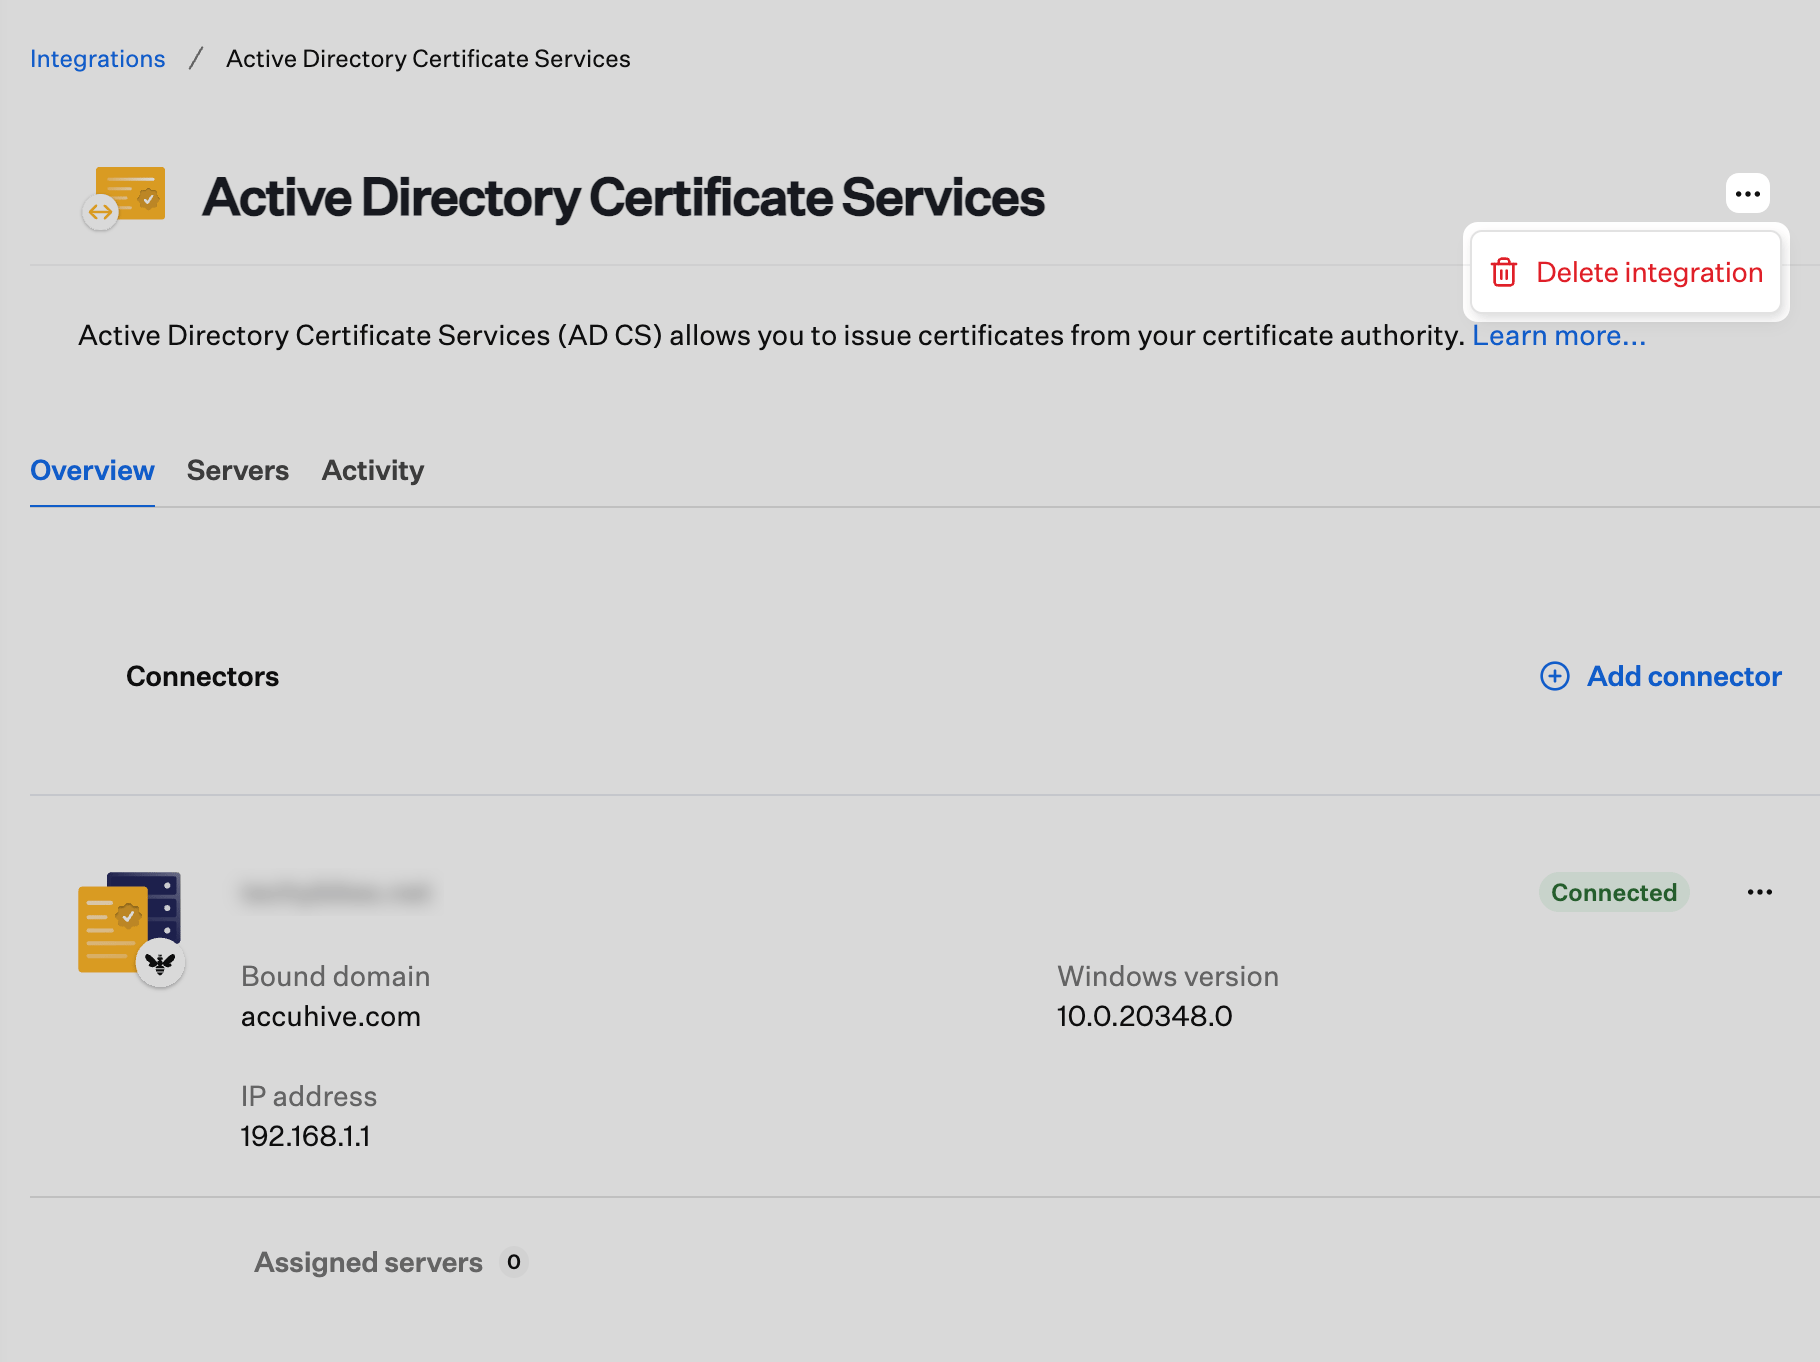
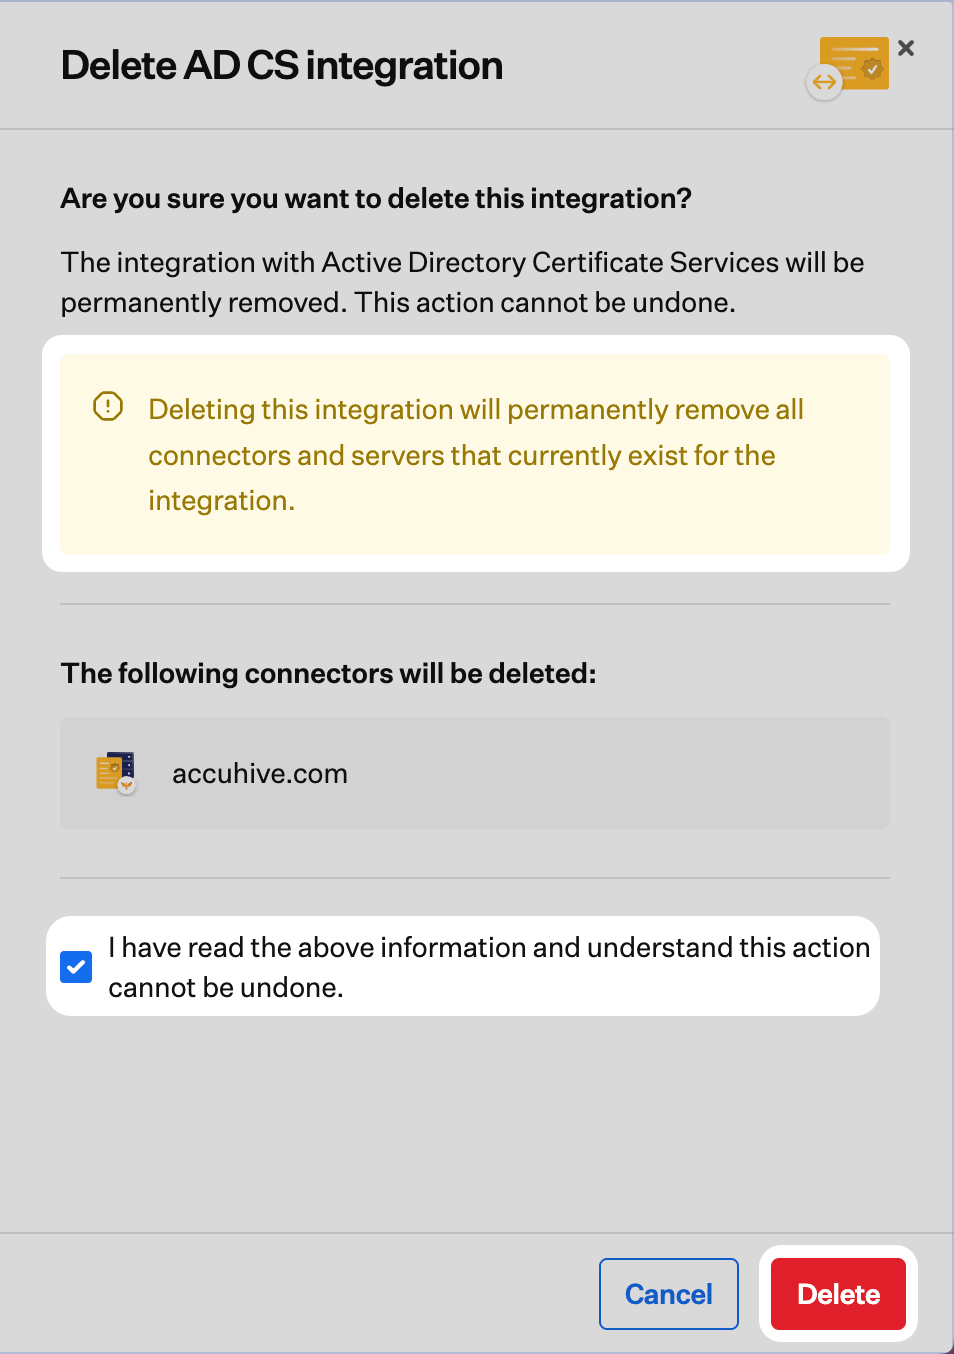
Removing the Integration
Use the steps below to delete the Active Directory Certificate Services integration from your Iru Endpoint tenant.Open the AD CS integration
Select Delete integration