

This guide applies to Mac computers
About Accessory & Storage Access Library Item
Iru Endpoint’s Accessory & Storage Access Library Item allows you, as the device or security administrator, to define access privileges and controls for external storage volumes, server volumes, and DMG file types on Mac computers.How It Works
The Accessory & Storage Access Library Item provides granular control over storage device access on managed Mac computers. It allows administrators to configure access privileges for external storage devices, disk images, and server volumes, with options for encryption requirements, password protection, and user-specific access controls.Adding an Accessory & Storage Access Library Item
To add this Library Item to your Iru Endpoint Library, follow the steps outlined in the Library Overview article.1
Name the Library Item
Give the new Accessory & Storage Access Library Item a Name.
2
Assign to Blueprints
Assign to your desired Blueprints.
Configuring External Volumes
The External volumes section allows you to manage access privileges for external storage devices such as USB, CD, and DVD drives connected to the accessory port and memory cards (SD, SDXC) inserted in the SD card slot. To manage access for external volumes, follow the steps below.1
Enable External Volume Management
Turn on management for external volumes.
2
Configure Access Privileges
From the Access privileges menu, select the desired access privileges for external volumes. The available options are: Read & Write, Read only, or No access.a. Set Encryption Requirements: Optionally, select Require encryption to ensure only encrypted volumes are mounted. For information about using Disk Utility to encrypt storage devices, see this Apple support article.b. Configure Password Protection: Optionally, select Require admin password to access to prompt users for an admin password to access content.
3
Set User Scope
Select All users to apply the access privileges to all users, including admin, or select Standard users to apply the access privileges only to standard users.
4
Configure Alert Messages
Optionally, select Display alert messages to alert users when the mounting of external volumes is blocked. Note, this setting is forced on when Require admin password to access is selected.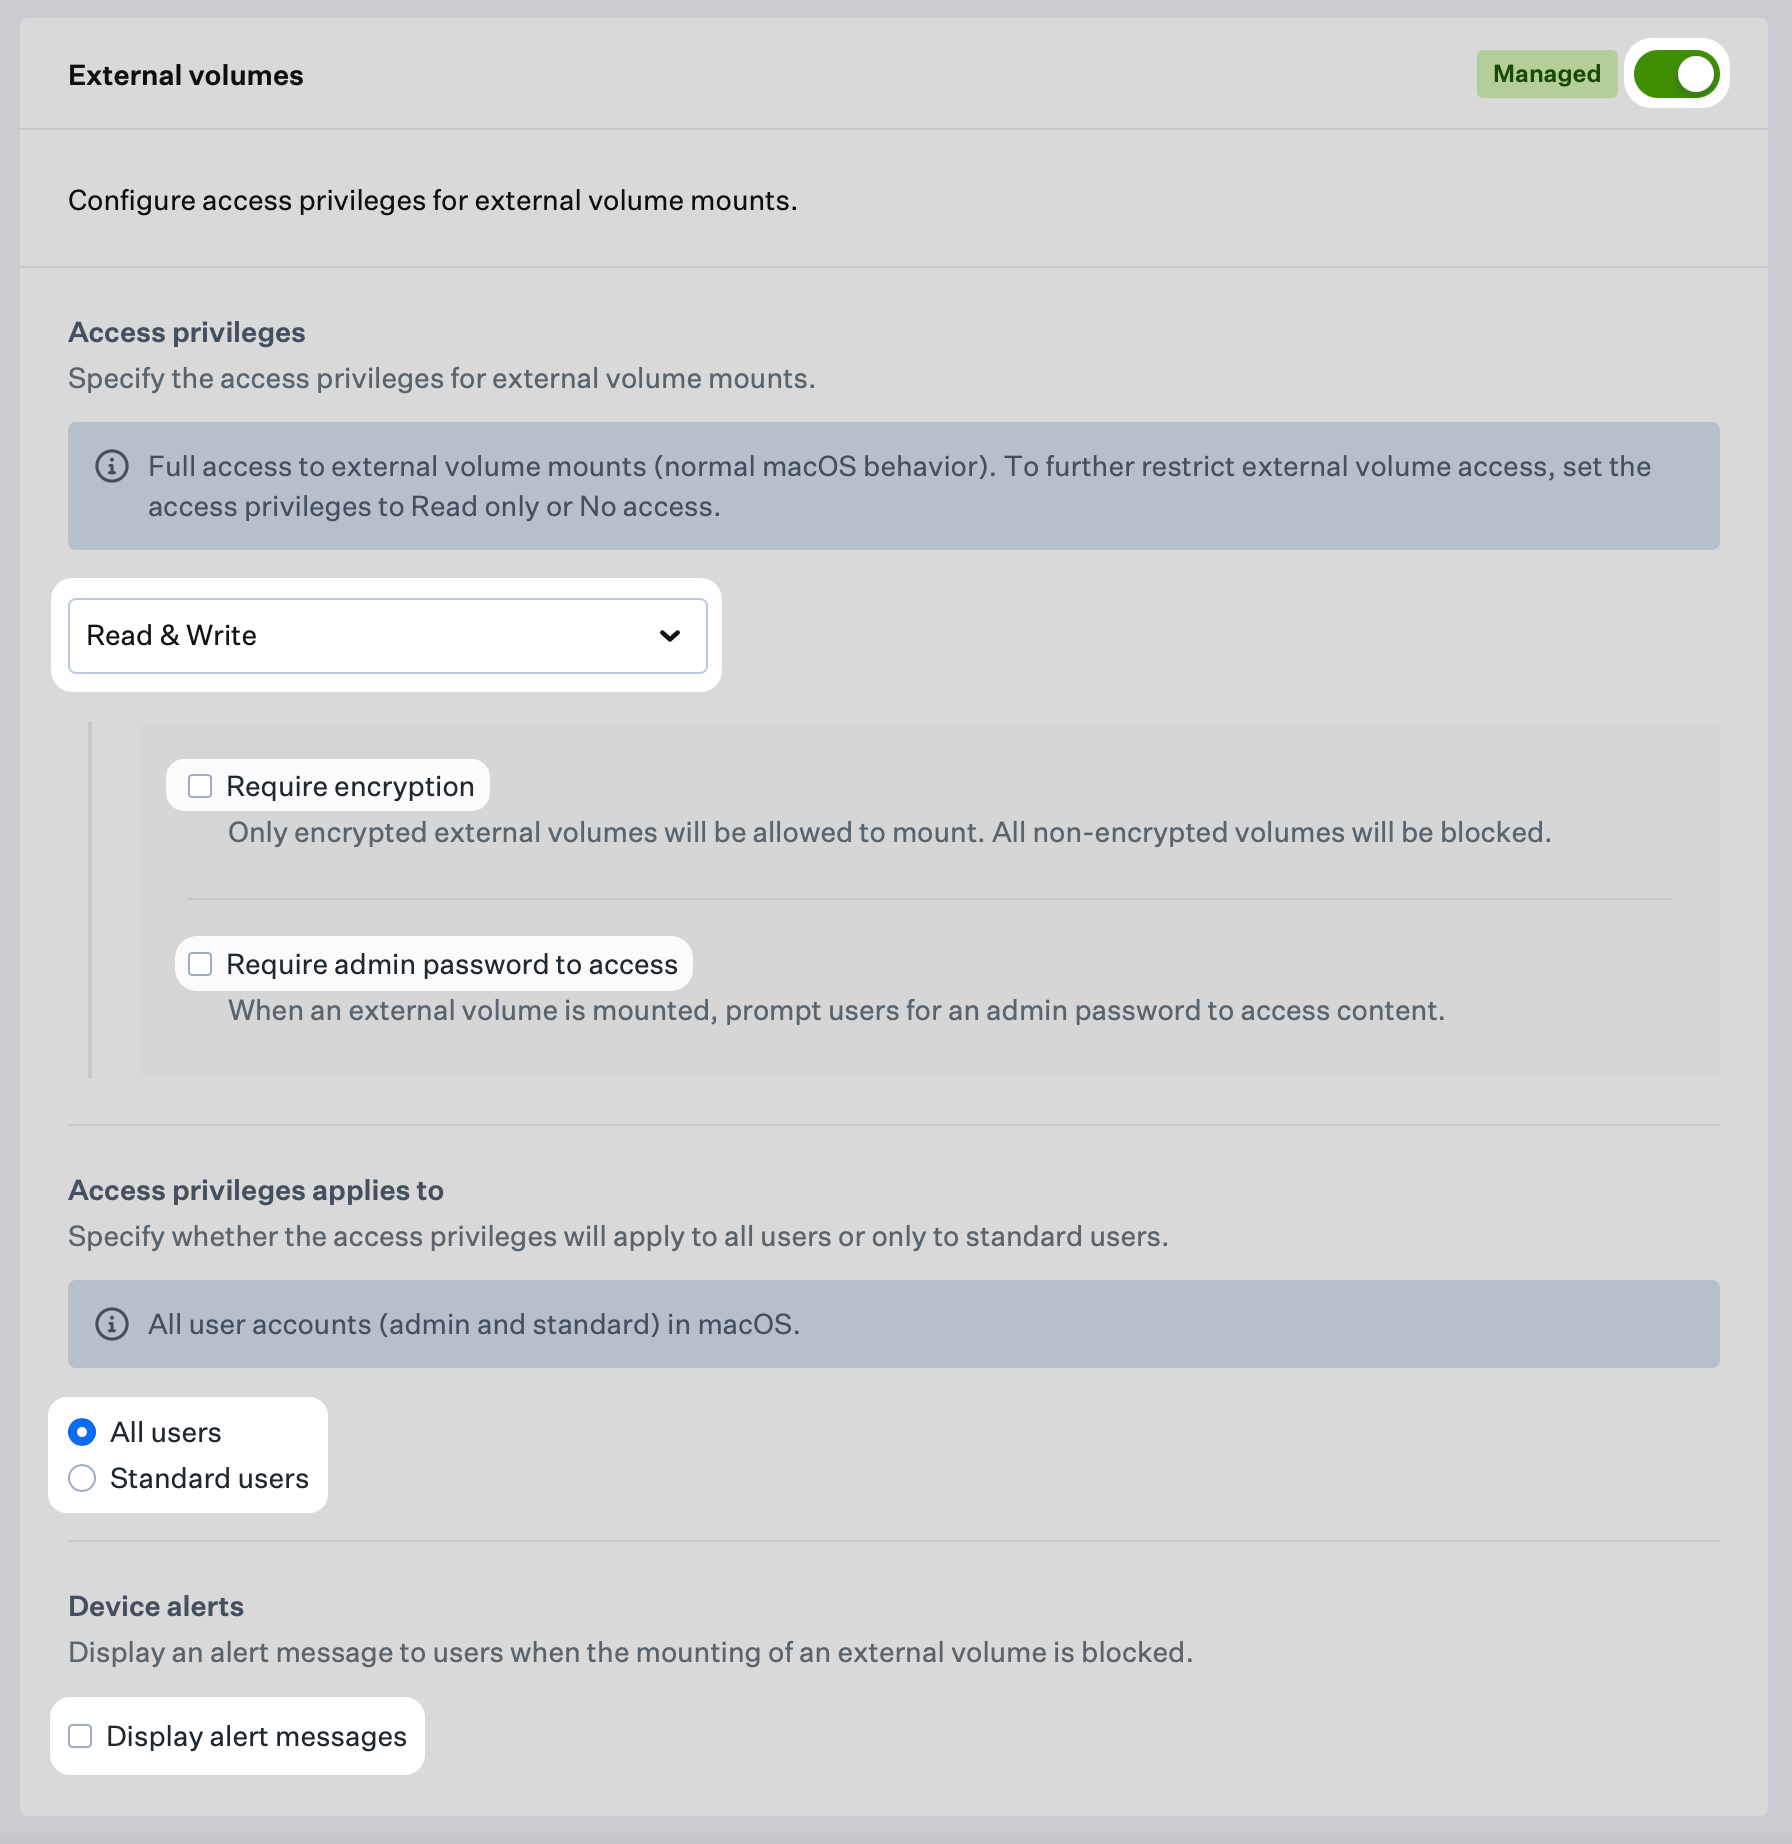
Configuring Disk Images
The Disk images section allows you to manage access privileges for DMG file types. To manage access for disk images, follow the steps below. Disk image settings specified here will apply to all DMG mounts on the device, including those in scripted automated workflows and in-app DMG mounts such as Google Update.1
Enable Disk Image Management
Turn on management for disk images.
2
Configure Access Privileges
The Access privileges menu allows you to select the desired access privileges for disk images. The available options are: Read & Write, Read only, or No access.a. Optionally, select Require admin password to access to prompt users for an admin password to access content.
3
Set User Scope
Select All users to apply the access privileges to all users, including admin, or select Standard users to apply the access privileges only to standard users.
4
Configure Alert Messages
Optionally, select Display alert messages to alert users when the mounting of disk images is blocked. Note, this setting is forced on when Require admin password to access is selected.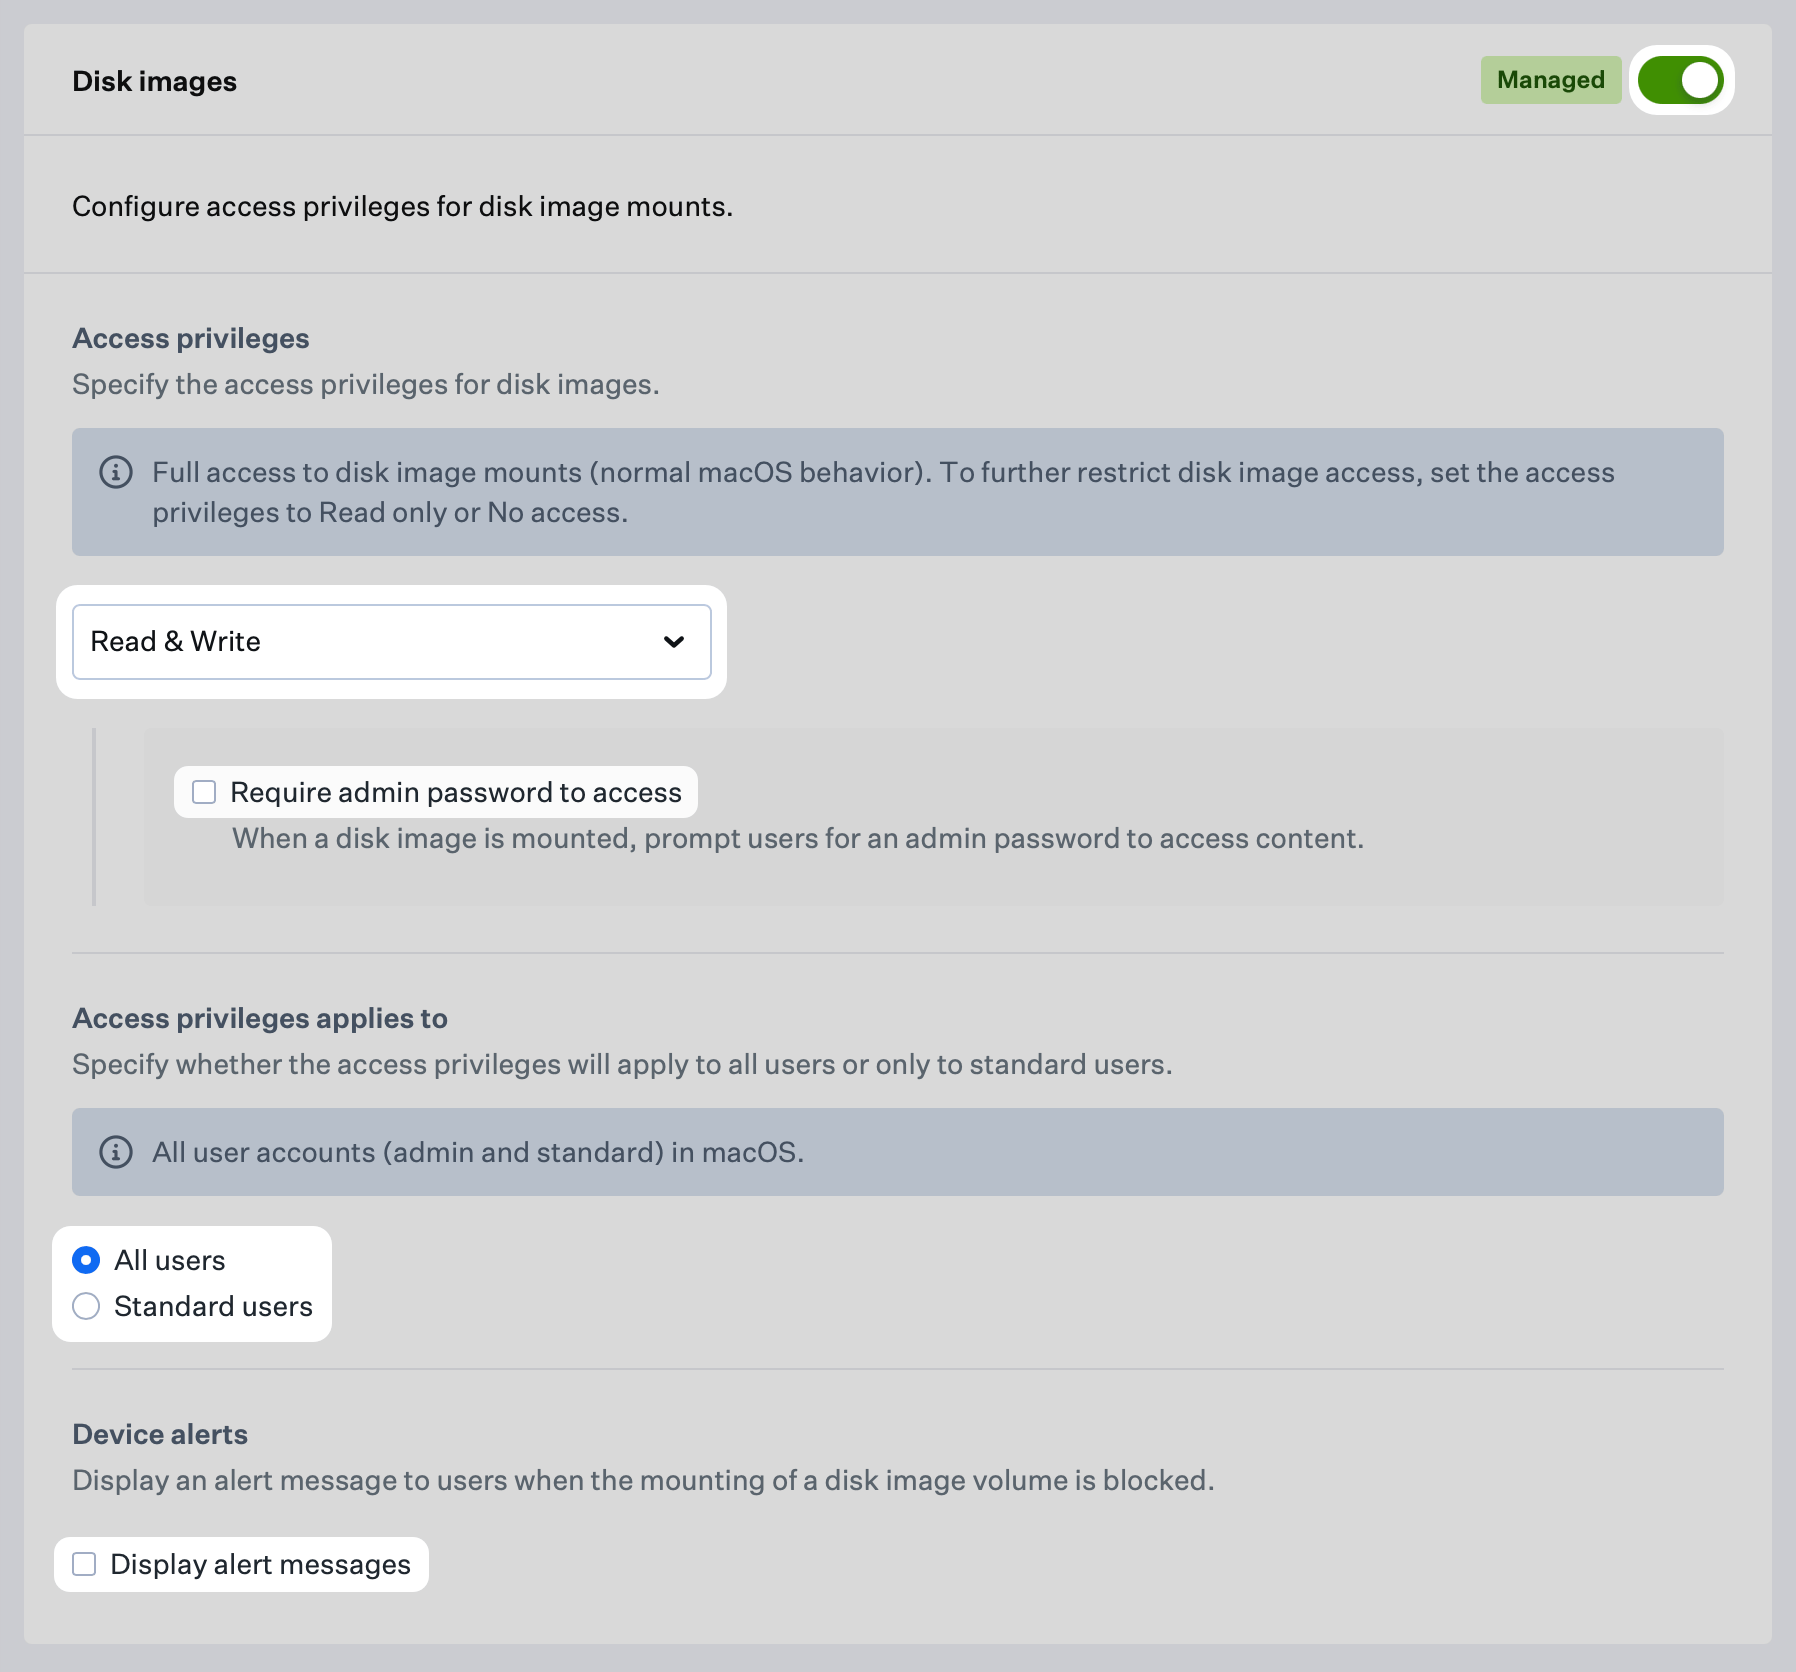
Configuring Server Volumes
The Server volumes section allows you to manage access privileges for server volume mounts such as SMB shares. To manage access for server volumes, follow the steps below.1
Enable Server Volume Management
Turn on management for server volumes.
2
Configure Access Privileges
Choose the desired access privileges for disk images from the Access privileges menu. The available options are: Read & Write or No access.
3
Set User Scope
Select All users to apply the access privileges to all users, including admin, or select Standard users to apply the access privileges only to standard users.
4
Configure Alert Messages
Optionally, select Display alert messages to display alert messages to users when the mounting of external volumes is blocked.
5
Save Configuration
Select the Save button to save the Accessory & Storage Library Item to your Library.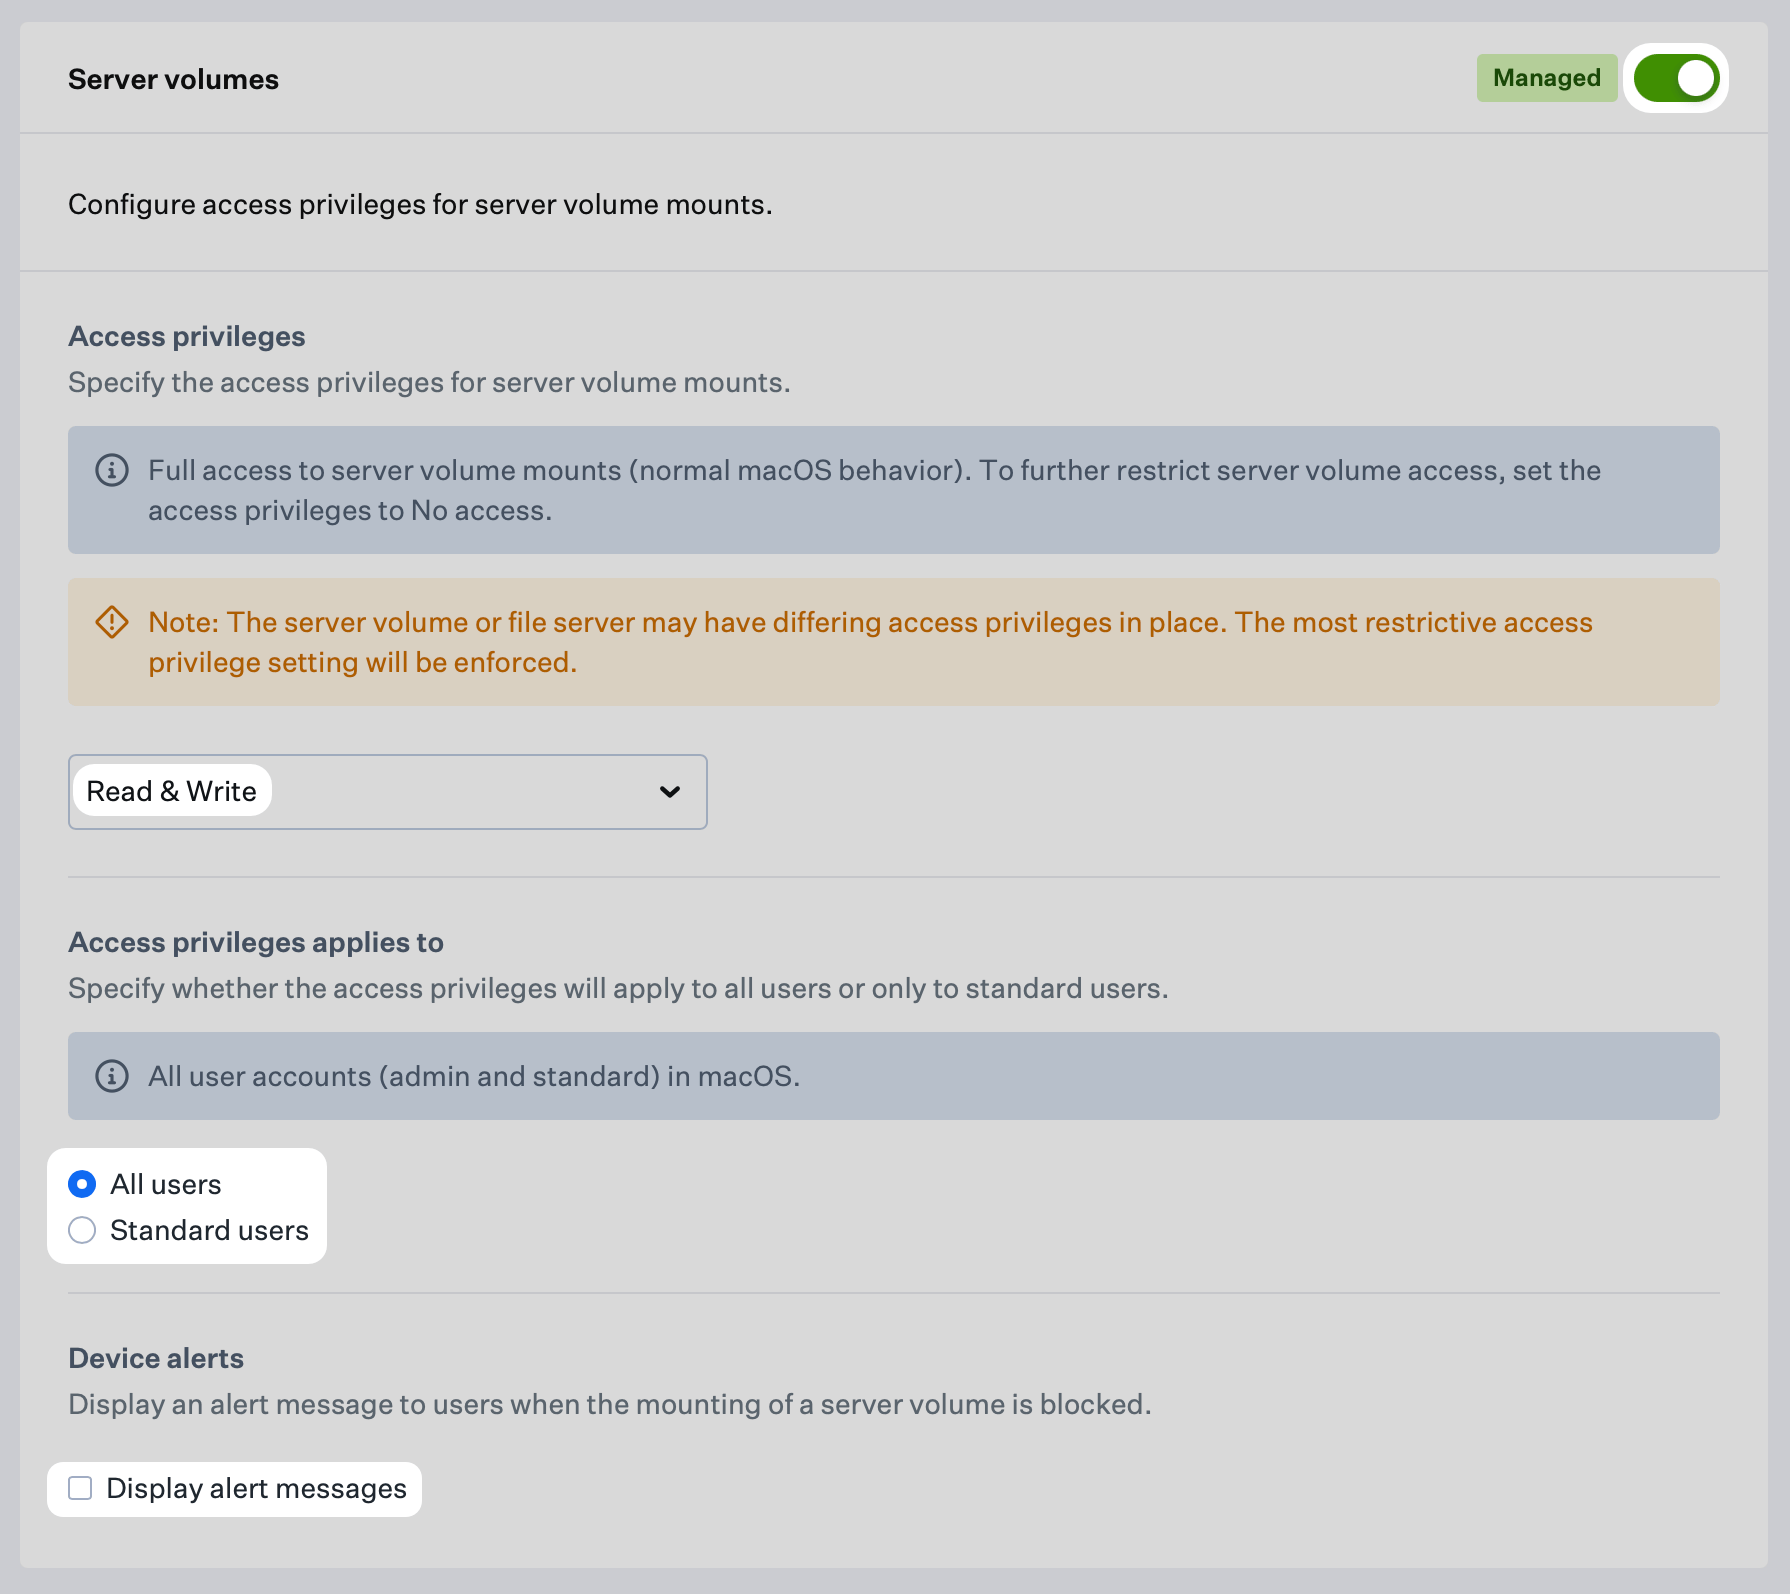
Understand Restricted Mode on Mac computers with Apple silicon
On a Mac with Apple silicon, the user may receive an alert when a new or unknown USB accessory attempts to connect, depending on the device’s Privacy & Security settings. This is known as Restricted Mode in macOS and is independent of the Device alert settings in this Library Item. Manage Restricted Mode with Allow USB accessories while device is locked in the Apple Restrictions Library Item. See this Apple Support article for more details.Considerations
EDR Requirement
The Endpoint Detection & Response add-on is required to use this Library Item. You do not need to assign the EDR Library Item to device Blueprints.
Access Privileges
Choose Read & Write, Read only, or No access based on your security requirements. Server volumes support Read & Write or No access only.
Encryption and Passwords
For external volumes, use Require encryption and Require admin password to access when you need stronger controls. Those options are available only for Read & Write and Read only.
User Scope
Apply privileges to All users or Standard users only, depending on your access control policies.
Alert Messages
Use Display alert messages so users know when mounting is blocked. This setting is forced on when Require admin password to access is selected.
Previously Mounted Volumes
Volumes mounted before this Library Item is deployed are not managed until they are unmounted and remounted.
Restricted Mode on Mac computers with Apple silicon
Restricted Mode on Apple silicon is separate from this Library Item’s alert settings. Manage it with Allow USB accessories while device is locked in the Apple Restrictions Library Item.
Disk Images and Workflows
Disk image settings apply to all DMG mounts, including scripted workflows and in-app mounts such as Google Update.
Test Before Broad Rollout
Test configuration changes in a controlled Blueprint before deploying widely, and review access settings as security policies change.