> ## Documentation Index
> Fetch the complete documentation index at: https://docs.iru.com/llms.txt
> Use this file to discover all available pages before exploring further.
# Library에서 App Store 앱 제거
> Iru Endpoint Library에서 App Store 앱을 제거합니다. Apps and Books 라이선스를 회수하고, Blueprint에서 앱 할당을 해제하고, 사용하지 않는 앱을 정리하세요.
**Apple Business Manager**는 이제 **Apple Business**입니다. **Apple School Manager**는 변경되지 않았습니다. 자세한 내용은 [Introducing Apple Business](https://www.apple.com/newsroom/2026/03/introducing-apple-business-a-new-all-in-one-platform-for-businesses-of-all-sizes/) 및 [Apple Business Manager is now Apple Business](https://support.apple.com/guide/apple-business-manager/apple-business-manager-is-now-apple-business-axmd79d79dea/web)를 참조하세요.
## Library에서 App Store 앱 제거 정보
Iru Endpoint 테넌트의 Apple Business 또는 Apple School Manager Apps and Books 토큰에 할당된 라이선스가 없는 경우 Library에서 App Store 앱 Library Item을 제거할 수 있습니다. 먼저 포털에서 앱의 라이선스 할당을 해제한 다음 Iru Endpoint Library에서 앱을 제거하세요.
## Apple Business 또는 Apple School Manager에서 App Store 라이선스 할당 해제
Iru Endpoint Library에서 앱을 제거하기 전에 Apple Business 또는 Apple School Manager에서 Iru Endpoint 테넌트의 Apps and Books 토큰에 사용되는 [조직 단위](https://support.apple.com/guide/business/configure-organizational-units-axmfdbe2cb0d/web)에서 해당 앱의 모든 라이선스 할당을 해제하세요.
Apps and Books를 관리할 수 있는 Managed Apple Account로 [Apple Business](https://business.apple.com) 또는 [Apple School Manager](https://school.apple.com)에 로그인하세요.
Apple Business 또는 Apple School Manager에서 [조직 단위 구성에 대한 Apple 지침](https://support.apple.com/guide/business/configure-organizational-units-axmfdbe2cb0d/web)을 따르세요. 이후 단계에서 앱 라이선스를 이 조직 단위로 이전합니다.
페이지 오른쪽 상단의 **조직 이름**을 선택하세요.
**설정**을 선택하세요.
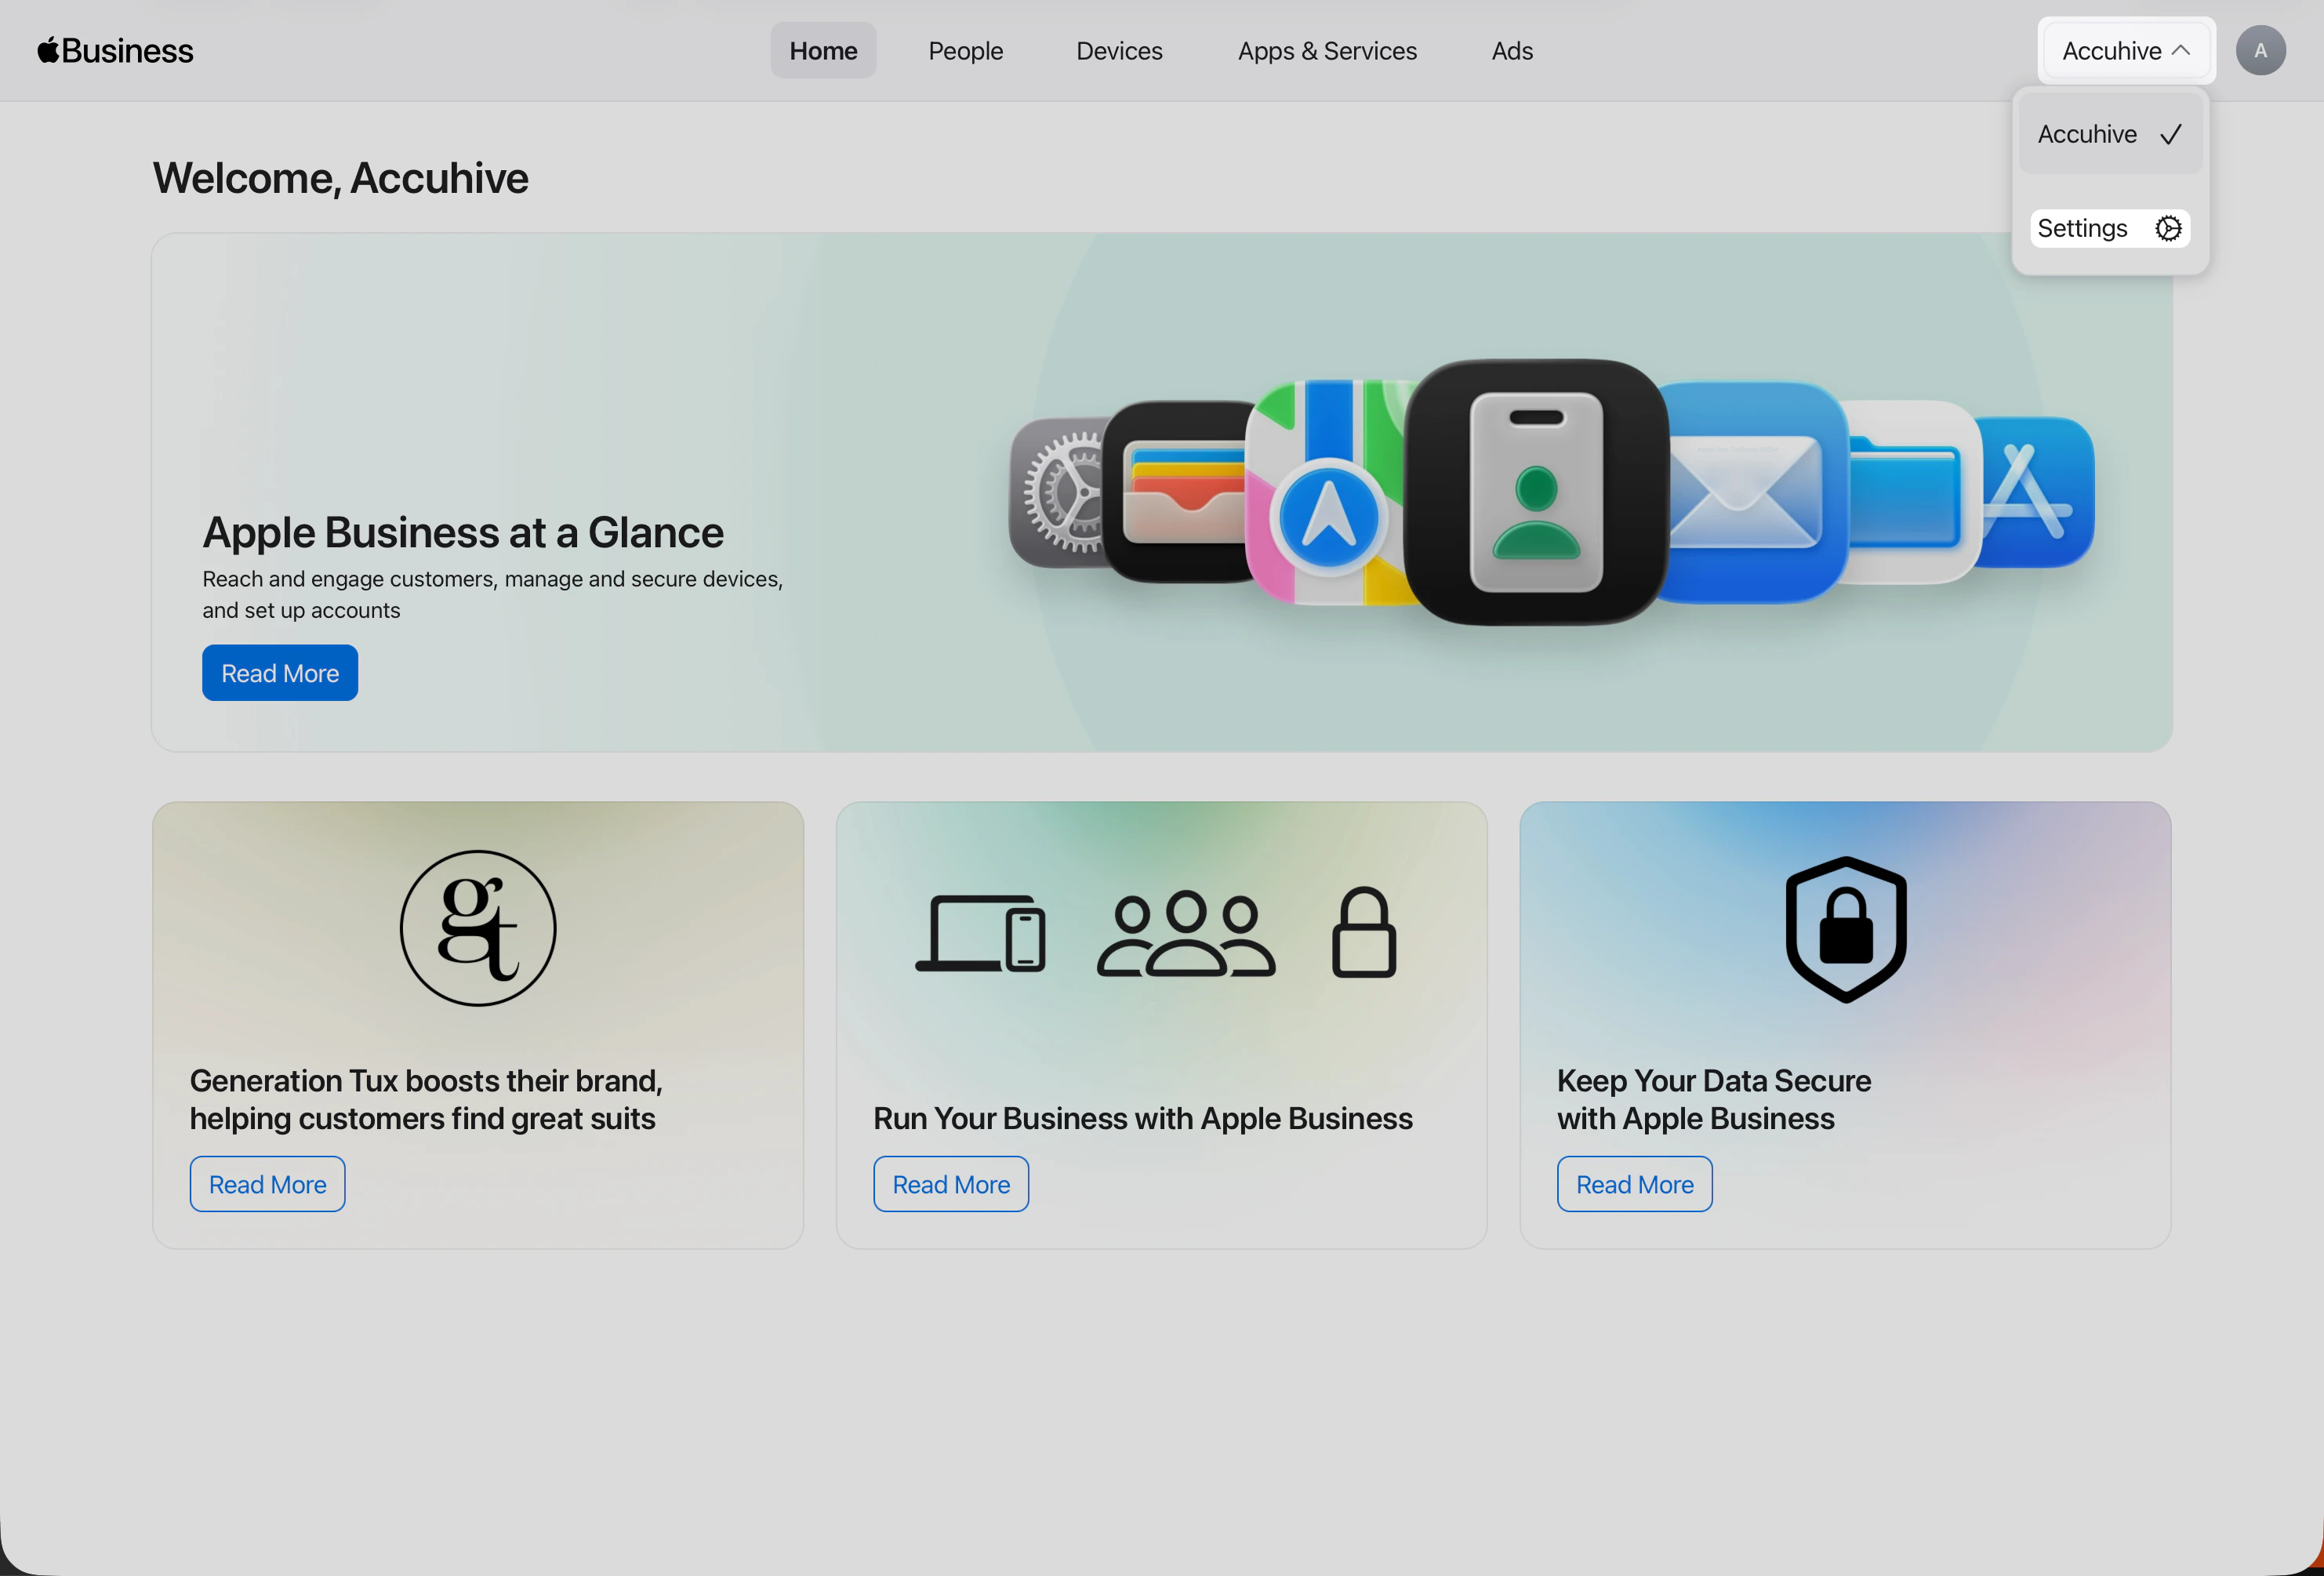 **설정**을 연 후 아직 해당 화면이 아니라면 **Payments & Billing** → **Apps & Books**로 이동하세요. 이 화면에서 조직의 Apps and Books 라이선스와 콘텐츠 토큰을 관리합니다.
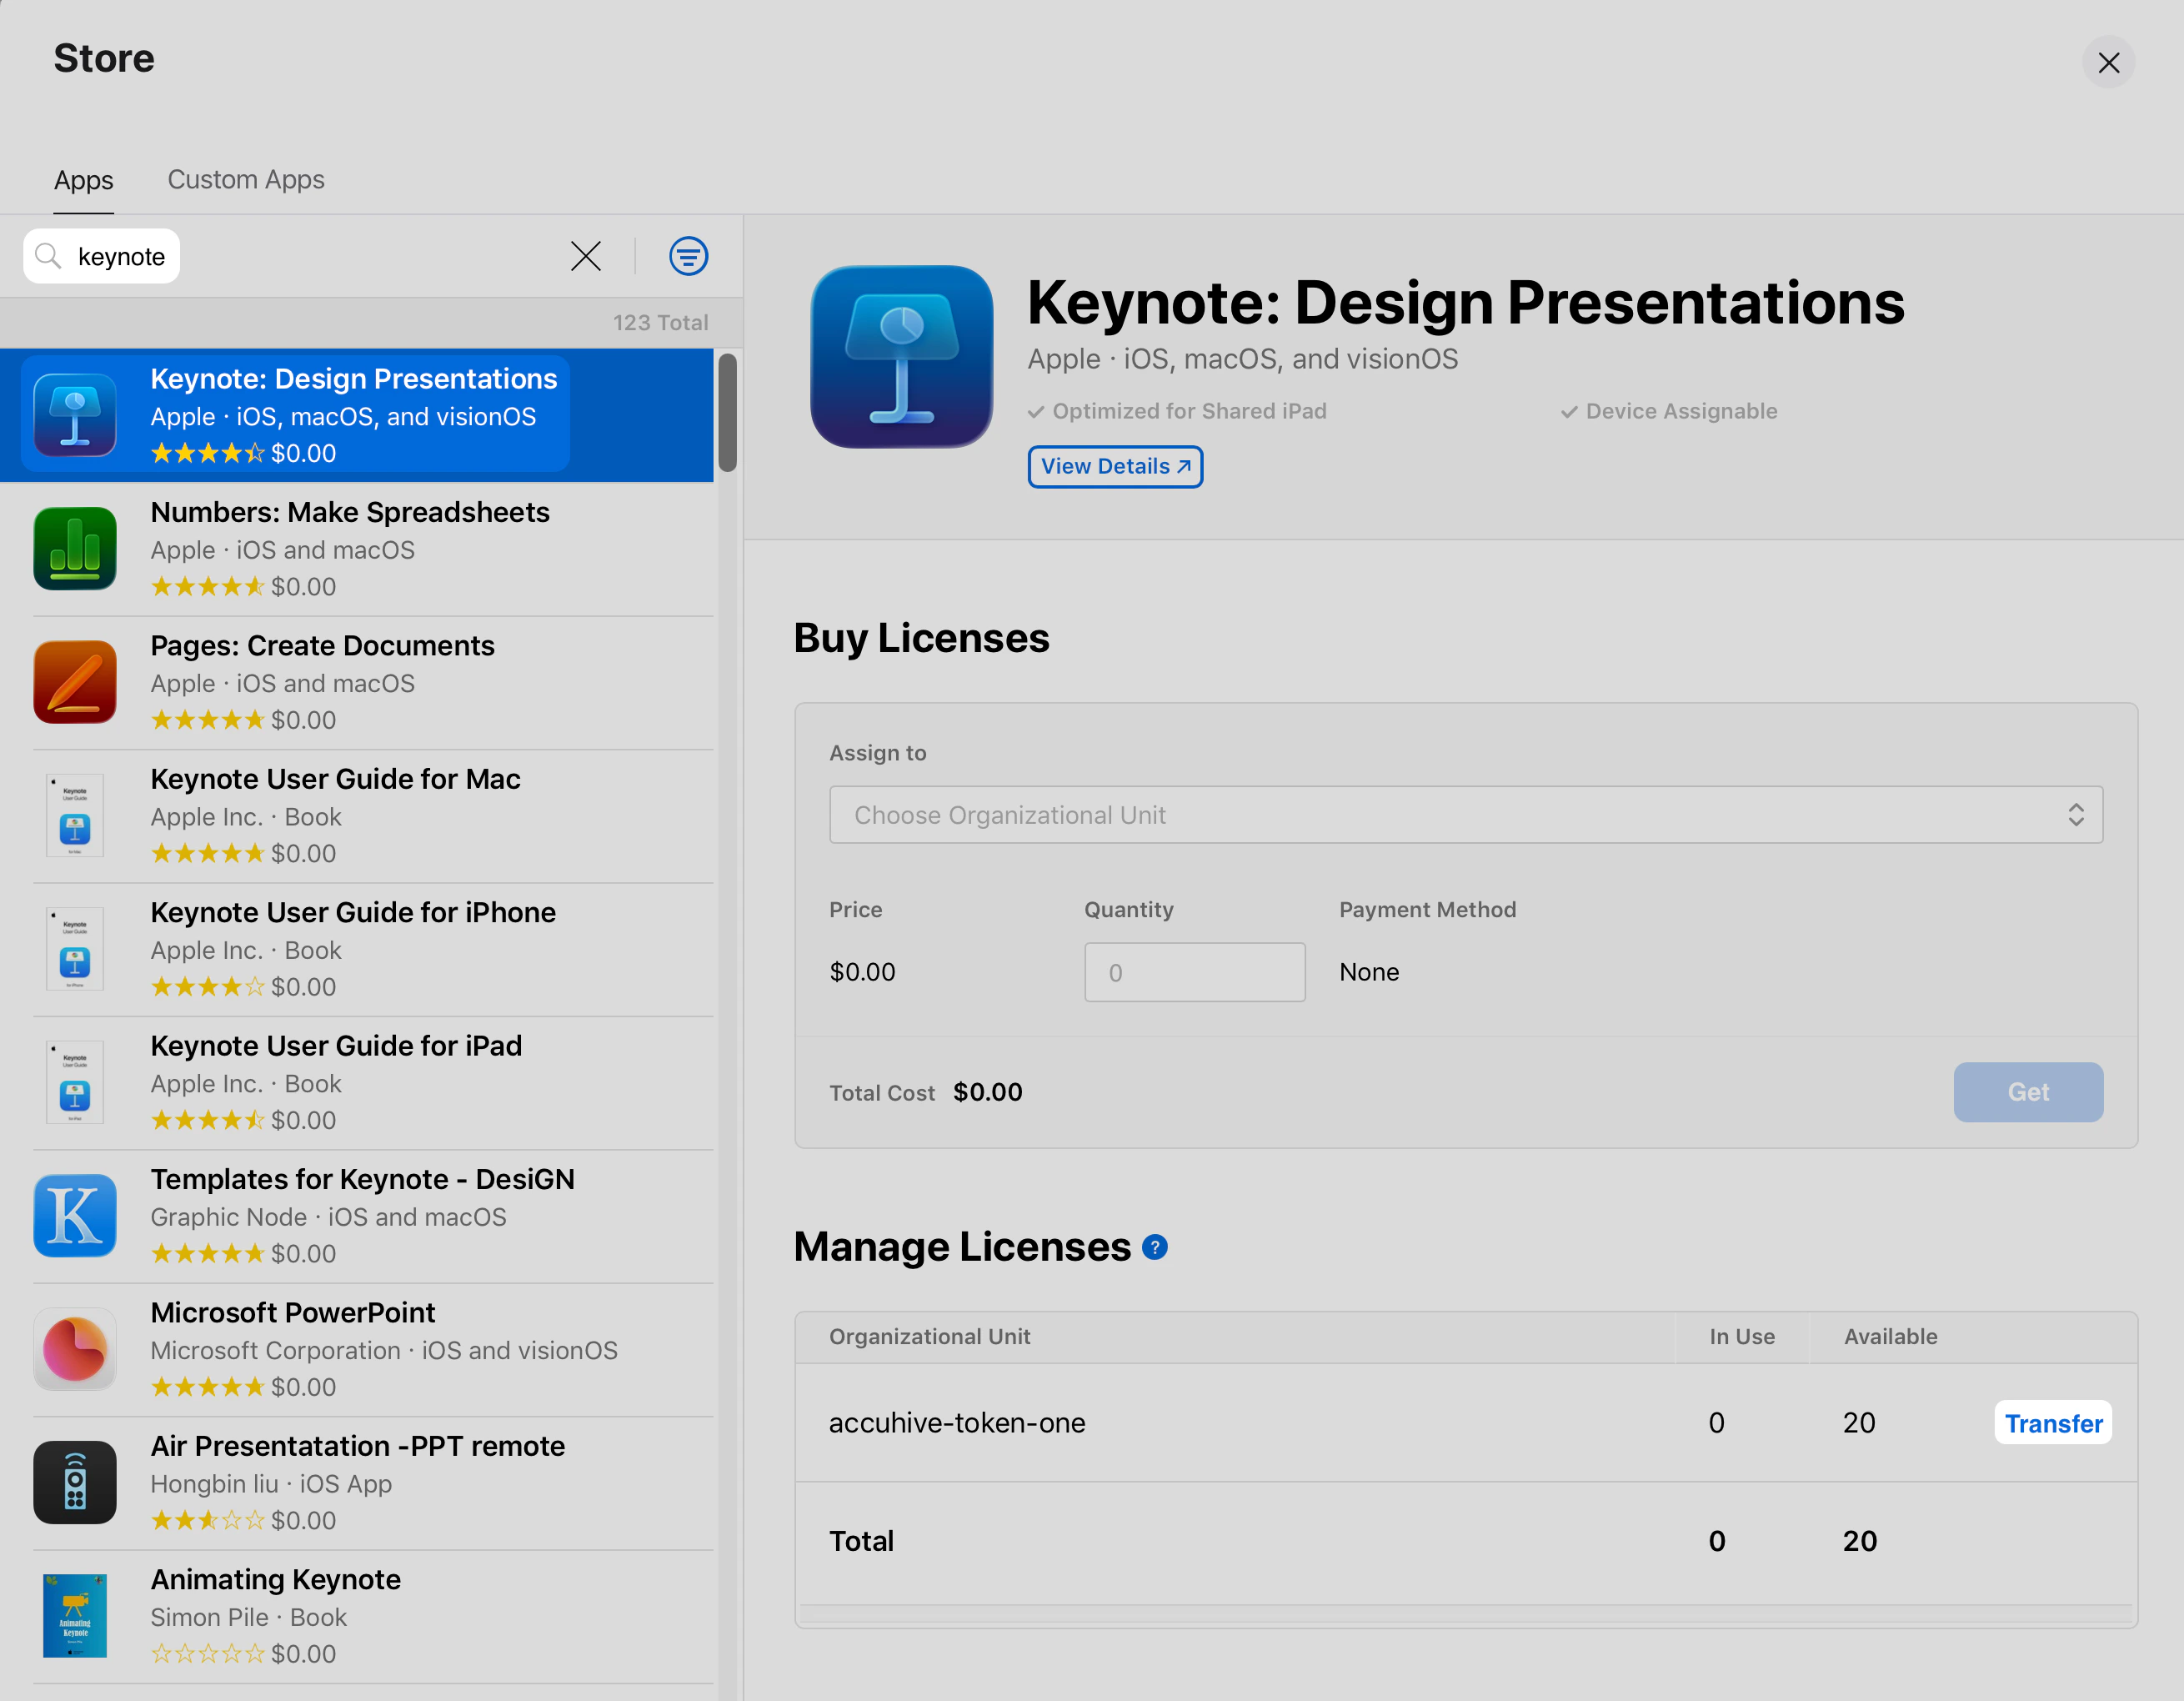
라이선스 할당을 해제할 앱을 찾아 선택하세요.
Iru Endpoint 테넌트의 Apps and Books 토큰에 사용되는 조직 단위 옆에서 **Transfer**를 선택하세요.
**설정**을 연 후 아직 해당 화면이 아니라면 **Payments & Billing** → **Apps & Books**로 이동하세요. 이 화면에서 조직의 Apps and Books 라이선스와 콘텐츠 토큰을 관리합니다.
라이선스 할당을 해제할 앱을 찾아 선택하세요.
Iru Endpoint 테넌트의 Apps and Books 토큰에 사용되는 조직 단위 옆에서 **Transfer**를 선택하세요.
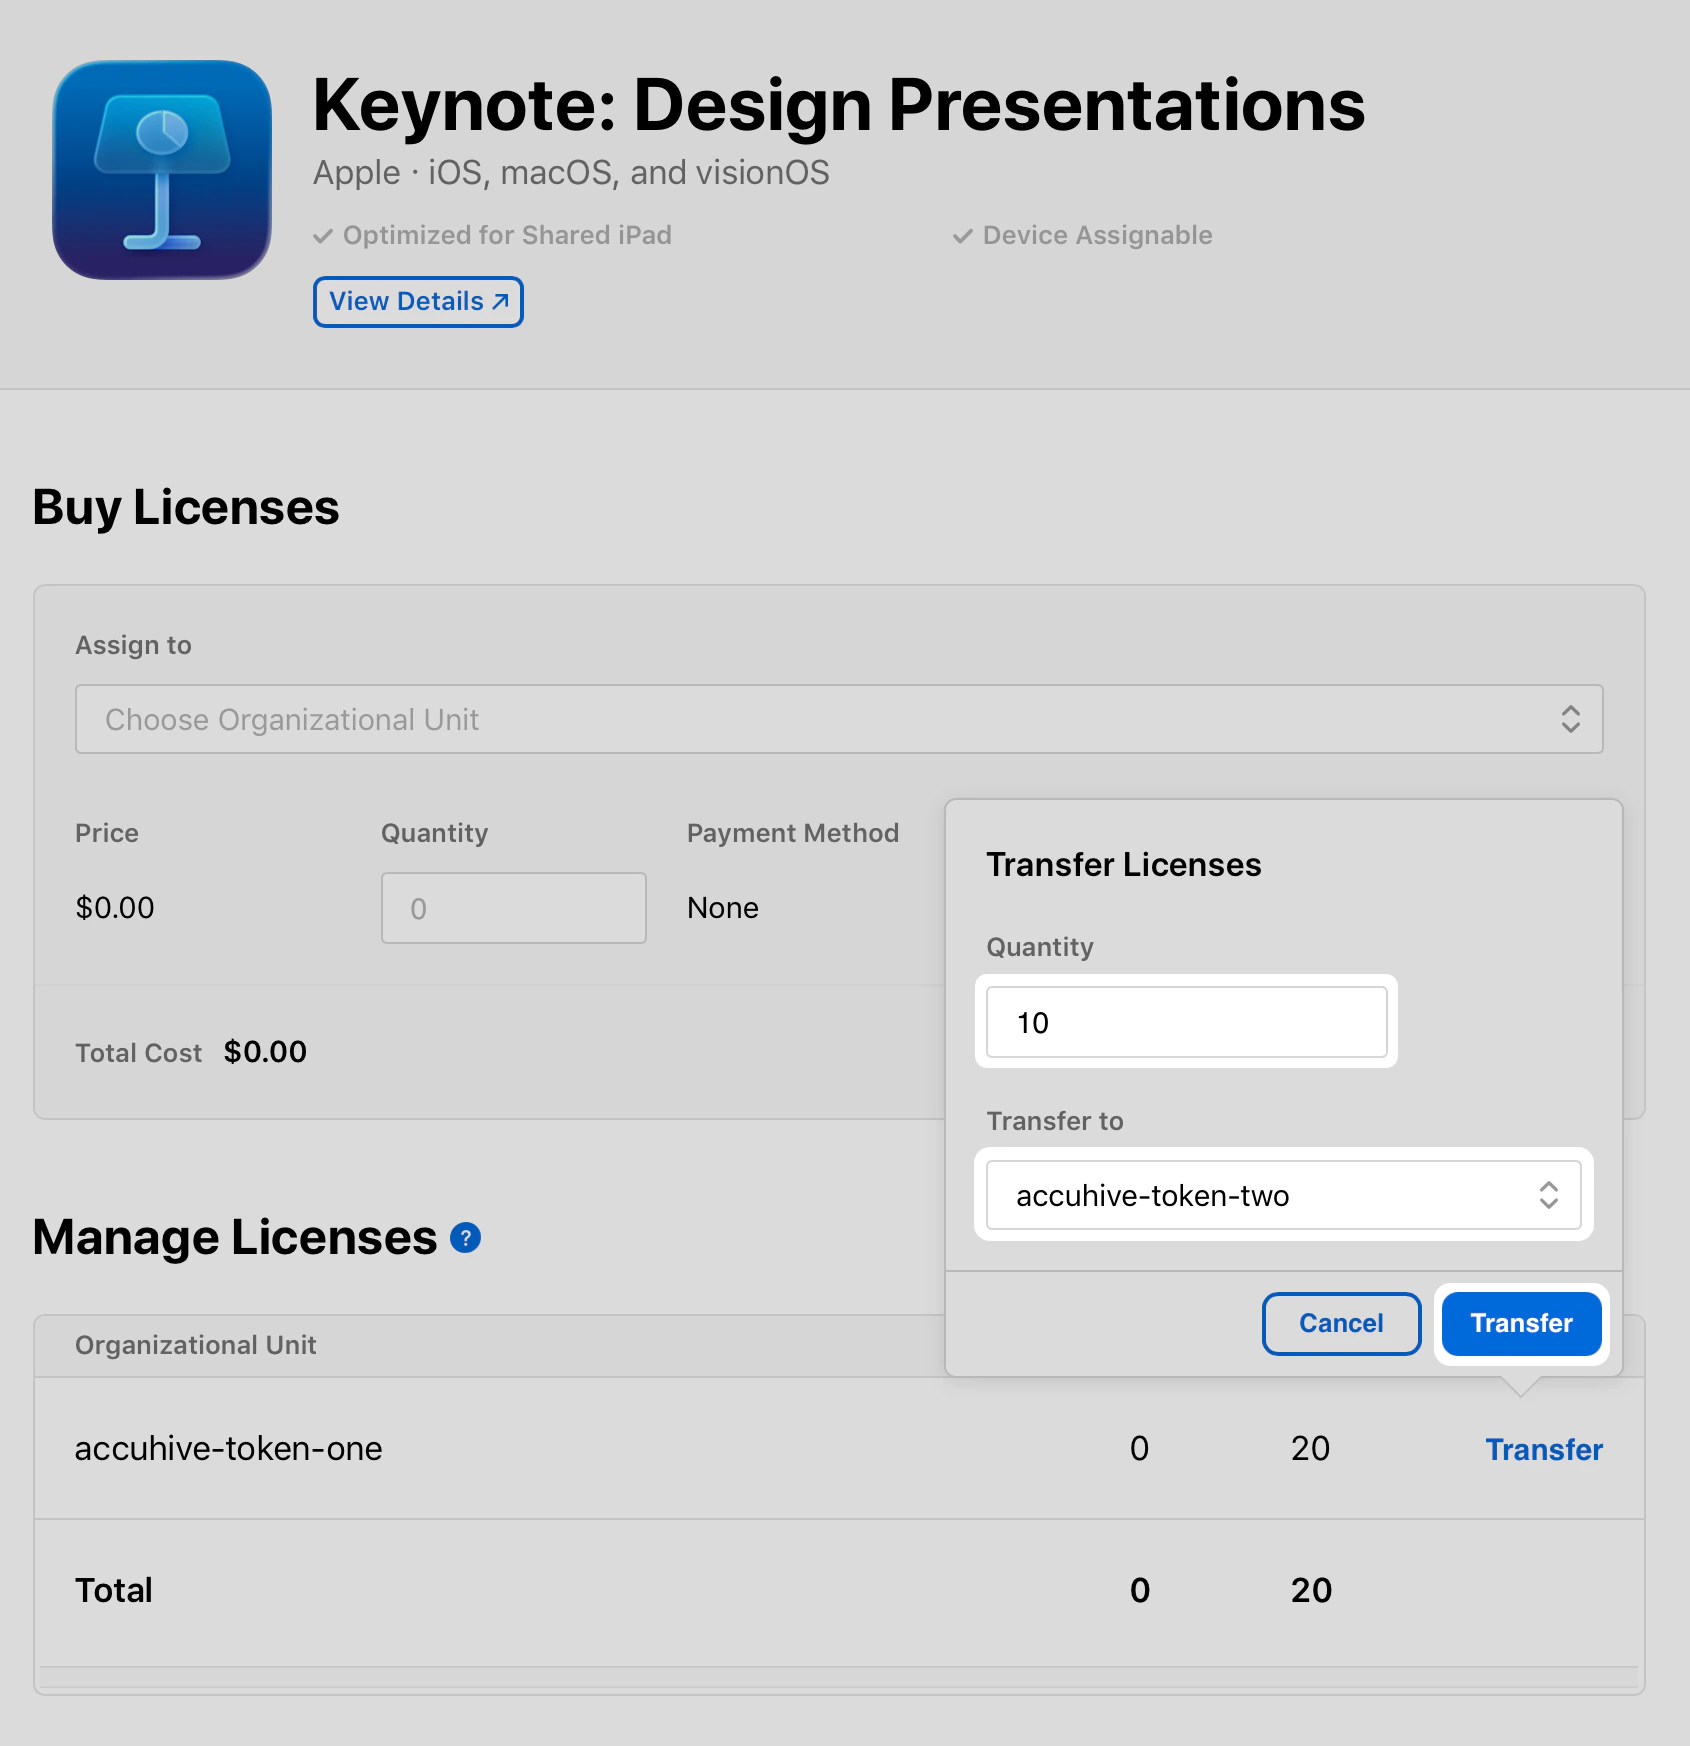
 **Quantity** 필드에 해당 조직 단위에 할당된 총 라이선스 수를 입력하세요.
**Transfer to**에서 이 단계의 앞부분에서 생성한 조직 단위를 선택하세요.
**Transfer**를 선택하세요.
**Quantity** 필드에 해당 조직 단위에 할당된 총 라이선스 수를 입력하세요.
**Transfer to**에서 이 단계의 앞부분에서 생성한 조직 단위를 선택하세요.
**Transfer**를 선택하세요.
 이전에 Transfer 옵션이 있던 위치에 **Processing** 상태가 표시됩니다. 계속하기 전에 완료될 때까지 기다리세요.
이제 라이선스가 새 조직 단위 아래에 표시되어야 합니다. 아래 단계를 사용하여 Library에서 앱을 제거하세요.
## Library에서 App Store 앱 제거하기
Apple Business 또는 Apple School Manager에서 라이선스 할당을 해제한 후 Iru Endpoint Library에서 앱을 제거하세요.
웹 브라우저에서 Iru Endpoint 테넌트를 열고 필요한 경우 로그인하세요.
왼쪽 탐색에서 **Library**를 선택하세요.
페이지 오른쪽 상단 근처의 **App Store Apps 동기화** 버튼을 선택하세요.
이전에 Transfer 옵션이 있던 위치에 **Processing** 상태가 표시됩니다. 계속하기 전에 완료될 때까지 기다리세요.
이제 라이선스가 새 조직 단위 아래에 표시되어야 합니다. 아래 단계를 사용하여 Library에서 앱을 제거하세요.
## Library에서 App Store 앱 제거하기
Apple Business 또는 Apple School Manager에서 라이선스 할당을 해제한 후 Iru Endpoint Library에서 앱을 제거하세요.
웹 브라우저에서 Iru Endpoint 테넌트를 열고 필요한 경우 로그인하세요.
왼쪽 탐색에서 **Library**를 선택하세요.
페이지 오른쪽 상단 근처의 **App Store Apps 동기화** 버튼을 선택하세요.
 Library에서 제거할 앱을 검색하세요.
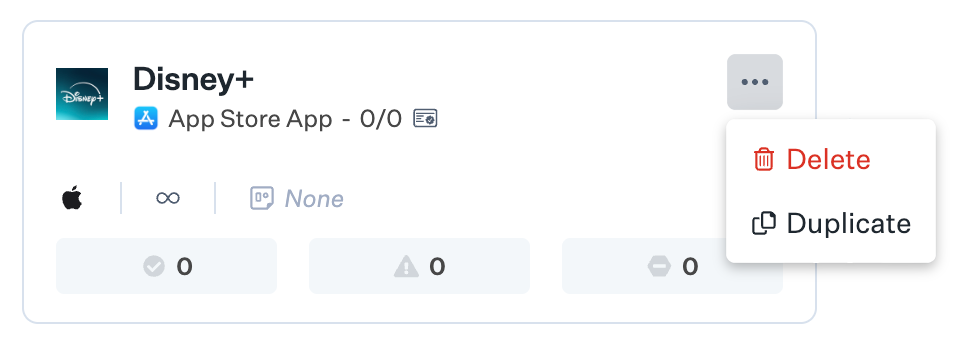
앱 타일의 줄임표를 선택하세요.
메뉴에서 **삭제**를 선택하세요.
Library에서 제거할 앱을 검색하세요.
앱 타일의 줄임표를 선택하세요.
메뉴에서 **삭제**를 선택하세요.
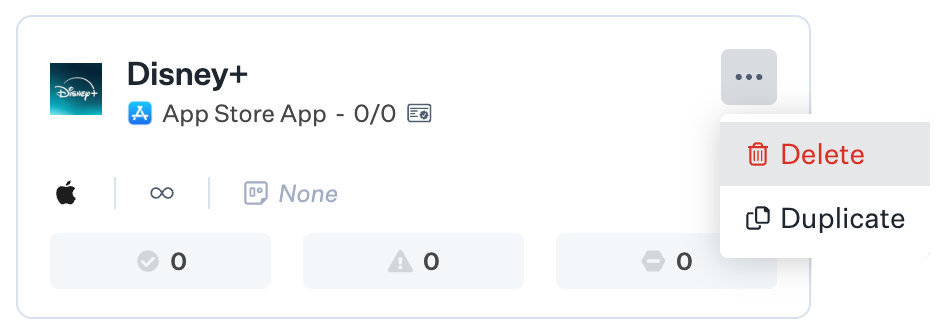 **삭제** 옵션을 사용할 수 없는 경우 나중에 다시 확인하고 **App Store Apps 동기화**를 다시 선택하세요. 그래도 표시되지 않으면 Apple Business 또는 Apple School Manager를 여세요. Iru Endpoint 테넌트의 Apps and Books 토큰에 사용되는 조직 단위에 해당 앱의 라이선스가 할당되어 있지 않은지 확인하세요.
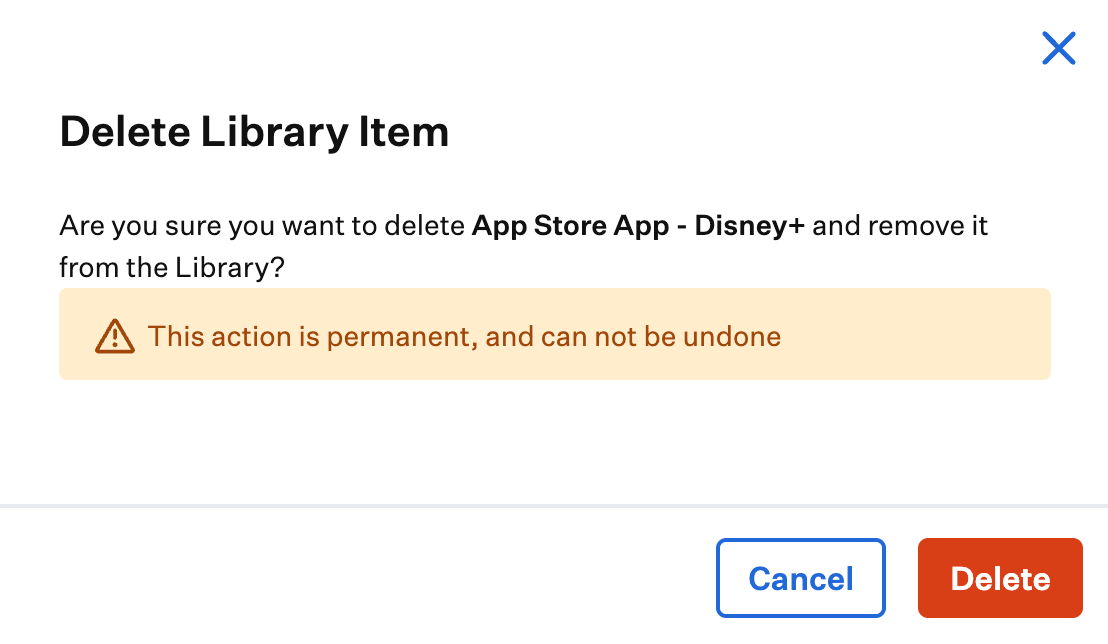
프롬프트에서 **삭제**를 선택하여 확인하세요.
**삭제** 옵션을 사용할 수 없는 경우 나중에 다시 확인하고 **App Store Apps 동기화**를 다시 선택하세요. 그래도 표시되지 않으면 Apple Business 또는 Apple School Manager를 여세요. Iru Endpoint 테넌트의 Apps and Books 토큰에 사용되는 조직 단위에 해당 앱의 라이선스가 할당되어 있지 않은지 확인하세요.
프롬프트에서 **삭제**를 선택하여 확인하세요.
 ## 관련 문서
Library Item을 선별 및 관리하고 Blueprint에 추가합니다.
App Store 앱 배포 및 라이선스 관리를 위해 Apps and Books 통합을 설정합니다.
Apple Business 또는 Apple School Manager 통합을 통해 App Store 앱과 Custom Apps를 배포합니다.
Apple Business 또는 Apple School Manager, APNs, Apps and Books 및 관련 통합.
## 관련 문서
Library Item을 선별 및 관리하고 Blueprint에 추가합니다.
App Store 앱 배포 및 라이선스 관리를 위해 Apps and Books 통합을 설정합니다.
Apple Business 또는 Apple School Manager 통합을 통해 App Store 앱과 Custom Apps를 배포합니다.
Apple Business 또는 Apple School Manager, APNs, Apps and Books 및 관련 통합.