> ## Documentation Index
> Fetch the complete documentation index at: https://docs.iru.com/llms.txt
> Use this file to discover all available pages before exploring further.
# macOS Dock 수정
> Iru Endpoint를 사용하여 관리되는 Mac 컴퓨터의 macOS Dock을 사용자 지정합니다. Custom Profile로 앱 아이콘을 추가하고, 기본값을 제거하고, Dock 레이아웃을 잠급니다.
이 가이드는 Mac 컴퓨터에 적용됩니다
macOS 기기에 애플리케이션을 배포한 후 해당 아이콘을 Dock에 추가하면 사용자가 더 쉽게 찾을 수 있습니다. Custom Profile을 생성하여 Dock에 아이콘을 추가할 수 있습니다.
이 방법은 최종 사용자가 Dock을 변경할 수 없도록 Dock을 잠급니다. 사용자가 Dock을 변경할 수 있도록 하는 스크립트 기반 옵션을 원하는 경우 [Iru Agent 명령줄 인터페이스](/ko/endpoint/agent/iru-agent-command-line-interface#dock) 문서를 참조하거나 GitHub 리포지토리에서 [Configure Dock Dockutil](https://github.com/kandji-inc/support/tree/main/Scripts/configure-dock-dockutil) 스크립트를 배포할 수 있습니다.
### iMazing Profile Editor 다운로드 및 설치
웹사이트 또는 Mac App Store에서 [iMazing Profile Editor](https://imazing.com/profile-editor/download)를 다운로드합니다.
직접 다운로드한 경우 iMazingProfileEditorMac.dmg를 열고 iMazing Profile Editor.app을 응용 프로그램 폴더로 드래그합니다.
### Dock 프로파일 생성
iMazing Profile Editor를 연 후 다음 단계를 따릅니다.
왼쪽에서 **일반** 도메인을 선택하고 기본 프로파일 설정을 구성합니다.
* **이름**을 원하는 프로파일 이름으로 설정합니다
* **Identifier**를 고유한 문자열로 설정합니다
* **조직**을 조직 이름으로 설정합니다
* **Payload Description**을 프로파일의 목적을 설명하도록 설정합니다
페이로드 범위를 **System**으로 설정합니다.
오른쪽 상단 검색 상자에서 **Dock**을 검색하고 **Add Configuration Payload**를 선택합니다.
Dock 페이로드 내에서 적절한 옵션을 구성합니다.
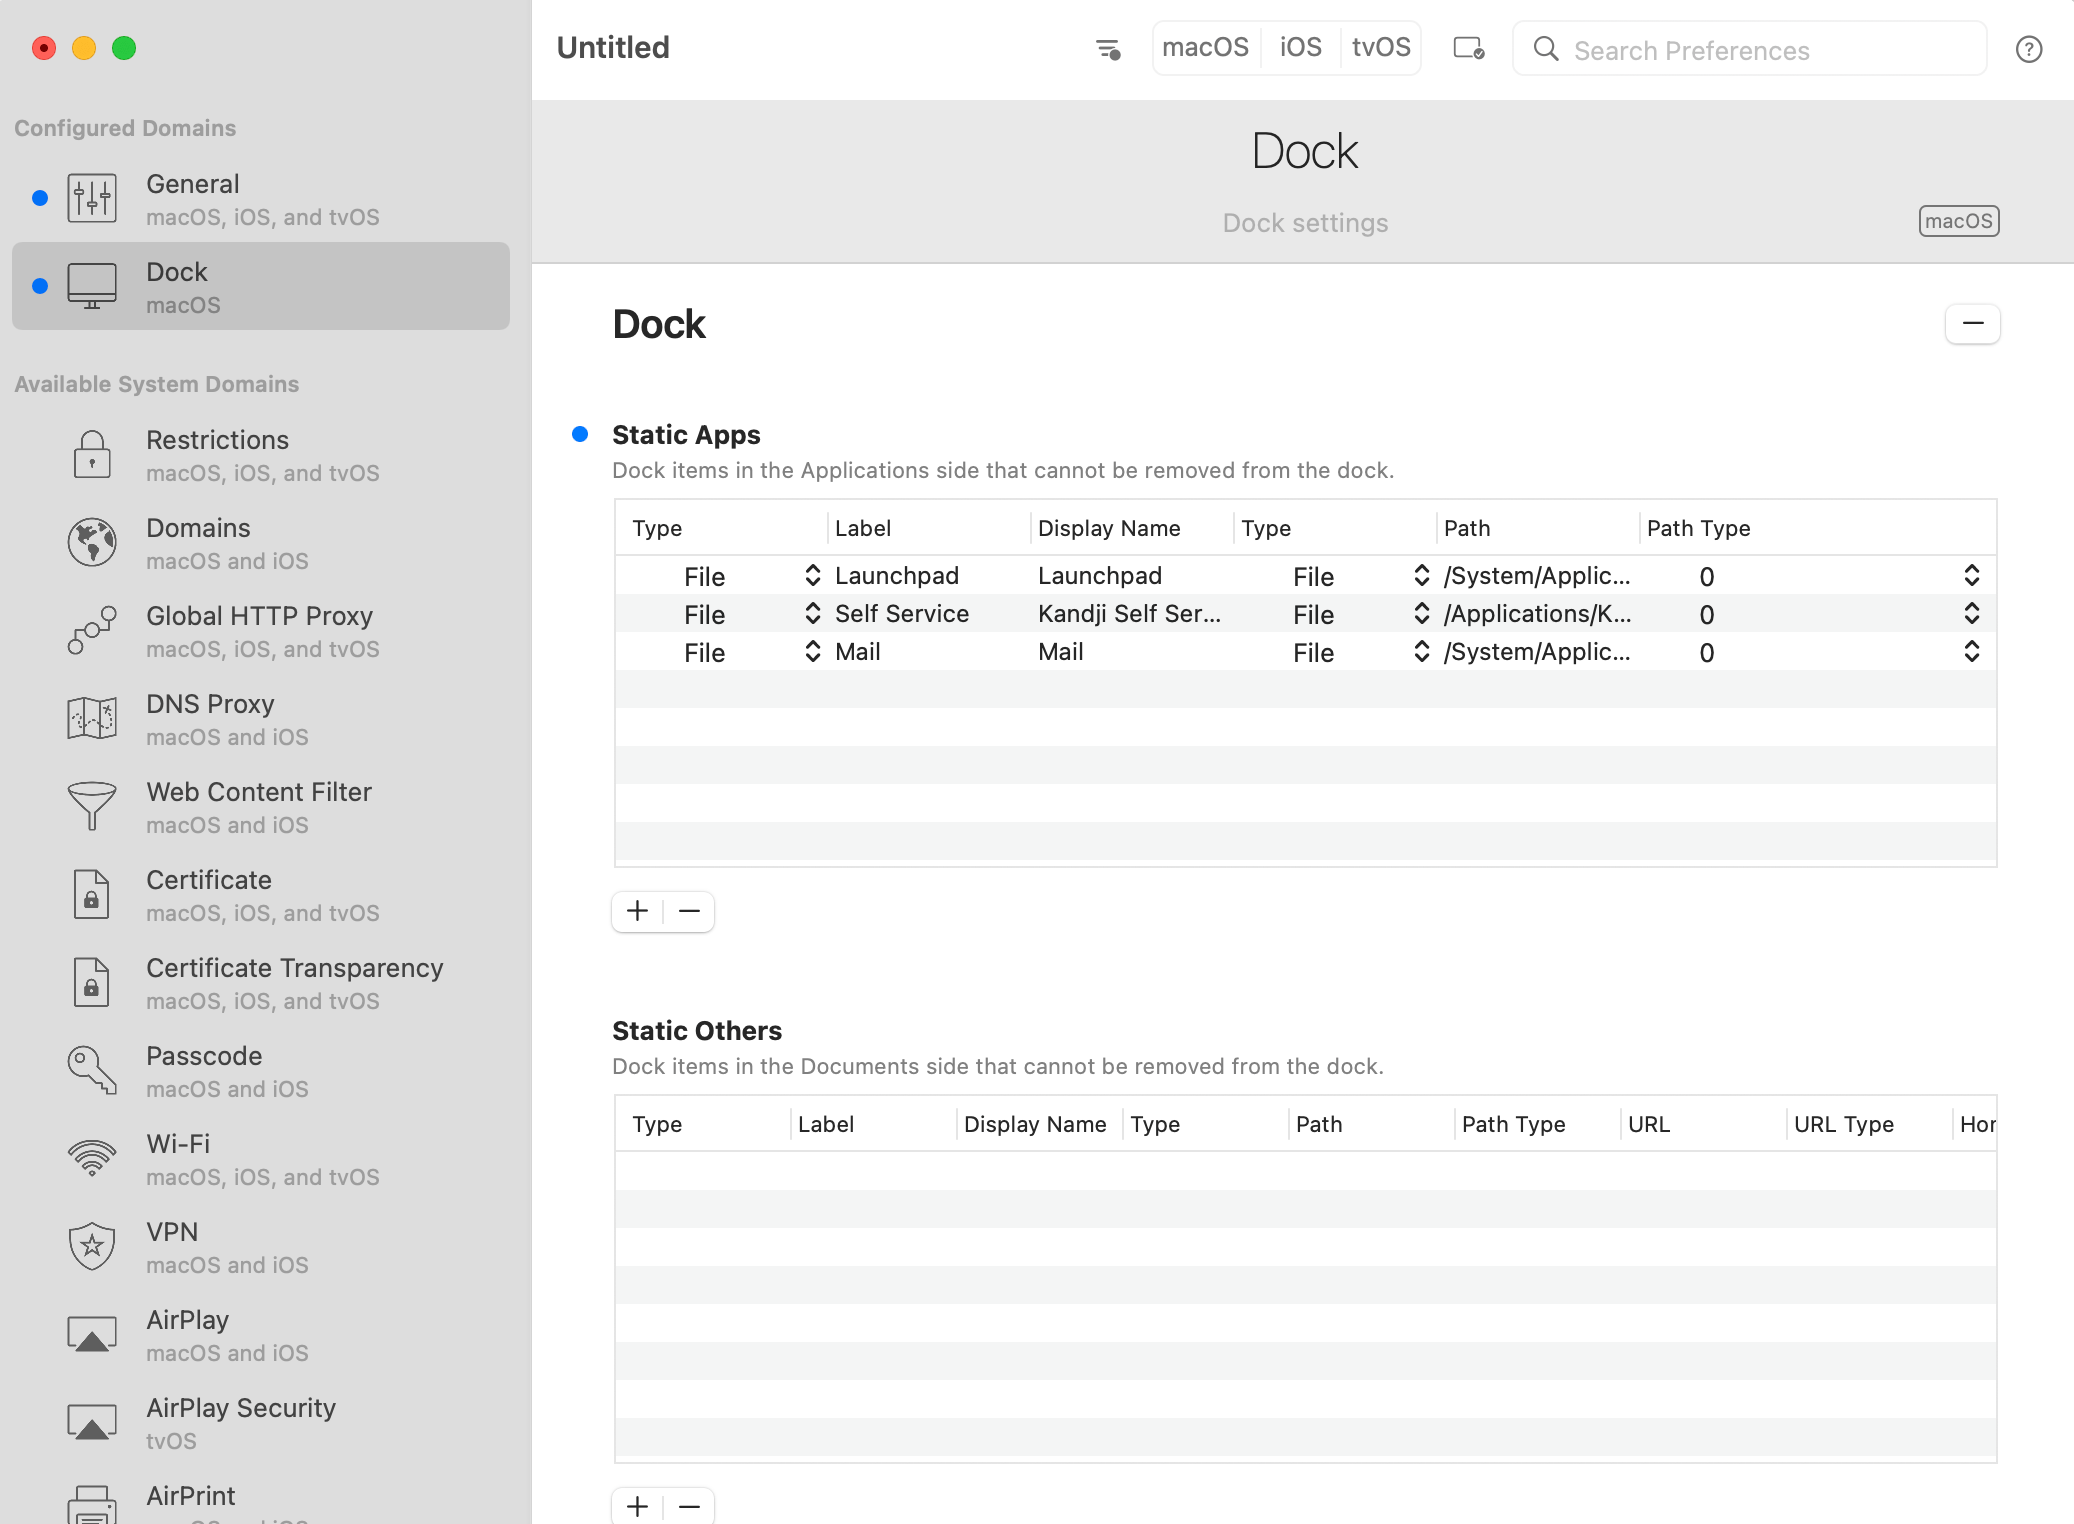 메뉴 막대로 이동하여 File > **저장**을 선택한 다음 저장 위치를 선택하고 프로파일을 **저장**합니다.
Iru Endpoint를 사용하여 프로파일을 배포하는 경우 서명할 필요가 없습니다. Iru Endpoint는 배포 중에 프로파일에 서명합니다.
### Custom Profile Library Item 추가
이 Library Item을 Iru Endpoint Library에 추가하려면 [Library 개요](/ko/endpoint/library/library-items-profiles/library-overview) 문서에 설명된 단계를 따르십시오.
### 사용자 지정 Dock 프로파일을 Iru Endpoint에 업로드
프로파일에 설명이 포함된 이름을 지정합니다.
Blueprint Assignment 드롭다운에서 [**Blueprint**](/ko/endpoint/blueprints/assignment-maps/creating-a-blueprint)를 선택합니다.
기기 제품군을 **Mac**으로 설정합니다.
Dock 프로파일을 드래그 앤 드롭하여 업로드합니다.
Custom Profile을 저장합니다.
선택한 Blueprints에 등록된 기기는 다음에 Iru Endpoint와 체크인한 후 사용자 지정된 Dock을 표시합니다.
메뉴 막대로 이동하여 File > **저장**을 선택한 다음 저장 위치를 선택하고 프로파일을 **저장**합니다.
Iru Endpoint를 사용하여 프로파일을 배포하는 경우 서명할 필요가 없습니다. Iru Endpoint는 배포 중에 프로파일에 서명합니다.
### Custom Profile Library Item 추가
이 Library Item을 Iru Endpoint Library에 추가하려면 [Library 개요](/ko/endpoint/library/library-items-profiles/library-overview) 문서에 설명된 단계를 따르십시오.
### 사용자 지정 Dock 프로파일을 Iru Endpoint에 업로드
프로파일에 설명이 포함된 이름을 지정합니다.
Blueprint Assignment 드롭다운에서 [**Blueprint**](/ko/endpoint/blueprints/assignment-maps/creating-a-blueprint)를 선택합니다.
기기 제품군을 **Mac**으로 설정합니다.
Dock 프로파일을 드래그 앤 드롭하여 업로드합니다.
Custom Profile을 저장합니다.
선택한 Blueprints에 등록된 기기는 다음에 Iru Endpoint와 체크인한 후 사용자 지정된 Dock을 표시합니다.