> ## Documentation Index
> Fetch the complete documentation index at: https://docs.iru.com/llms.txt
> Use this file to discover all available pages before exploring further.
# Organization
> Manage your Iru tenant's Organization page. Edit the Organization Profile, including the company name and logo your people see in Iru Identity, choose Endpoint platforms, turn Iru AI on or off, and submit requests.
### About the Organization Page
The **Organization** page holds the settings that apply across your whole tenant. It has two parts:
* **Organization Profile**: The section at the top of the page. It holds your organization-wide details, such as your company name, logo, and business details. Select **Edit** to change them.
* **Tabs**: Settings for the other parts of Iru:
* **Endpoint**: The platforms you manage, your device count, and the device domains your devices must reach.
* **Iru AI**: Whether Iru AI is available in your tenant.
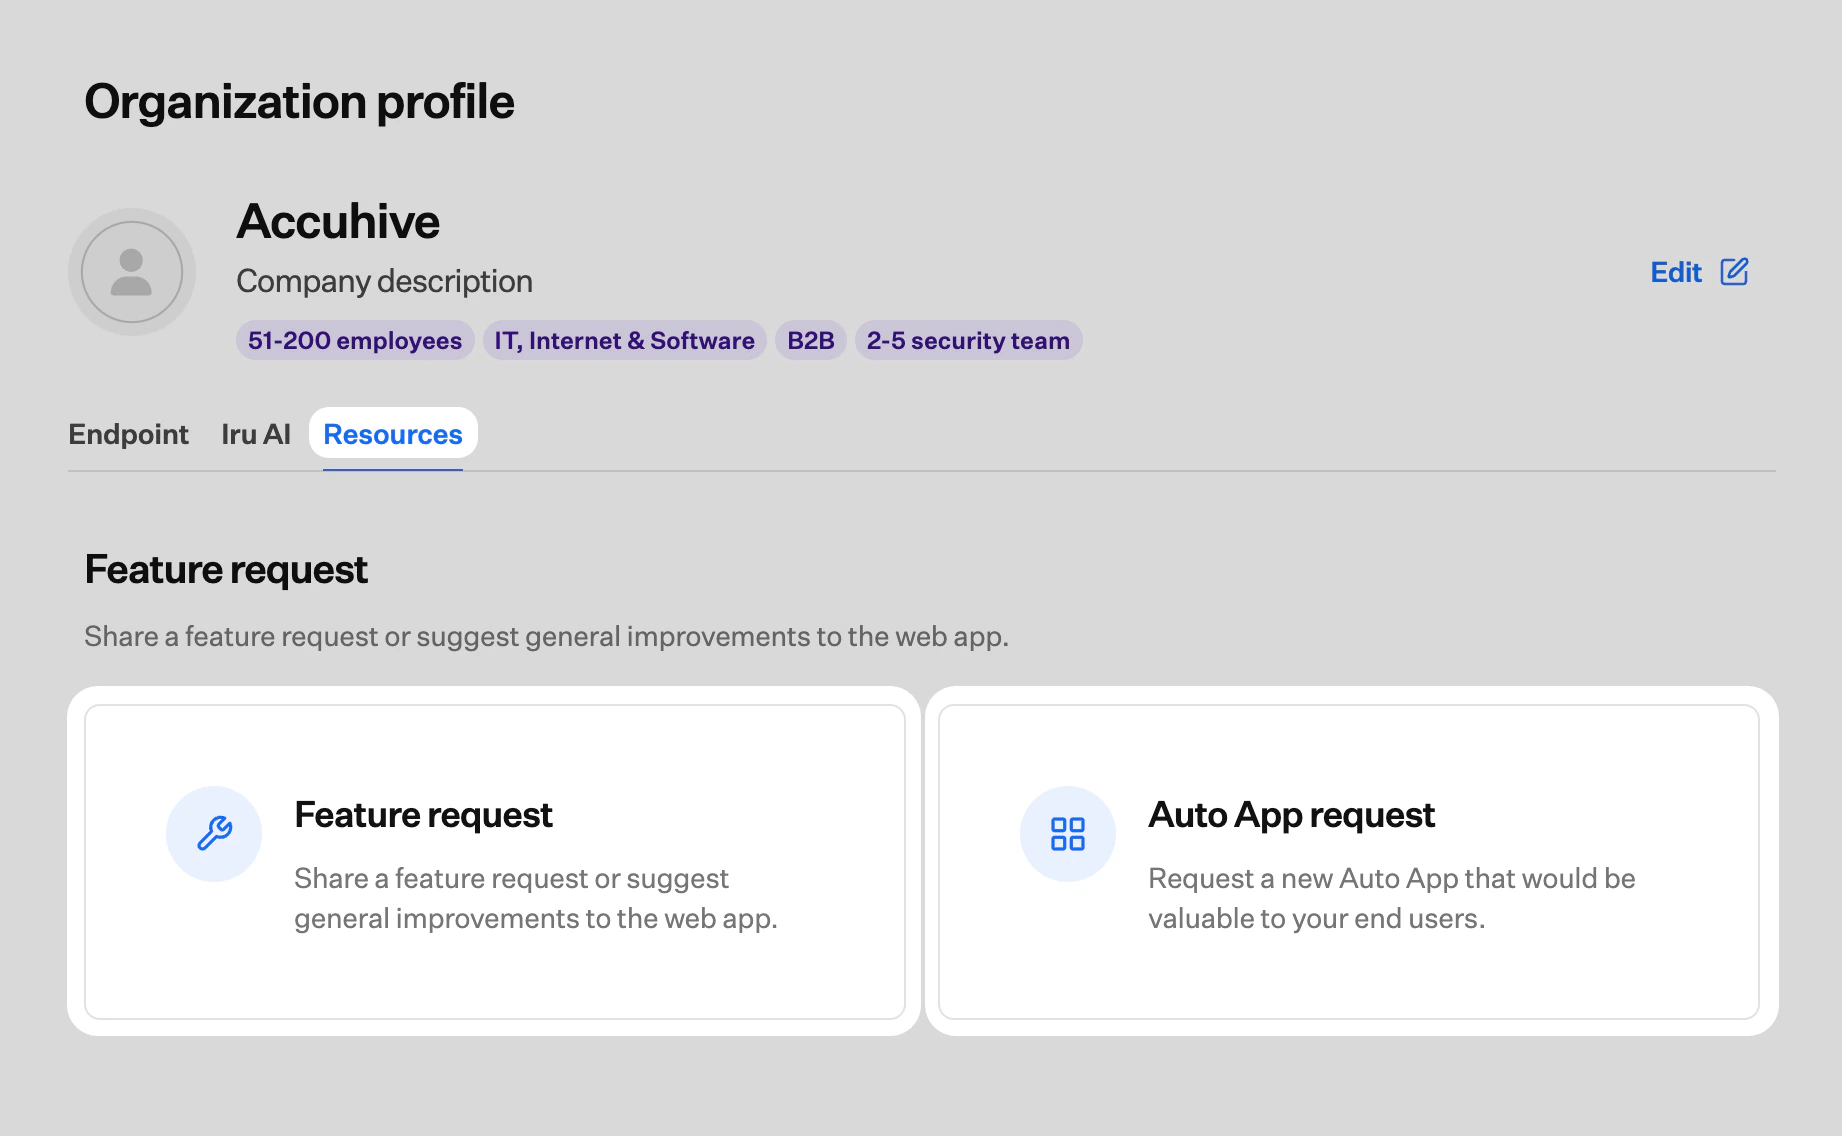
* **Resources**: Feature requests and Auto App requests.
Your company name and logo also appear to your people in Iru Identity, on the sign-in screen and on their app dashboard.
### Open the Organization Page
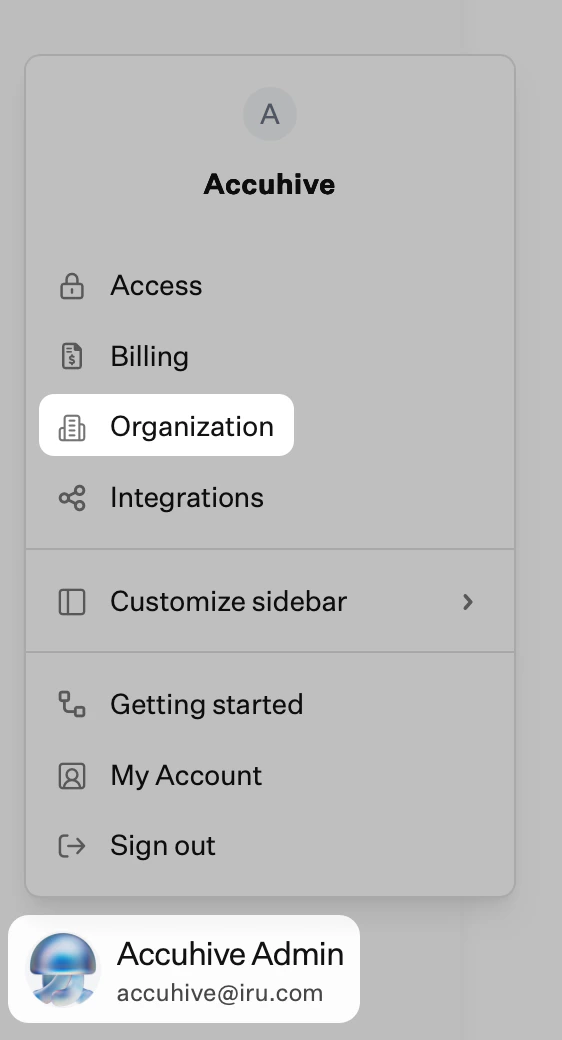
In the sidebar, select the [**Account Menu Button**](/en/iru/platform-overview/account-menu), then select **Organization**.
 ### Edit the Organization Profile
The **Organization Profile** describes your company and sets the name and logo for your tenant.
In the **Organization Profile** section at the top of the **Organization** page, select **Edit**.
Change any of the following fields:
* **Add company logo**: Upload your logo.
* **Company name**: The name of your organization.
* **Business description**: A short description of what your company does.
* **Industry** and **Business type**: Choose the options that describe your company.
* **Company size** and **Company language**: Choose your organization's size and primary language.
* **Has IT department**: Select **Yes** or **No**.
* **Security team size**: Select the size of your security team.
Select **Save changes** at the bottom right of the page.
#### Where Your People See the Name and Logo
Your company name and logo are your tenant's brand in Iru Identity. They tell your people they are signing in to the right place, which also helps them spot look-alike phishing pages.
* **Sign-in screen**: Your logo and company name appear while users authenticate. See [The sign-in experience](/en/identity/authentication/sign-in-experience).
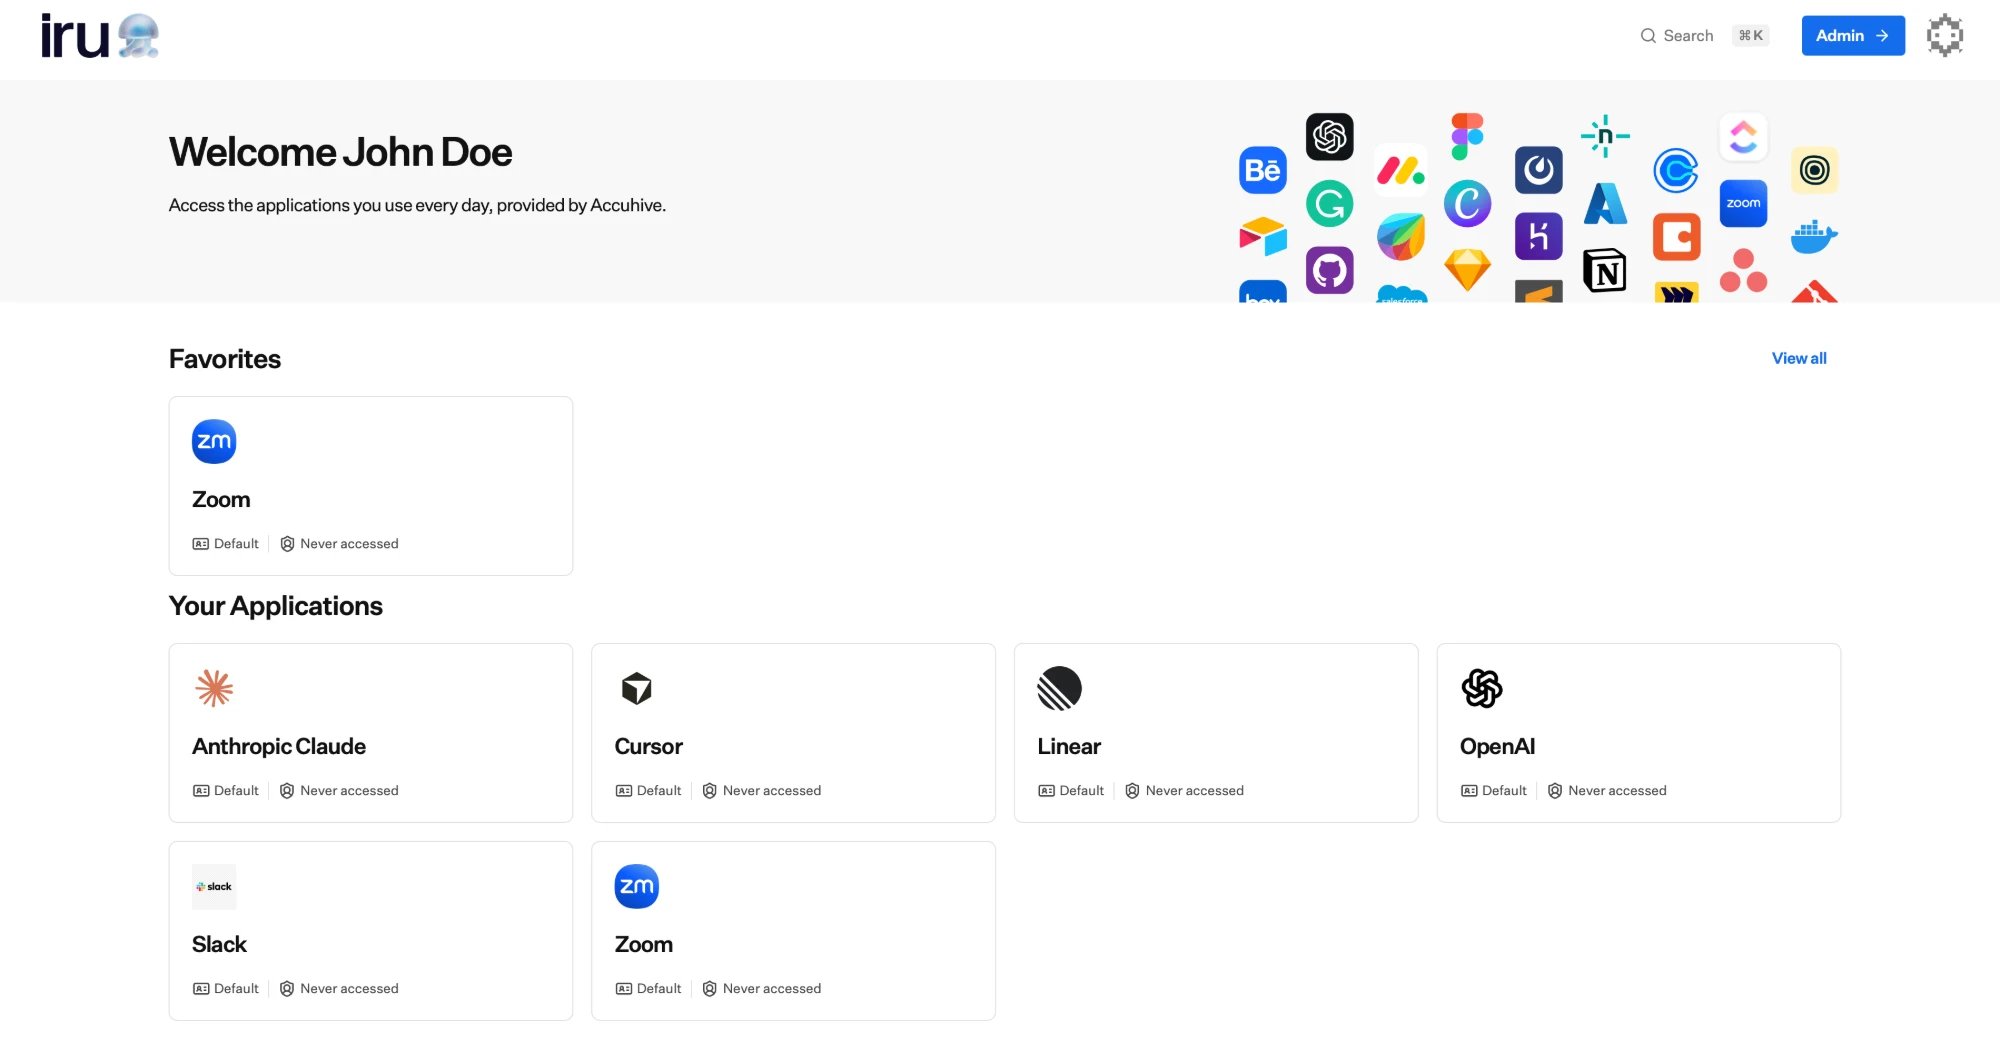
* **App dashboard**: Iru welcomes each user and notes that their applications are provided by your organization, using your company name. See [End-user experience](/en/identity/administration/end-user-experience).
### Edit the Organization Profile
The **Organization Profile** describes your company and sets the name and logo for your tenant.
In the **Organization Profile** section at the top of the **Organization** page, select **Edit**.
Change any of the following fields:
* **Add company logo**: Upload your logo.
* **Company name**: The name of your organization.
* **Business description**: A short description of what your company does.
* **Industry** and **Business type**: Choose the options that describe your company.
* **Company size** and **Company language**: Choose your organization's size and primary language.
* **Has IT department**: Select **Yes** or **No**.
* **Security team size**: Select the size of your security team.
Select **Save changes** at the bottom right of the page.
#### Where Your People See the Name and Logo
Your company name and logo are your tenant's brand in Iru Identity. They tell your people they are signing in to the right place, which also helps them spot look-alike phishing pages.
* **Sign-in screen**: Your logo and company name appear while users authenticate. See [The sign-in experience](/en/identity/authentication/sign-in-experience).
* **App dashboard**: Iru welcomes each user and notes that their applications are provided by your organization, using your company name. See [End-user experience](/en/identity/administration/end-user-experience).
 Self Service uses its own logo, header, and subheader. Customize those in [Configuring Branding and Preview](/en/endpoint/settings/self-service/self-service-settings#configuring-branding-and-preview).
Use the company name your people already recognize, such as the name on your internal portal, so the connection to your organization is clear at sign-in.
### Endpoint Tab
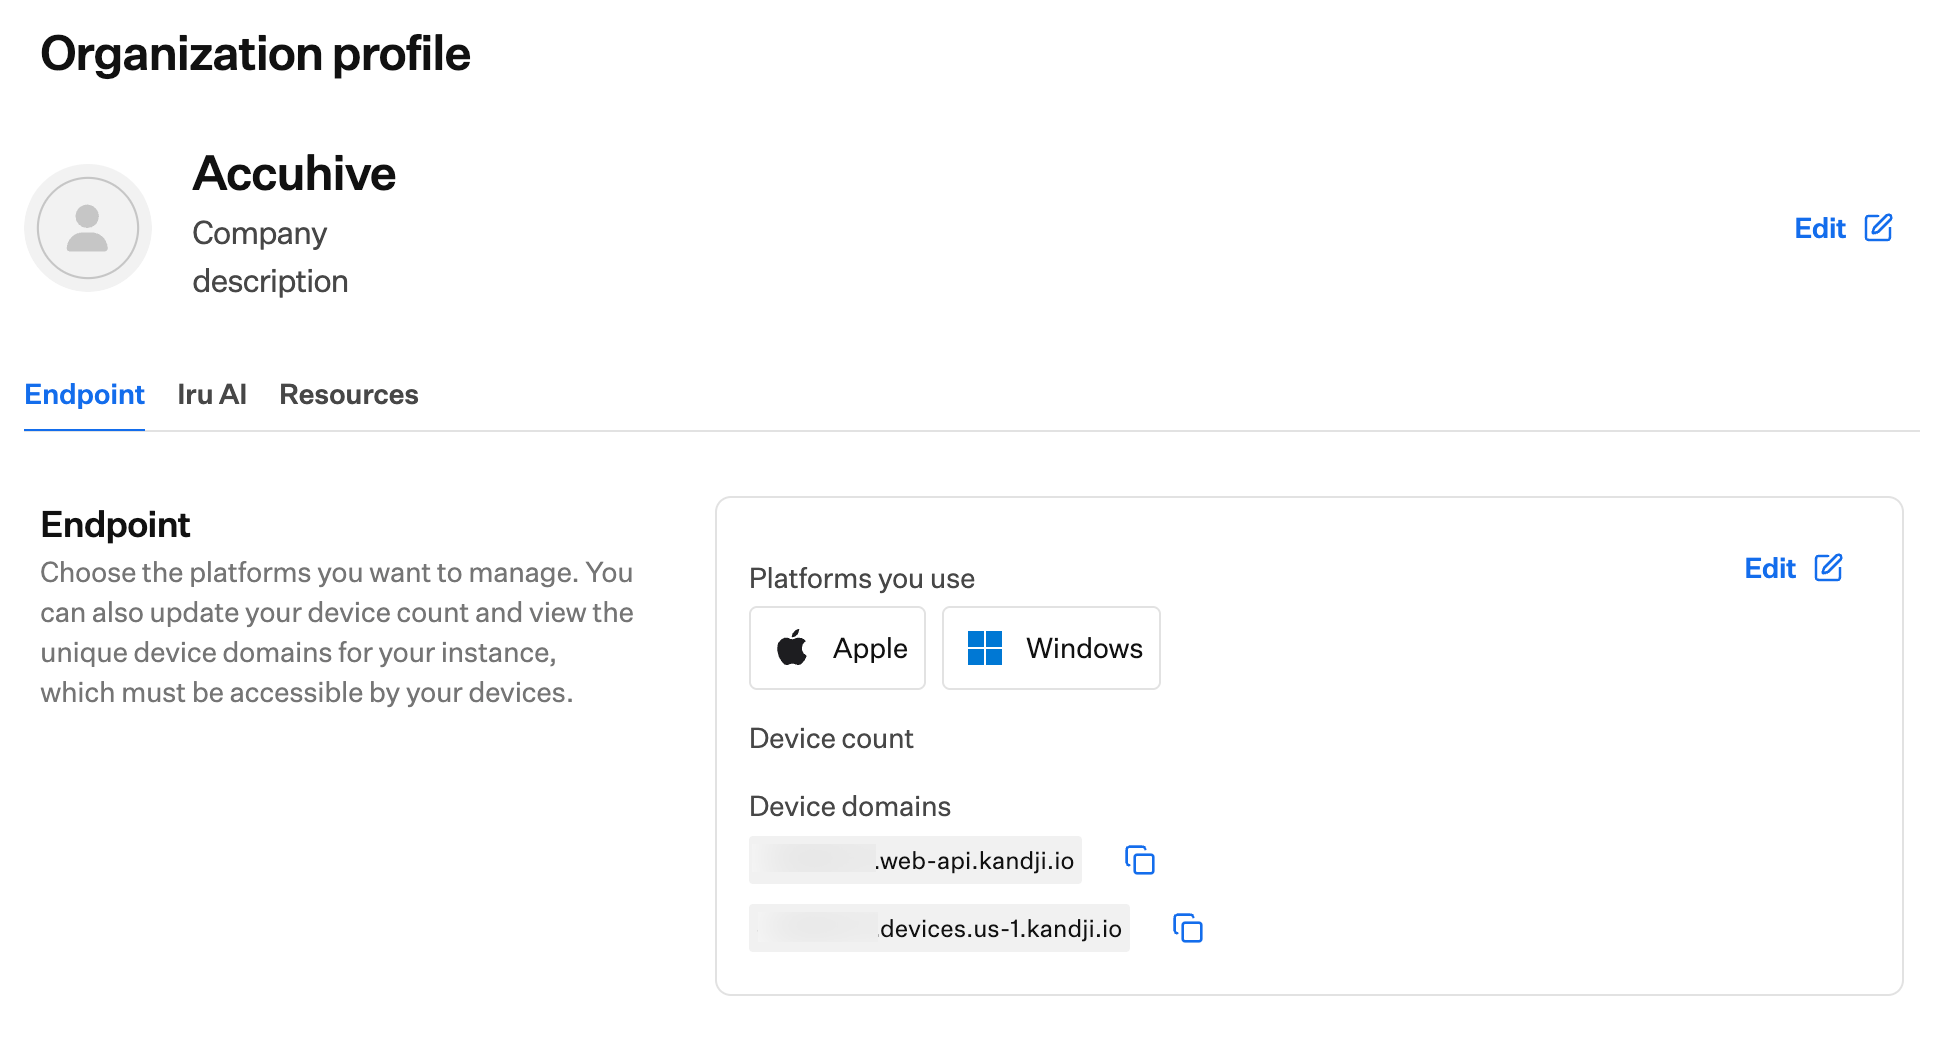
The **Endpoint** tab shows the platforms your tenant manages, your device count, and your device domains. Devices must be able to reach both device domains. Use the copy button next to each domain when you configure firewalls or proxies. See [Using Iru on Enterprise Networks](/en/iru/requirements/using-iru-on-enterprise-networks).
Self Service uses its own logo, header, and subheader. Customize those in [Configuring Branding and Preview](/en/endpoint/settings/self-service/self-service-settings#configuring-branding-and-preview).
Use the company name your people already recognize, such as the name on your internal portal, so the connection to your organization is clear at sign-in.
### Endpoint Tab
The **Endpoint** tab shows the platforms your tenant manages, your device count, and your device domains. Devices must be able to reach both device domains. Use the copy button next to each domain when you configure firewalls or proxies. See [Using Iru on Enterprise Networks](/en/iru/requirements/using-iru-on-enterprise-networks).
 #### Change Platforms and Device Count
Only the **Account Owner** can change which platforms your tenant uses. Other team members see a notice naming the Account Owner, and **Edit** is unavailable. See [Team Member Role Permissions](/en/iru/access/team-member-role-permissions).
On the **Organization** page, select the **Endpoint** tab.
In the **Endpoint** section, select **Edit**.
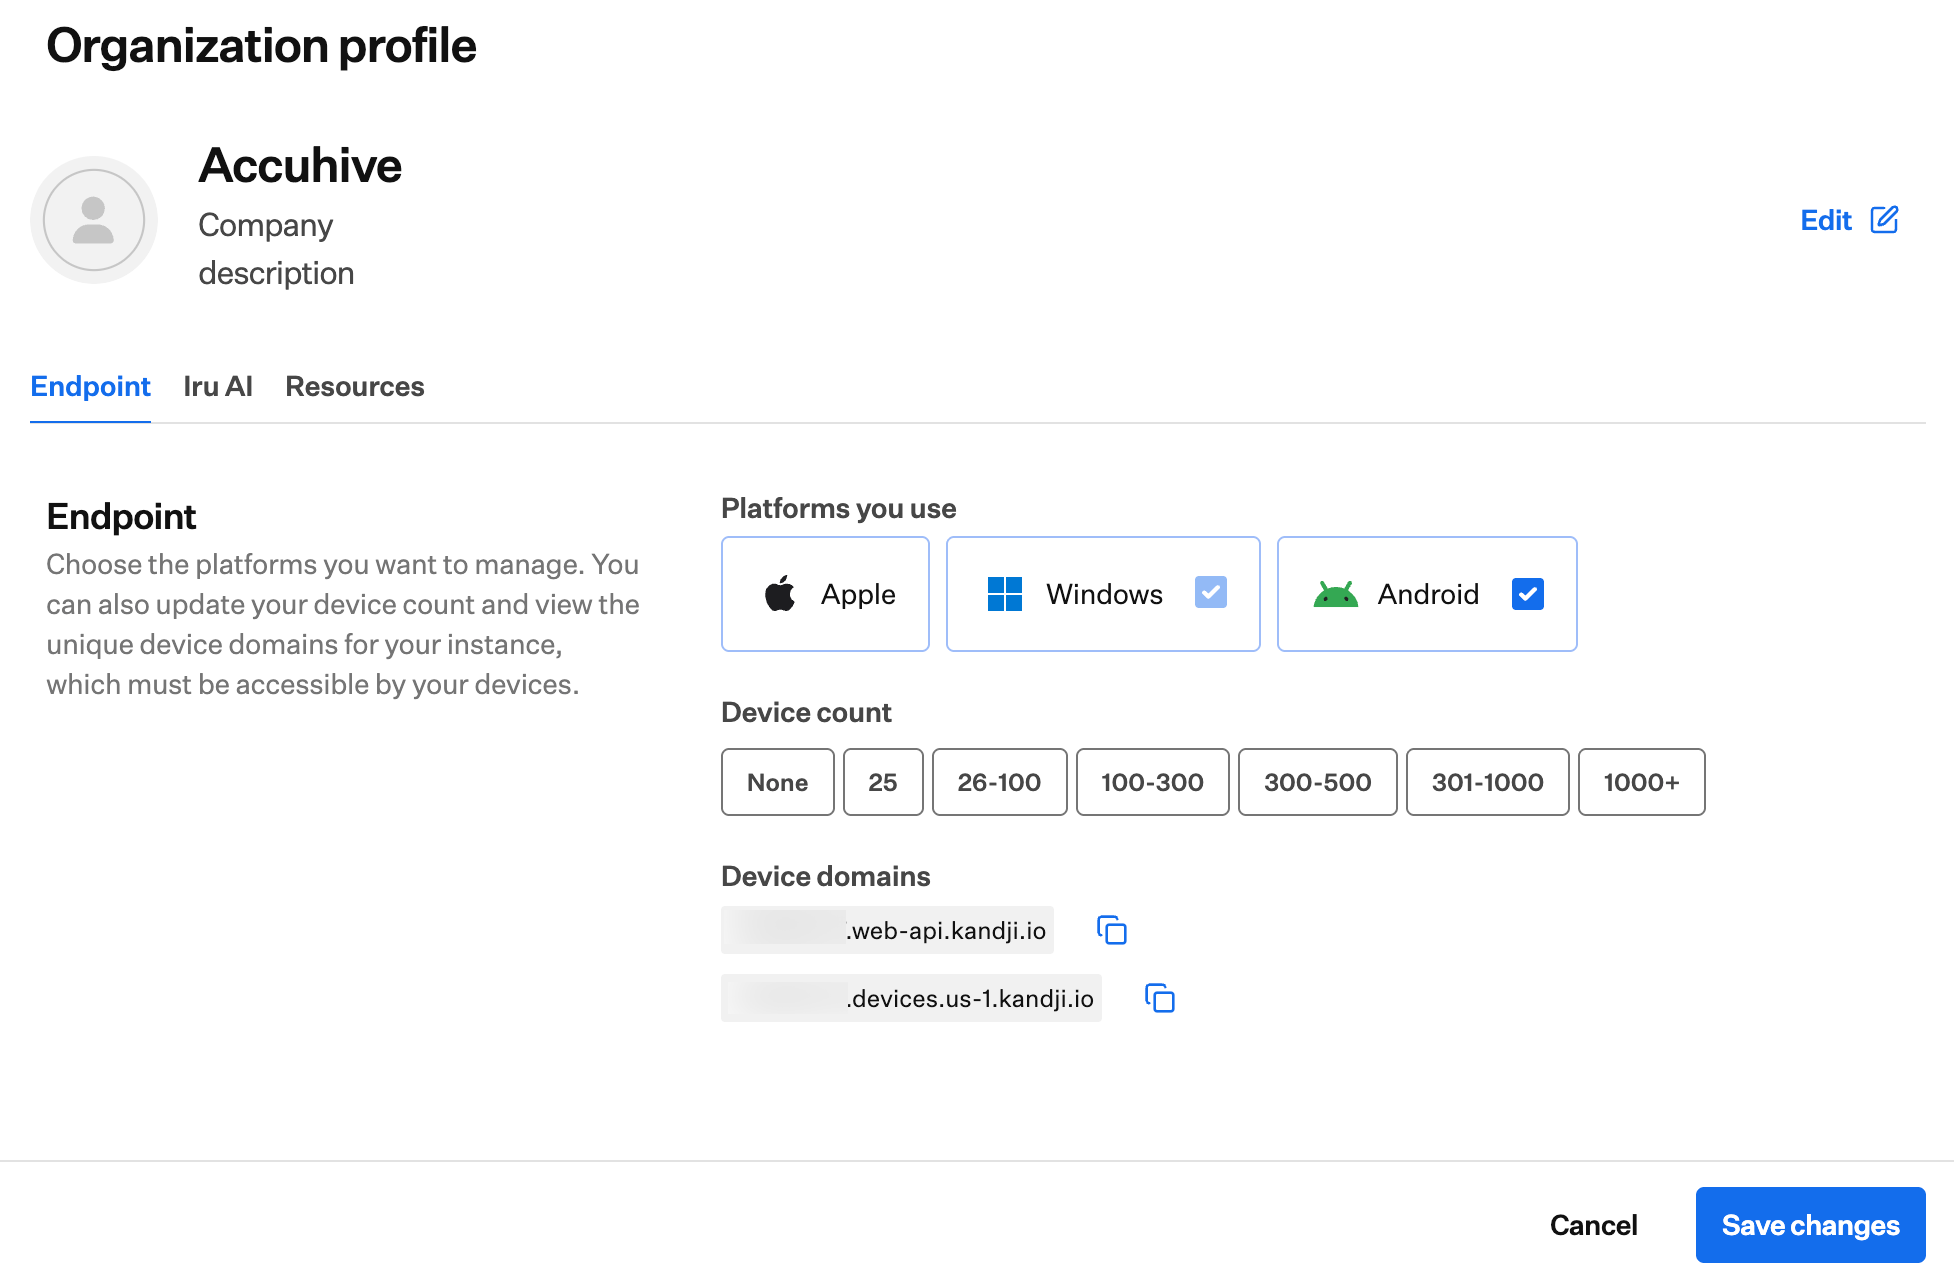
Under **Platforms you use**, select **Windows** or **Android** to turn a platform on or off. Under **Device count**, select the range that matches your fleet.
#### Change Platforms and Device Count
Only the **Account Owner** can change which platforms your tenant uses. Other team members see a notice naming the Account Owner, and **Edit** is unavailable. See [Team Member Role Permissions](/en/iru/access/team-member-role-permissions).
On the **Organization** page, select the **Endpoint** tab.
In the **Endpoint** section, select **Edit**.
Under **Platforms you use**, select **Windows** or **Android** to turn a platform on or off. Under **Device count**, select the range that matches your fleet.
 Select **Save changes** at the bottom right of the page.
After you turn on a platform, finish setting it up. See [Windows Setup](/en/endpoint/getting-started/platform-setup/windows-setup) and [Android Setup](/en/endpoint/getting-started/platform-setup/android-setup).
#### When a Platform Can't Be Turned Off
Iru keeps a platform on while it is still in use. Hover over a platform that can't be changed to see why.
* **Windows**: Can't be turned off while Windows devices are enrolled. Remove your Windows devices first.
* **Android**: Can't be turned off while Android devices are enrolled and the Android Enterprise integration is connected. Remove your Android devices and [disconnect Android Enterprise](/en/endpoint/getting-started/platform-setup/android-setup#disconnecting-android-enterprise) first.
### Iru AI Tab
Only the **Account Owner** can turn Iru AI on or off for the whole tenant. On the **Iru AI** tab, use the **Iru AI** toggle under **Iru AI enablement**. For what changes when Iru AI is off, see [Managing Iru AI Access](/en/iru/iru-ai/iru-ai-overview#managing-iru-ai-access).
### Resources Tab
The **Resources** tab is where you send ideas to the Iru team. Share a [feature request](/en/endpoint/settings/submit-feature-requests-and-ideas) or request a [new Auto App](/en/endpoint/settings/submit-an-auto-app-request).
Select **Save changes** at the bottom right of the page.
After you turn on a platform, finish setting it up. See [Windows Setup](/en/endpoint/getting-started/platform-setup/windows-setup) and [Android Setup](/en/endpoint/getting-started/platform-setup/android-setup).
#### When a Platform Can't Be Turned Off
Iru keeps a platform on while it is still in use. Hover over a platform that can't be changed to see why.
* **Windows**: Can't be turned off while Windows devices are enrolled. Remove your Windows devices first.
* **Android**: Can't be turned off while Android devices are enrolled and the Android Enterprise integration is connected. Remove your Android devices and [disconnect Android Enterprise](/en/endpoint/getting-started/platform-setup/android-setup#disconnecting-android-enterprise) first.
### Iru AI Tab
Only the **Account Owner** can turn Iru AI on or off for the whole tenant. On the **Iru AI** tab, use the **Iru AI** toggle under **Iru AI enablement**. For what changes when Iru AI is off, see [Managing Iru AI Access](/en/iru/iru-ai/iru-ai-overview#managing-iru-ai-access).
### Resources Tab
The **Resources** tab is where you send ideas to the Iru team. Share a [feature request](/en/endpoint/settings/submit-feature-requests-and-ideas) or request a [new Auto App](/en/endpoint/settings/submit-an-auto-app-request).
 ### Related Articles
Reach Organization and other tenant-wide settings.
See how your name and logo appear as your users authenticate.
See the app dashboard where your people launch their apps.
Customize the logo, header, and subheader in Self Service.
Check which roles can change Organization settings.
### Related Articles
Reach Organization and other tenant-wide settings.
See how your name and logo appear as your users authenticate.
See the app dashboard where your people launch their apps.
Customize the logo, header, and subheader in Self Service.
Check which roles can change Organization settings.