> ## Documentation Index
> Fetch the complete documentation index at: https://docs.iru.com/llms.txt
> Use this file to discover all available pages before exploring further.
# Manage authenticators
> Compare Iru Access to a standalone passkey, add another device or a backup authenticator, and manage the authenticators you use to sign in to Iru Identity.
You prove it's you when you sign in with an **authenticator**; no password. Both
kinds Iru uses are unlocked by your fingerprint, face, or screen lock, and because
the secret never leaves your device, neither can be phished or reused on a fake
sign-in page.
## Iru Access vs. a standalone passkey
Iru offers two kinds of authenticator, and you may have both. They appear together
in your in-app **Authenticators** list.
| Authenticator | What it is | In the app it's labeled |
| -------------- | ----------------------------------------------------------------------------------------------- | -------------------------------------------------------------------------------- |
| **Iru Access** | The Iru Access app registered to a specific device. Each device is its own authenticator. | "Iru Access on This Device" (this one) or "Iru Access" (another of your devices) |
| **Passkey** | A standalone passkey you created in your **browser or operating system** and also use with Iru. | "Passkey" |
You **create** a standalone passkey in your browser or operating system, not
inside Iru Access - creating new passkeys through the app isn't supported. Iru
Access can *use* a passkey you already have to set itself up on a device (below).
## Add another device or a backup
Install Iru Access on the new device, open it, and choose **"Register with
Existing Authenticator."** Then either enter the **6-digit code** shown on your
existing device's **"Add New Device"** screen (the existing device approves
with its biometric over Bluetooth), or confirm with a passkey you already have.
In Iru Access choose **"Register with Existing Authenticator" → "A Passkey I
use with Iru, but not Iru Access,"** enter your **Iru domain** (for example
`yourcompany.iru.com`), and confirm with the passkey when prompted by your
browser or device.
**On Windows**, the entry point is labeled **"Register with existing passkey"**
and asks for your **Iru domain** (for example `yourcompany.iru.com`). Once the
device is registered, turn on its passkey plugin once under **Settings ▸
Accounts ▸ Passkeys ▸ Advanced options** so your browser can use Iru Access to
sign in.
**On macOS**, if a passkey does not appear when you sign in using a browser, see
[Accessing your apps](/en/identity/end-user/accessing-your-apps#find-and-open-an-app).
## Manage your authenticators
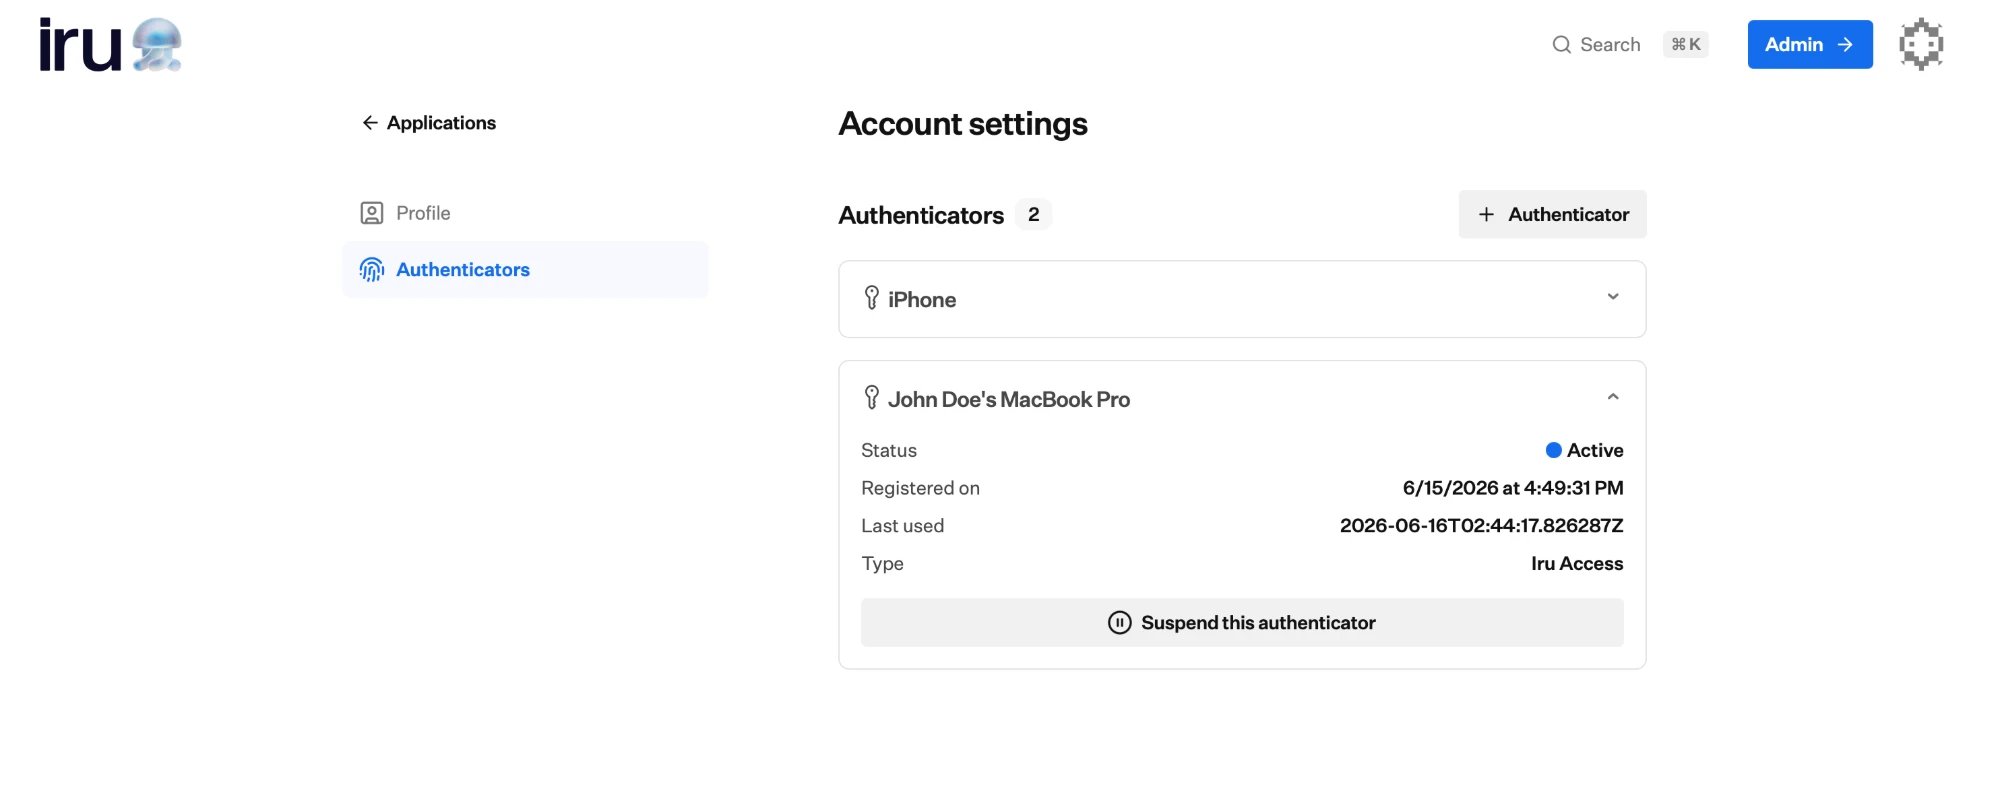
See everything registered to you in the **Iru Access** app, or in your
**Account settings** on the web (open **Account** from the avatar menu on your app
dashboard, then **Authenticators**), with when each was added and last used. From
there you can:
* **Suspend** an authenticator to block it temporarily, **Activate** it again, or
**Delete** one you no longer use.
* You can't suspend or delete the authenticator securing your **current session** -
a safeguard against locking yourself out.
 ## If you lose a device
There's no self-service way to recover access on your own. If you still have
another registered device, set up your replacement from it using the steps above.
If a lost device was your only authenticator, contact your administrator. They can
send you a new invitation so you can set up a replacement device. See
[Installing Iru Access](/en/identity/end-user/installing-iru-access) to register again.
For browser sign-in help, including the macOS passkey prompt, see
[Accessing your apps](/en/identity/end-user/accessing-your-apps#find-and-open-an-app).
## Where to go next
Set up the app that holds your credential.
Open your apps once you're set up.
Overview of passkeys, Iru Access, and how sign-in works
## If you lose a device
There's no self-service way to recover access on your own. If you still have
another registered device, set up your replacement from it using the steps above.
If a lost device was your only authenticator, contact your administrator. They can
send you a new invitation so you can set up a replacement device. See
[Installing Iru Access](/en/identity/end-user/installing-iru-access) to register again.
For browser sign-in help, including the macOS passkey prompt, see
[Accessing your apps](/en/identity/end-user/accessing-your-apps#find-and-open-an-app).
## Where to go next
Set up the app that holds your credential.
Open your apps once you're set up.
Overview of passkeys, Iru Access, and how sign-in works