> ## Documentation Index
> Fetch the complete documentation index at: https://docs.iru.com/llms.txt
> Use this file to discover all available pages before exploring further.
# Installing Iru Access
> Install and set up the Iru Access app on your Mac, iPhone, iPad, or PC so you can sign in quickly with a passkey and keep your device trusted for access.
**Iru Access** is the app you use to sign in to your organization's applications.
It holds a device-bound sign-in credential securely on your device and, on a
managed device, confirms the device is healthy so you can reach what you need.
Your IT team may deploy Iru Access to your device for you. If it's already
installed, skip to [registering](#register-your-device). Otherwise, start from
the invitation your organization sends you.
## Install Iru Access
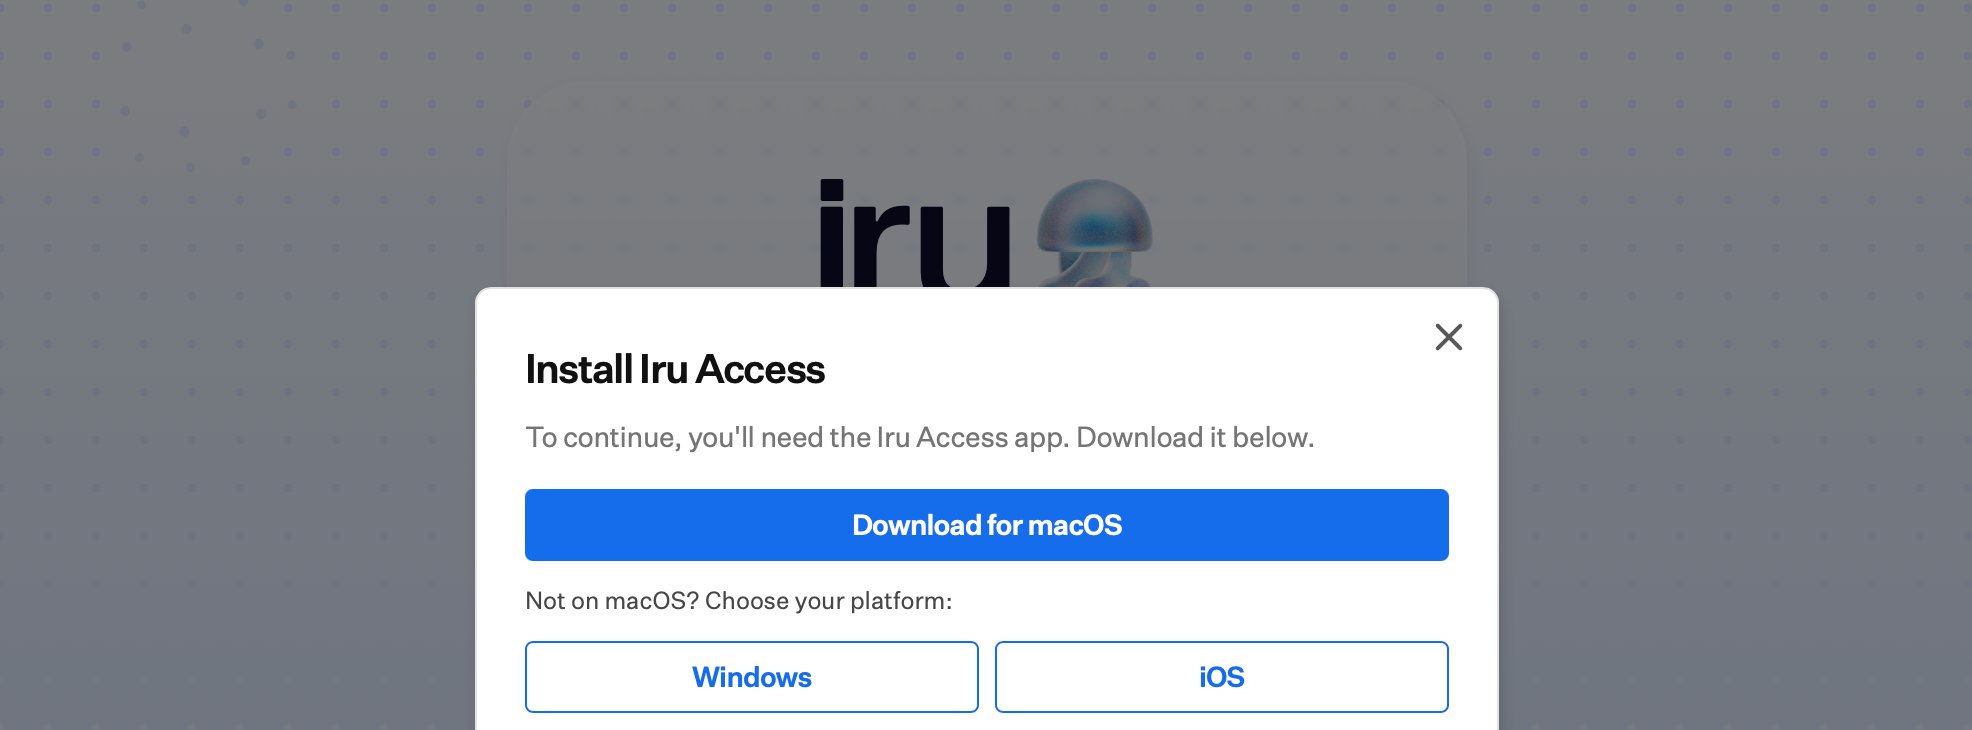
If the app isn't already on your device, install it from the **link in your
invitation** or your organization's **Iru Access download page** (you can scan the
QR code shown in the app's *Add New Device* screen or open the link). On iPhone
and iPad, Iru Access is also available on the App Store.
 ## Register your device
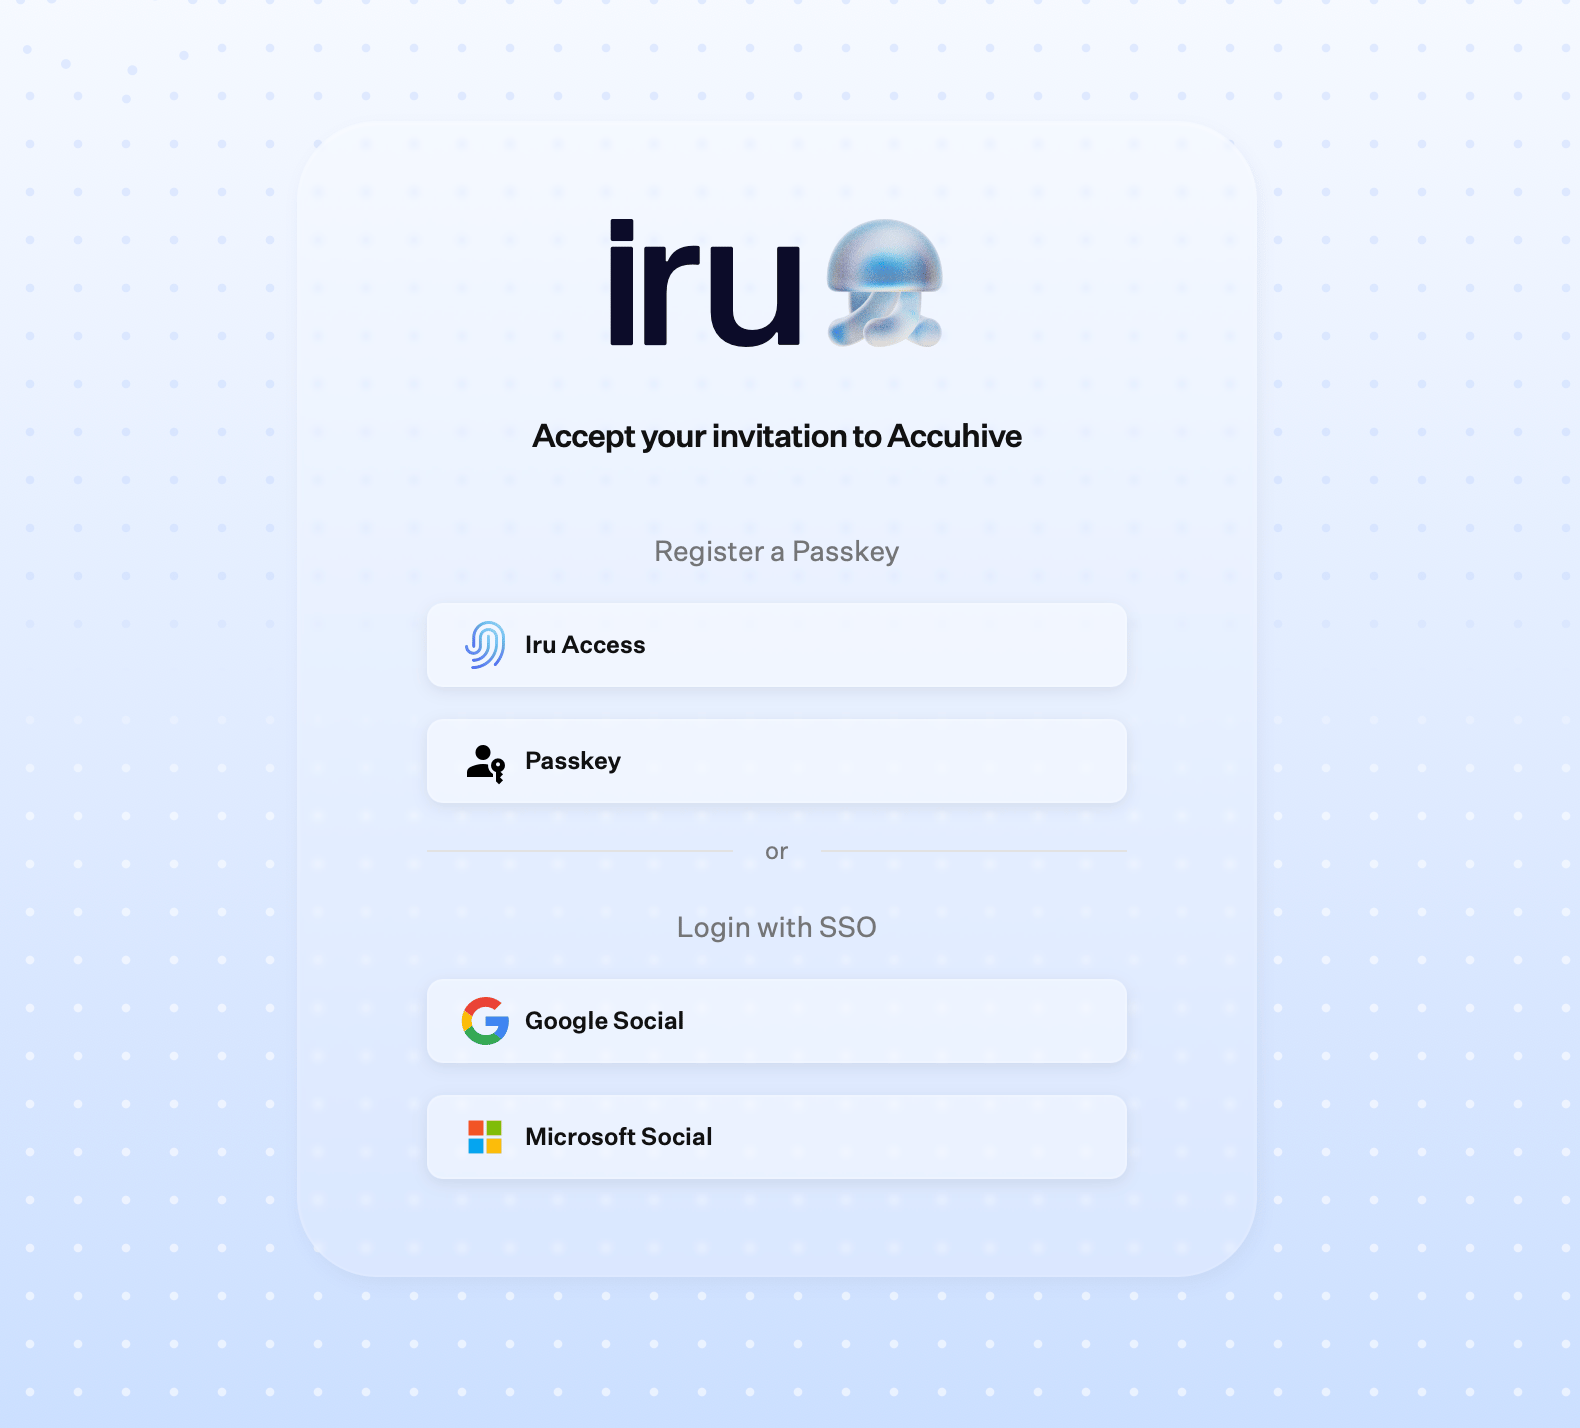
Opening your invitation brings you to a page where you choose how to register.
Choosing **Iru Access** launches the app and walks you through registration; you
can also register a standalone **passkey** or continue with a connected provider.
For how standalone passkeys differ from Iru Access, see
[Manage authenticators](/en/identity/end-user/manage-authenticators).
## Register your device
Opening your invitation brings you to a page where you choose how to register.
Choosing **Iru Access** launches the app and walks you through registration; you
can also register a standalone **passkey** or continue with a connected provider.
For how standalone passkeys differ from Iru Access, see
[Manage authenticators](/en/identity/end-user/manage-authenticators).
 The Iru Access screens differ slightly by platform; follow the tab for your
device.
The link opens Iru Access on your device. If the link has expired you'll
see **"Registration Failed"**; ask your administrator for a new one.
Iru greets you with **"Welcome, \[your name]"** and shows your
**Username** and **Iru server**. Check they're right and choose
**Continue**.
On the **"Finalize Registration"** screen, confirm with your device's
biometric or screen lock (**Touch ID** on a Mac, **Face ID** on an
iPhone, or your device passcode/password. This secures your credential to
the device.
You'll see **"Registration Complete"**. Choose **Done**; on a Mac you
land on your Home screen, on iPhone/iPad on your Account screen. You're
ready to [open your apps](/en/identity/end-user/accessing-your-apps).
Iru Access on Windows requires **Windows 11 24H2 or 25H2**, and
uses **Windows Hello** (your PIN, fingerprint, or face) to protect your
credential.
The link launches **"Iru Access Registration"** and briefly shows
**"Reading registration info"** while it loads your invitation. If the
link has expired, ask your administrator for a new one.
Iru greets you with **"Welcome, \[your name]!"** and shows your
**Username** and **Iru server**. Check they're right and choose
**Continue**.
On **"Finalizing registration"**, **authenticate with Windows Hello**
when prompted. This secures your credential to the device.
You'll see **"Registration Completed"** and land on the **Iru Access Home
Screen**.
So your browser can use Iru Access when you sign in, enable it once under
**Settings ▸ Accounts ▸ Passkeys ▸ Advanced options** and turn on **Iru
Access**. You're ready to
[open your apps](/en/identity/end-user/accessing-your-apps).
**Apple Vision Pro** is supported: Iru Access runs there as the iPad app, so
follow the **iPhone & iPad** steps above.
Set up more than one device (say your laptop and your phone) so losing one
doesn't lock you out. See
[Manage authenticators](/en/identity/end-user/manage-authenticators) for
adding another device or a backup.
## Add another account
Iru Access can hold more than one account at once, handy if you have a second
Iru identity, such as a separate administrator account or an account at another
organization.
The Iru Access screens differ slightly by platform; follow the tab for your
device.
The link opens Iru Access on your device. If the link has expired you'll
see **"Registration Failed"**; ask your administrator for a new one.
Iru greets you with **"Welcome, \[your name]"** and shows your
**Username** and **Iru server**. Check they're right and choose
**Continue**.
On the **"Finalize Registration"** screen, confirm with your device's
biometric or screen lock (**Touch ID** on a Mac, **Face ID** on an
iPhone, or your device passcode/password. This secures your credential to
the device.
You'll see **"Registration Complete"**. Choose **Done**; on a Mac you
land on your Home screen, on iPhone/iPad on your Account screen. You're
ready to [open your apps](/en/identity/end-user/accessing-your-apps).
Iru Access on Windows requires **Windows 11 24H2 or 25H2**, and
uses **Windows Hello** (your PIN, fingerprint, or face) to protect your
credential.
The link launches **"Iru Access Registration"** and briefly shows
**"Reading registration info"** while it loads your invitation. If the
link has expired, ask your administrator for a new one.
Iru greets you with **"Welcome, \[your name]!"** and shows your
**Username** and **Iru server**. Check they're right and choose
**Continue**.
On **"Finalizing registration"**, **authenticate with Windows Hello**
when prompted. This secures your credential to the device.
You'll see **"Registration Completed"** and land on the **Iru Access Home
Screen**.
So your browser can use Iru Access when you sign in, enable it once under
**Settings ▸ Accounts ▸ Passkeys ▸ Advanced options** and turn on **Iru
Access**. You're ready to
[open your apps](/en/identity/end-user/accessing-your-apps).
**Apple Vision Pro** is supported: Iru Access runs there as the iPad app, so
follow the **iPhone & iPad** steps above.
Set up more than one device (say your laptop and your phone) so losing one
doesn't lock you out. See
[Manage authenticators](/en/identity/end-user/manage-authenticators) for
adding another device or a backup.
## Add another account
Iru Access can hold more than one account at once, handy if you have a second
Iru identity, such as a separate administrator account or an account at another
organization.
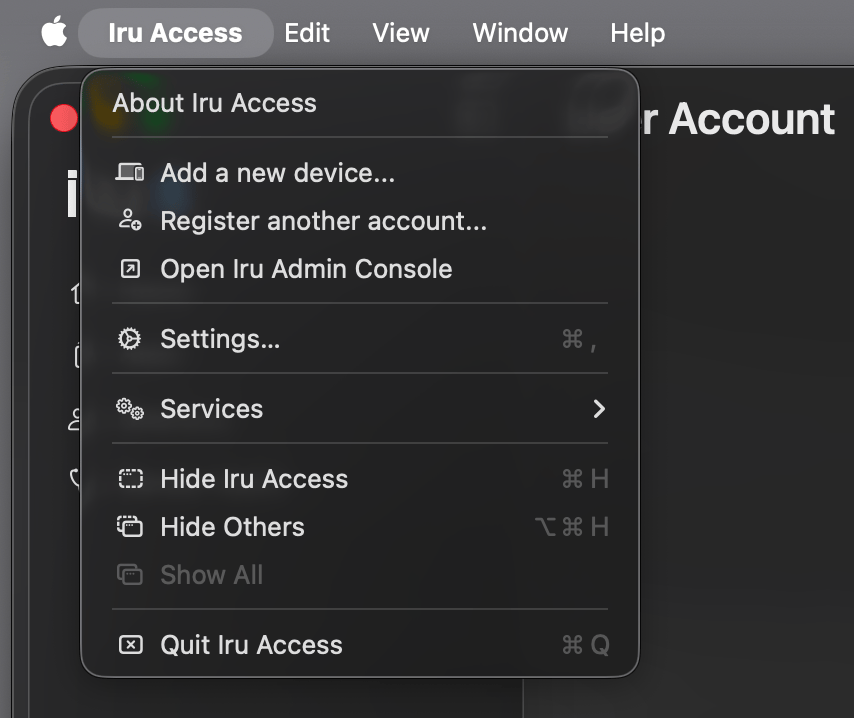 On a Mac, open the **Iru Access** menu in the menu bar at the top of the screen:
* **Register another account…** begins a fresh registration for an additional
account; finish it from that account's invitation, exactly as you did the
first time.
* **Add a new device…** registers this Mac against an account you already use on
another device; see
[Manage authenticators](/en/identity/end-user/manage-authenticators).
Each account you register stays available in Iru Access, so you can keep more
than one identity set up at the same time.
## Where to go next
Open your assigned apps once Iru Access is set up.
Add another device or a standalone passkey, and manage what you have.
What Iru Access shares with your organization, and what stays private.
On a Mac, open the **Iru Access** menu in the menu bar at the top of the screen:
* **Register another account…** begins a fresh registration for an additional
account; finish it from that account's invitation, exactly as you did the
first time.
* **Add a new device…** registers this Mac against an account you already use on
another device; see
[Manage authenticators](/en/identity/end-user/manage-authenticators).
Each account you register stays available in Iru Access, so you can keep more
than one identity set up at the same time.
## Where to go next
Open your assigned apps once Iru Access is set up.
Add another device or a standalone passkey, and manage what you have.
What Iru Access shares with your organization, and what stays private.