> ## Documentation Index
> Fetch the complete documentation index at: https://docs.iru.com/llms.txt
> Use this file to discover all available pages before exploring further.
# Configure multiple ADE tokens using the Iru Endpoint API
> Configure multiple Automated Device Enrollment tokens with the Iru Endpoint API to link several Apple Business or School Manager accounts to MDM servers.
**Apple Business Manager** is now **Apple Business**. **Apple School Manager** is unchanged. For more information, see [Introducing Apple Business](https://www.apple.com/newsroom/2026/03/introducing-apple-business-a-new-all-in-one-platform-for-businesses-of-all-sizes/) and [Apple Business Manager is now Apple Business](https://support.apple.com/guide/apple-business-manager/apple-business-manager-is-now-apple-business-axmd79d79dea/web).
### About Multiple ADE Token Configuration
Configuring multiple Automated Device Enrollment (ADE) tokens allows you to manage multiple Apple Business or Apple School Manager integrations simultaneously. This process uses the Iru Endpoint API to automate token creation and management, enabling bulk operations and improved token lifecycle management.
### How It Works
Multiple ADE token configuration works by using the Iru Endpoint API to create, manage, and monitor multiple ADE integrations. The process involves downloading public keys, creating integrations through API calls, and verifying successful token creation. This approach enables automated management of multiple Apple Business or Apple School Manager connections.
### Configuring an Iru Endpoint API token
If you do not feel confident in completing this process yourself, please reach out to [Iru Endpoint Support](/en/iru/iru-support/access-to-iru-support) for additional guidance.
It is highly recommended that you renew the current Automated Device Enrollment token in Iru Endpoint ([**Account Menu Button**](/en/iru/platform-overview/account-menu) → **Integrations** → Apple integrations → Automated Device Enrollment > Renew) before starting this process. Only the latest Automated Device Enrollment token that you add will be displayed on your Apple integrations page; renewing your existing token first makes the process easier.
Prepare an API token and store it in a secure location. You can read more about this in our [Iru Endpoint API](/en/endpoint/api/iru-api-overview) article.
#### Create or Modify an API Token
Create a new API token or modify an existing one with ADE permissions.
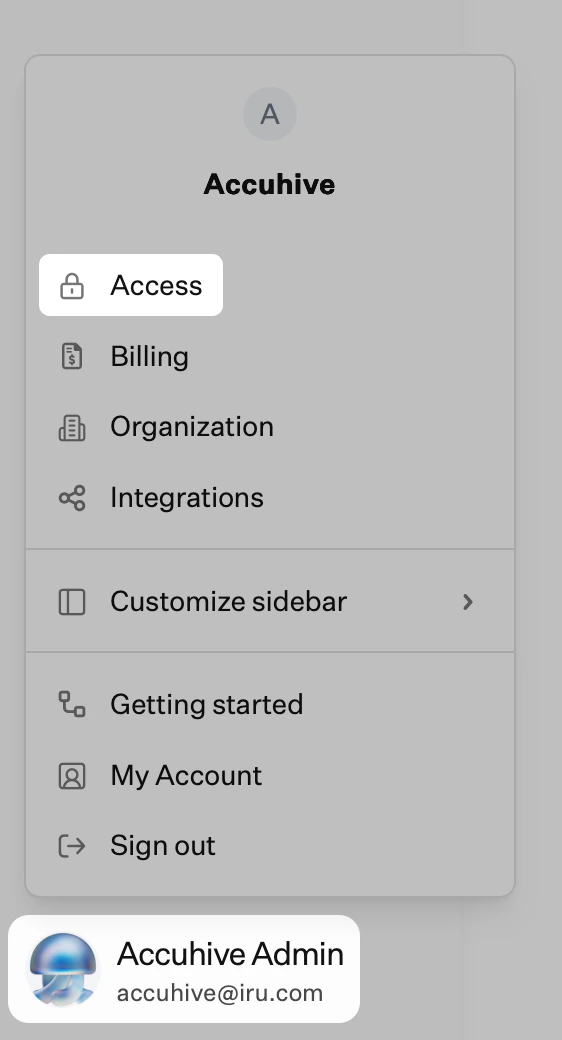
In Iru Endpoint, in the sidebar, click the [**Account Menu Button**](/en/iru/platform-overview/account-menu).
Click **Access** in the menu.
 Select the **API tokens** tab.
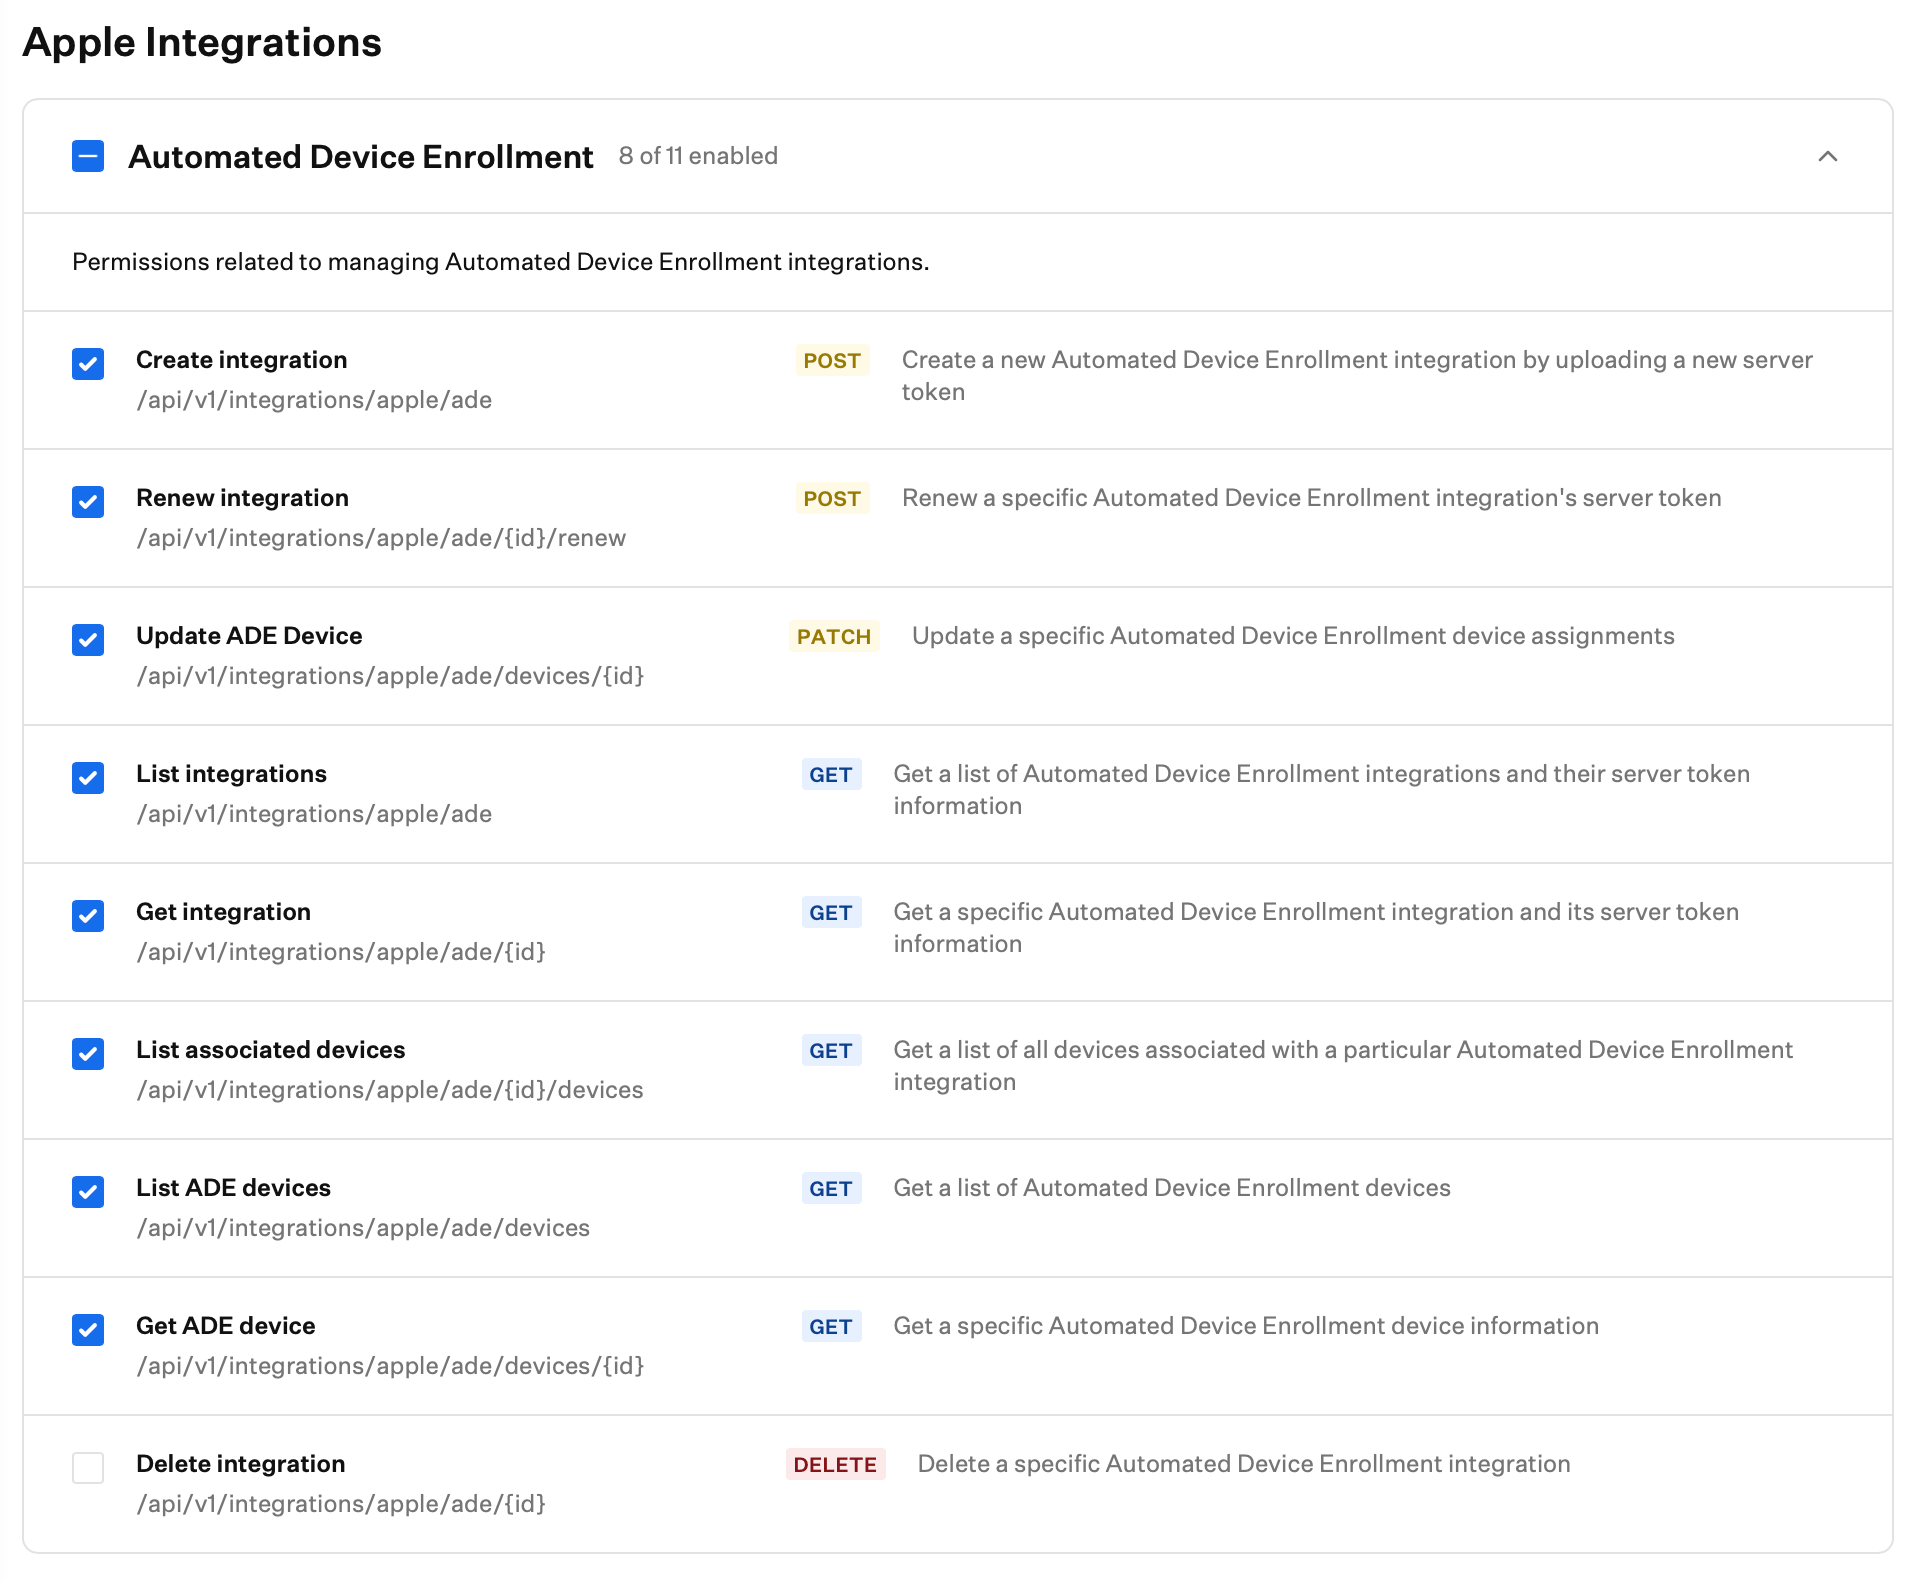
Create or modify the existing API Token to include all ADE-related permissions.
Select the **API tokens** tab.
Create or modify the existing API Token to include all ADE-related permissions.
 ### Preparing Postman
Most of the steps moving forward will be performed inside the Postman application on your device. You can skip this section if you already have Postman configured.
Check your Collection for the Automated Device Enrollment integrations folder.
Define your API URL if undefined in the Iru Endpoint API folder at the top of the collection.
Define the API Token in your Environment variables following our How to Set Up the Iru Endpoint API in Postman article.
### Downloading Public Key
Now that Postman is configured with the API Key and Iru Endpoint Subdomain, you can download the public key.
Select the Iru Endpoint API > Automated Device Enrollment Integrations > GET Download ADE public key in the Collection.
Click the Send button.
Copy the output and paste it into a text editor.
Set the file format to plain text.
Save the text file with the .pem certificate file extension.
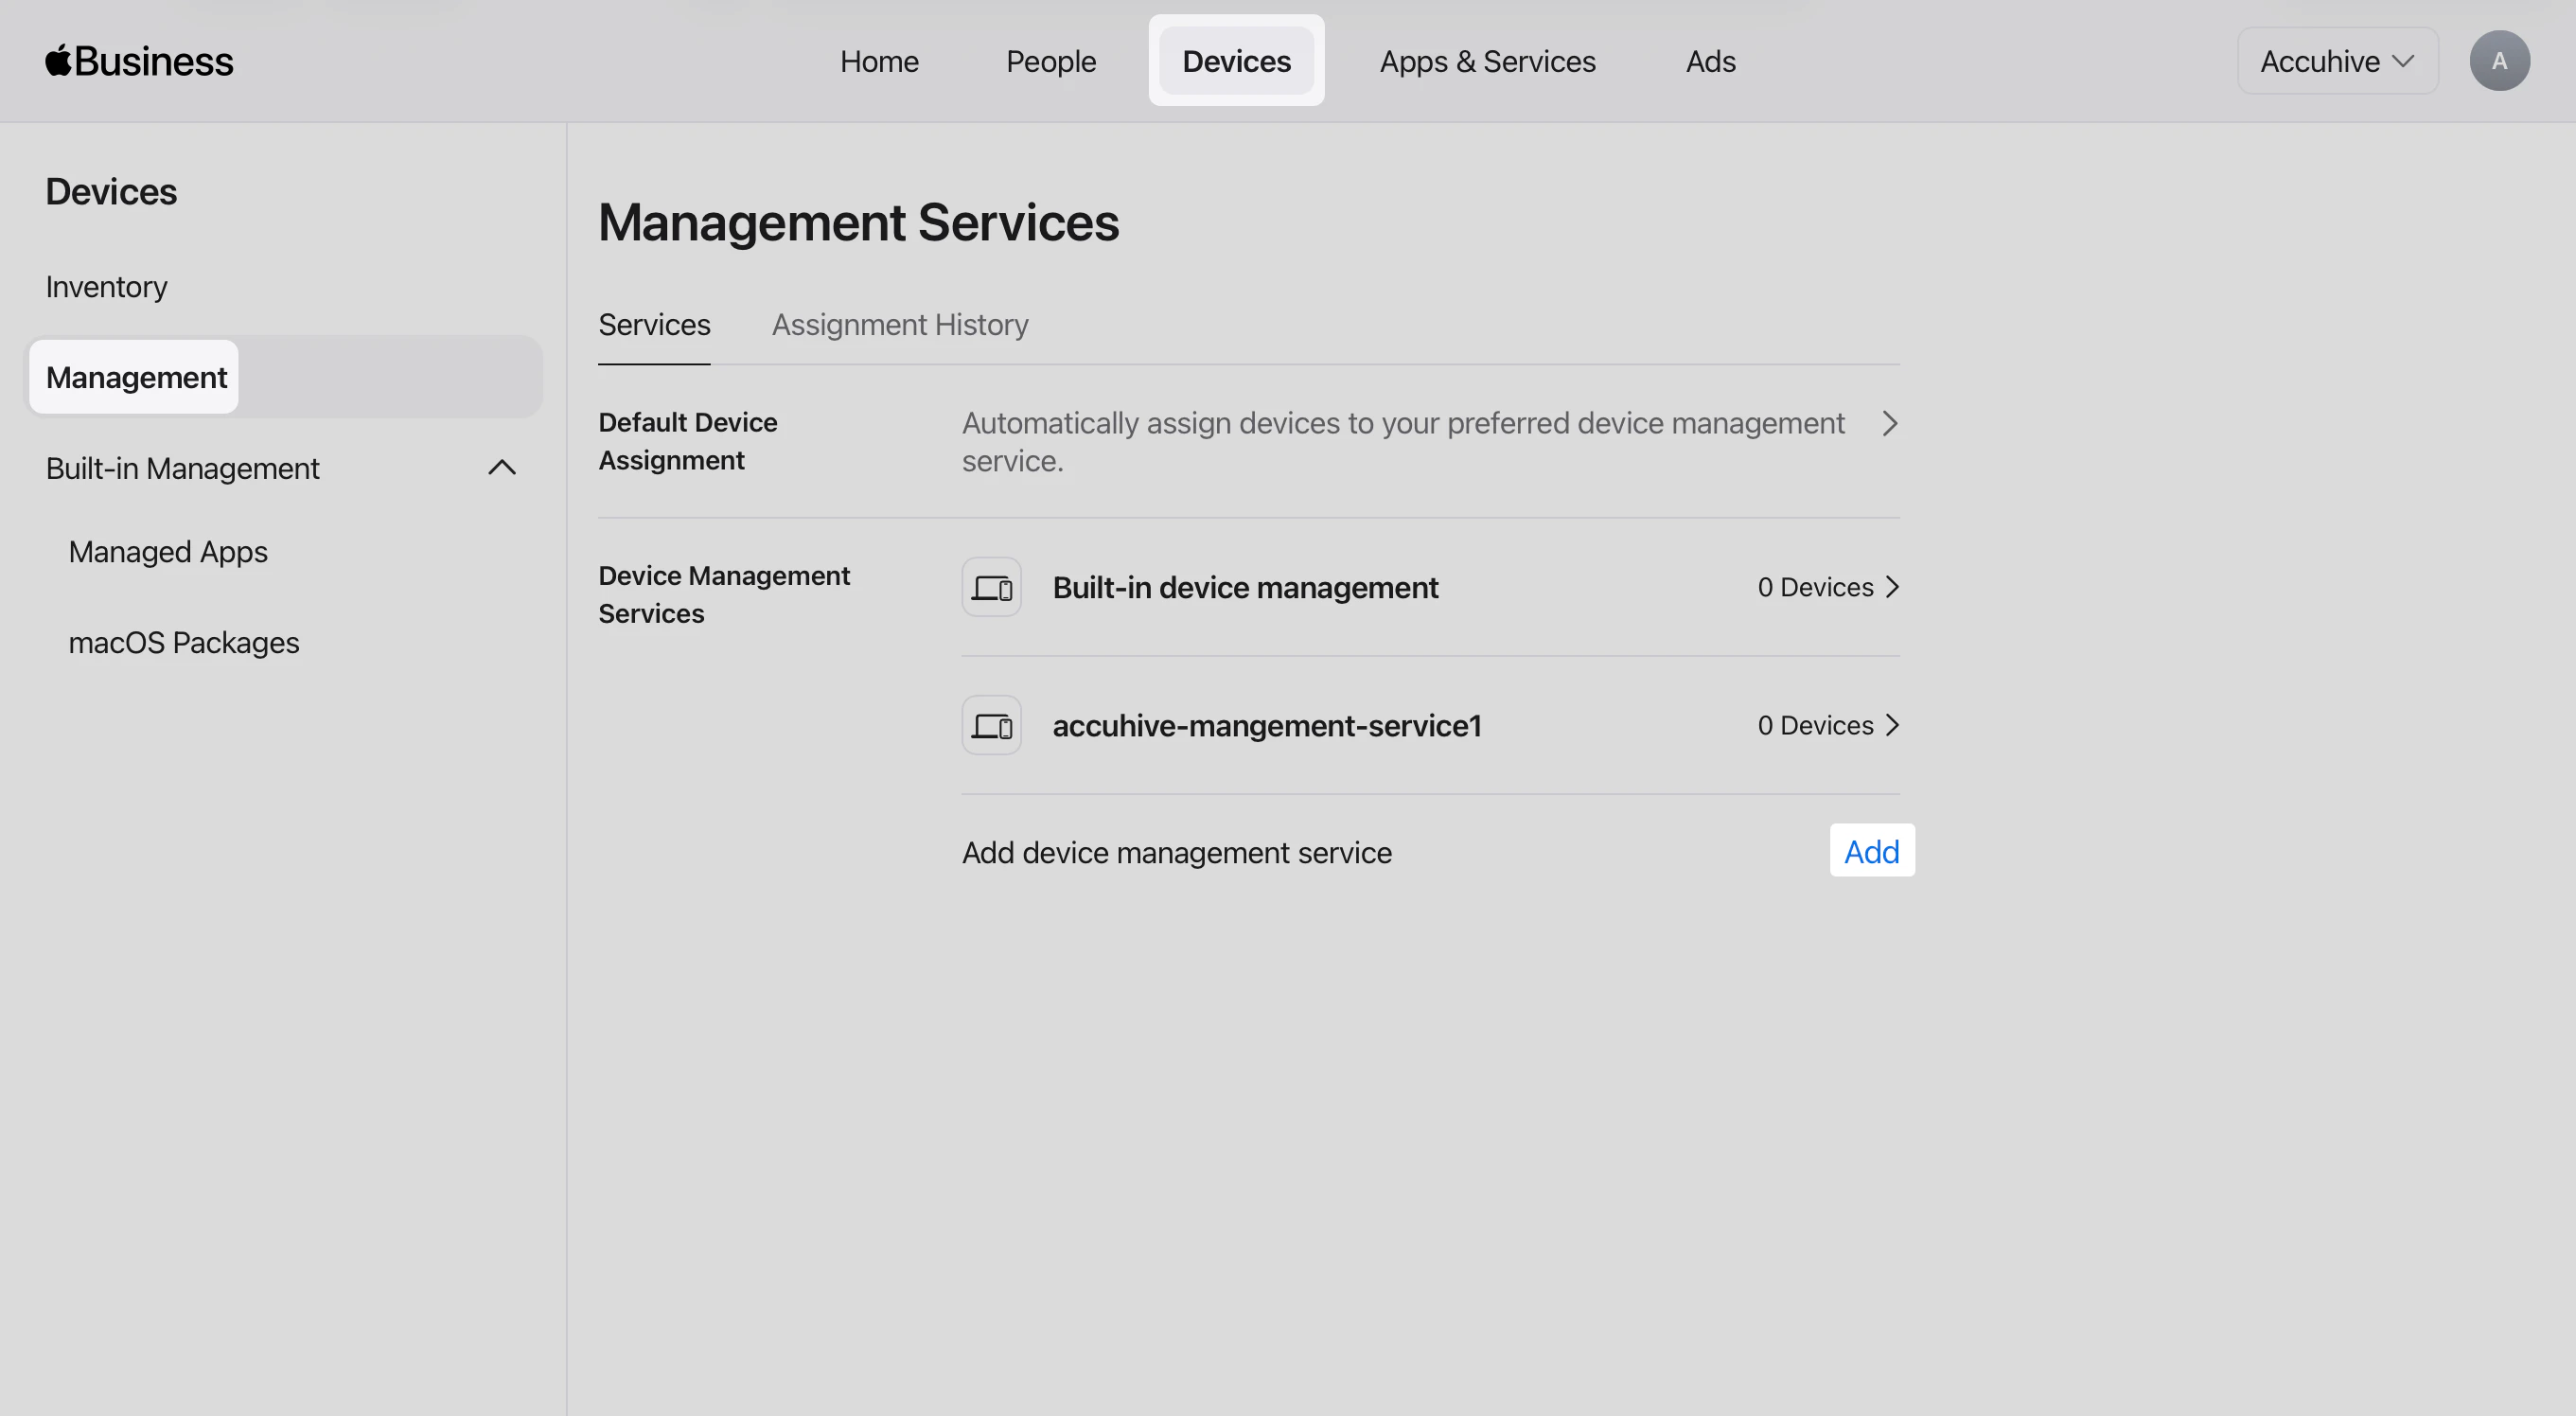
Sign in to [Apple Business](https://business.apple.com) or [Apple School Manager](https://school.apple.com) with a Managed Apple Account that can manage device management services.
Click the **Devices** tab at the top of the page.
In the left sidebar, click **Management**.
Scroll to the bottom of the **Management Services** list and click **Add** next to **Add device management service**.
### Preparing Postman
Most of the steps moving forward will be performed inside the Postman application on your device. You can skip this section if you already have Postman configured.
Check your Collection for the Automated Device Enrollment integrations folder.
Define your API URL if undefined in the Iru Endpoint API folder at the top of the collection.
Define the API Token in your Environment variables following our How to Set Up the Iru Endpoint API in Postman article.
### Downloading Public Key
Now that Postman is configured with the API Key and Iru Endpoint Subdomain, you can download the public key.
Select the Iru Endpoint API > Automated Device Enrollment Integrations > GET Download ADE public key in the Collection.
Click the Send button.
Copy the output and paste it into a text editor.
Set the file format to plain text.
Save the text file with the .pem certificate file extension.
Sign in to [Apple Business](https://business.apple.com) or [Apple School Manager](https://school.apple.com) with a Managed Apple Account that can manage device management services.
Click the **Devices** tab at the top of the page.
In the left sidebar, click **Management**.
Scroll to the bottom of the **Management Services** list and click **Add** next to **Add device management service**.
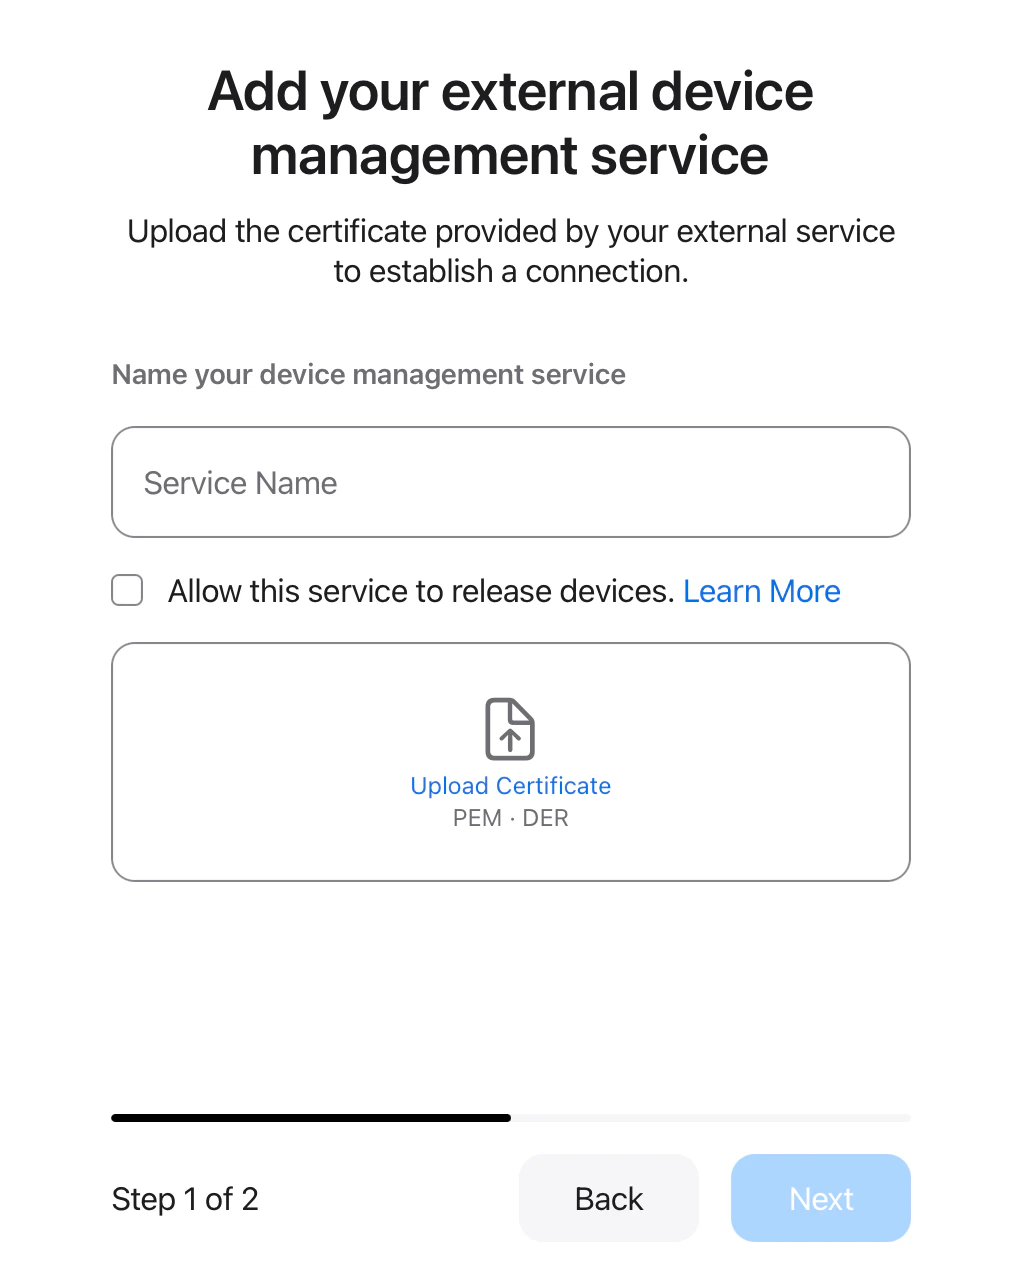
 In the **Service Name** field, enter a name that identifies this MDM integration (for example, one that matches how you will label the token in Postman).
If your organization needs it, select **Allow this service to release devices**.
Upload the **.pem** file you saved from the public key output.
Click **Next**.
In the **Service Name** field, enter a name that identifies this MDM integration (for example, one that matches how you will label the token in Postman).
If your organization needs it, select **Allow this service to release devices**.
Upload the **.pem** file you saved from the public key output.
Click **Next**.
 Click **Download Service Token**.
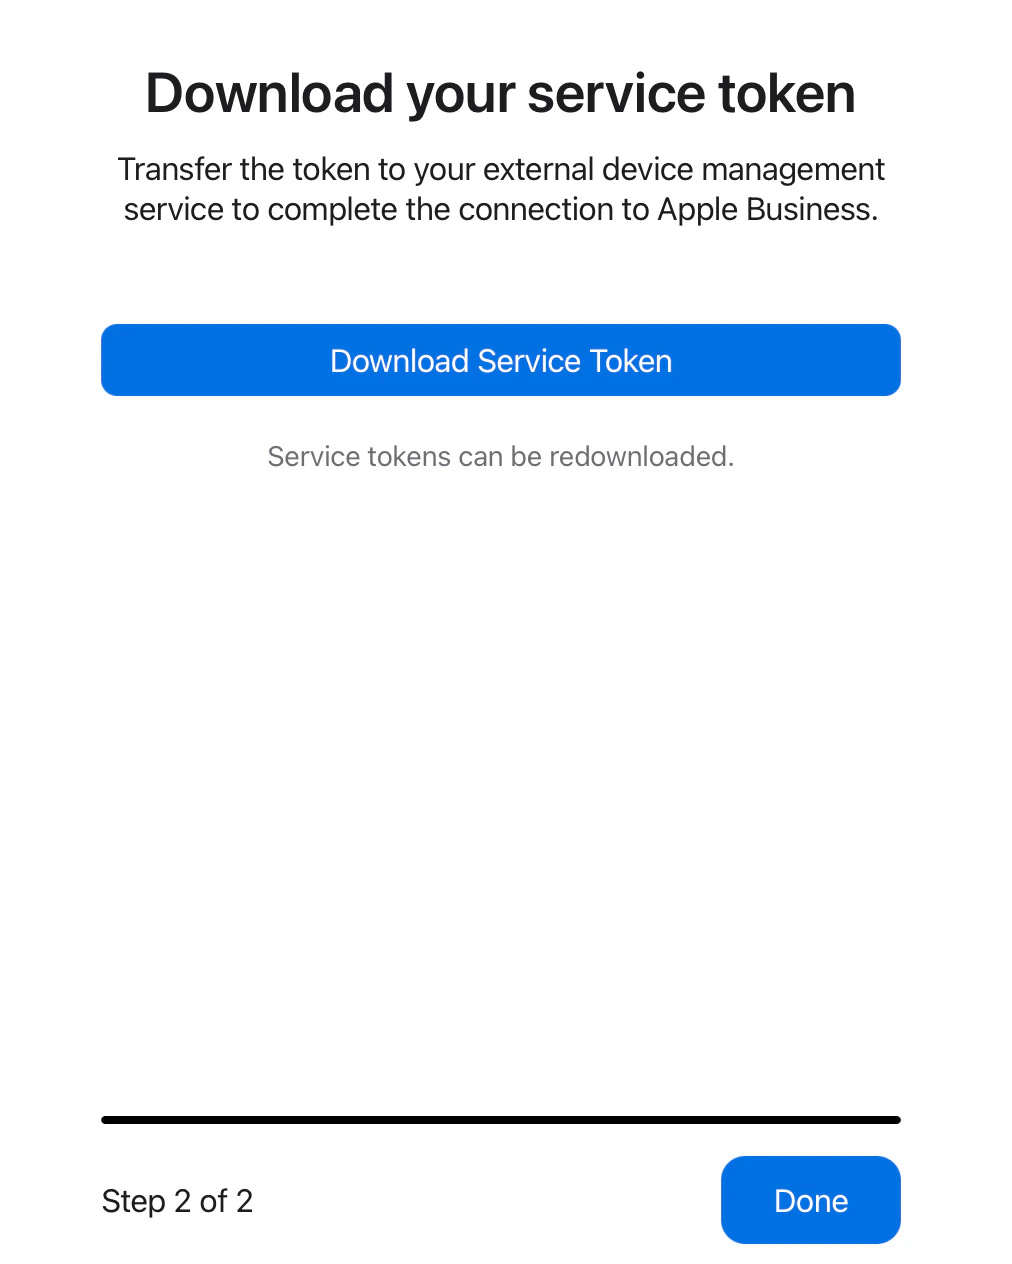 Click **Done**.
### Creating Integration
This section will cover using the API command that will complete the process of creating the new ADE connection. Use the **.p7m** file you downloaded from Apple Business or Apple School Manager.
Select Iru Endpoint API > Automated Device Enrollment Integrations > POST Create ADE Integration in the Collection.
Click on the Body tab that has a green dot and enter blueprint\_id, phone, and email.
Click Select Files and attach the .p7m file.
Click the Send button.
You can repeat the Download public key and Create Integration processes for each additional integration you would like to add.
### Checking Current Integrations
Iru Endpoint API > Automated Device Enrollment Integrations > GET List ADE Integrations command will give us all current ADE integrations so that we can verify that the integration was added successfully.
Select Iru Endpoint API > Automated Device Enrollment Integrations > GET List ADE Integrations in the Collection.
Click the Send button.
If the count is equal to at least 2, the creation process is successful.
### Considerations
* **API Token Security**: Store your API token in a secure location and never share it publicly
* **Postman Configuration**: Ensure Postman is properly configured with the latest API collection
* **Error Handling**: Monitor API responses for errors and troubleshoot accordingly
* **Monitoring**: Regularly check integration status and token validity
* **ADE Token Renewal**: Renew existing ADE tokens before creating new ones to maintain continuity
* **Certificate Management**: Keep track of .pem and .p7m files for each integration
* **Integration Limits**: Be aware of any limits on the number of ADE integrations per tenant
* **Blueprint Configuration**: Ensure blueprints are properly configured before creating integrations
* **Apple Business or Apple School Manager access**: Verify you have administrative access to the portal for MDM server creation
* **Documentation**: Keep records of all created integrations and their configurations
* **Testing**: Test integrations in a controlled environment before production deployment
* **Backup Strategy**: Have a plan for managing integrations if API access becomes unavailable
* **Support**: Contact Iru Endpoint Support for assistance with complex integration scenarios
* **Compliance**: Ensure ADE integrations meet your organization's security and compliance requirements
Click **Done**.
### Creating Integration
This section will cover using the API command that will complete the process of creating the new ADE connection. Use the **.p7m** file you downloaded from Apple Business or Apple School Manager.
Select Iru Endpoint API > Automated Device Enrollment Integrations > POST Create ADE Integration in the Collection.
Click on the Body tab that has a green dot and enter blueprint\_id, phone, and email.
Click Select Files and attach the .p7m file.
Click the Send button.
You can repeat the Download public key and Create Integration processes for each additional integration you would like to add.
### Checking Current Integrations
Iru Endpoint API > Automated Device Enrollment Integrations > GET List ADE Integrations command will give us all current ADE integrations so that we can verify that the integration was added successfully.
Select Iru Endpoint API > Automated Device Enrollment Integrations > GET List ADE Integrations in the Collection.
Click the Send button.
If the count is equal to at least 2, the creation process is successful.
### Considerations
* **API Token Security**: Store your API token in a secure location and never share it publicly
* **Postman Configuration**: Ensure Postman is properly configured with the latest API collection
* **Error Handling**: Monitor API responses for errors and troubleshoot accordingly
* **Monitoring**: Regularly check integration status and token validity
* **ADE Token Renewal**: Renew existing ADE tokens before creating new ones to maintain continuity
* **Certificate Management**: Keep track of .pem and .p7m files for each integration
* **Integration Limits**: Be aware of any limits on the number of ADE integrations per tenant
* **Blueprint Configuration**: Ensure blueprints are properly configured before creating integrations
* **Apple Business or Apple School Manager access**: Verify you have administrative access to the portal for MDM server creation
* **Documentation**: Keep records of all created integrations and their configurations
* **Testing**: Test integrations in a controlled environment before production deployment
* **Backup Strategy**: Have a plan for managing integrations if API access becomes unavailable
* **Support**: Contact Iru Endpoint Support for assistance with complex integration scenarios
* **Compliance**: Ensure ADE integrations meet your organization's security and compliance requirements