> ## Documentation Index
> Fetch the complete documentation index at: https://docs.iru.com/llms.txt
> Use this file to discover all available pages before exploring further.
# Configure Platform SSO with Entra ID
> Set up the Platform SSO Library Item in Iru Endpoint for Microsoft Entra ID integration. Enable macOS login with Entra credentials and token-based SSO.
Platform SSO is available for Mac computers
### What is Platform SSO?
Platform SSO is a capability that allows users to sign in to their Mac devices using a hardware-bound key, smart card, or their IdP password. This feature enhances the Microsoft Enterprise SSO plug-in for Apple devices, providing single sign-on for Microsoft Entra ID accounts on macOS.
For more information, see [Microsoft's macOS Platform Single Sign-on overview](https://learn.microsoft.com/en-us/entra/identity/devices/macos-psso).
### Add and Configure the Company Portal Auto App
To add this Library Item to your Iru Endpoint Library, follow the steps outlined in the [Library Overview](/en/endpoint/library/library-items-profiles/library-overview) article.
Assign to your desired [Blueprints](/en/endpoint/getting-started/blueprints-and-library/configuring-blueprints).
Set your **Installation Method** to Continuously Enforce.
Specify your **Version Enforcement** settings.
Click the **Save** button.
### Add and Configure a Login Window Library Item
To add this Library Item to your Iru Endpoint Library, follow the steps outlined in the [Library Overview](/en/endpoint/library/library-items-profiles/library-overview) article.
Enter a **Name** for your Login Window Library Item.
Assign to your desired [Blueprints](/en/endpoint/getting-started/blueprints-and-library/configuring-blueprints).
Under **User Visibility**, select **Display username and password fields**.
Click the **Save** button.
### Add and Configure a Single Sign-on Extension Library Item
To add this Library Item to your Iru Endpoint Library, follow the steps outlined in the [Library Overview](/en/endpoint/library/library-items-profiles/library-overview) article.
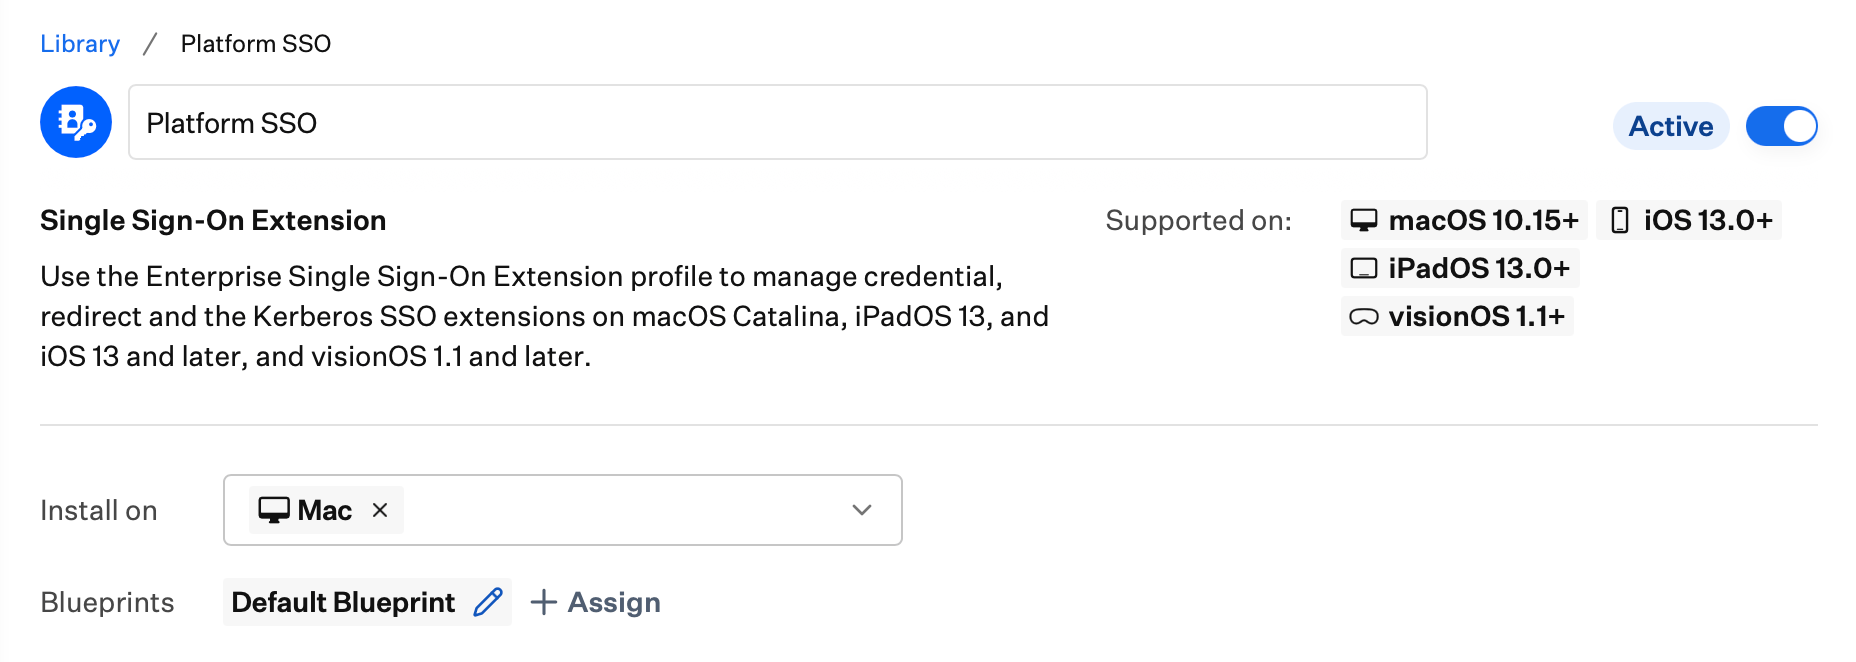
Enter a **Name** for the new Library Item.
Select **Mac** as the **Install on** platform.
Assign to your desired [Blueprints](/en/endpoint/getting-started/blueprints-and-library/configuring-blueprints).
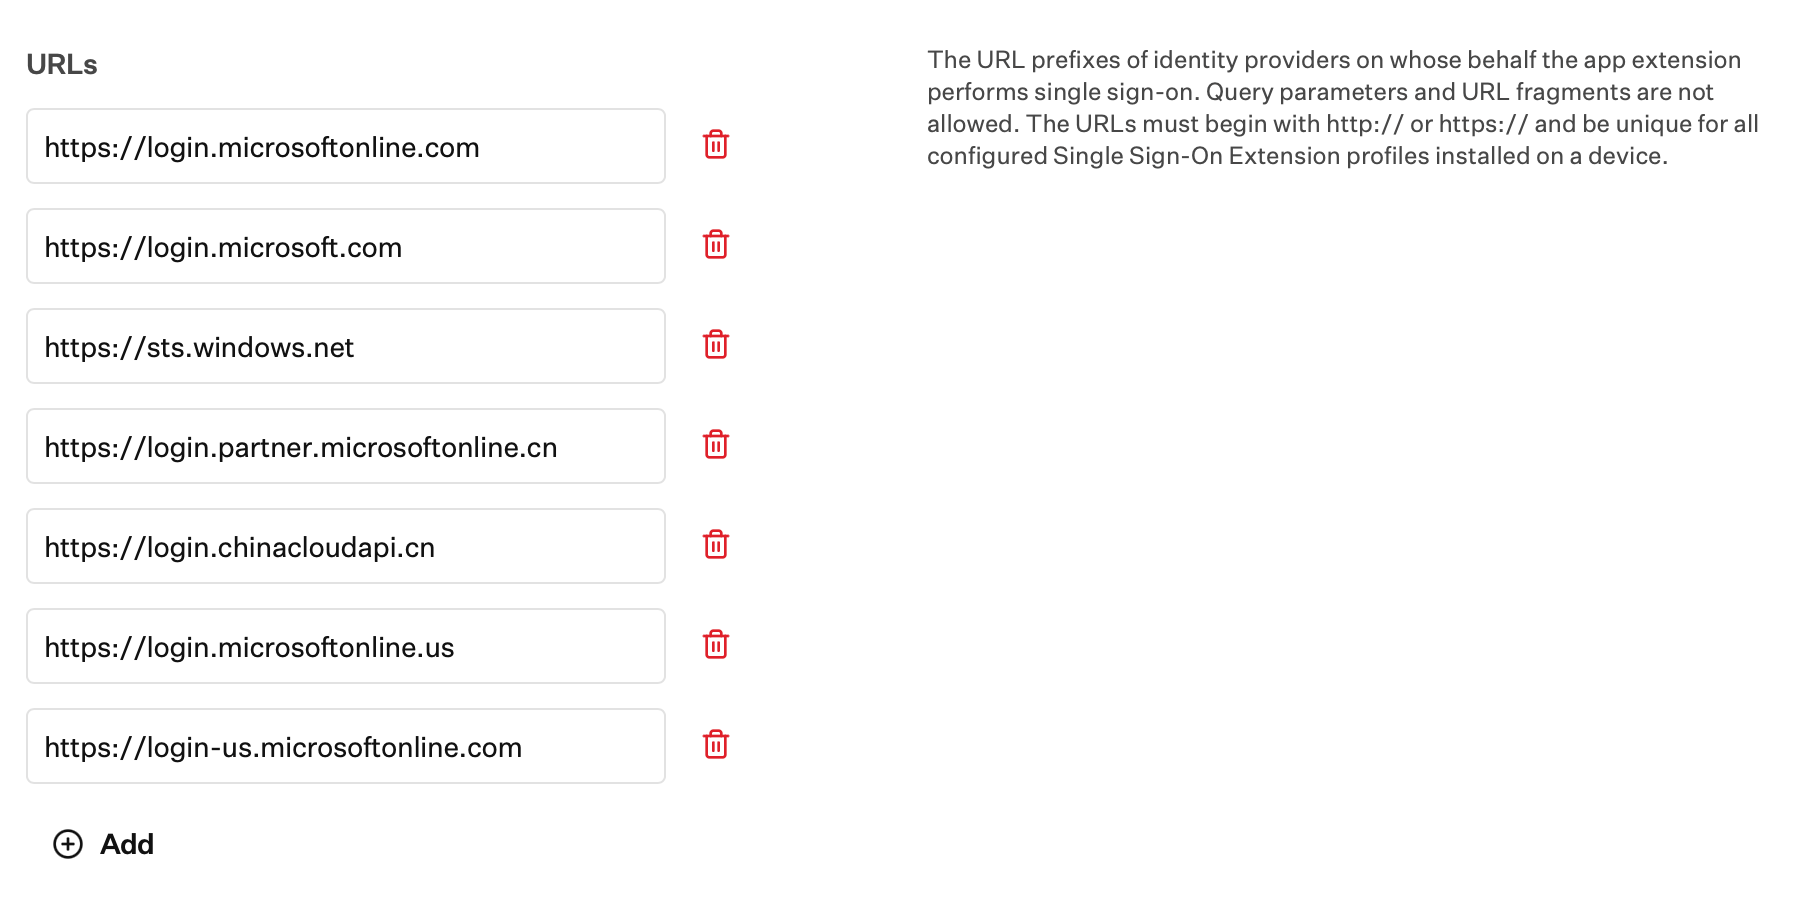
 Under **Extension type**, select **Redirect**.
For **Extension identifier**, enter the following:
```text theme={null}
com.microsoft.CompanyPortalMac.ssoextension
```
Enter the following in **Team identifier**:
```text theme={null}
UBF8T346G9
```
Paste the following URLs into the **URLs** fields.
```text theme={null}
https://login.microsoftonline.com
```
```text theme={null}
https://login.microsoft.com
```
```text theme={null}
https://sts.windows.net
```
Under **Extension type**, select **Redirect**.
For **Extension identifier**, enter the following:
```text theme={null}
com.microsoft.CompanyPortalMac.ssoextension
```
Enter the following in **Team identifier**:
```text theme={null}
UBF8T346G9
```
Paste the following URLs into the **URLs** fields.
```text theme={null}
https://login.microsoftonline.com
```
```text theme={null}
https://login.microsoft.com
```
```text theme={null}
https://sts.windows.net
```
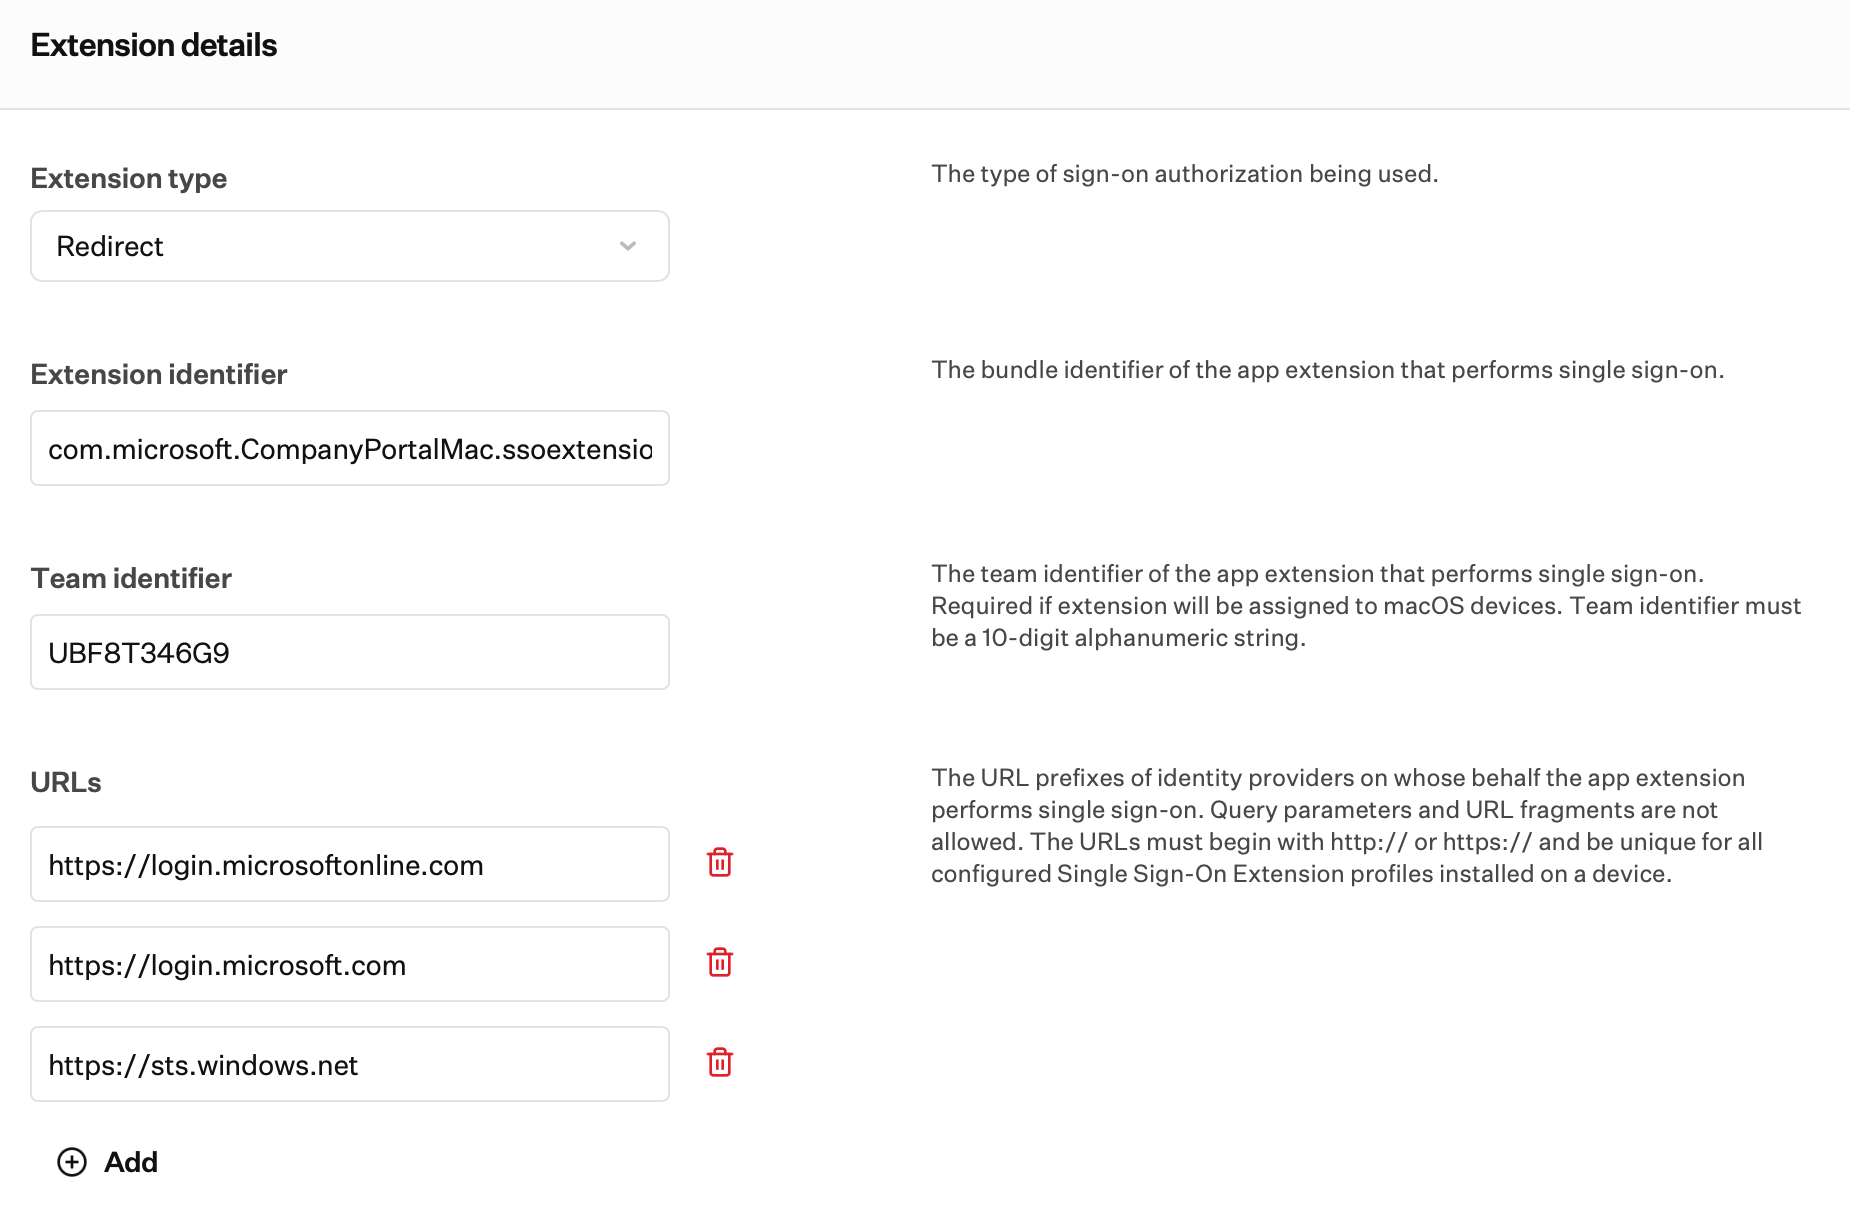 If you use sovereign cloud domains, include the following additional URLs.
```text theme={null}
https://login.partner.microsoftonline.cn
```
```text theme={null}
https://login.chinacloudapi.cn
```
```text theme={null}
https://login.microsoftonline.us
```
```text theme={null}
https://login-us.microsoftonline.com
```
If you use sovereign cloud domains, include the following additional URLs.
```text theme={null}
https://login.partner.microsoftonline.cn
```
```text theme={null}
https://login.chinacloudapi.cn
```
```text theme={null}
https://login.microsoftonline.us
```
```text theme={null}
https://login-us.microsoftonline.com
```
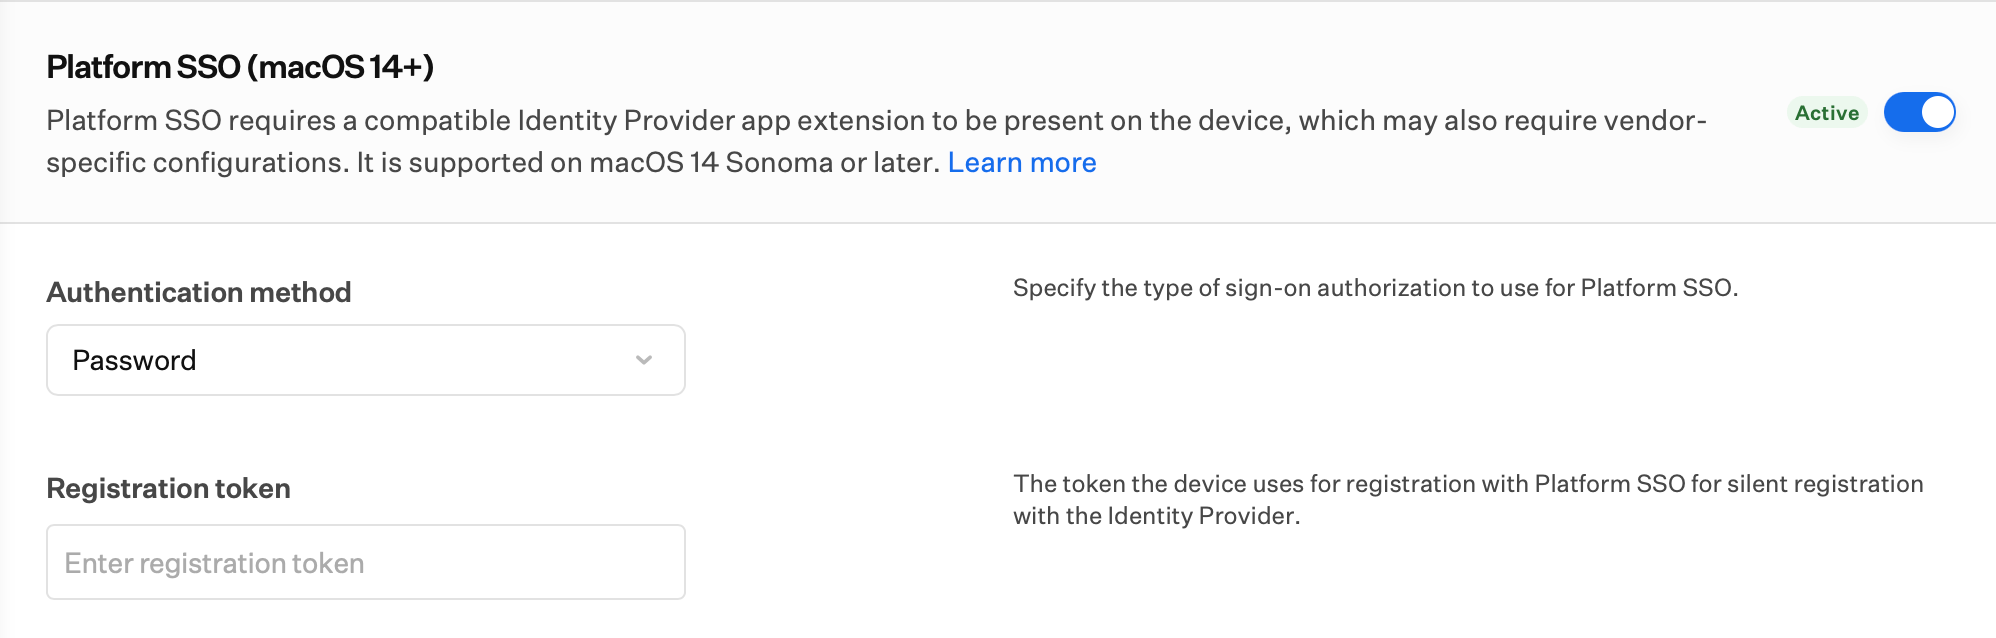
 Toggle the switch for **Platform SSO**.
Select your **Authentication Method**. For information on which method to use for your organization, refer to [Microsoft's support article](https://learn.microsoft.com/en-us/mem/intune/configuration/platform-sso-macos#step-1---decide-the-authentication-method).
Optionally, enter your **Registration token** when your identity provider requires one. The Mac uses this value for Platform SSO registration with your identity provider, including silent registration when your identity provider and SSO extension support it.
Toggle the switch for **Platform SSO**.
Select your **Authentication Method**. For information on which method to use for your organization, refer to [Microsoft's support article](https://learn.microsoft.com/en-us/mem/intune/configuration/platform-sso-macos#step-1---decide-the-authentication-method).
Optionally, enter your **Registration token** when your identity provider requires one. The Mac uses this value for Platform SSO registration with your identity provider, including silent registration when your identity provider and SSO extension support it.
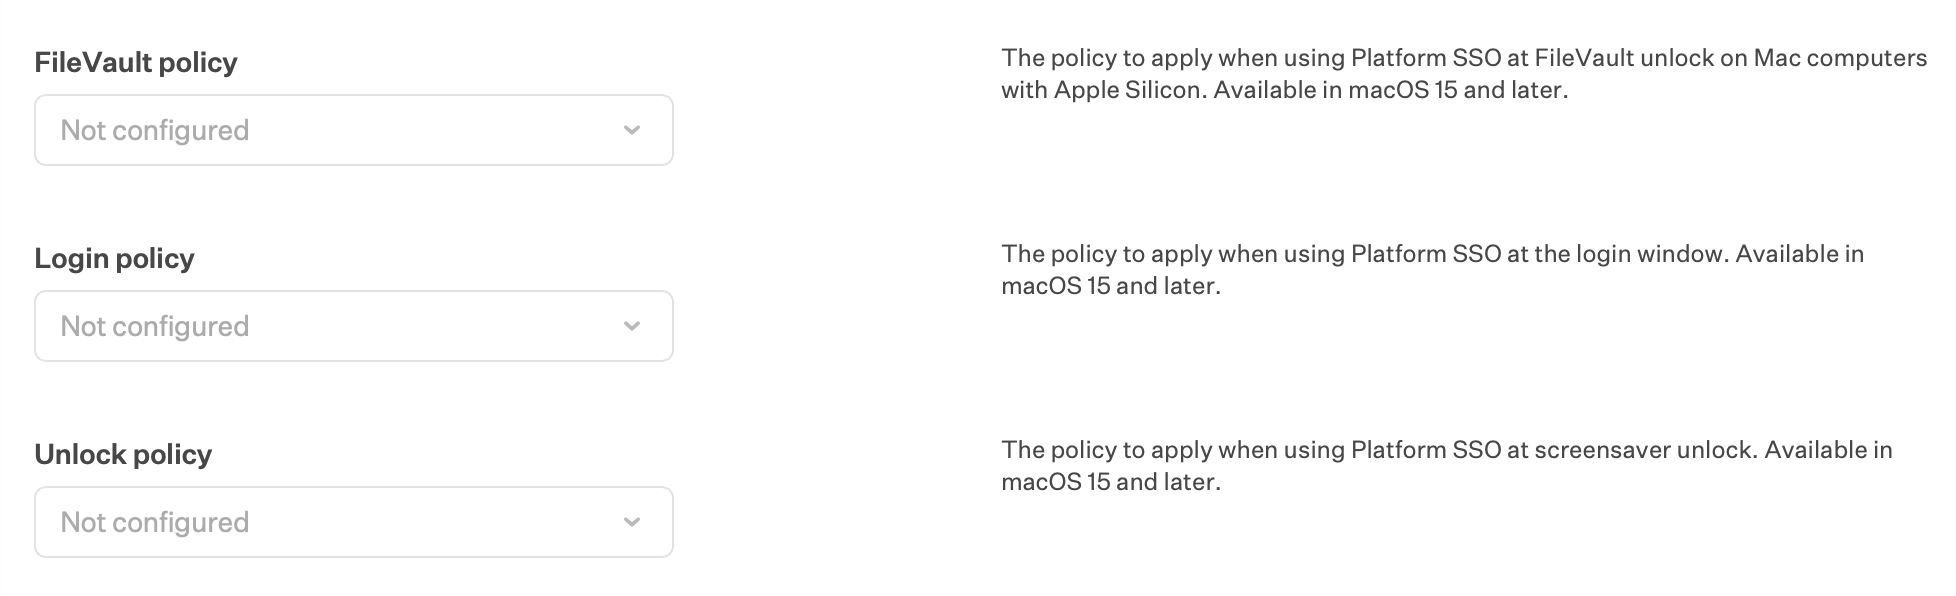
 Enable additional optional settings for macOS 15 and later as needed.
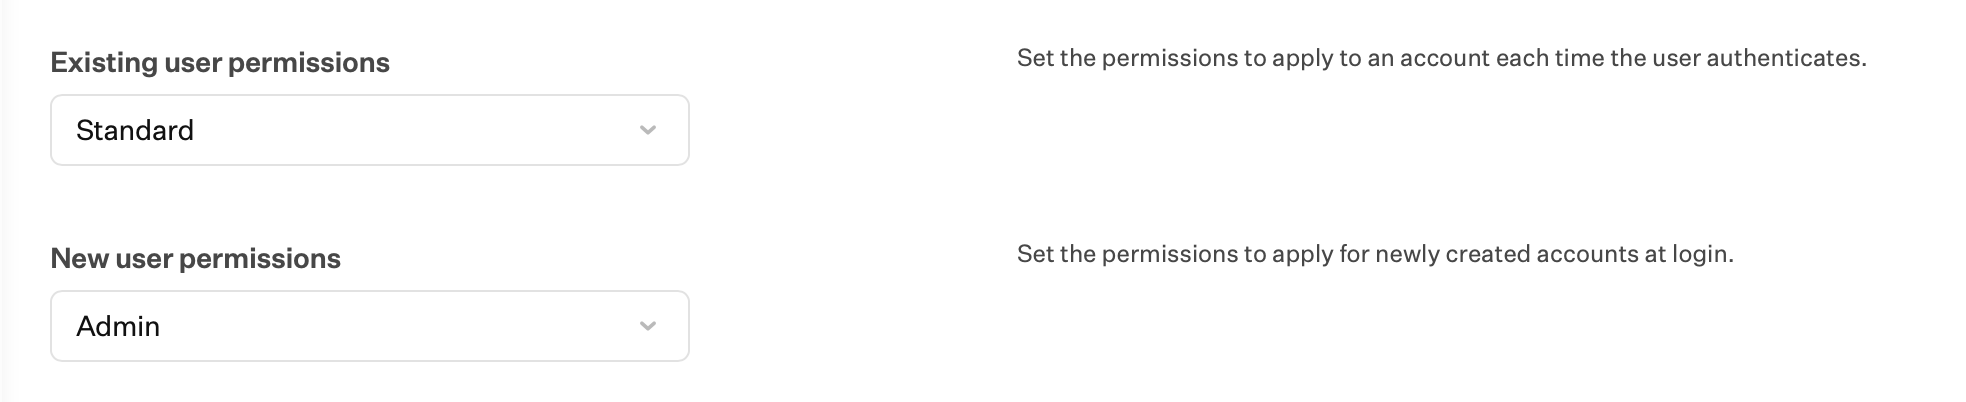
 Set default permissions for **Existing Users**.
Set default permissions for **New Users**.
Set default permissions for **Existing Users**.
Set default permissions for **New Users**.
 Select the checkbox for **Shared Device Keys**.
Enable **Allow authorization (with identity provider account)**. This will allow users to interact with system authorization prompts using their Microsoft Entra ID credentials.
If you want to automatically create local accounts for users, enable **Allow creation of new users at login**. To create a local account, the device must be connected to the internet at the login screen with FileVault unlocked, and Iru must have a valid Bootstrap token for that device.
Select the checkbox for **Shared Device Keys**.
Enable **Allow authorization (with identity provider account)**. This will allow users to interact with system authorization prompts using their Microsoft Entra ID credentials.
If you want to automatically create local accounts for users, enable **Allow creation of new users at login**. To create a local account, the device must be connected to the internet at the login screen with FileVault unlocked, and Iru must have a valid Bootstrap token for that device.
 If checked, the device UDID and serial number will be included in Platform SSO attestations. Available in macOS 15.4 and later.
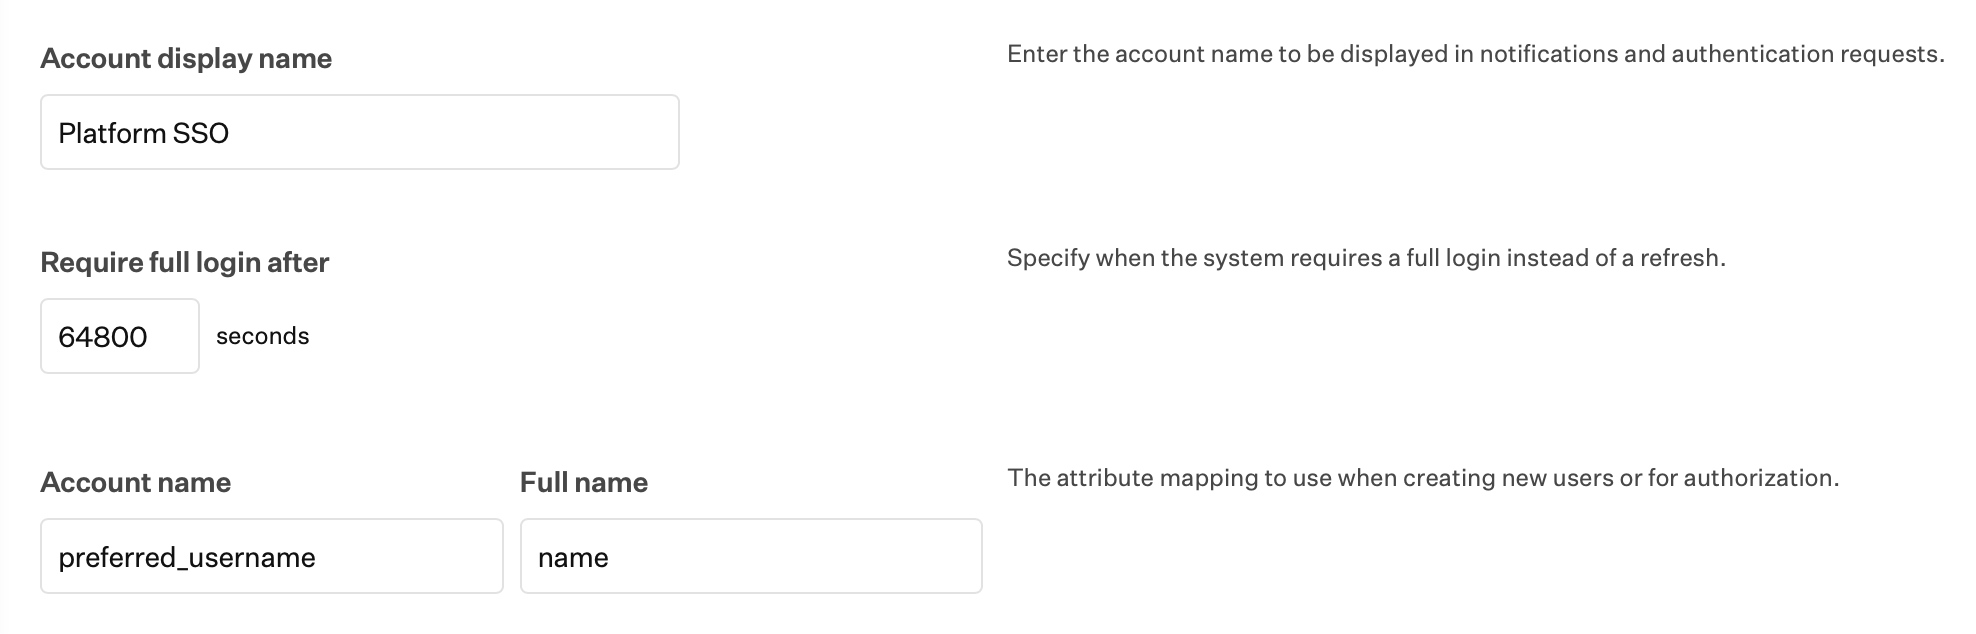
Enter an **Account display name**.
Specify the number of seconds after which to **Require full login**.
In **Token mapping**, enter the following for **AccountName**:
```text theme={null}
preferred_username
```
Enter the following for **FullName**:
```text theme={null}
name
```
If checked, the device UDID and serial number will be included in Platform SSO attestations. Available in macOS 15.4 and later.
Enter an **Account display name**.
Specify the number of seconds after which to **Require full login**.
In **Token mapping**, enter the following for **AccountName**:
```text theme={null}
preferred_username
```
Enter the following for **FullName**:
```text theme={null}
name
```
 If desired, configure **Admin Groups**, **Additional Groups**, and **User Groups.**
Microsoft [currently only supports](https://learn.microsoft.com/en-us/mem/intune/configuration/platform-sso-macos#more-platform-sso-settings-you-can-configure) using static Standard and Admin values for new and existing users.
* **Admin groups** are groups from Microsoft Entra ID that should have administrator access on the device. These groups are used to grant elevated permissions to specific users
* **Additional groups** are custom groups you'd like to create in the device's local directory. These groups can be used to organize users and apply specific settings or permissions
* **User groups** are particularly useful, allowing you to map specific macOS system rights to custom groups created in the local directory. For example, you can use user groups to grant 'sudo' access or manage printer permissions
Click the **Save** button.
### Enable Registration During Setup Assistant (macOS 26 and later)
Starting in macOS 26, Platform SSO can run during Setup Assistant so the Mac can register with your identity provider earlier in the enrollment flow. This section lets you configure registration during setup, first-user creation, profile picture sync behavior, and Authenticated Guest Mode for shared-device workflows.
When you deploy Platform SSO with Automated Device Enrollment, do not set **Primary account type** to **Skip primary account creation** in the **Mac** section of your [Automated Device Enrollment Library Item](/en/endpoint/enrollment/apple/configuring-apple-enrollment). Setup Assistant is where the user sets the local account password. If you skip primary account creation, that step does not run, the password is never set, and enrollment can stall.
Mac computers with Apple silicon and some other models store account credentials in the [Secure Enclave](https://support.apple.com/guide/security/the-secure-enclave-sec59b0b31ff/web). See Apple's documentation for which devices include a Secure Enclave. Skipping primary account creation is for **Passport** workflows, not Platform SSO. See [Primary account creation](/en/endpoint/library/passport/passport-compatibility-with-macos-and-iru-endpoint-features#primary-account-creation) if you use Passport instead.
In the **Library**, open the existing **Single Sign-on Extension** Library Item you created earlier, click **Edit**, then go to the **Mac macOS 26 and later** section.
Select **Yes** for **Enable registration during Setup Assistant** so Platform SSO registration runs while Setup Assistant is still in progress.
For **Create first user during Setup Assistant**, select **Yes** when the Mac should create its first local account during Setup Assistant using Platform SSO. If your organization provisions the first account differently, adjust this setting to match that workflow.
Configure **Synchronize profile picture** based on whether the Mac should request the user’s login profile picture from the SSO extension during this setup flow.
Configure **Enable Authenticated Guest Mode** when you deploy shared Mac computers where users sign in temporarily with IdP credentials and want Authenticated Guest Mode behavior. For standard single-user Mac computers, leave this behavior off.
Under **New user authentication methods**, select the authentication methods available for newly created accounts.
Click the **Save** button.
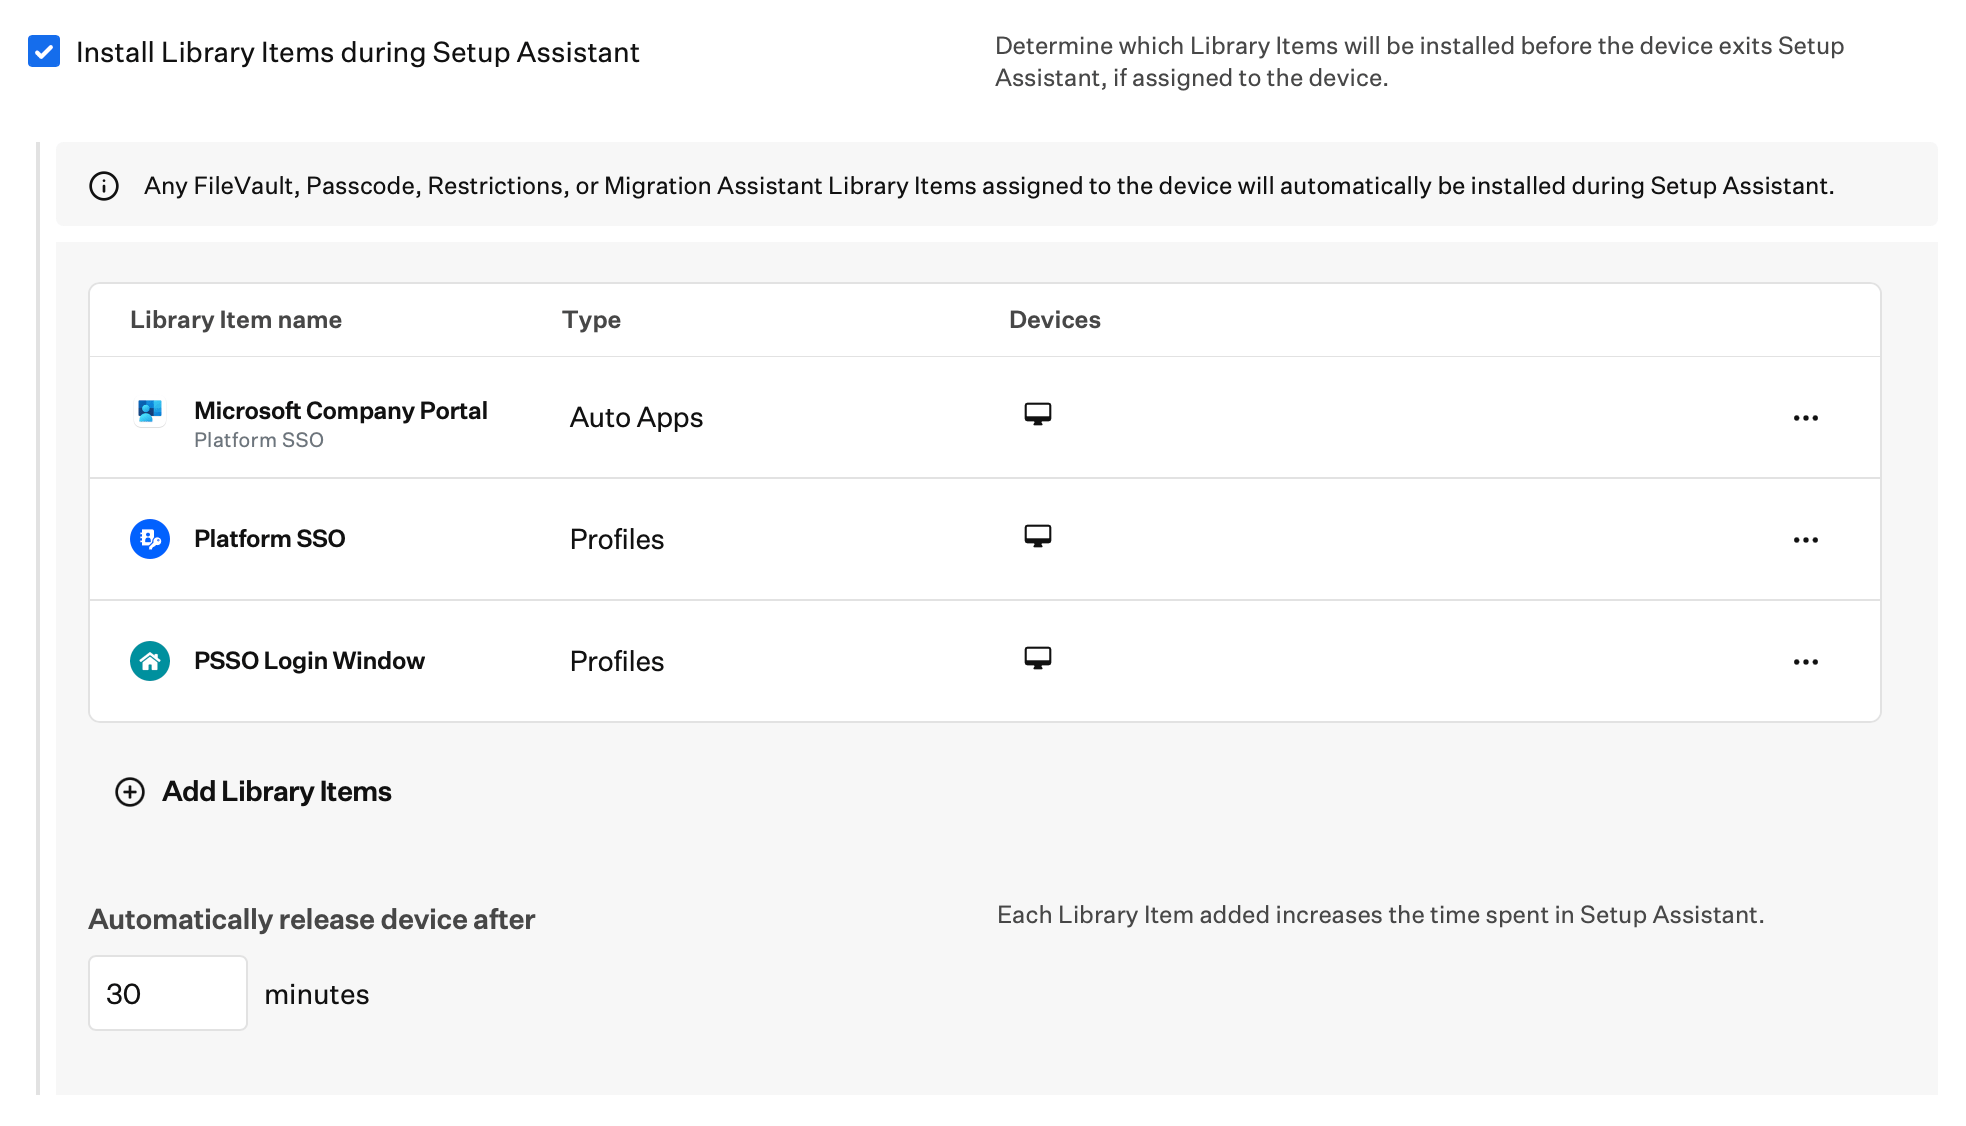
In your **Automated Device Enrollment** Library Item, turn on **Install Library Items during Setup Assistant** for **Mac**. Add the **Company Portal Auto App**, **Login Window**, and **Single Sign-on Extension** Library Items you configured in this guide so they install during enrollment setup. See [Install Library Items during Setup Assistant](/en/endpoint/enrollment/apple/configuring-apple-enrollment#install-library-items-during-setup-assistant) for the full details. If a device is stuck on **Configuring**, see [Manually release devices held in Setup Assistant](/en/endpoint/enrollment/apple/configuring-apple-enrollment#manually-release-devices-held-in-setup-assistant).
If desired, configure **Admin Groups**, **Additional Groups**, and **User Groups.**
Microsoft [currently only supports](https://learn.microsoft.com/en-us/mem/intune/configuration/platform-sso-macos#more-platform-sso-settings-you-can-configure) using static Standard and Admin values for new and existing users.
* **Admin groups** are groups from Microsoft Entra ID that should have administrator access on the device. These groups are used to grant elevated permissions to specific users
* **Additional groups** are custom groups you'd like to create in the device's local directory. These groups can be used to organize users and apply specific settings or permissions
* **User groups** are particularly useful, allowing you to map specific macOS system rights to custom groups created in the local directory. For example, you can use user groups to grant 'sudo' access or manage printer permissions
Click the **Save** button.
### Enable Registration During Setup Assistant (macOS 26 and later)
Starting in macOS 26, Platform SSO can run during Setup Assistant so the Mac can register with your identity provider earlier in the enrollment flow. This section lets you configure registration during setup, first-user creation, profile picture sync behavior, and Authenticated Guest Mode for shared-device workflows.
When you deploy Platform SSO with Automated Device Enrollment, do not set **Primary account type** to **Skip primary account creation** in the **Mac** section of your [Automated Device Enrollment Library Item](/en/endpoint/enrollment/apple/configuring-apple-enrollment). Setup Assistant is where the user sets the local account password. If you skip primary account creation, that step does not run, the password is never set, and enrollment can stall.
Mac computers with Apple silicon and some other models store account credentials in the [Secure Enclave](https://support.apple.com/guide/security/the-secure-enclave-sec59b0b31ff/web). See Apple's documentation for which devices include a Secure Enclave. Skipping primary account creation is for **Passport** workflows, not Platform SSO. See [Primary account creation](/en/endpoint/library/passport/passport-compatibility-with-macos-and-iru-endpoint-features#primary-account-creation) if you use Passport instead.
In the **Library**, open the existing **Single Sign-on Extension** Library Item you created earlier, click **Edit**, then go to the **Mac macOS 26 and later** section.
Select **Yes** for **Enable registration during Setup Assistant** so Platform SSO registration runs while Setup Assistant is still in progress.
For **Create first user during Setup Assistant**, select **Yes** when the Mac should create its first local account during Setup Assistant using Platform SSO. If your organization provisions the first account differently, adjust this setting to match that workflow.
Configure **Synchronize profile picture** based on whether the Mac should request the user’s login profile picture from the SSO extension during this setup flow.
Configure **Enable Authenticated Guest Mode** when you deploy shared Mac computers where users sign in temporarily with IdP credentials and want Authenticated Guest Mode behavior. For standard single-user Mac computers, leave this behavior off.
Under **New user authentication methods**, select the authentication methods available for newly created accounts.
Click the **Save** button.
In your **Automated Device Enrollment** Library Item, turn on **Install Library Items during Setup Assistant** for **Mac**. Add the **Company Portal Auto App**, **Login Window**, and **Single Sign-on Extension** Library Items you configured in this guide so they install during enrollment setup. See [Install Library Items during Setup Assistant](/en/endpoint/enrollment/apple/configuring-apple-enrollment#install-library-items-during-setup-assistant) for the full details. If a device is stuck on **Configuring**, see [Manually release devices held in Setup Assistant](/en/endpoint/enrollment/apple/configuring-apple-enrollment#manually-release-devices-held-in-setup-assistant).