> ## Documentation Index
> Fetch the complete documentation index at: https://docs.iru.com/llms.txt
> Use this file to discover all available pages before exploring further.
# SCIM Directory Integration
> Set up SCIM-based user directory synchronization in Iru Endpoint. Automatically provision and deprovision users and groups from your identity provider.
### About SCIM Directory Integration
SCIM, or the [System for Cross-domain Identity Management](https://scim.cloud/), is a protocol designed to make managing user identities across different systems simpler and more efficient. It's particularly useful when you're using multiple cloud-based applications, as it helps automate the process of adding and removing users.
### How It Works
SCIM involves two main roles:
* **Client** - This is usually an identity provider or identity access management system, like Microsoft Entra ID or Okta, that manages core identity data.
* **Service Provider** - A software-as-a-service (SaaS) application, like Iru Endpoint, that uses identity data to manage user access and permissions.
SCIM supports several operations, including provisioning, synchronization, and deprovisioning. This one-way sync allows you to automatically create user accounts in Iru Endpoint, keep user attributes up-to-date between your MDM and IdP, and automatically remove or disable user accounts when they are no longer needed.
### Configuring SCIM in Iru Endpoint
To configure a SCIM integration between your Identity Provider (IdP) and Iru Endpoint, you will need to:
* Create a new SCIM Directory Integration in Iru Endpoint
* Obtain the SCIM API URL and API token from Iru Endpoint to use with your IdP.
* Access your IdP to create an app integration, map SCIM attributes, and push desired user groups.
#### Creating a New SCIM Directory Integration
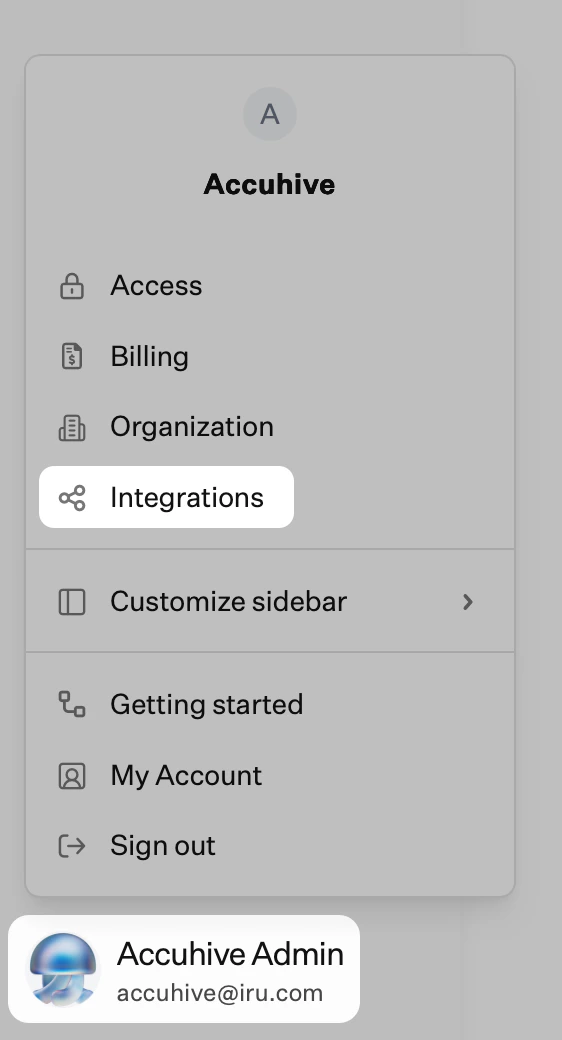
In Iru Endpoint, in the sidebar, click the [**Account Menu Button**](/en/iru/platform-overview/account-menu), then select **Integrations**.
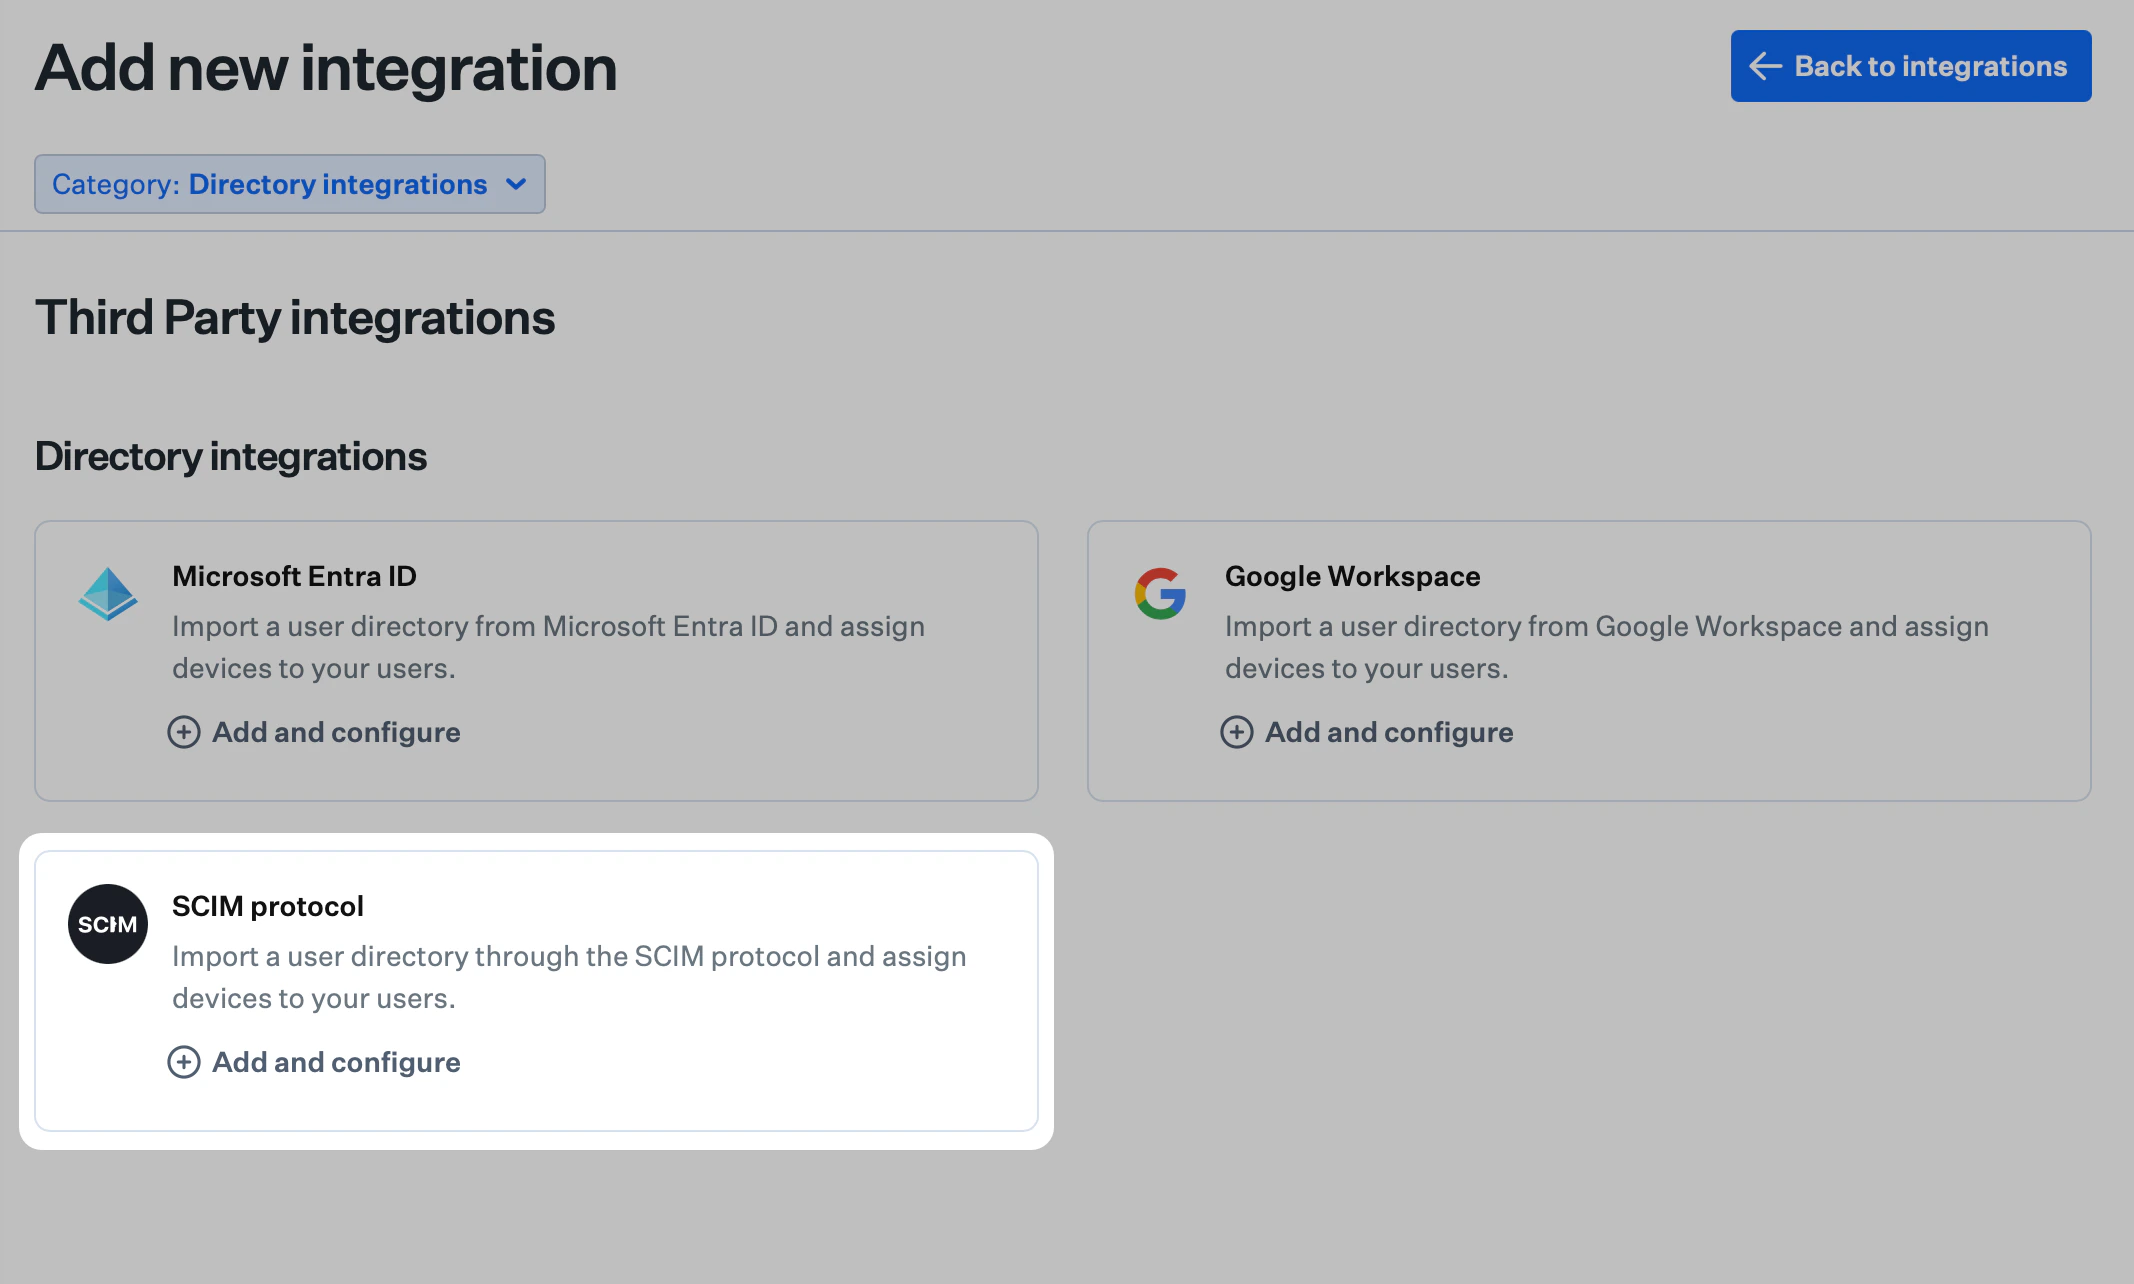
 Click **Discover integrations** in the upper-right of the Integrations page.
On the **SCIM protocol** tile, click **Add and configure**.
Click **Discover integrations** in the upper-right of the Integrations page.
On the **SCIM protocol** tile, click **Add and configure**.
 Click **Get started**.
Enter a unique name for the SCIM integration.
Click **Generate token**. The SCIM user directory integration uses an HTTP authorization header with a Bearer Token as the authentication method.
Click **Get started**.
Enter a unique name for the SCIM integration.
Click **Generate token**. The SCIM user directory integration uses an HTTP authorization header with a Bearer Token as the authentication method.
 Click **Copy token**.
The token will not be visible again after you click Done. Store it securely before continuing.
Confirm that you have copied the token by checking the box, then click **Done**. You will return to the **Integrations** page.
Click **Copy token**.
The token will not be visible again after you click Done. Store it securely before continuing.
Confirm that you have copied the token by checking the box, then click **Done**. You will return to the **Integrations** page.
 #### Obtaining the SCIM API URL
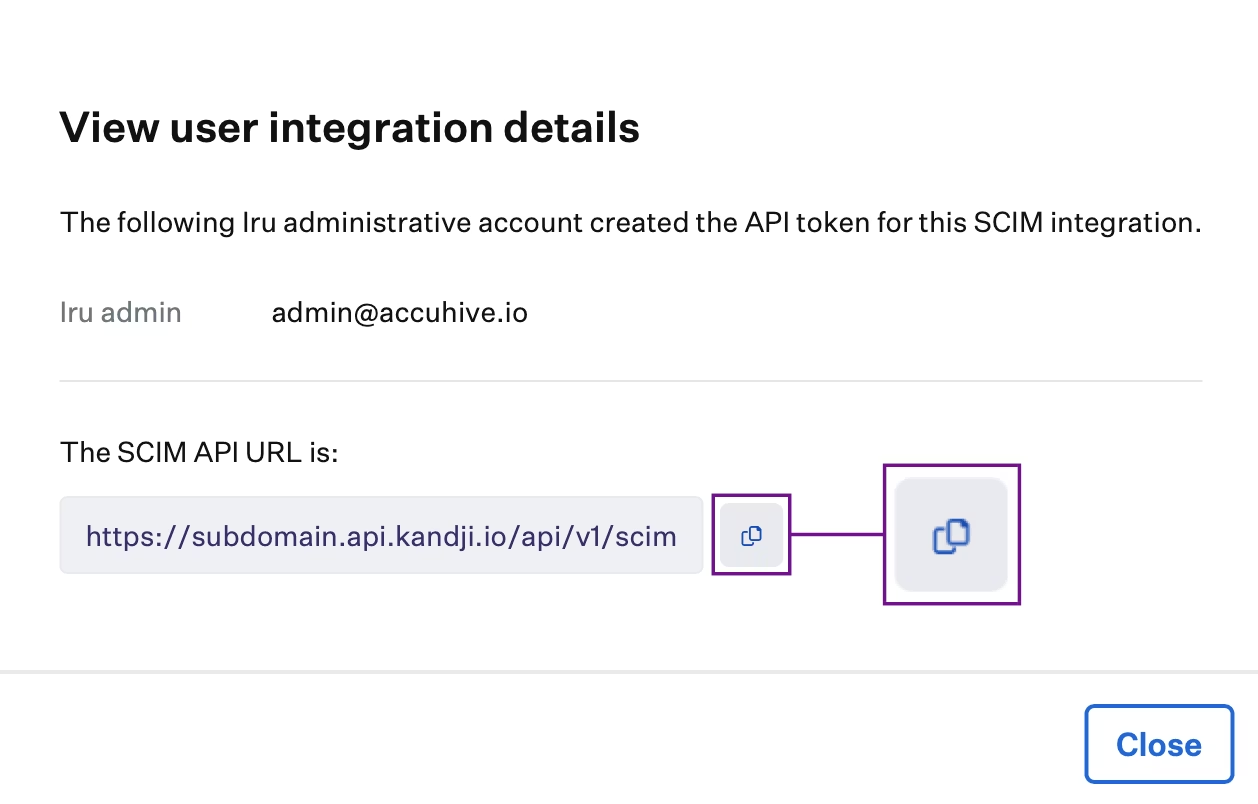
Your SCIM API URL is available from the integration details in Iru Endpoint. You will need to provide this URL to your identity provider when configuring the SCIM connection.
Click the **ellipsis** on the SCIM directory integration you just created.
Select **View Details**.
#### Obtaining the SCIM API URL
Your SCIM API URL is available from the integration details in Iru Endpoint. You will need to provide this URL to your identity provider when configuring the SCIM connection.
Click the **ellipsis** on the SCIM directory integration you just created.
Select **View Details**.
 **Copy** the SCIM API URL (e.g. `https://subdomain.api.iru.com/api/v1/scim`). Your identity provider will require this.
The URL displayed in your tenant may still show the `api.kandji.io` domain. The `api.kandji.io` version of the SCIM API URL will also work for this purpose.
Click **Close**.
**Copy** the SCIM API URL (e.g. `https://subdomain.api.iru.com/api/v1/scim`). Your identity provider will require this.
The URL displayed in your tenant may still show the `api.kandji.io` domain. The `api.kandji.io` version of the SCIM API URL will also work for this purpose.
Click **Close**.
 ### Renaming a SCIM Integration
To change the name of an existing SCIM directory integration:
Click the **ellipsis** on the SCIM directory integration you want to rename.
Select **Rename**.
### Renaming a SCIM Integration
To change the name of an existing SCIM directory integration:
Click the **ellipsis** on the SCIM directory integration you want to rename.
Select **Rename**.
 Enter the new name for the integration and save.
 ### Rotating the SCIM Token
Rotate the SCIM API token when you need to invalidate the current token (for example, after a security concern or when reconfigured in your IdP). After rotating, update the new token in your identity provider.
Click the **ellipsis** on the SCIM directory integration.
Select **Rotate token**.
### Rotating the SCIM Token
Rotate the SCIM API token when you need to invalidate the current token (for example, after a security concern or when reconfigured in your IdP). After rotating, update the new token in your identity provider.
Click the **ellipsis** on the SCIM directory integration.
Select **Rotate token**.
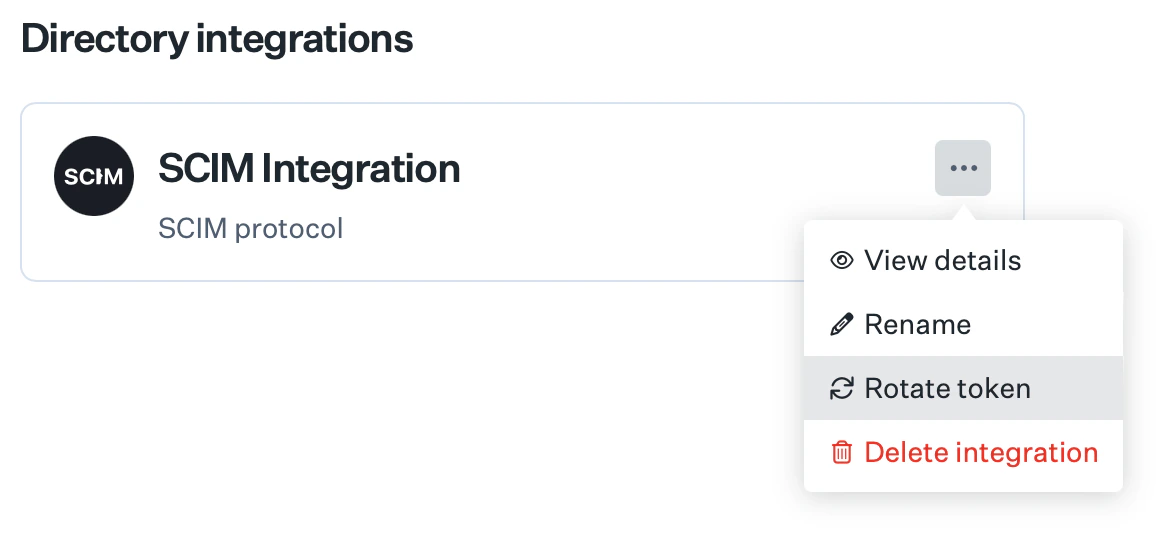 Confirm the rotation in the prompt. The previous token will no longer work.
 Copy the new token and update it in your IdP.
 ### Deleting a SCIM Integration
Removing a SCIM directory integration stops synchronization from your IdP and removes the integration from Iru Endpoint. Update or remove the SCIM app in your IdP to avoid errors.
Click the **ellipsis** on the SCIM directory integration you want to remove.
Select **Delete integration**.
### Deleting a SCIM Integration
Removing a SCIM directory integration stops synchronization from your IdP and removes the integration from Iru Endpoint. Update or remove the SCIM app in your IdP to avoid errors.
Click the **ellipsis** on the SCIM directory integration you want to remove.
Select **Delete integration**.
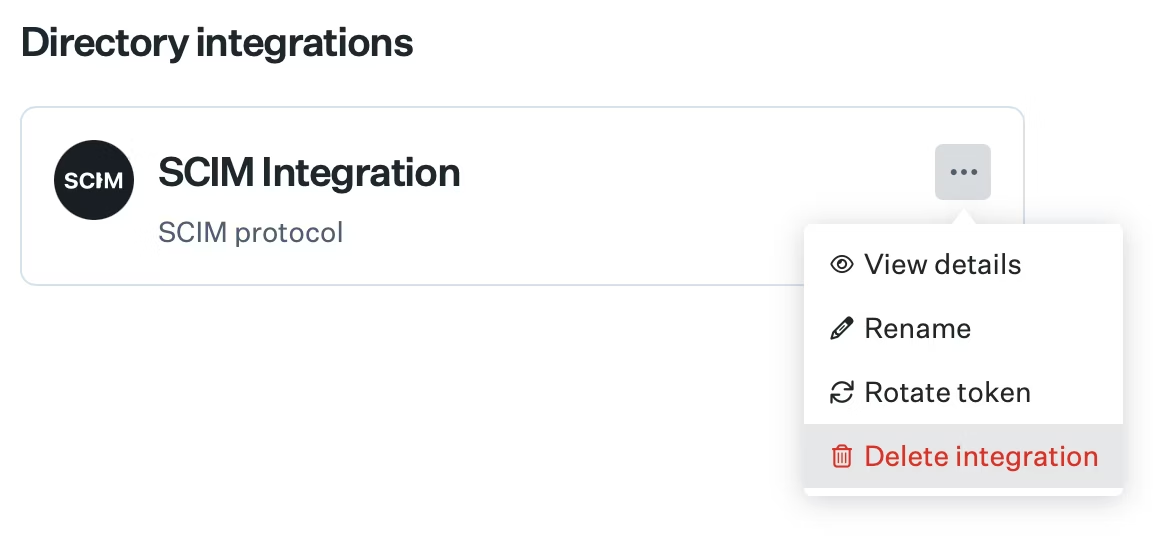 Confirm that you want to delete the integration in the prompt.
 ### SCIM Schema and Supported Attributes
Iru Endpoint supports the following SCIM attributes. Refer to these attributes when mapping your SCIM application in your IdP.
Iru Endpoint does not use any attributes that are not in the list below. To limit the attributes sent, please modify the attributes configured in the SCIM app in your IdP.
**User attributes**
| **Attribute** | **Description** | **Required** |
| -------------- | --------------------------------------------------------------------------------------------------------------- | ------------ |
| userName | Unique identifier for the user, used to authenticate to the service provider | Yes |
| name.formatted | The user's full name (for example, "John Doe"). This attribute or the displayName attribute is required | No |
| displayName | The user's full name (for example, "John Doe"). This attribute or the name.formatted attribute is required | Yes |
| title | The user's title, such as "Vice President." | No |
| active | The user's status within the identity provider. This attribute is automatically added by the Identity Provider. | Yes |
| emails.value | The user's email address as a subattribute of emails. Iru Endpoint only stores the first email in the list. | Yes |
| department | Identifies the name of a department. | No |
**Group attributes**
| **Attribute** | **Description** | **Required** |
| ------------- | ------------------------------------ | ------------ |
| displayName | A human-readable name for the Group. | Yes |
| members | A list of members in the Group. | Yes |
When using SCIM to sync users from a directory, the SCIM app automatically sends new information to Iru Endpoint, so there is no need for a Sync Now button that you would see when using the native Entra ID or Google Workspace directory integrations. Each cloud IdP has its own standard for syncing SCIM data.
Please check with your identity provider's documentation to understand how SCIM sync is configured.
### Related Articles
Configure SCIM in your identity provider using the article for your IdP. Iru Endpoint's SCIM implementation follows the SCIMv2 specification.
Connect Okta to Iru Endpoint for automatic user and group provisioning via SCIM
Connect Microsoft Entra ID (Azure AD) to Iru Endpoint for SCIM-based user and group provisioning
Connect OneLogin to Iru Endpoint for automatic user and group provisioning via SCIM
### SCIM Schema and Supported Attributes
Iru Endpoint supports the following SCIM attributes. Refer to these attributes when mapping your SCIM application in your IdP.
Iru Endpoint does not use any attributes that are not in the list below. To limit the attributes sent, please modify the attributes configured in the SCIM app in your IdP.
**User attributes**
| **Attribute** | **Description** | **Required** |
| -------------- | --------------------------------------------------------------------------------------------------------------- | ------------ |
| userName | Unique identifier for the user, used to authenticate to the service provider | Yes |
| name.formatted | The user's full name (for example, "John Doe"). This attribute or the displayName attribute is required | No |
| displayName | The user's full name (for example, "John Doe"). This attribute or the name.formatted attribute is required | Yes |
| title | The user's title, such as "Vice President." | No |
| active | The user's status within the identity provider. This attribute is automatically added by the Identity Provider. | Yes |
| emails.value | The user's email address as a subattribute of emails. Iru Endpoint only stores the first email in the list. | Yes |
| department | Identifies the name of a department. | No |
**Group attributes**
| **Attribute** | **Description** | **Required** |
| ------------- | ------------------------------------ | ------------ |
| displayName | A human-readable name for the Group. | Yes |
| members | A list of members in the Group. | Yes |
When using SCIM to sync users from a directory, the SCIM app automatically sends new information to Iru Endpoint, so there is no need for a Sync Now button that you would see when using the native Entra ID or Google Workspace directory integrations. Each cloud IdP has its own standard for syncing SCIM data.
Please check with your identity provider's documentation to understand how SCIM sync is configured.
### Related Articles
Configure SCIM in your identity provider using the article for your IdP. Iru Endpoint's SCIM implementation follows the SCIMv2 specification.
Connect Okta to Iru Endpoint for automatic user and group provisioning via SCIM
Connect Microsoft Entra ID (Azure AD) to Iru Endpoint for SCIM-based user and group provisioning
Connect OneLogin to Iru Endpoint for automatic user and group provisioning via SCIM