> ## Documentation Index
> Fetch the complete documentation index at: https://docs.iru.com/llms.txt
> Use this file to discover all available pages before exploring further.
# AD CS Integration: Configure the Integration
> Run the Iru Endpoint AD CS integration wizard to add Certification Authority hosts, assign connector servers, and create certificate Library Items.
The AD CS integration is configured from the Iru Endpoint Integrations page in your Iru Endpoint web app. Once setup is complete, you can manage Iru Endpoint AD CS Connector servers, add your AD CS Certification Authority (CA) hosts, and create Library Items, all from the AD CS integration page.
### Prerequisites
Confirm the following before you run the AD CS integration wizard in the Iru Endpoint web app.
Create a [computer certificate template](/en/endpoint/integrations/certificate-services/active-directory-certificate-services/active-directory-certificate-services-ad-cs-integration-create-a-computer-certificate-template) in AD CS for use with Iru Endpoint before you rely on the Connector host for enrollment.
Ensure you can sign in to the Windows Server designated as the AD CS Connector and transfer or run the installer when the wizard finishes.
Firewall and proxy rules must allow the paths in [Using Iru on Enterprise Networks](/en/iru/requirements/using-iru-on-enterprise-networks#ad-cs-integration-network-requirements) under **AD CS Integration Network Requirements**. The updated Connector uses Iru sign-in (not Auth0). Allow your Iru web app, Iru Identity, tenant API (`subdomain.gateway.iru.com`, `subdomain.gateway.eu.iru.com`, `subdomain.clients.*`), and `adcsconn` as documented there. Your network must allow traffic between Iru Endpoint, the Connector host, and AD CS, including HTTPS from the Connector to Iru Endpoint without SSL inspection breaking that path when inspection is in use.
If the **legacy** Connector still runs on some hosts until you finish upgrading them, keep the legacy Auth0 allowlist rows from that same article until those hosts run the updated Connector.
The Connector host must meet **Windows Server 2019 or higher**, **.NET 8 or later**, **TPM or vTPM**, **WebView2** (bundled with the installer), and domain membership in the forest your issuing CAs serve. For the full checklist, see [AD CS Connector Server Requirements](/en/endpoint/integrations/certificate-services/active-directory-certificate-services/active-directory-certificate-services-ad-cs-integration-ad-cs-connector-installation#ad-cs-connector-server-requirements) in [AD CS Connector Installation](/en/endpoint/integrations/certificate-services/active-directory-certificate-services/active-directory-certificate-services-ad-cs-integration-ad-cs-connector-installation).
Have the Windows Server online so you can install the AD CS Connector as soon as you finish the steps in **AD CS Integration Setup** below.
### AD CS Integration Setup
In the left-hand navigation, select **Integrations**.
Near the top-right, select **Discover integrations**.
Find the **Active Directory Certificate Services** integration and click **Add and configure**.
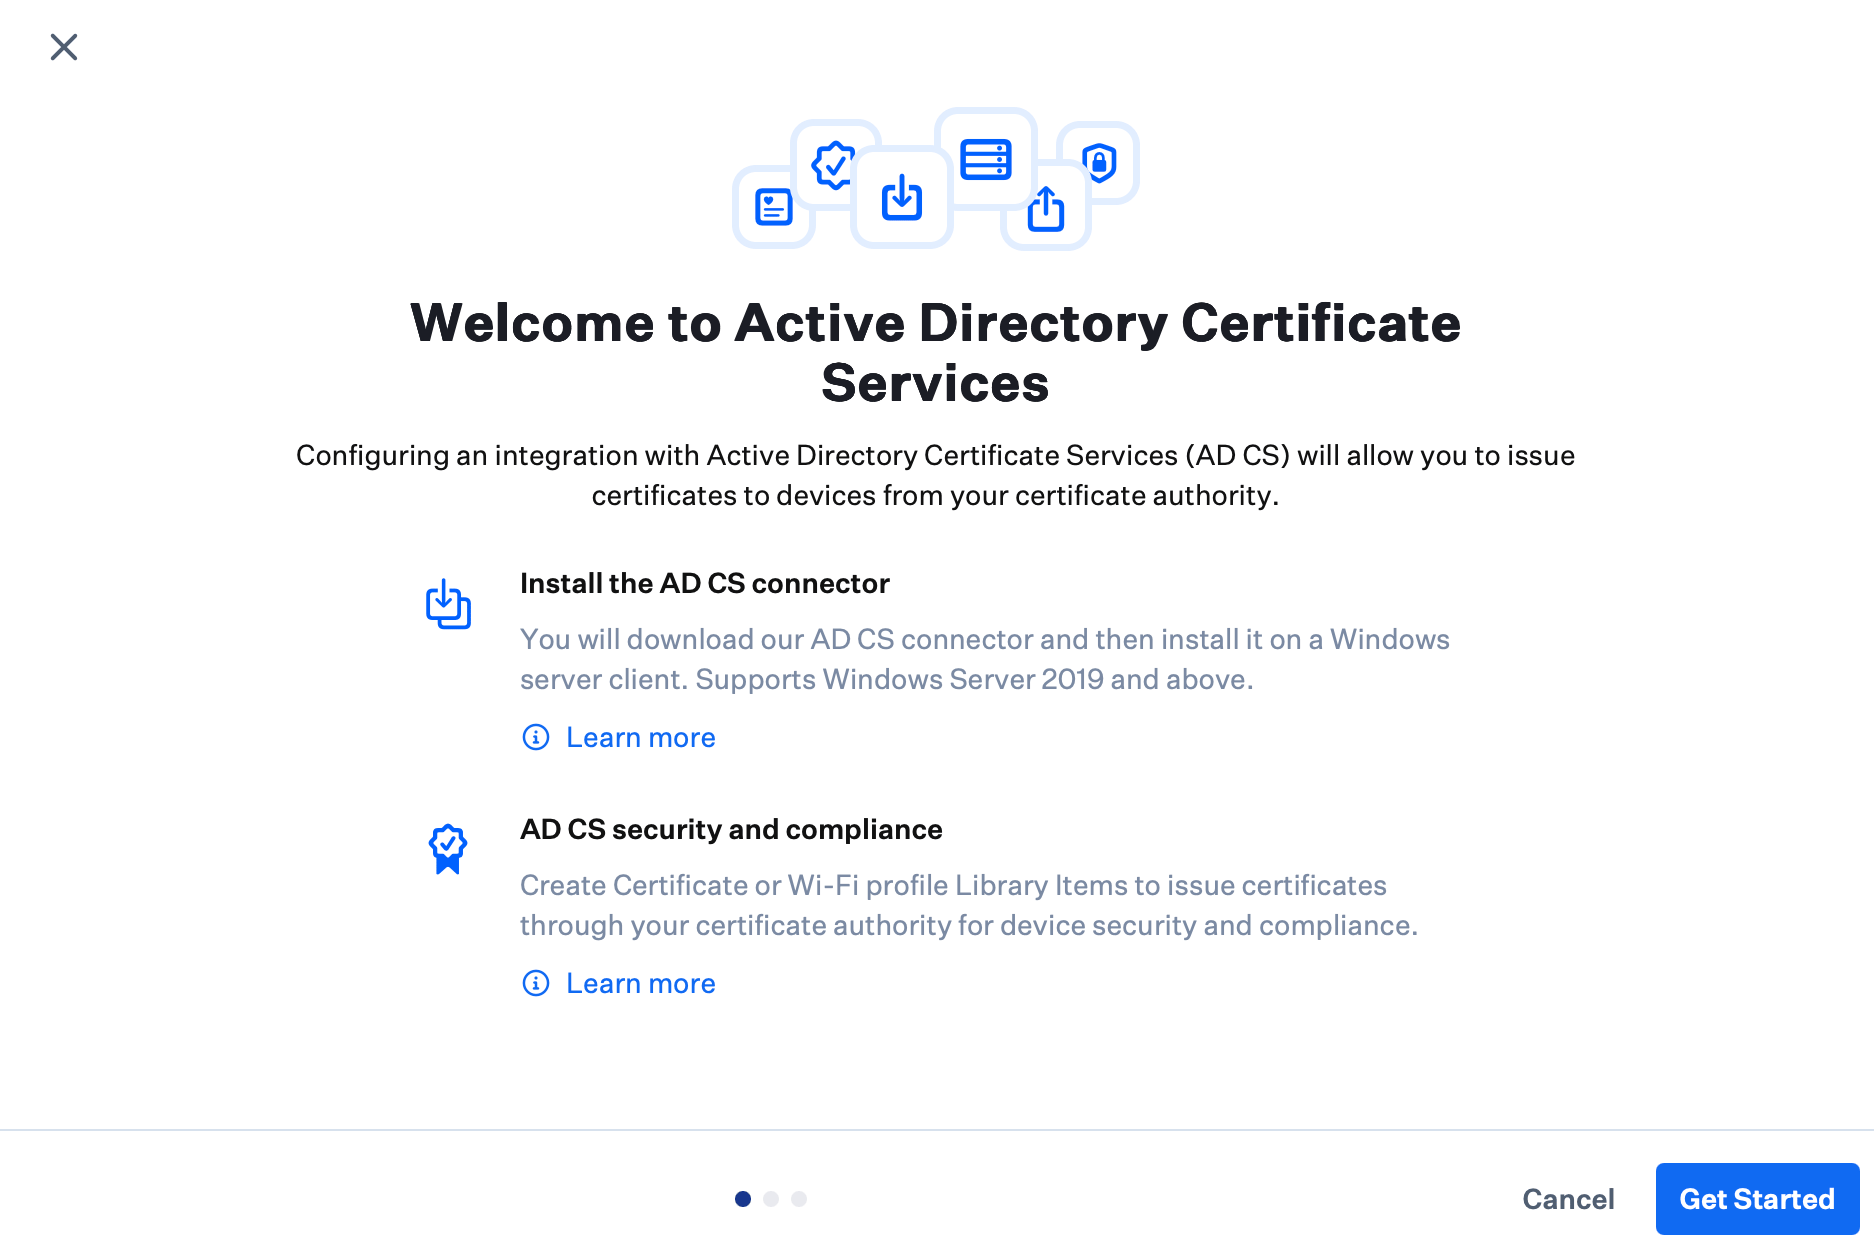
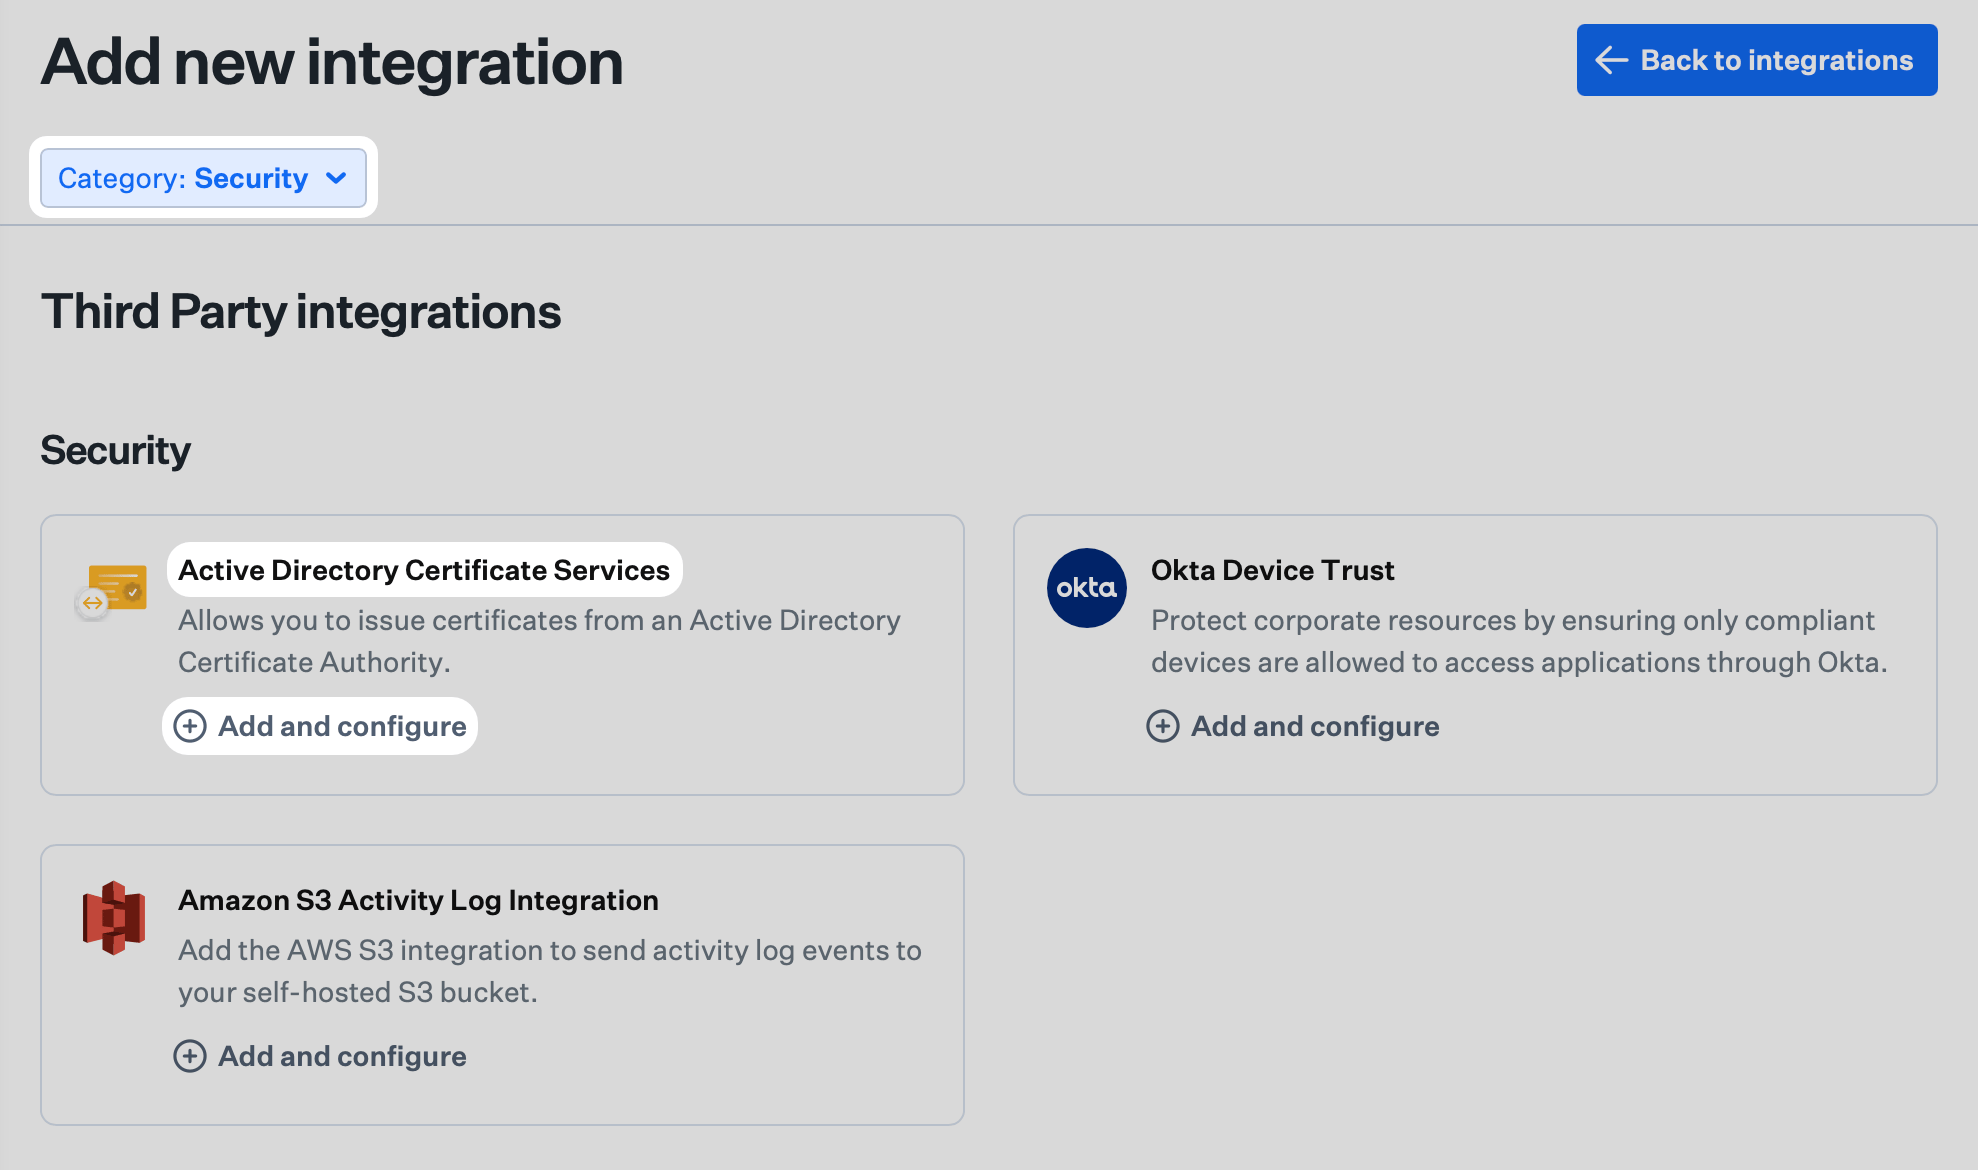 Select **Get started** to continue setup.
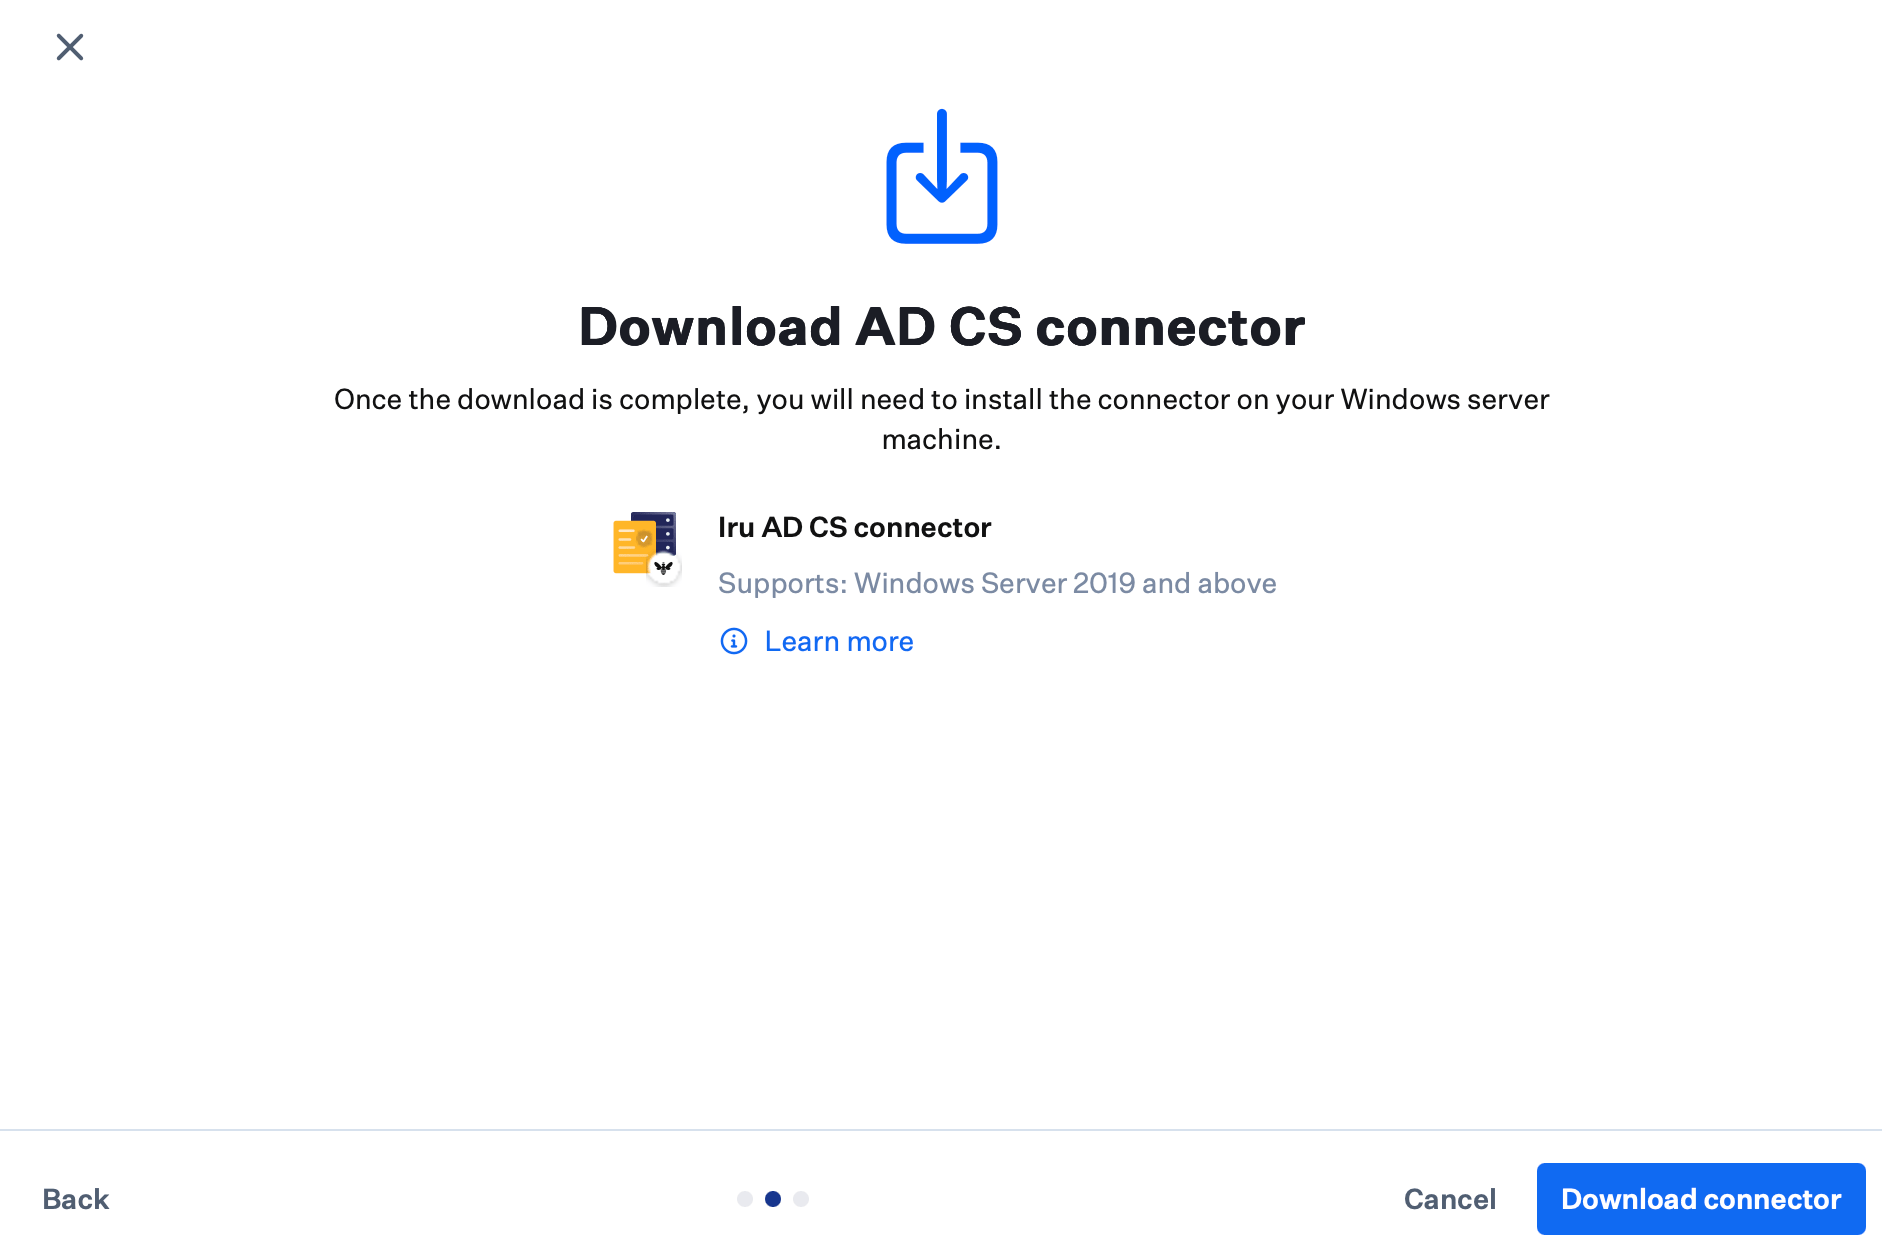
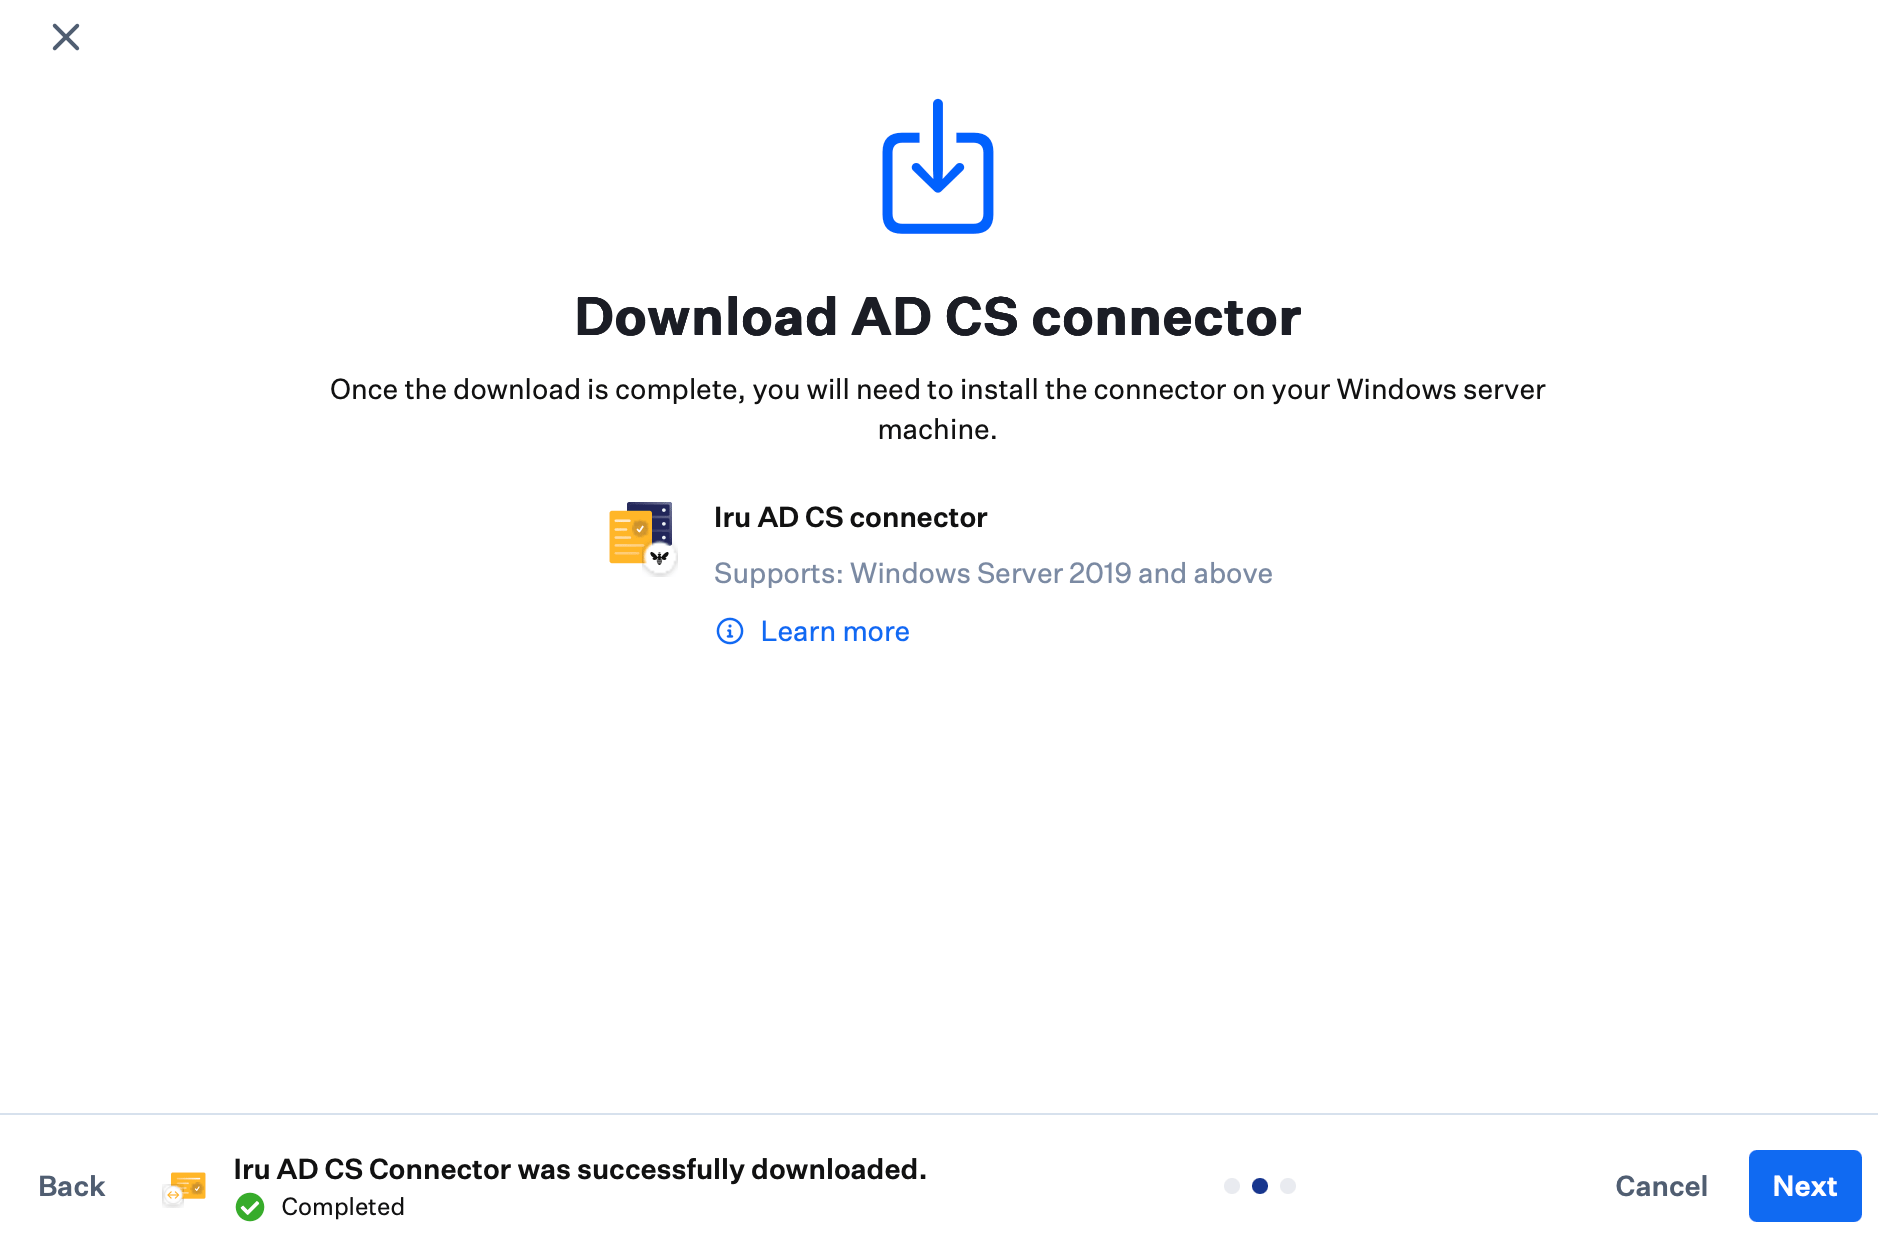
 In the Download window, click **Download connector**.
 You should see an indicator displaying the download progress. Once the download is done, the Iru Endpoint AD CS Connector installer file will be in your default downloads folder.
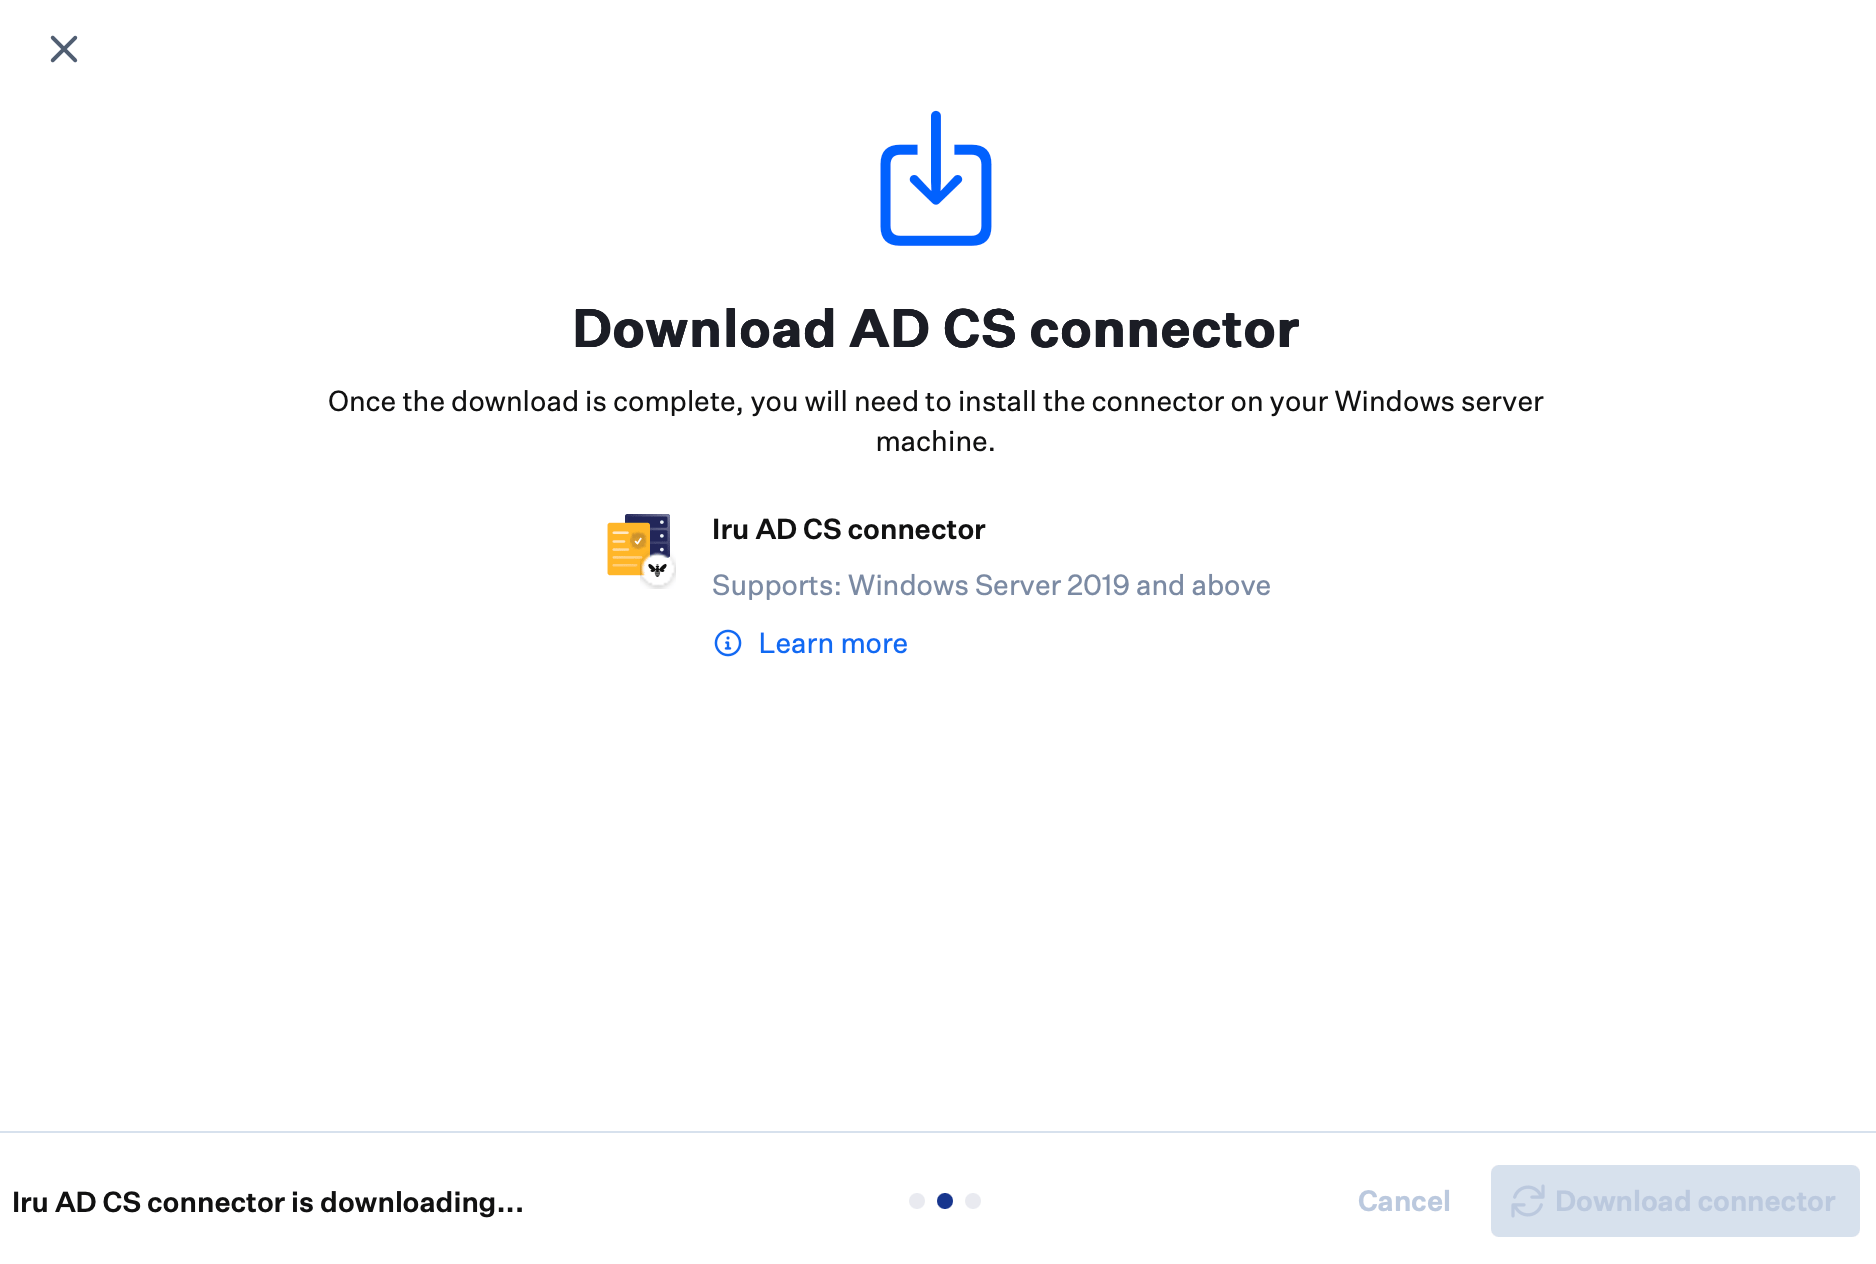 Once the download completes, click **Next**.
 On the **Connection pending…** screen, read the tasks to perform on the Windows Server designated as the AD CS Connector.
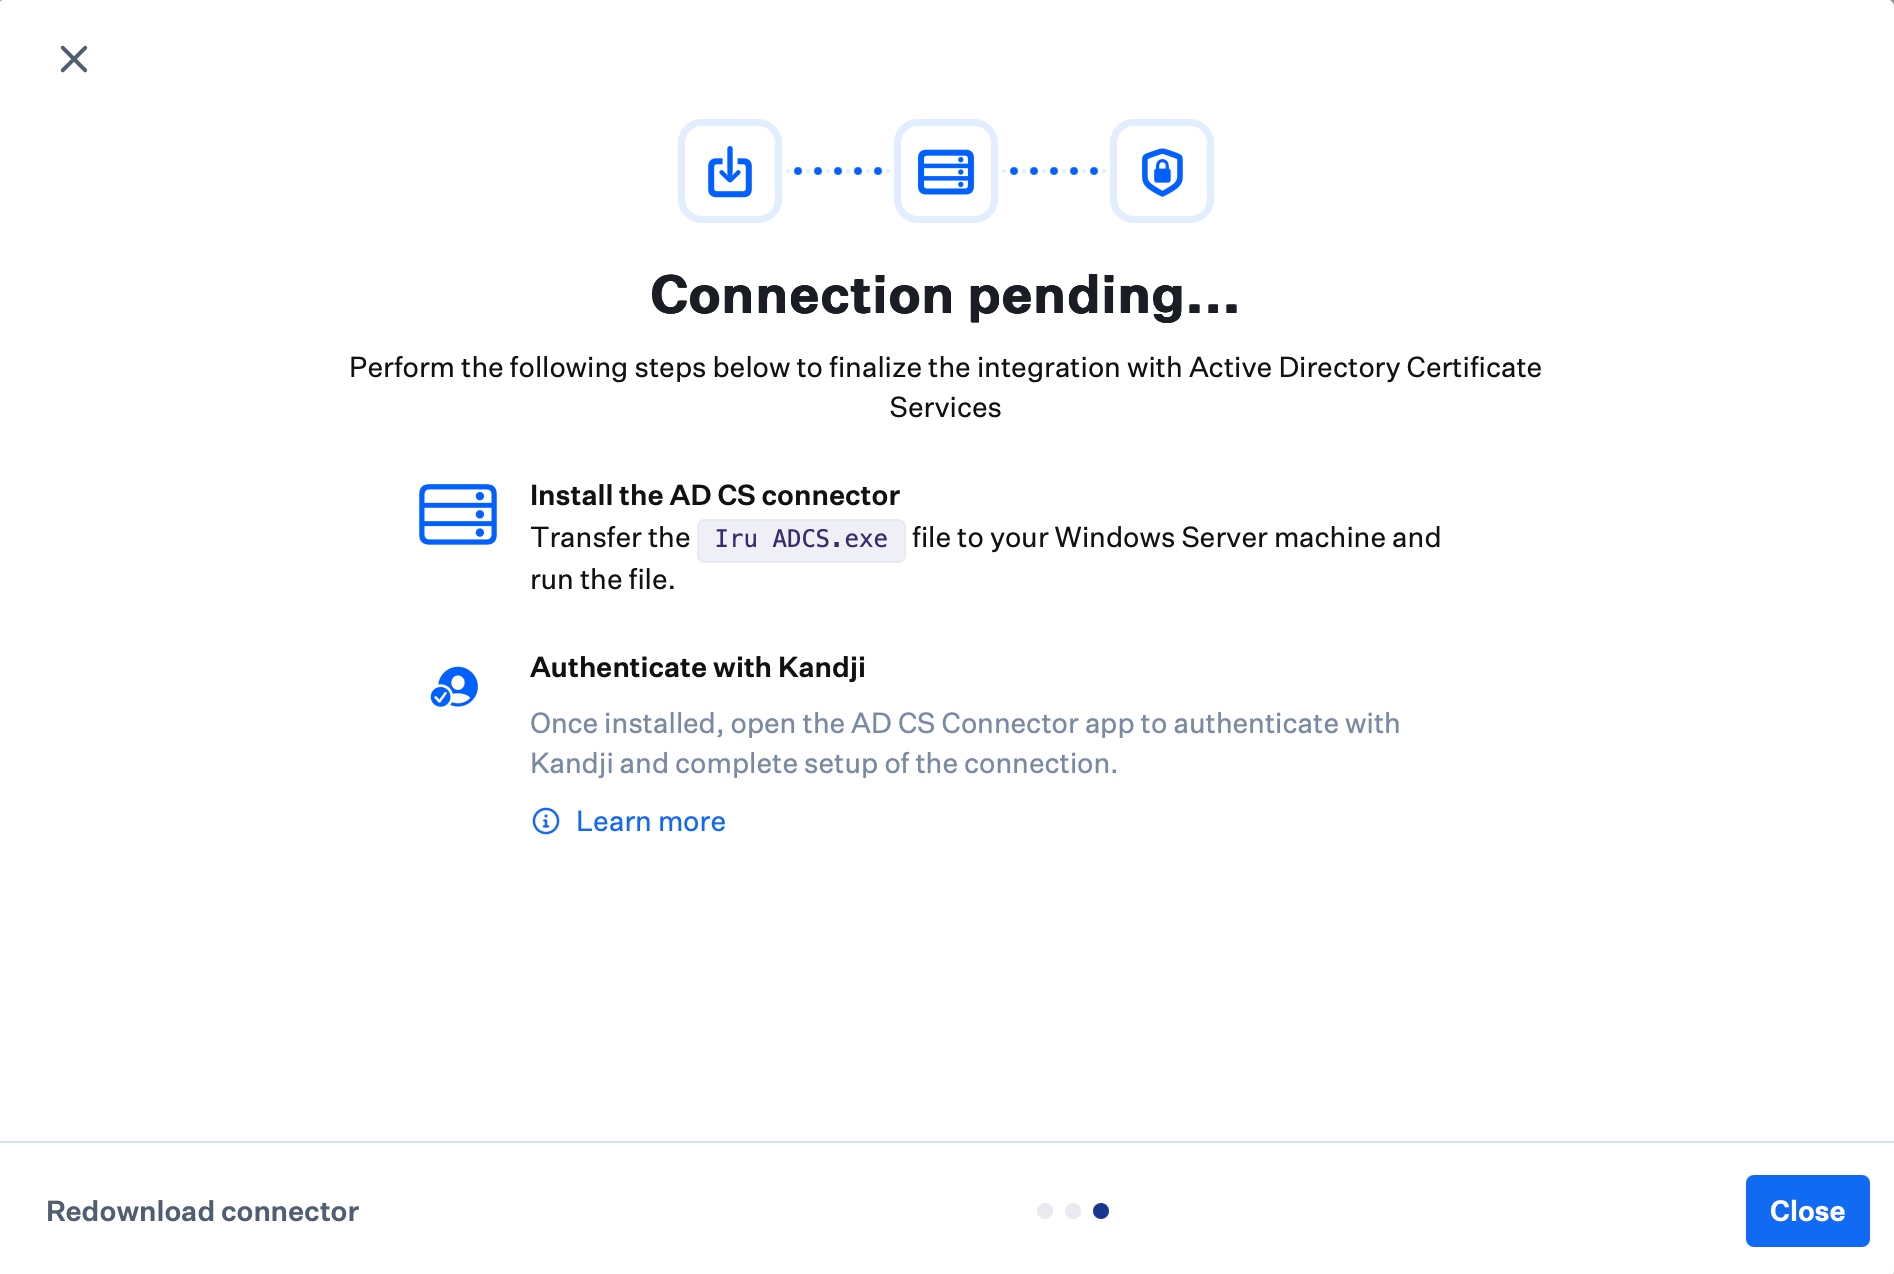 To go back to the main Integrations page, click **Close**.
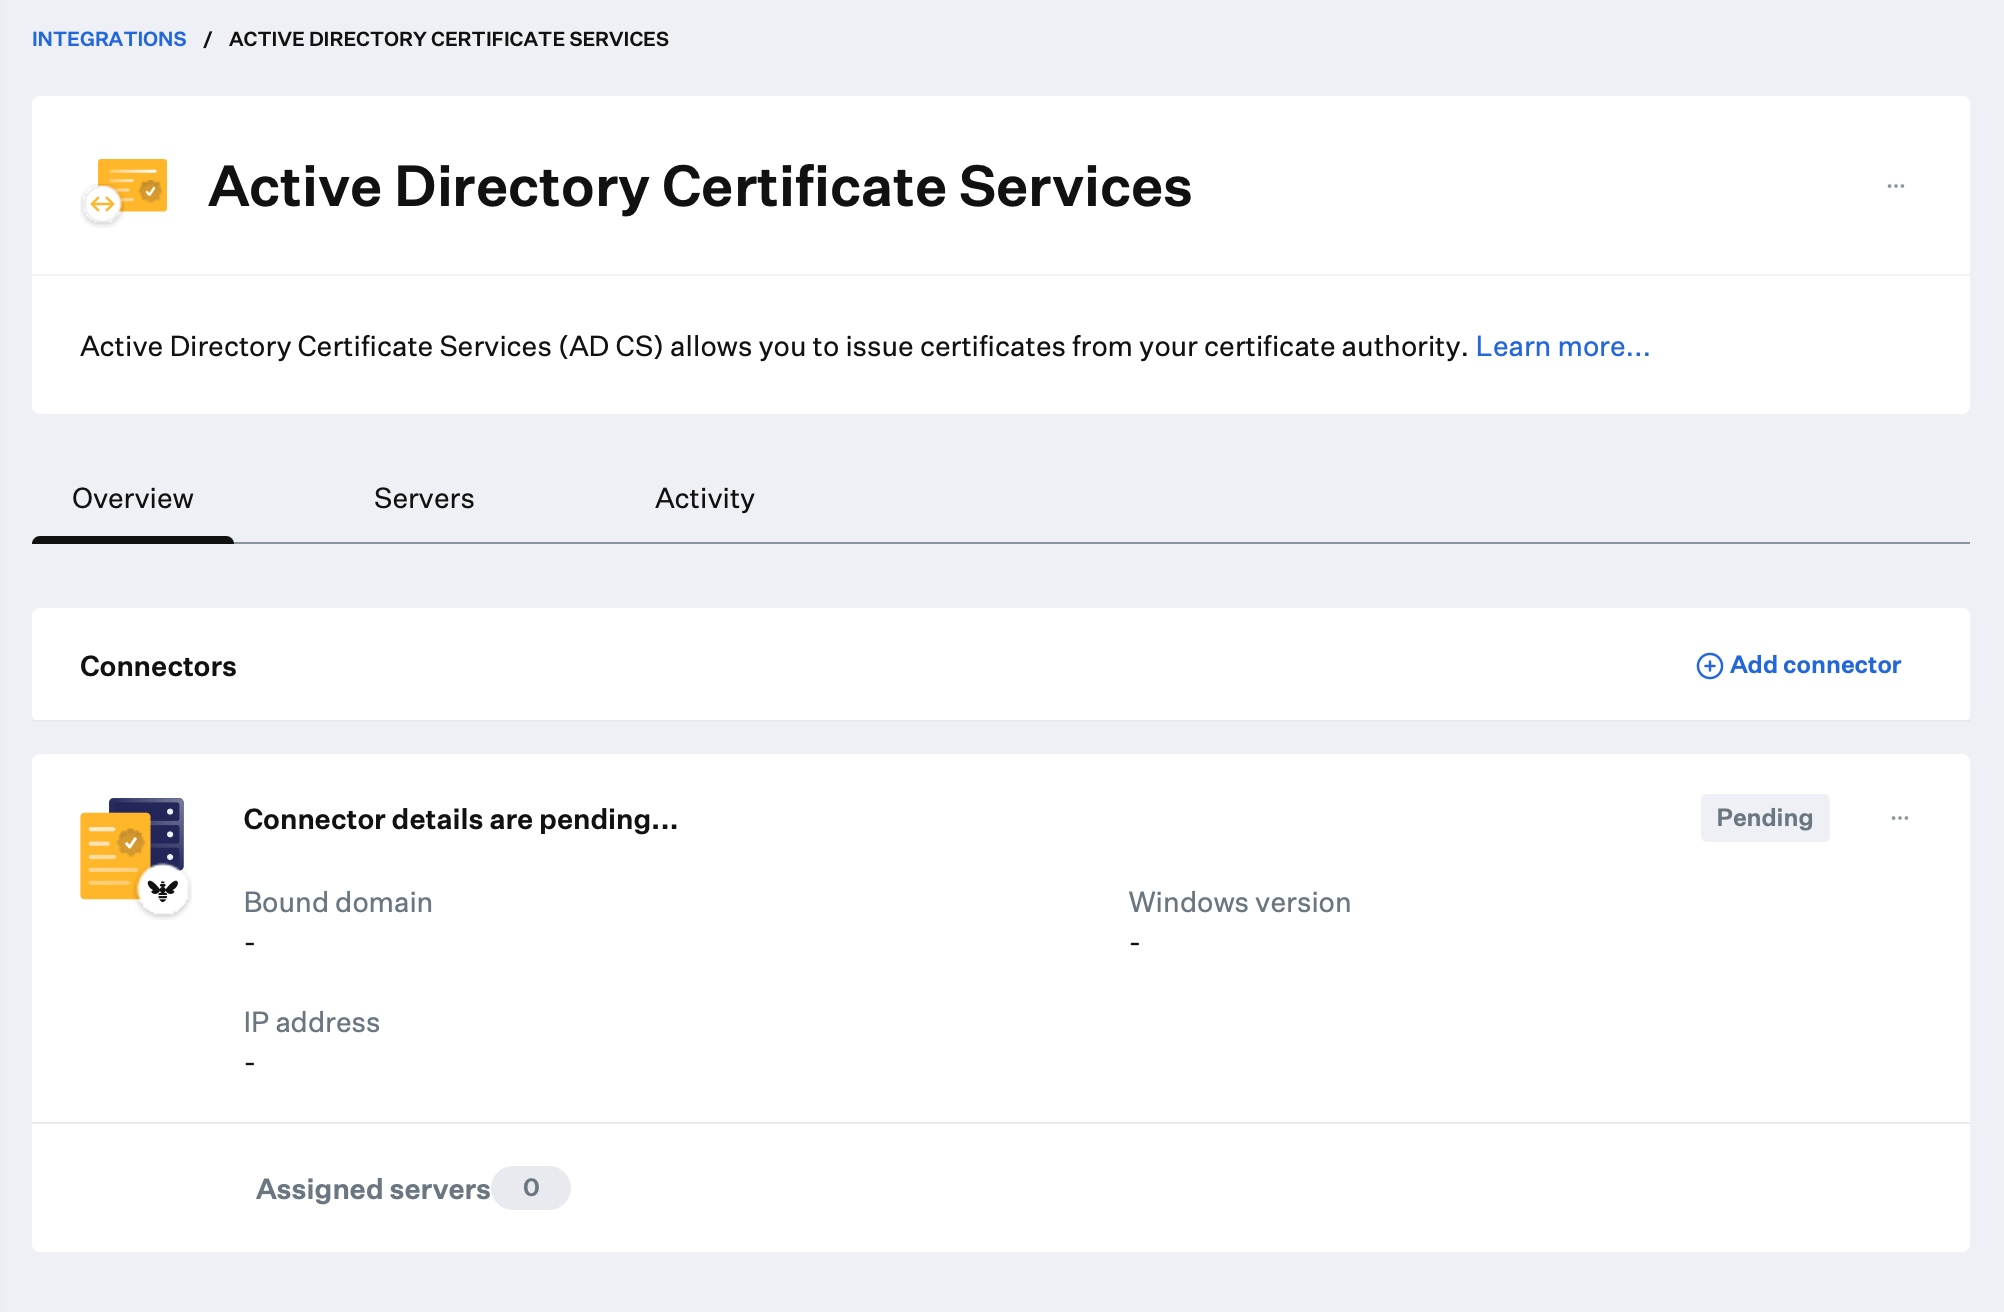
An AD CS integration card should be visible on the main Integrations page.
The status will show as **Pending installation…** until the AD CS Connector has been installed on the Windows server, you have signed in with an Iru Endpoint administrator account, you have completed **registration URL** approval in the browser, and the Connector shows as active in Iru Endpoint.
To go back to the main Integrations page, click **Close**.
An AD CS integration card should be visible on the main Integrations page.
The status will show as **Pending installation…** until the AD CS Connector has been installed on the Windows server, you have signed in with an Iru Endpoint administrator account, you have completed **registration URL** approval in the browser, and the Connector shows as active in Iru Endpoint.
 On the Windows Server designated as the AD CS Connector, follow [AD CS Connector Installation](/en/endpoint/integrations/certificate-services/active-directory-certificate-services/active-directory-certificate-services-ad-cs-integration-ad-cs-connector-installation#installation) to install and register the Connector, including sign-in and **registration URL** approval in the browser. When the Connector app shows **Connected** and the integration lists the Connector as **Active**, continue with the next section.
### Next Steps
After you close the setup wizard with the installer downloaded:
Complete [AD CS Connector Installation](/en/endpoint/integrations/certificate-services/active-directory-certificate-services/active-directory-certificate-services-ad-cs-integration-ad-cs-connector-installation), including initialization, **registration URL** approval, and verification that the Connector shows **Connected** and **Active**.
When the Connector is connected, continue in this article with [Adding AD CS Certificate Authority Servers](#adding-ad-cs-certificate-authority-servers) and [Assigning an AD CS server to a Connector](#assigning-an-ad-cs-server-to-a-connector).
### Overview of the AD CS integration page
Use the **Overview** page to review Connector status and open actions such as install instructions, **Redownload Connector**, or delete a Connector row.
Click on the AD CS integration card to go to the **Overview** page.
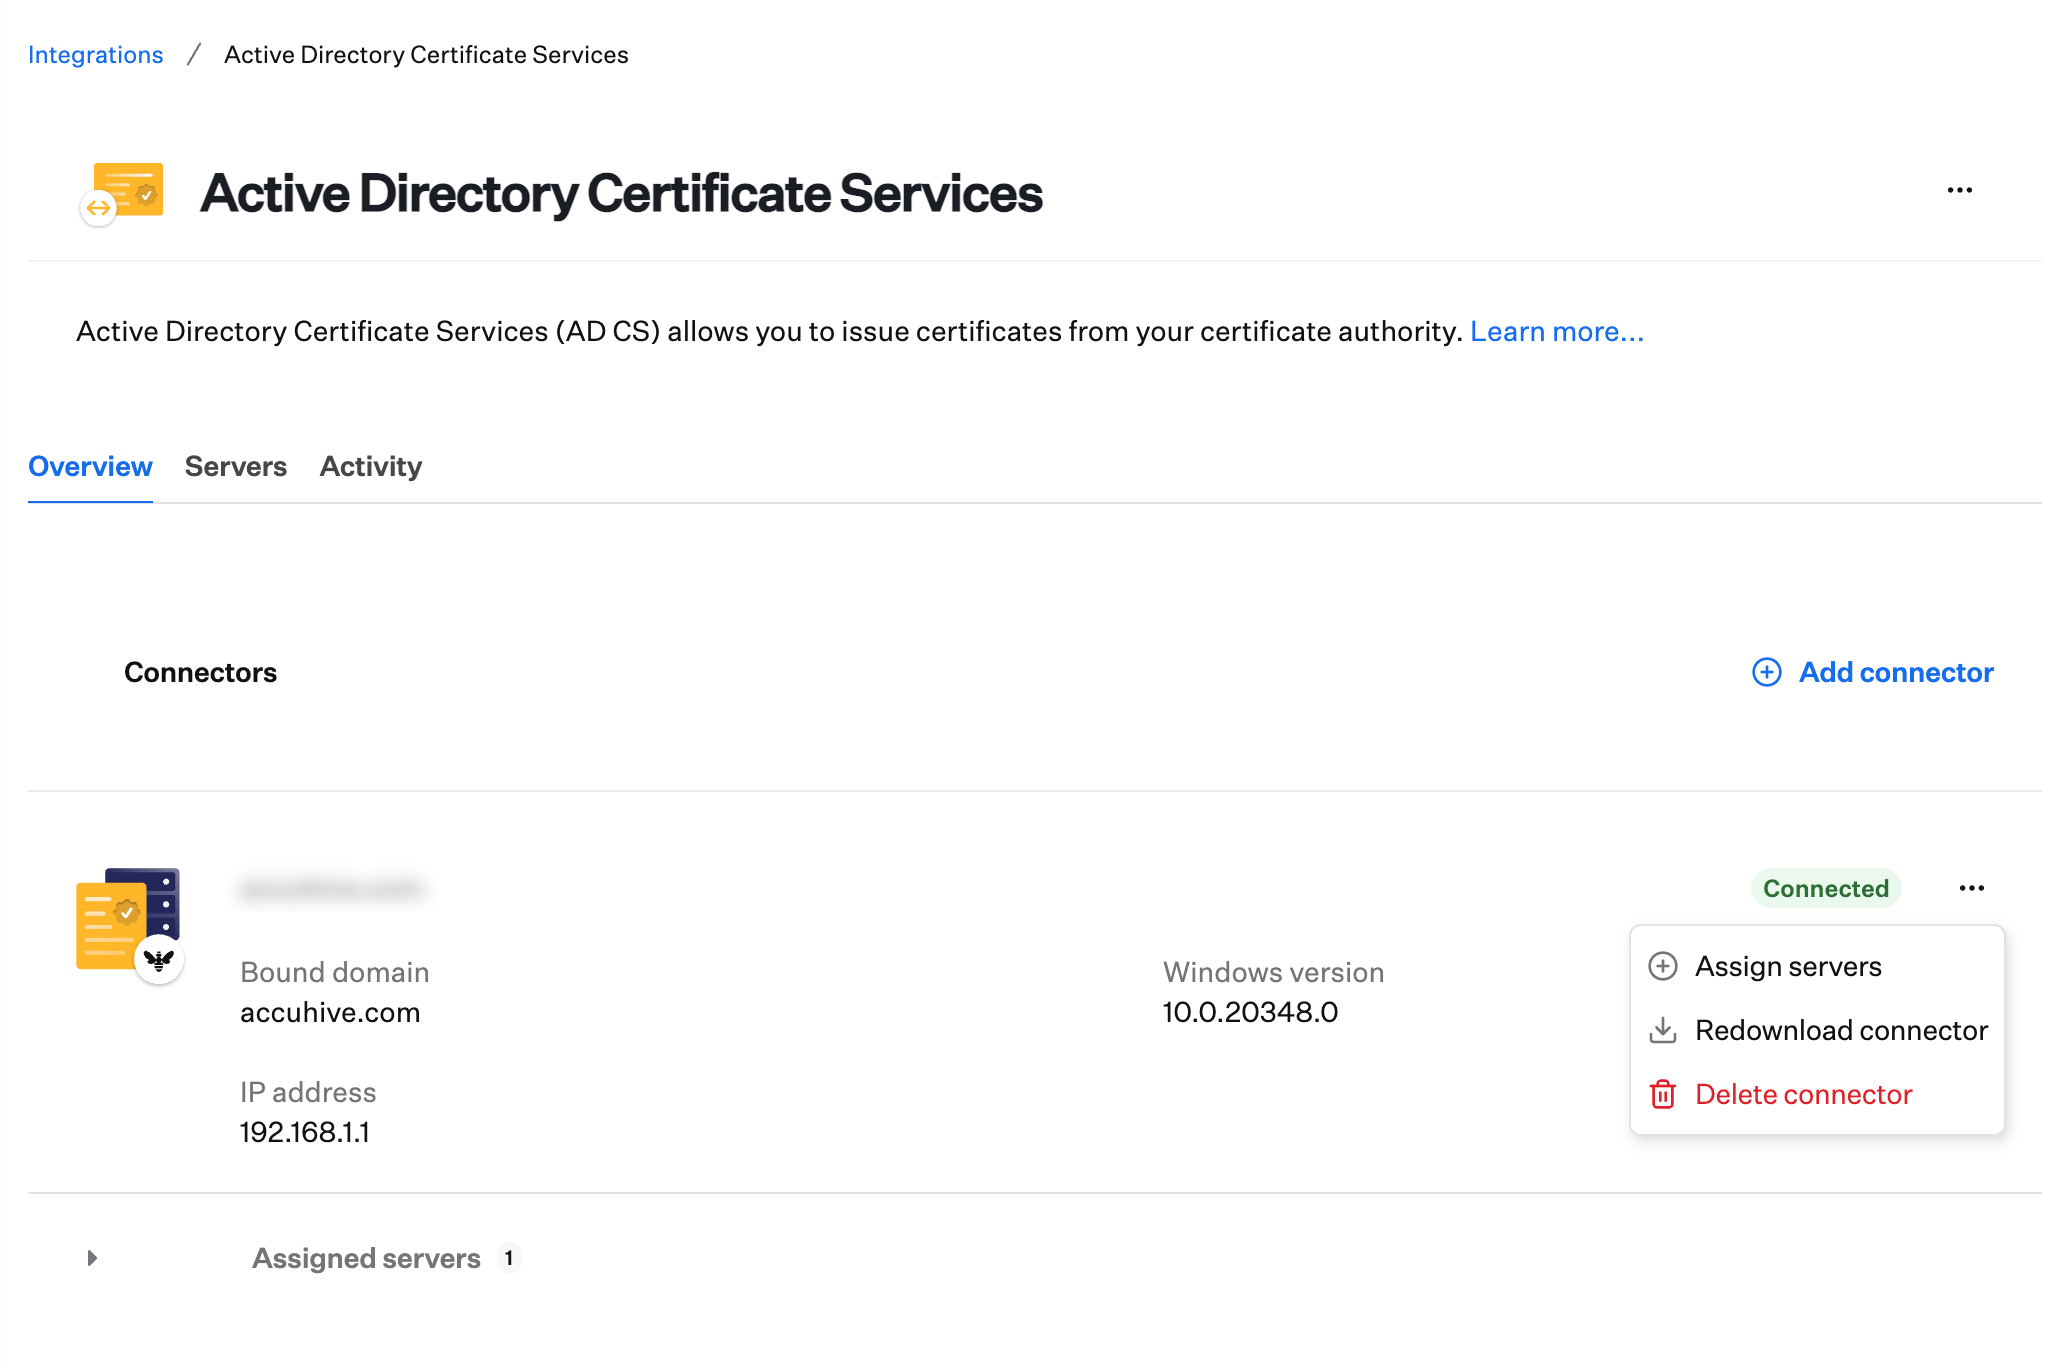
On the Overview page, you can see information about the AD CS Connector that was just added. Most of the details will not be populated until the AD CS Connector is installed on the Windows server and a connection is made back to Iru Endpoint.
* The domain to which the AD CS Connector server is bound.
* The Connector's IP address.
* Assigned AD CS servers. Servers can be assigned once the AD CS Connector is connected back to Iru Endpoint.
* The version of the Windows server where the AD CS Connector is installed.
* Status on the connection between Iru Endpoint and the Iru Endpoint AD CS Connector. The status will remain in a Pending state until the Connector is installed on the Windows server and a connection is made back to Iru Endpoint.
* In the Connector action menu (...), you can view the installation instructions, redownload the connector installer, or delete the connector.
On the Windows Server designated as the AD CS Connector, follow [AD CS Connector Installation](/en/endpoint/integrations/certificate-services/active-directory-certificate-services/active-directory-certificate-services-ad-cs-integration-ad-cs-connector-installation#installation) to install and register the Connector, including sign-in and **registration URL** approval in the browser. When the Connector app shows **Connected** and the integration lists the Connector as **Active**, continue with the next section.
### Next Steps
After you close the setup wizard with the installer downloaded:
Complete [AD CS Connector Installation](/en/endpoint/integrations/certificate-services/active-directory-certificate-services/active-directory-certificate-services-ad-cs-integration-ad-cs-connector-installation), including initialization, **registration URL** approval, and verification that the Connector shows **Connected** and **Active**.
When the Connector is connected, continue in this article with [Adding AD CS Certificate Authority Servers](#adding-ad-cs-certificate-authority-servers) and [Assigning an AD CS server to a Connector](#assigning-an-ad-cs-server-to-a-connector).
### Overview of the AD CS integration page
Use the **Overview** page to review Connector status and open actions such as install instructions, **Redownload Connector**, or delete a Connector row.
Click on the AD CS integration card to go to the **Overview** page.
On the Overview page, you can see information about the AD CS Connector that was just added. Most of the details will not be populated until the AD CS Connector is installed on the Windows server and a connection is made back to Iru Endpoint.
* The domain to which the AD CS Connector server is bound.
* The Connector's IP address.
* Assigned AD CS servers. Servers can be assigned once the AD CS Connector is connected back to Iru Endpoint.
* The version of the Windows server where the AD CS Connector is installed.
* Status on the connection between Iru Endpoint and the Iru Endpoint AD CS Connector. The status will remain in a Pending state until the Connector is installed on the Windows server and a connection is made back to Iru Endpoint.
* In the Connector action menu (...), you can view the installation instructions, redownload the connector installer, or delete the connector.
 ### Adding AD CS Certificate Authority Servers
You must define the FQDN in the Server name field in the AD CS servers tray.
On the AD CS Integration page, click the **Servers** tab.
On the **Servers** tab, click **+ Add server** to open the tray for adding an issuing CA.
### Adding AD CS Certificate Authority Servers
You must define the FQDN in the Server name field in the AD CS servers tray.
On the AD CS Integration page, click the **Servers** tab.
On the **Servers** tab, click **+ Add server** to open the tray for adding an issuing CA.
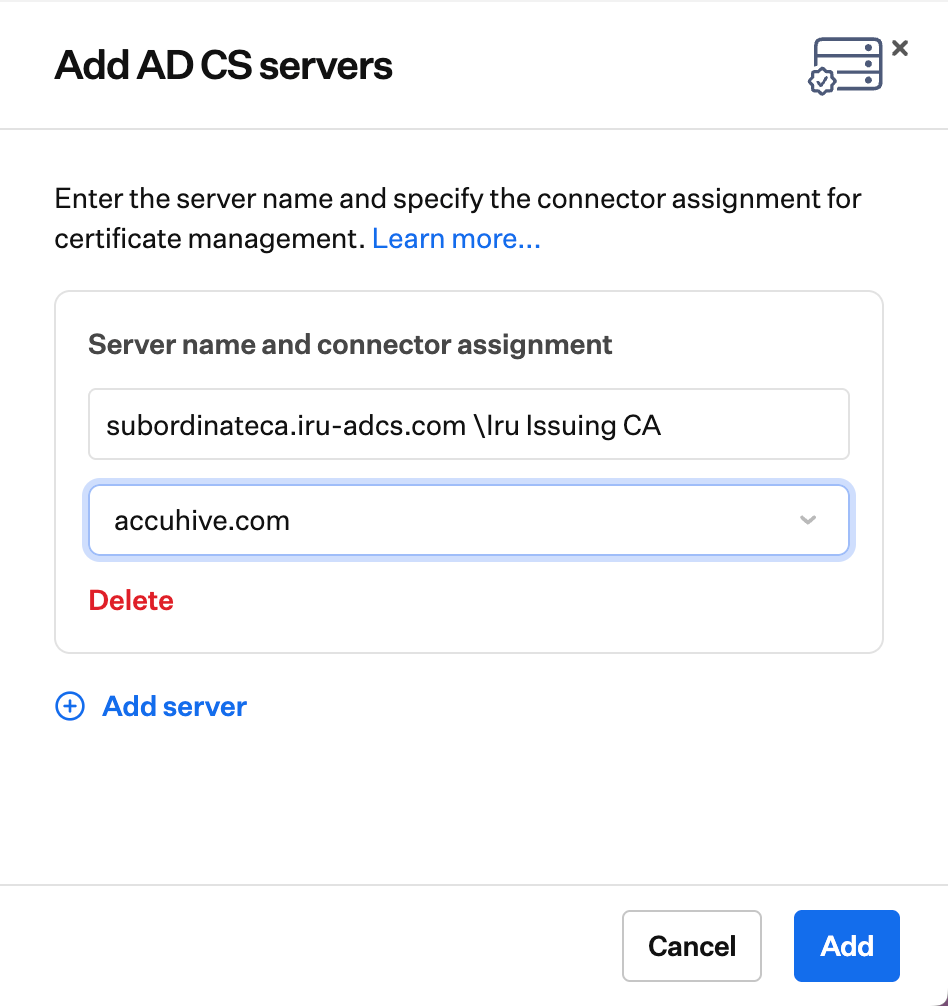
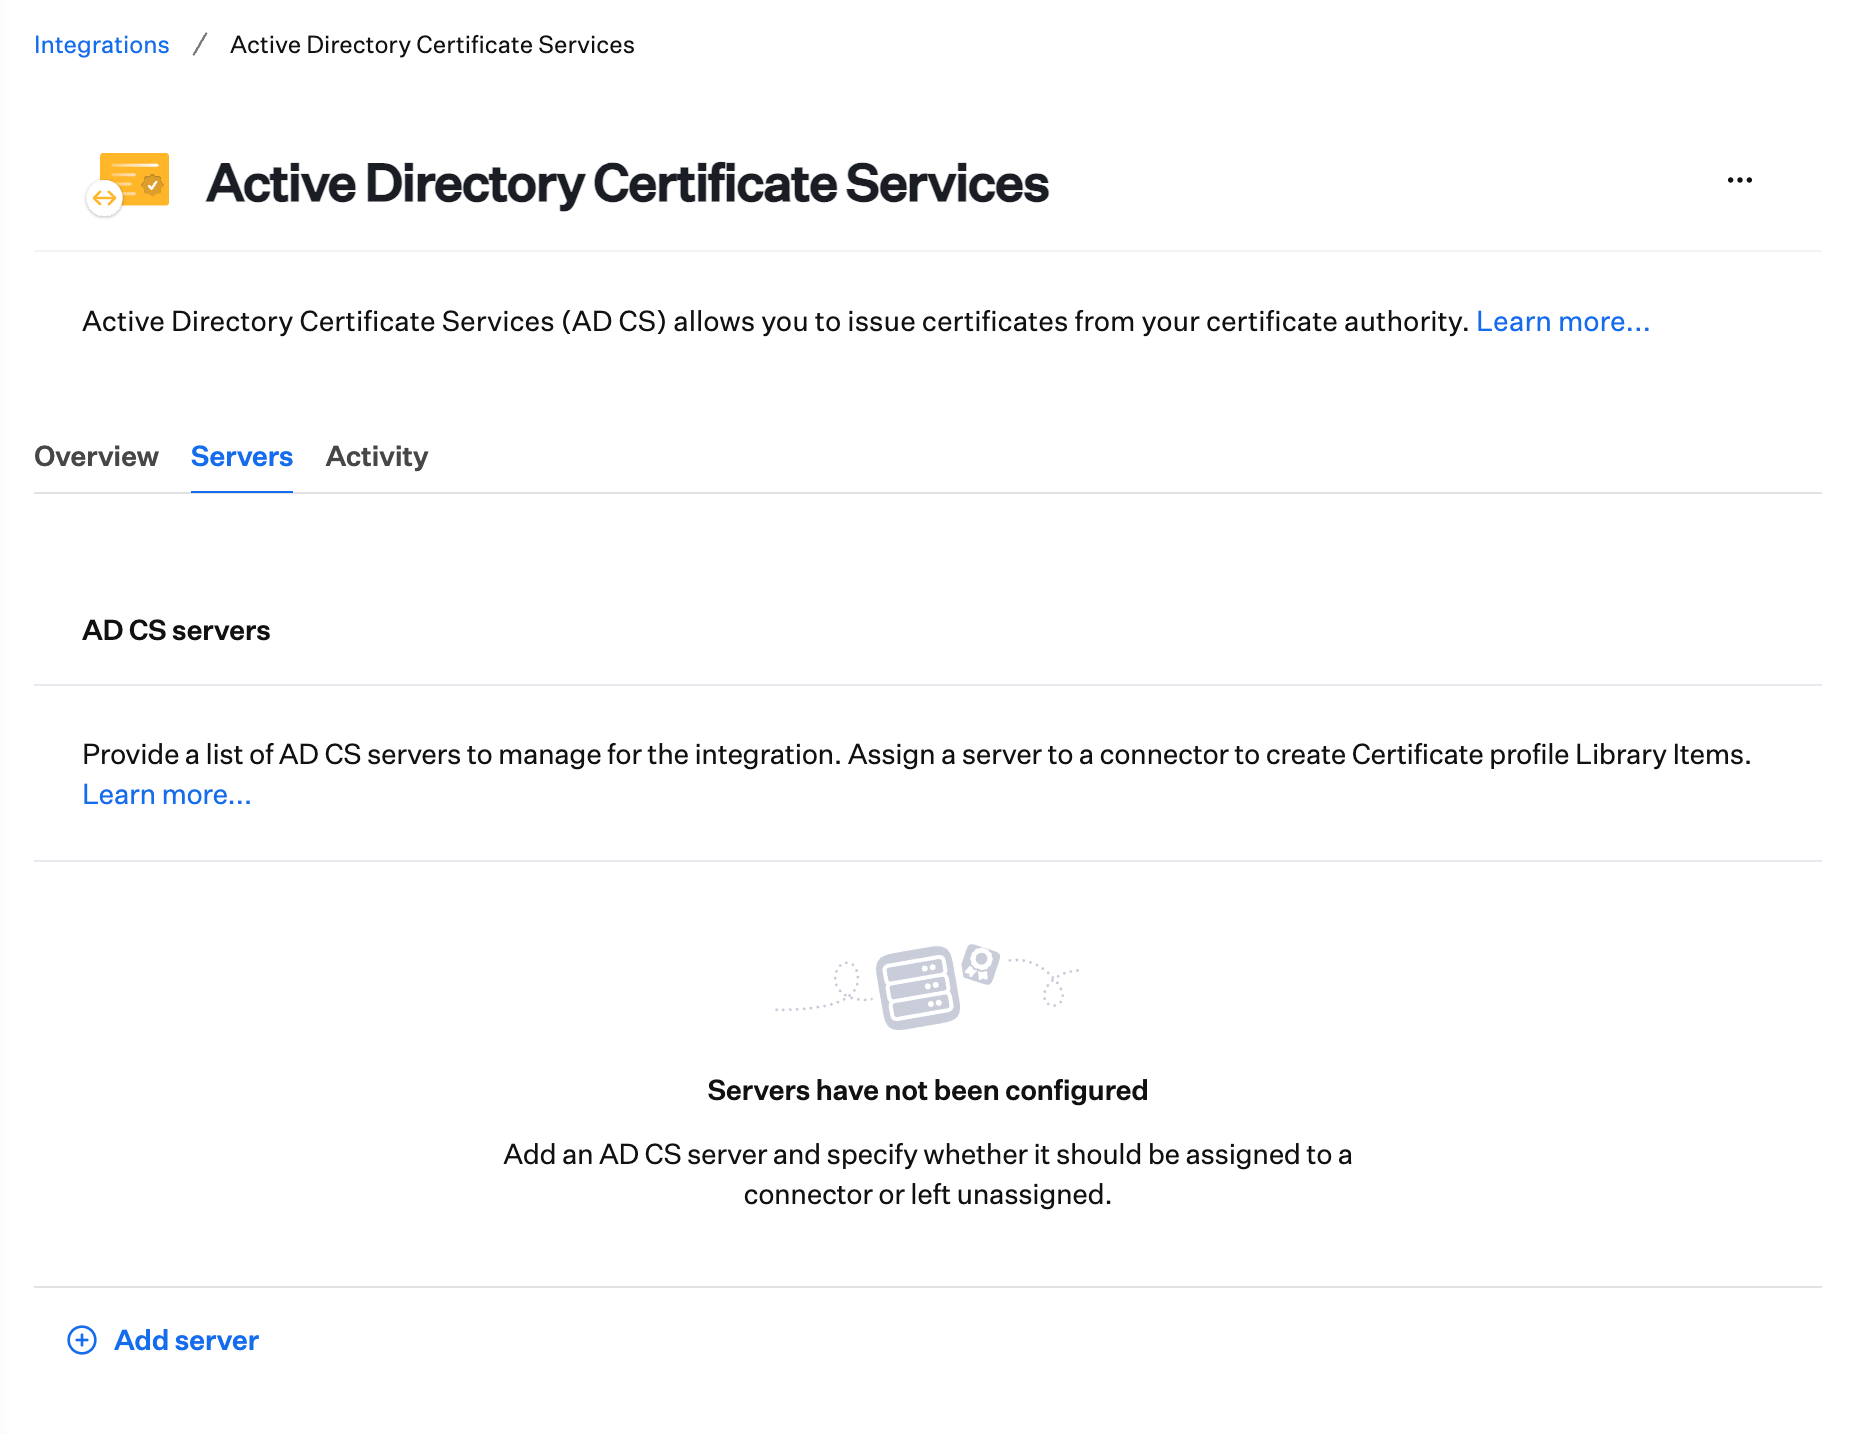 In the tray, add the AD CS server(s) that will be used for creating certificates using the format of: `ca_server_fqdn\issuing_ca_name` (Example: `subordinateca.example.com\QueenBee Issuing CA`). The issuing\_ca\_name is found in the Certificate Authority Snap-in on the issuing CA Windows server. You will be able to assign the server once the Connector shows a status of Connected.
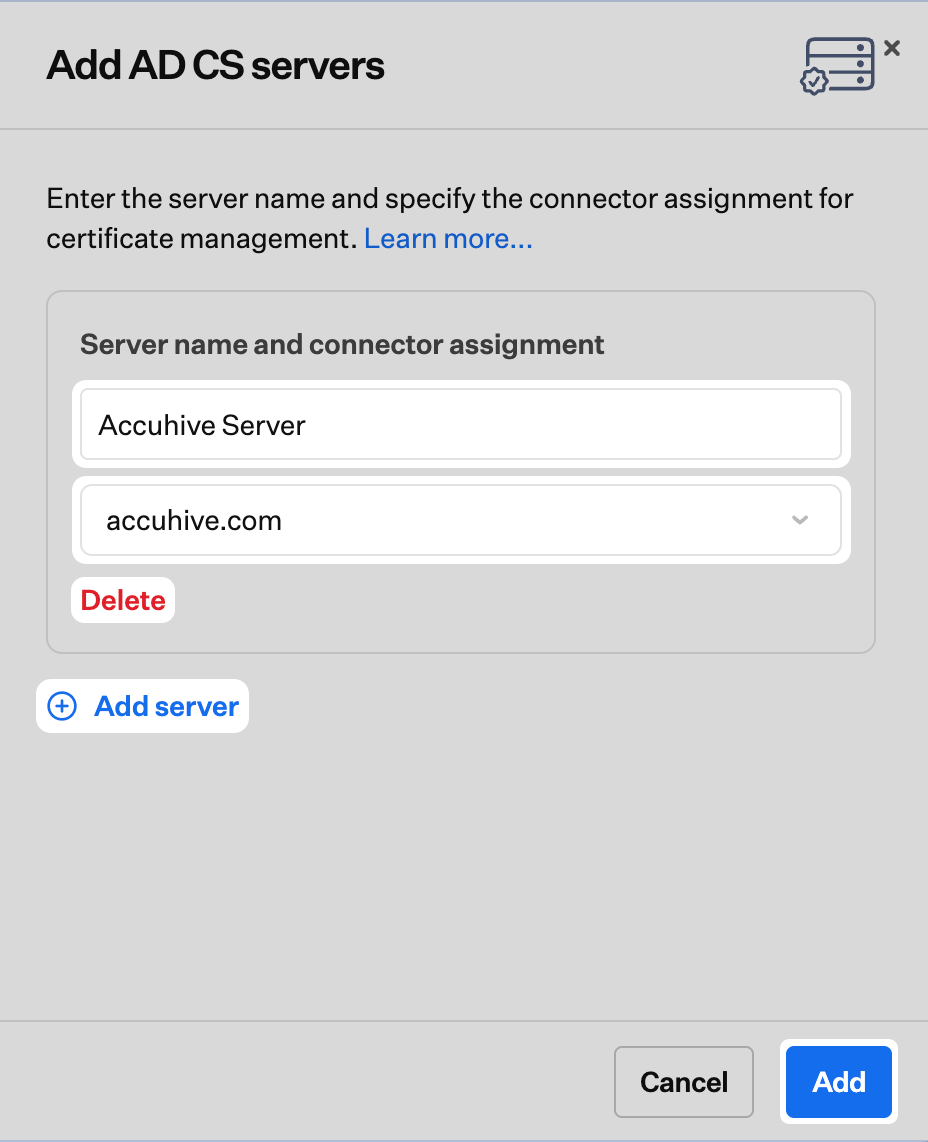 Click **Add**.
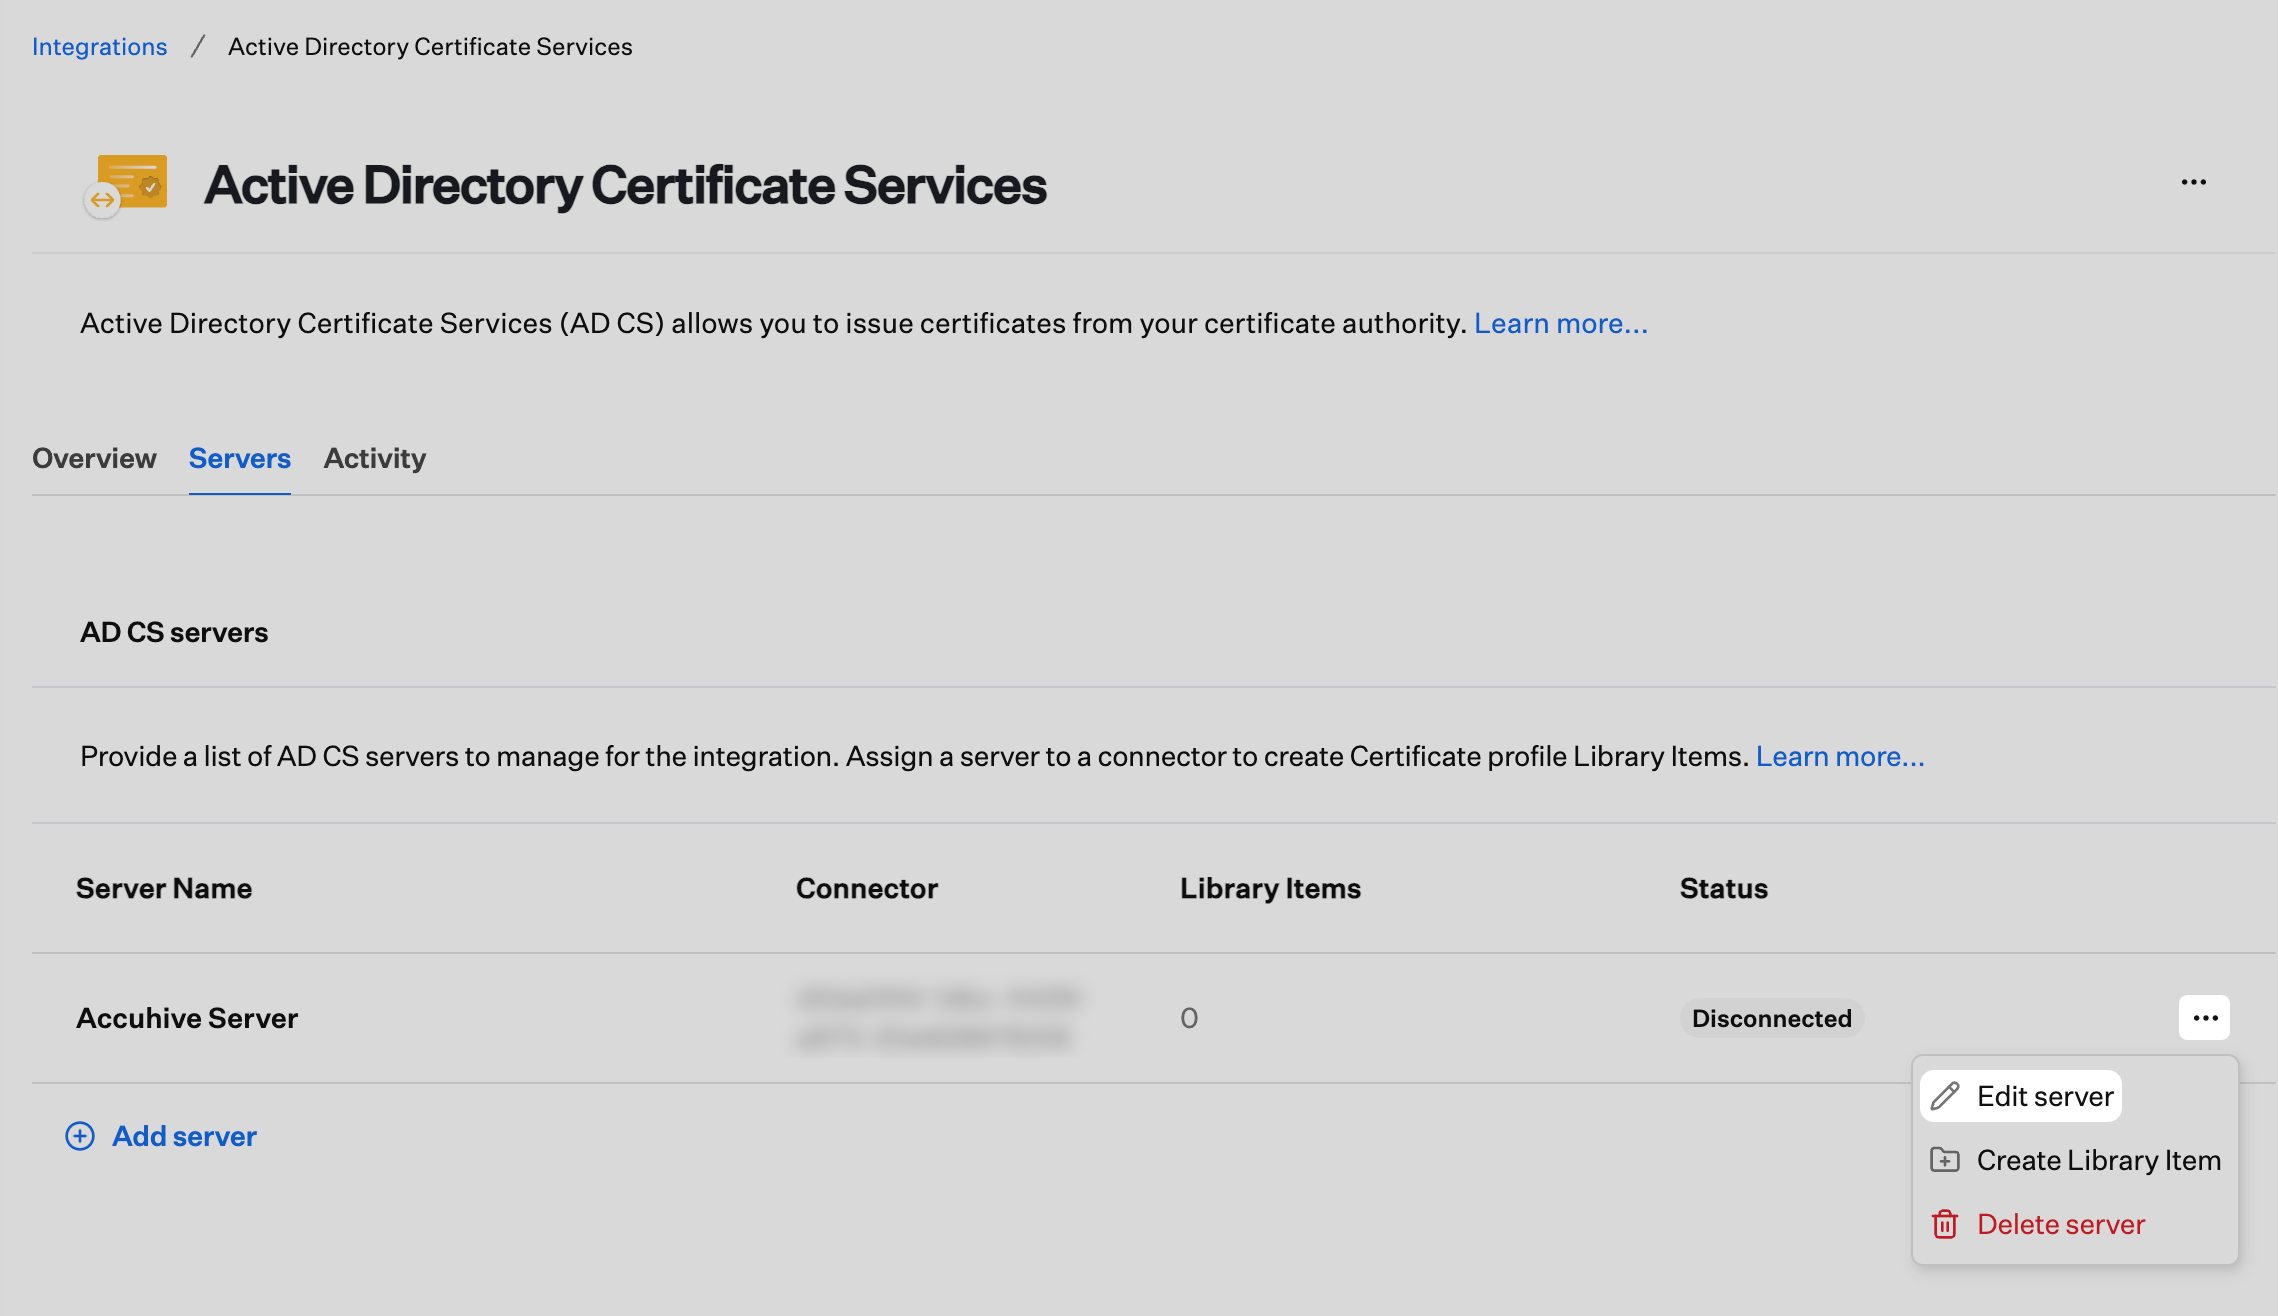
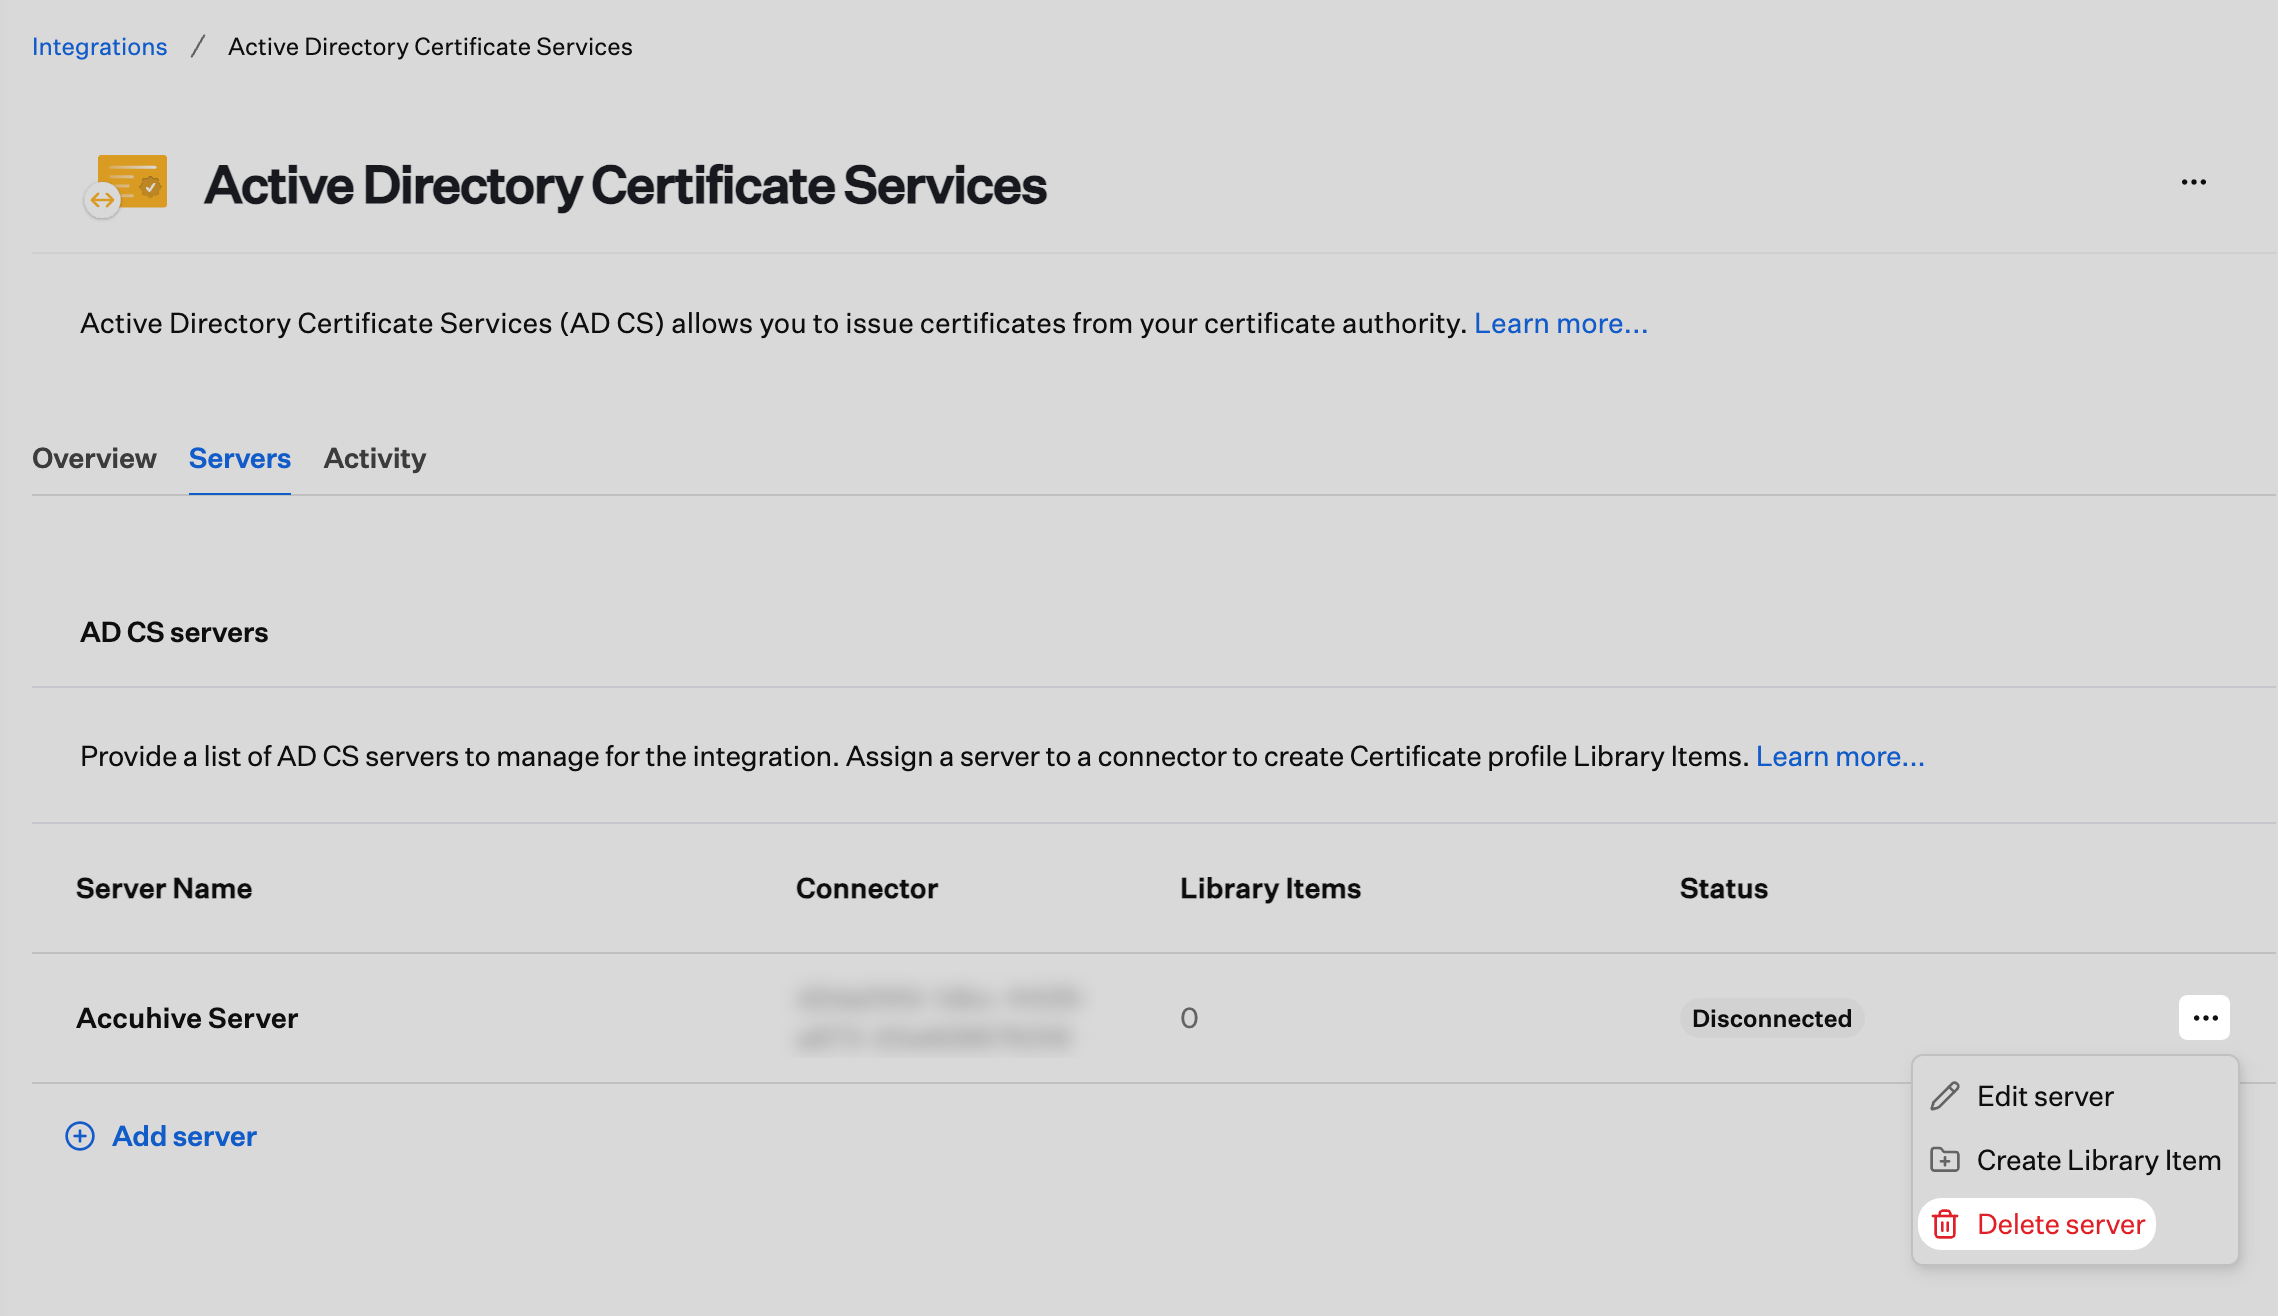
 The status for the AD CS server will show as **Disconnected** until assigned to an AD CS Connector. Once the AD CS Connector status shows **Connected**, you can assign the AD CS CA server(s) to the AD CS Connector. You can edit or delete the AD CS server from the action menu (**...**) on the AD CS server card.
 ### Assigning an AD CS server to a Connector
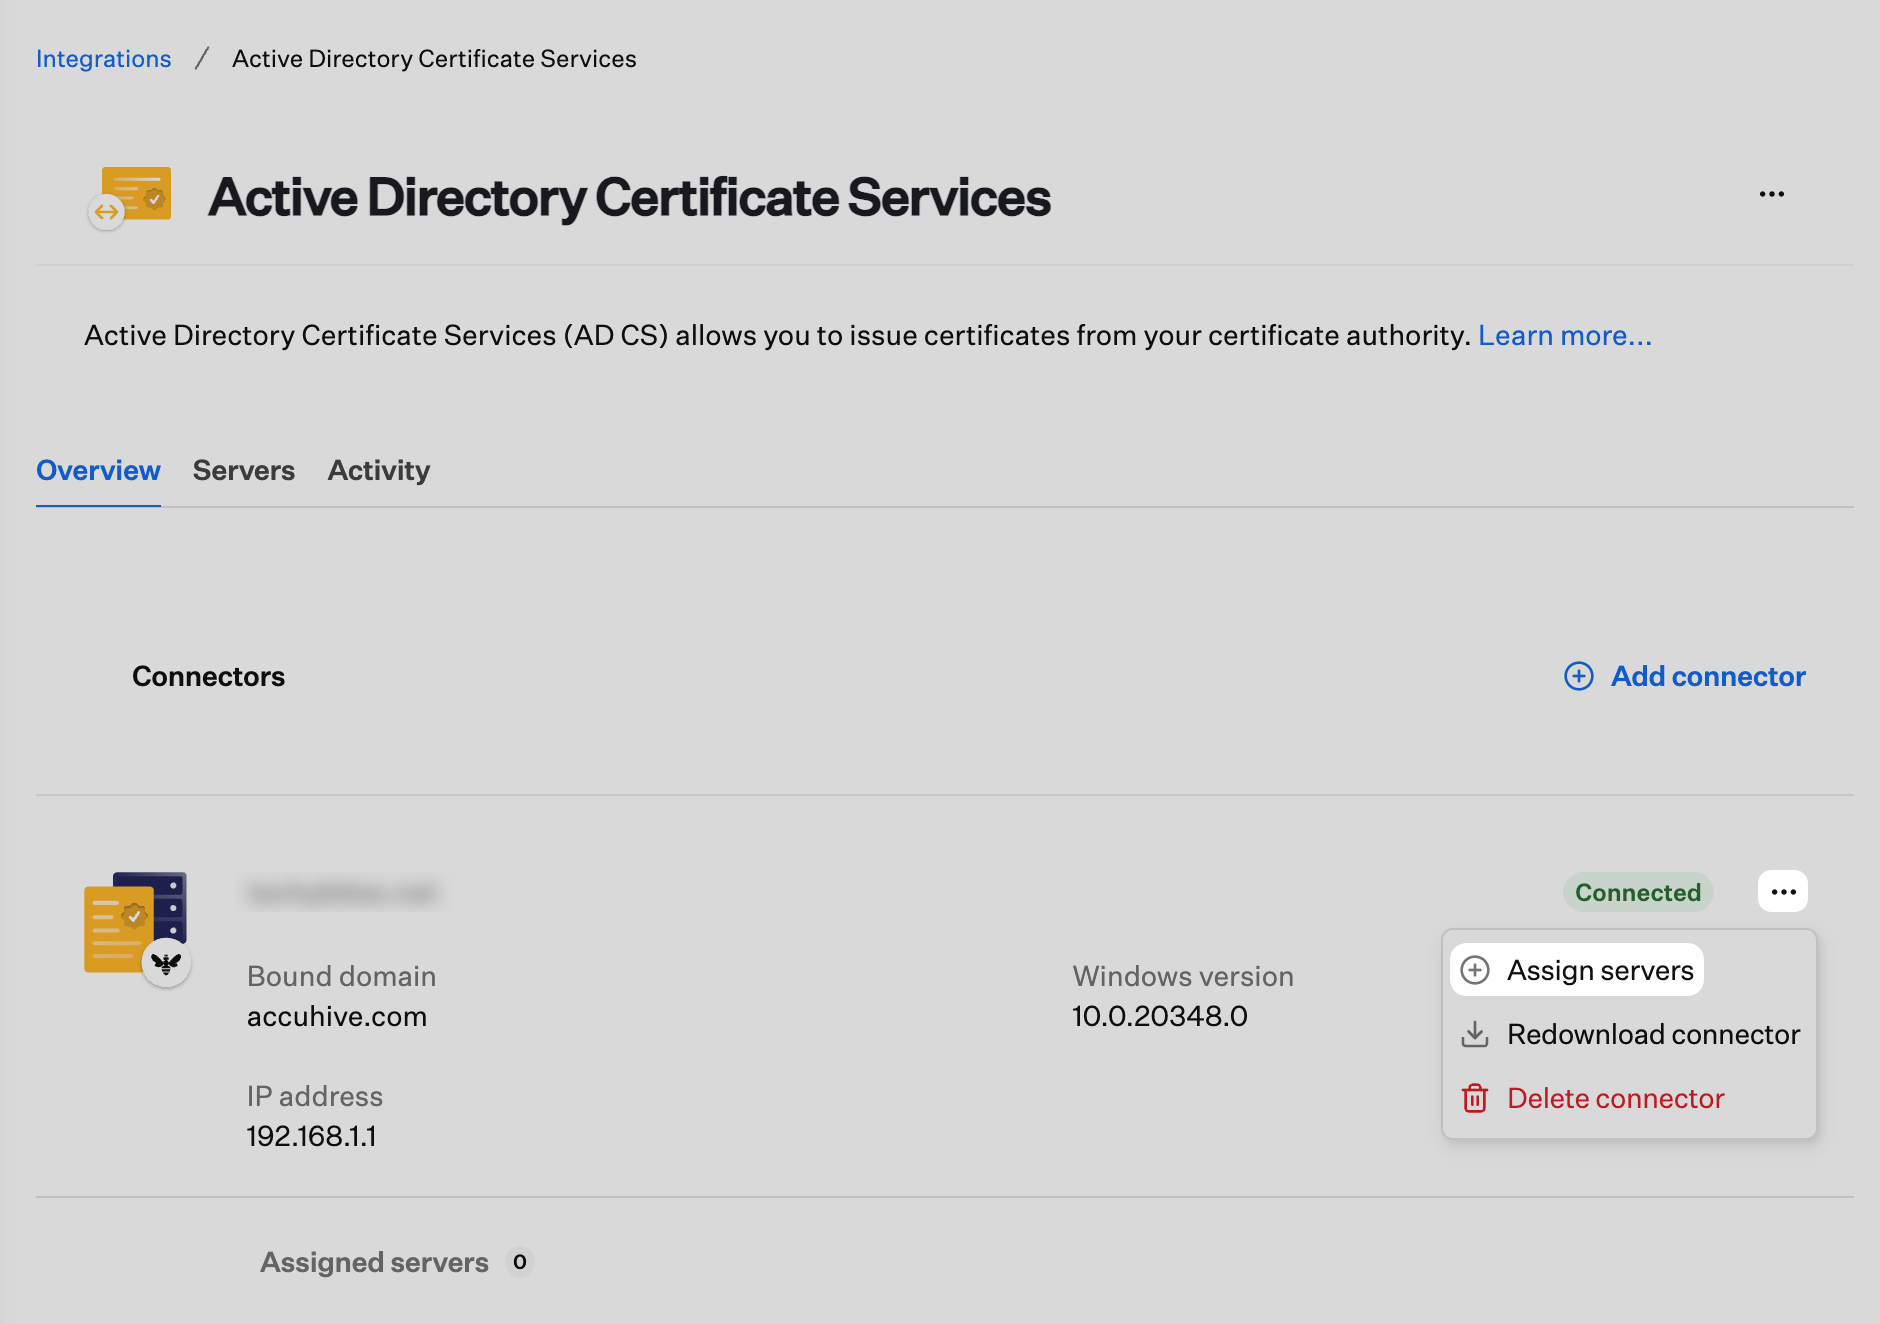
Once the AD CS Connector status shows as Connected, you can assign an AD CS server to the Connector.
On the AD CS Integration Overview page, click the action menu (…) on the Connector card.
Click **Assign servers**.
### Assigning an AD CS server to a Connector
Once the AD CS Connector status shows as Connected, you can assign an AD CS server to the Connector.
On the AD CS Integration Overview page, click the action menu (…) on the Connector card.
Click **Assign servers**.
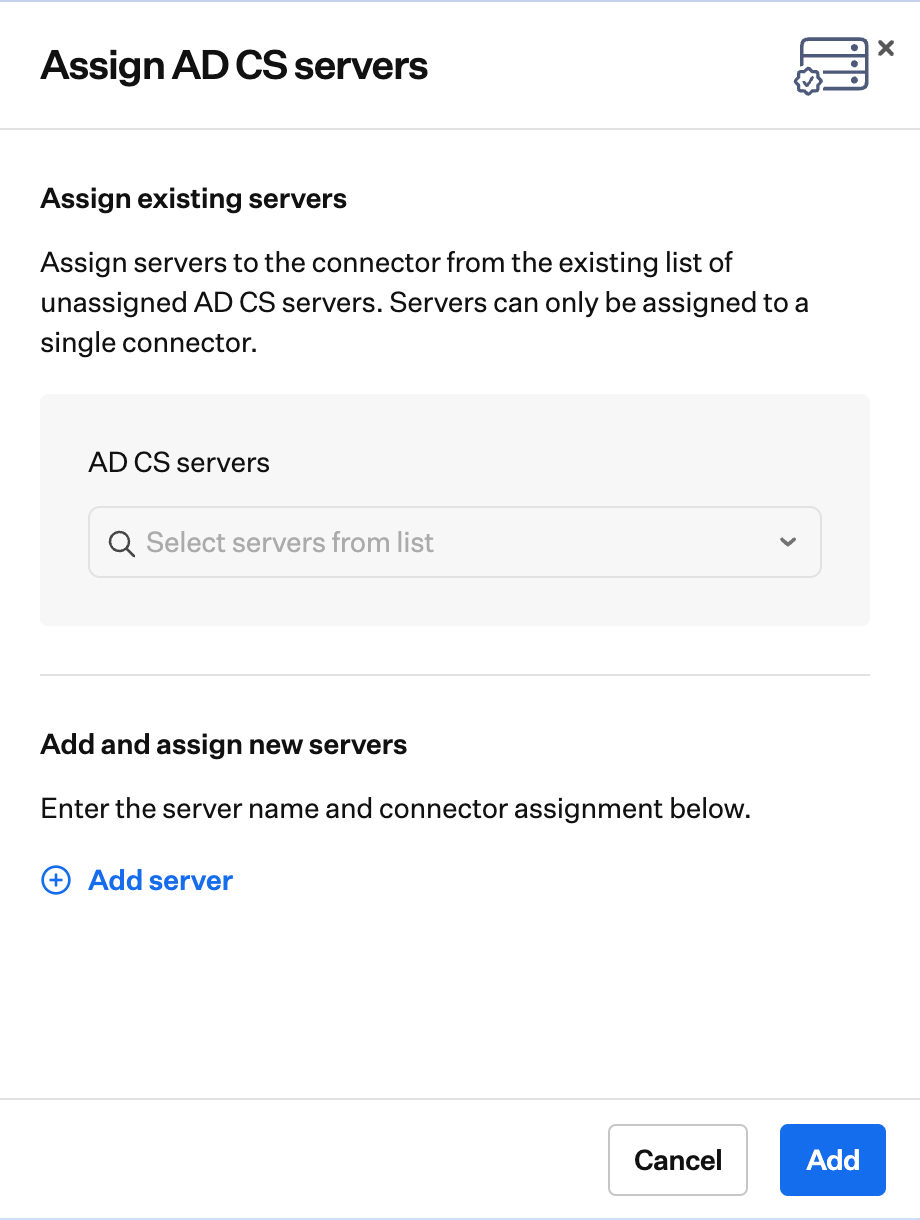
 Select one or more AD CS servers from the list.
Click **Add**.
Select one or more AD CS servers from the list.
Click **Add**.
 There should now be at least one AD CS server assigned to the Connector.
When you replace the **legacy** Connector with the **updated** Connector on the same Windows Server, Iru Endpoint lists the updated registration as a **new** Connector. Use **Assign servers** on the new Connector card to attach your issuing CAs, then delete the legacy Connector entry from the action menu (**...**) on the legacy card. For the full Kandji-to-Iru workflow, see [Migrating from Kandji to Iru with AD CS](/en/endpoint/integrations/certificate-services/active-directory-certificate-services/active-directory-certificate-services-ad-cs-integration-overview#migrating-from-kandji-to-iru-with-ad-cs) in **AD CS Integration: Overview**. For uninstall and install steps on the server, see [Installation](/en/endpoint/integrations/certificate-services/active-directory-certificate-services/active-directory-certificate-services-ad-cs-integration-ad-cs-connector-installation#installation) and [Uninstalling the AD CS Connector](/en/endpoint/integrations/certificate-services/active-directory-certificate-services/active-directory-certificate-services-ad-cs-integration-ad-cs-connector-installation#uninstalling-the-ad-cs-connector) in [AD CS Connector Installation](/en/endpoint/integrations/certificate-services/active-directory-certificate-services/active-directory-certificate-services-ad-cs-integration-ad-cs-connector-installation).
### Adding Additional Connectors
If needed, additional AD CS Connectors can be added to the AD CS integration.
In Iru Endpoint, navigate to **Integrations** and select the **Active Directory Certificate Services** integration card.
Click **Add connector**.
A new connector appears in **Pending** until you finish installation, sign-in, registration approval, and connection on the Windows Server.
### Create a Library Item from an AD CS server
When the AD CS **Servers** tab lists at least one issuing CA, you can start a certificate-related Library Item from the server row instead of starting only from **Library**.
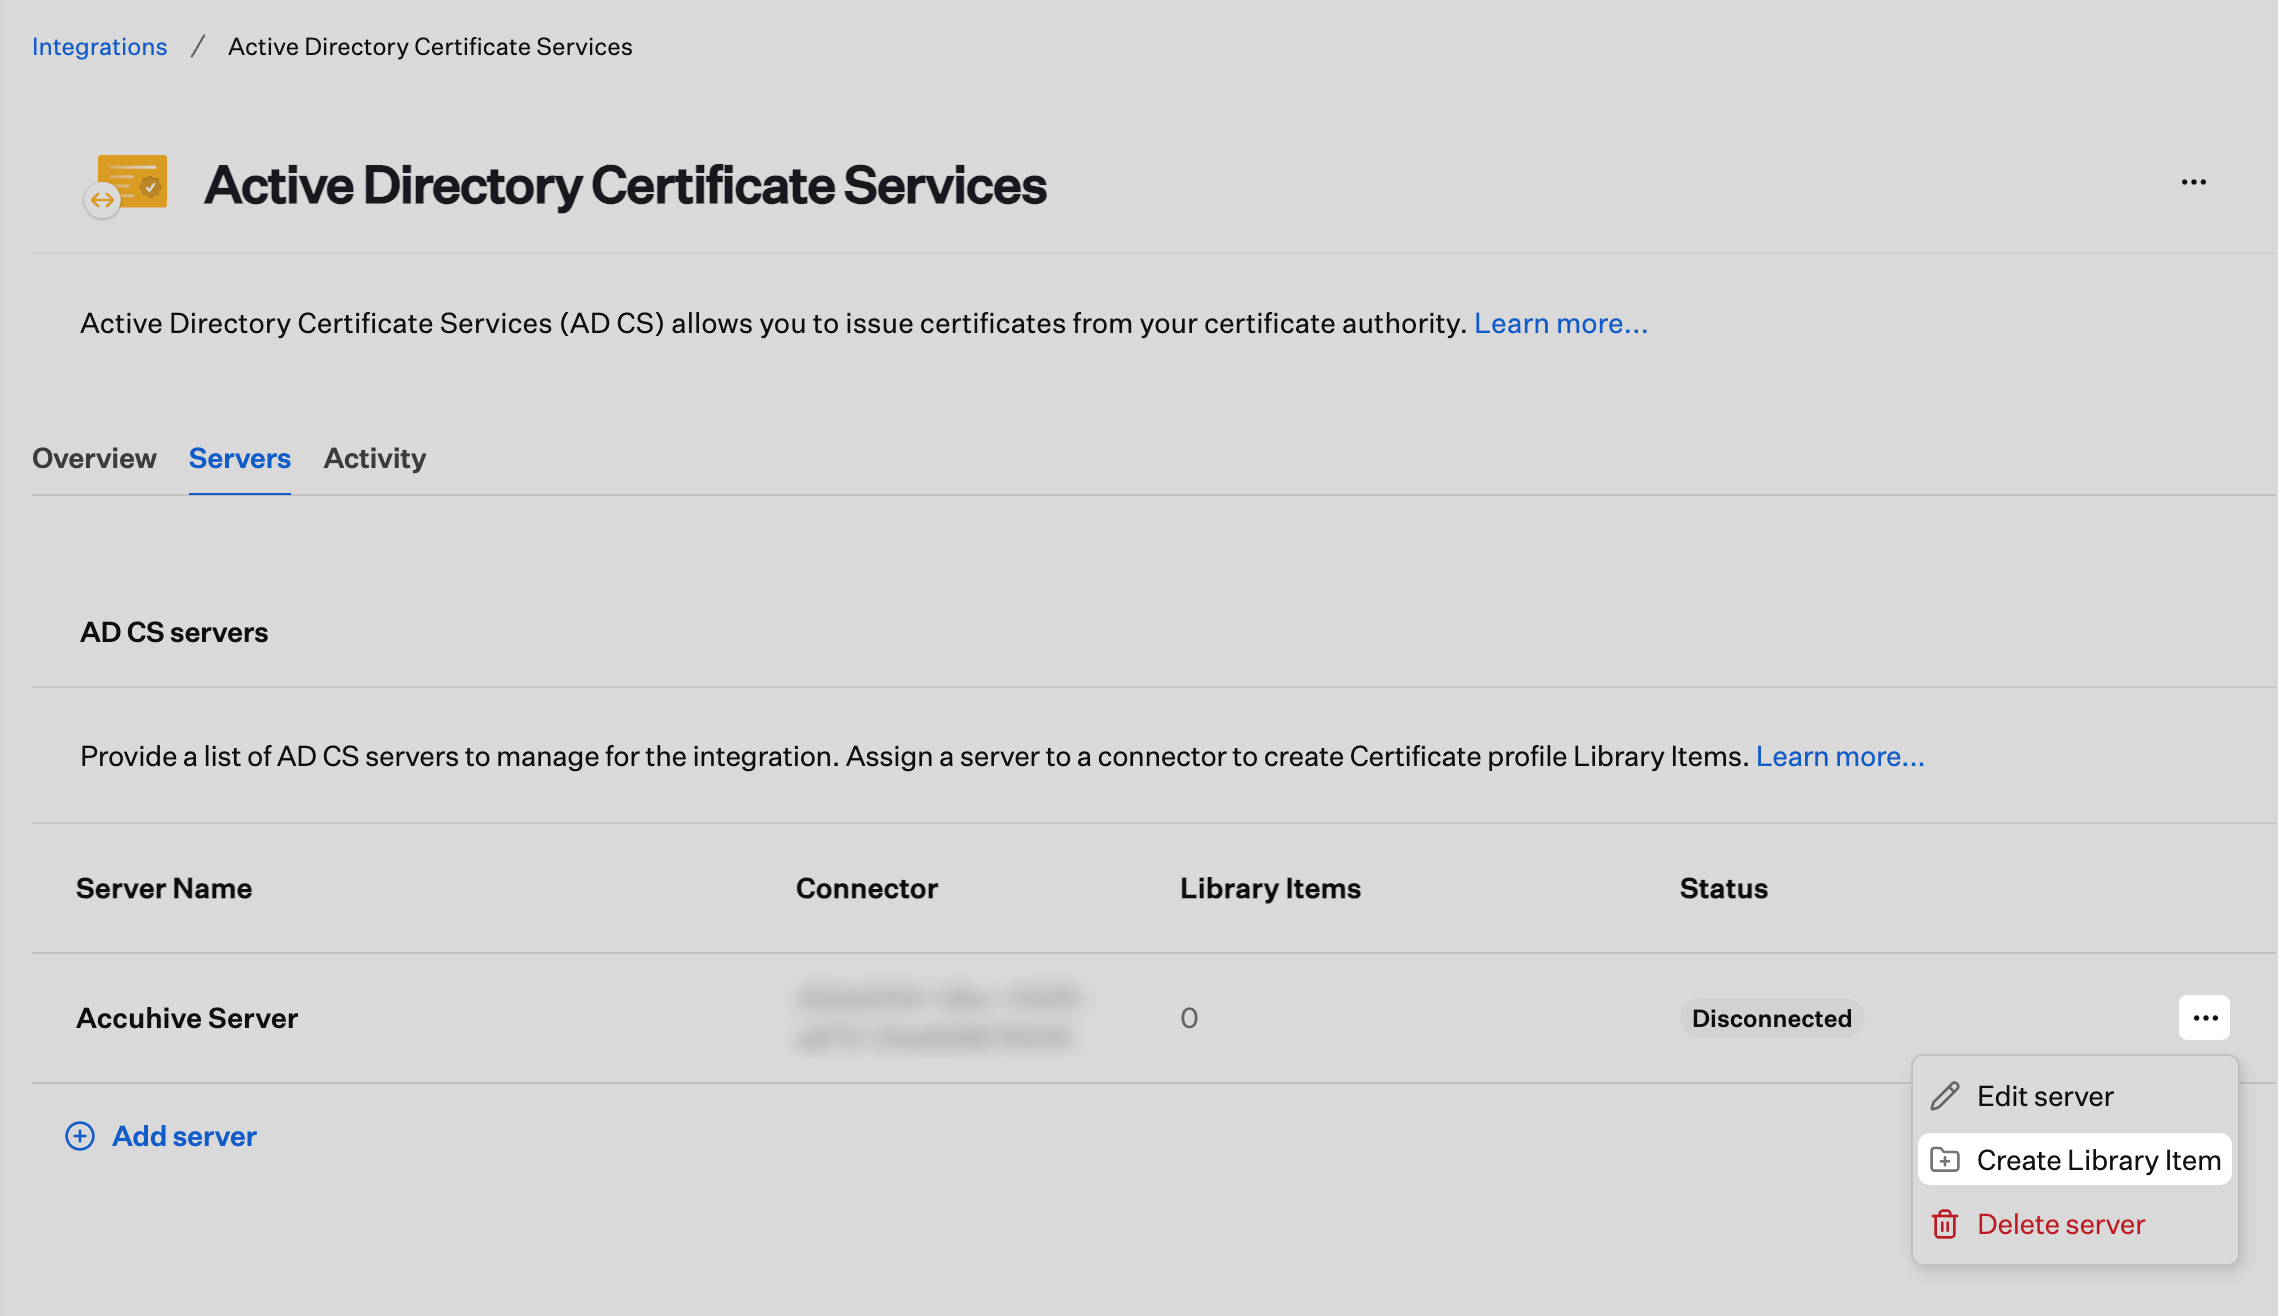
On the **Servers** tab, locate the AD CS server row, then open the action menu (**...**).
Click **Create Library Item**.
There should now be at least one AD CS server assigned to the Connector.
When you replace the **legacy** Connector with the **updated** Connector on the same Windows Server, Iru Endpoint lists the updated registration as a **new** Connector. Use **Assign servers** on the new Connector card to attach your issuing CAs, then delete the legacy Connector entry from the action menu (**...**) on the legacy card. For the full Kandji-to-Iru workflow, see [Migrating from Kandji to Iru with AD CS](/en/endpoint/integrations/certificate-services/active-directory-certificate-services/active-directory-certificate-services-ad-cs-integration-overview#migrating-from-kandji-to-iru-with-ad-cs) in **AD CS Integration: Overview**. For uninstall and install steps on the server, see [Installation](/en/endpoint/integrations/certificate-services/active-directory-certificate-services/active-directory-certificate-services-ad-cs-integration-ad-cs-connector-installation#installation) and [Uninstalling the AD CS Connector](/en/endpoint/integrations/certificate-services/active-directory-certificate-services/active-directory-certificate-services-ad-cs-integration-ad-cs-connector-installation#uninstalling-the-ad-cs-connector) in [AD CS Connector Installation](/en/endpoint/integrations/certificate-services/active-directory-certificate-services/active-directory-certificate-services-ad-cs-integration-ad-cs-connector-installation).
### Adding Additional Connectors
If needed, additional AD CS Connectors can be added to the AD CS integration.
In Iru Endpoint, navigate to **Integrations** and select the **Active Directory Certificate Services** integration card.
Click **Add connector**.
A new connector appears in **Pending** until you finish installation, sign-in, registration approval, and connection on the Windows Server.
### Create a Library Item from an AD CS server
When the AD CS **Servers** tab lists at least one issuing CA, you can start a certificate-related Library Item from the server row instead of starting only from **Library**.
On the **Servers** tab, locate the AD CS server row, then open the action menu (**...**).
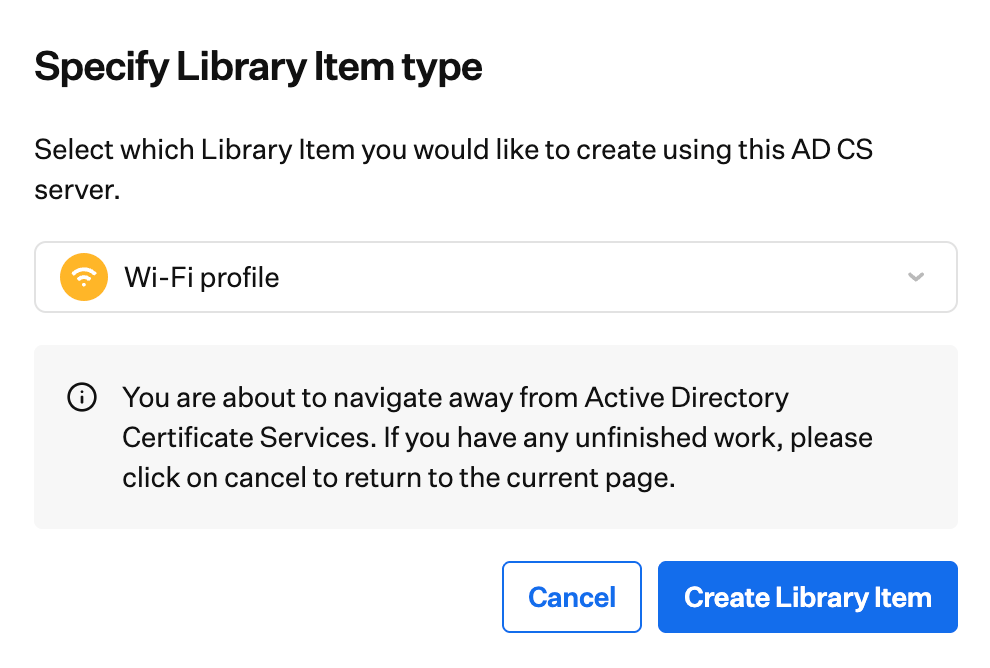
Click **Create Library Item**.
 In **Specify Library Item type**, pick the profile type you want to create (for example **Certificate** or **Wi-Fi**), then continue. Iru Endpoint opens the usual Library Item editor for that type with AD CS fields available.
 ### Remove a Connector from the Integration
Removing a single **Connector** row is different from [Removing the Integration](#removing-the-integration) below. Use this when you want to retire one Windows Server registration while keeping the AD CS integration enabled.
In **Integrations**, open **Active Directory Certificate Services**, then open the **Overview** tab.
On the connector card you want to remove, open the action menu (**...**), then click **Delete connector**. This removes only that Connector registration in Iru Endpoint, not the entire AD CS integration.
### Remove a Connector from the Integration
Removing a single **Connector** row is different from [Removing the Integration](#removing-the-integration) below. Use this when you want to retire one Windows Server registration while keeping the AD CS integration enabled.
In **Integrations**, open **Active Directory Certificate Services**, then open the **Overview** tab.
On the connector card you want to remove, open the action menu (**...**), then click **Delete connector**. This removes only that Connector registration in Iru Endpoint, not the entire AD CS integration.
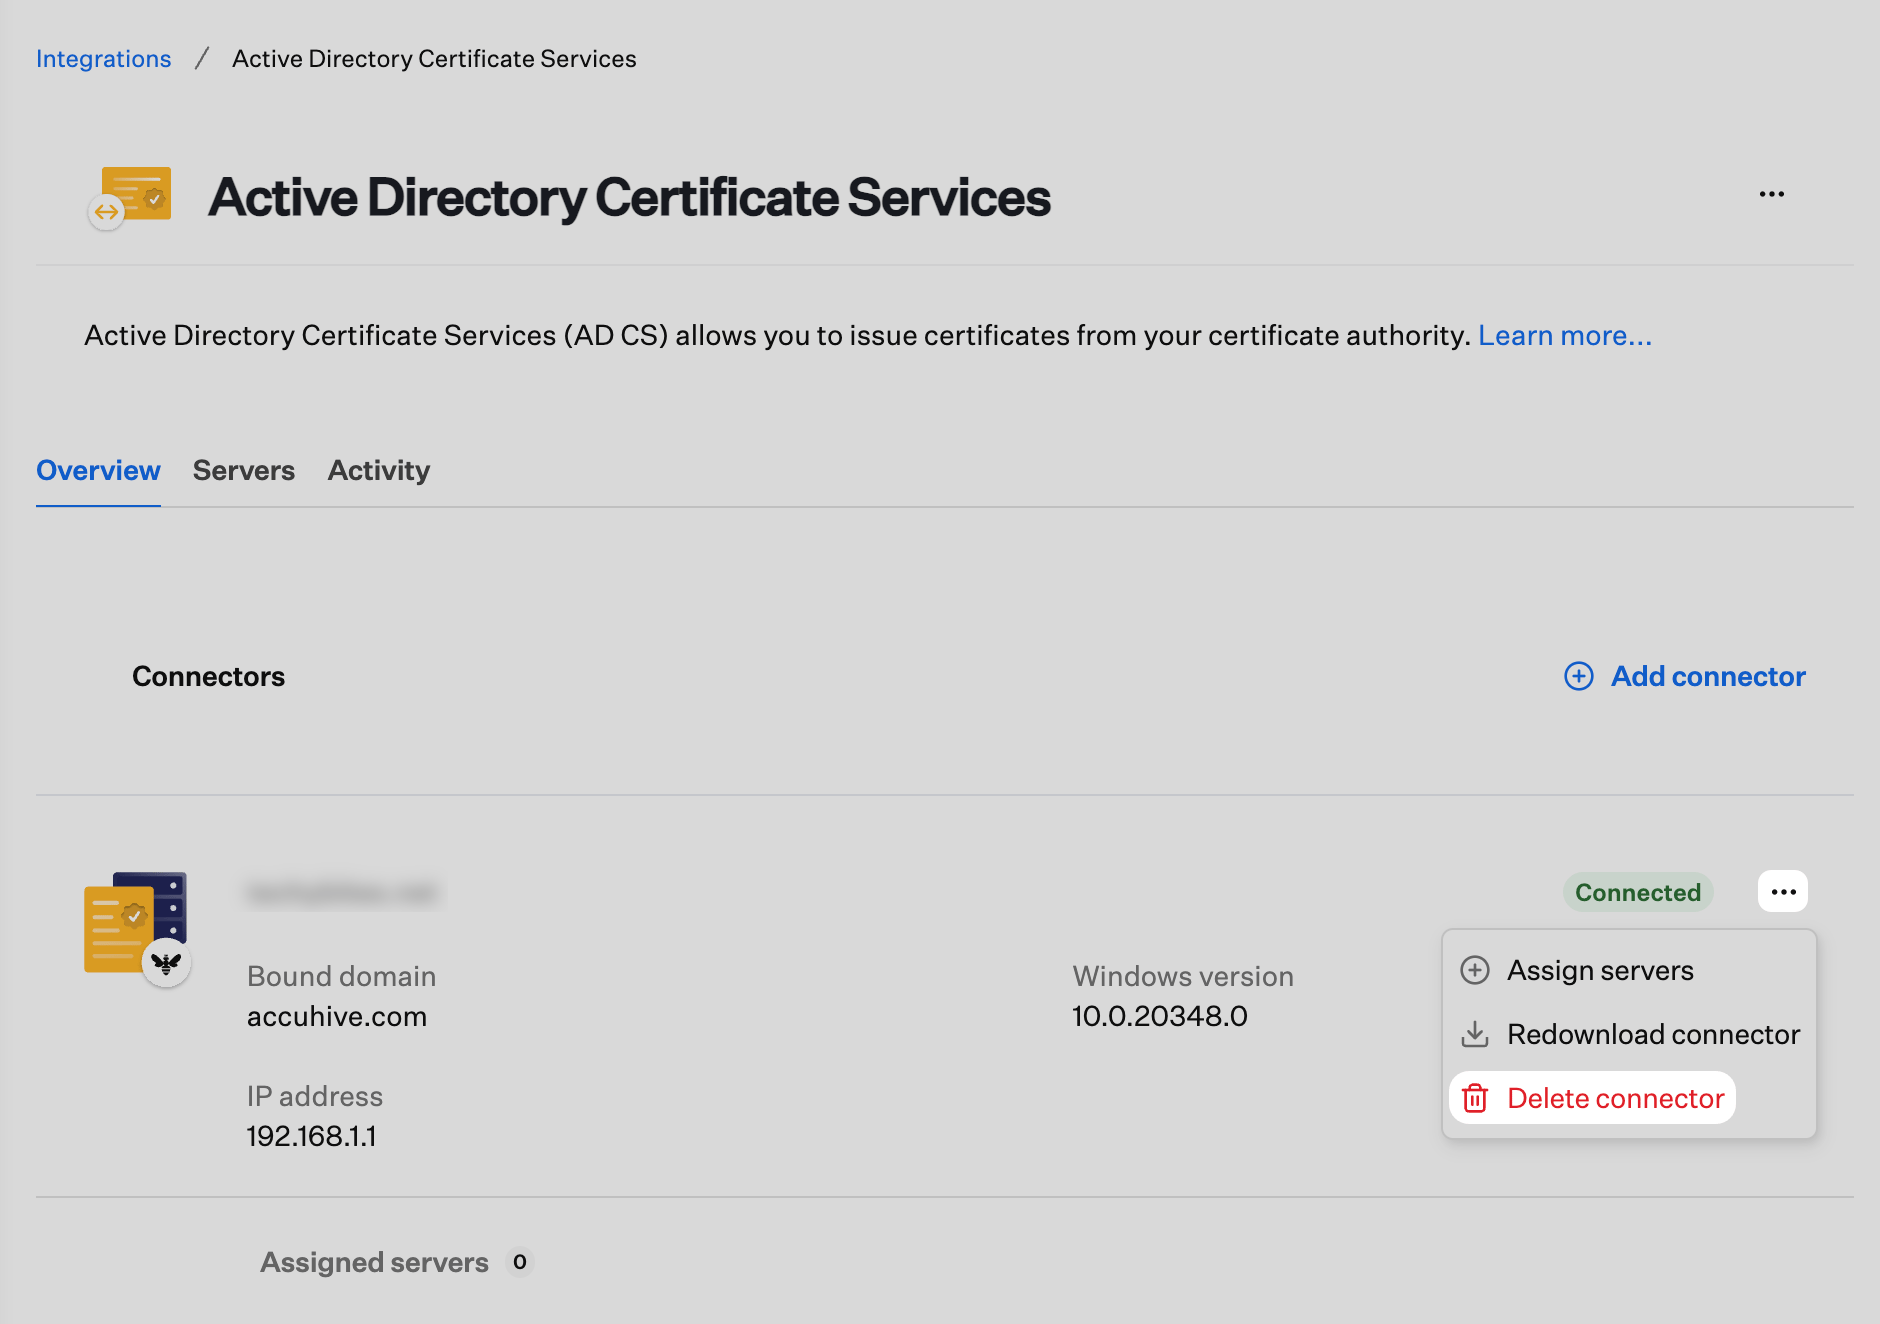 In the confirmation window, confirm removal of that connector from Iru Endpoint.
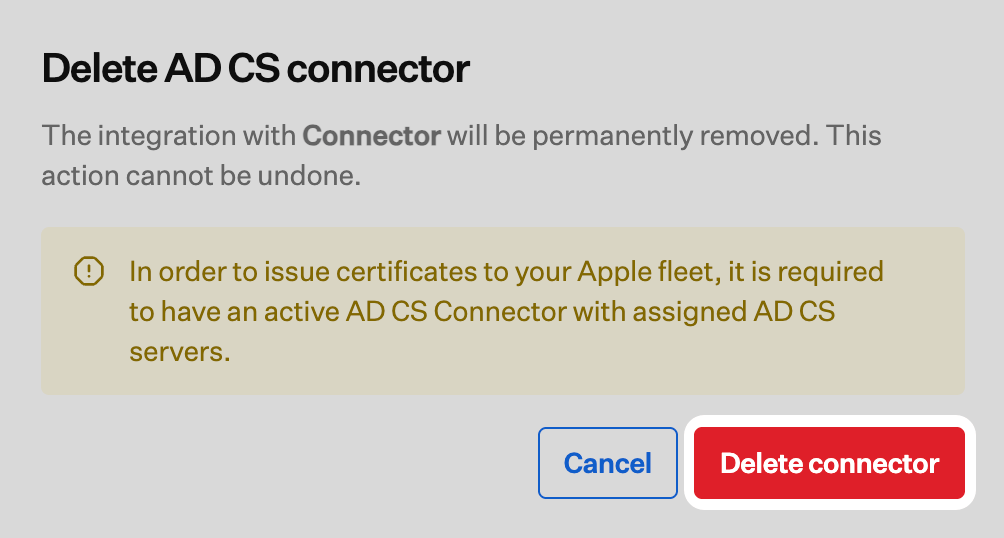 Deleting a connector row does not uninstall **Iru Endpoint AD CS Connector** from Windows Server. Remove the app on the host if you decommission that server. See [Uninstalling the AD CS Connector](/en/endpoint/integrations/certificate-services/active-directory-certificate-services/active-directory-certificate-services-ad-cs-integration-ad-cs-connector-installation#uninstalling-the-ad-cs-connector).
### Removing the Integration
This integration is a requirement to issue AD CS certificates to your fleet. Deleting this integration cannot be undone.
Use the steps below to delete the **Active Directory Certificate Services** integration from your Iru Endpoint tenant.
In Iru Endpoint, navigate to **Integrations**.
Click on the Active Directory Certificate Services integration that you want to remove.
On the main Active Directory Certificate Services page, click the Action menu (**...**) and click **Delete integration**.
Deleting a connector row does not uninstall **Iru Endpoint AD CS Connector** from Windows Server. Remove the app on the host if you decommission that server. See [Uninstalling the AD CS Connector](/en/endpoint/integrations/certificate-services/active-directory-certificate-services/active-directory-certificate-services-ad-cs-integration-ad-cs-connector-installation#uninstalling-the-ad-cs-connector).
### Removing the Integration
This integration is a requirement to issue AD CS certificates to your fleet. Deleting this integration cannot be undone.
Use the steps below to delete the **Active Directory Certificate Services** integration from your Iru Endpoint tenant.
In Iru Endpoint, navigate to **Integrations**.
Click on the Active Directory Certificate Services integration that you want to remove.
On the main Active Directory Certificate Services page, click the Action menu (**...**) and click **Delete integration**.
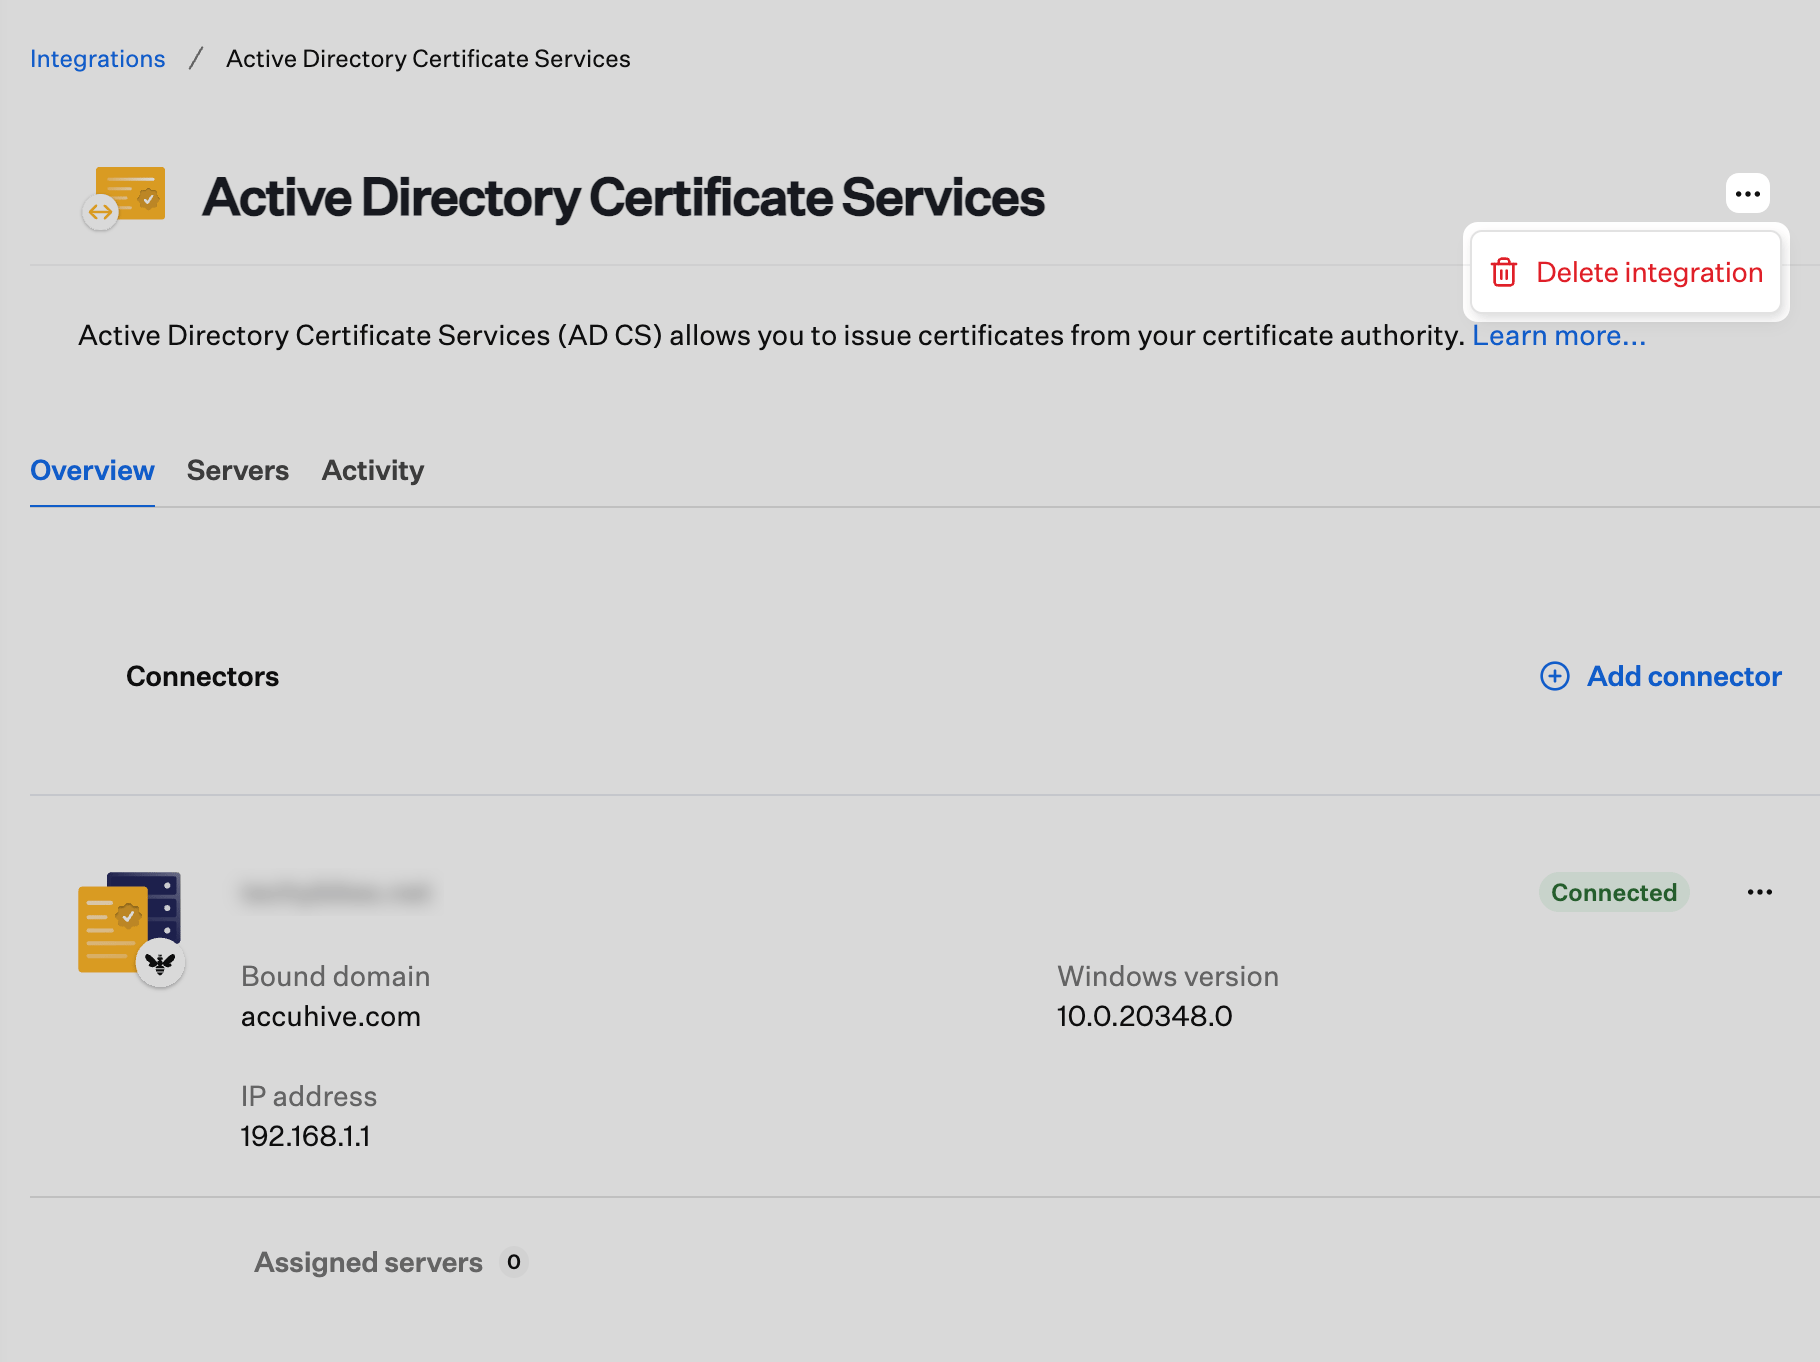 In the **Delete AD CS Integration** window, check the box to confirm that you've read the warning, then click the **Delete** button. Once the integration is removed, you will be taken back to the main Integration page.
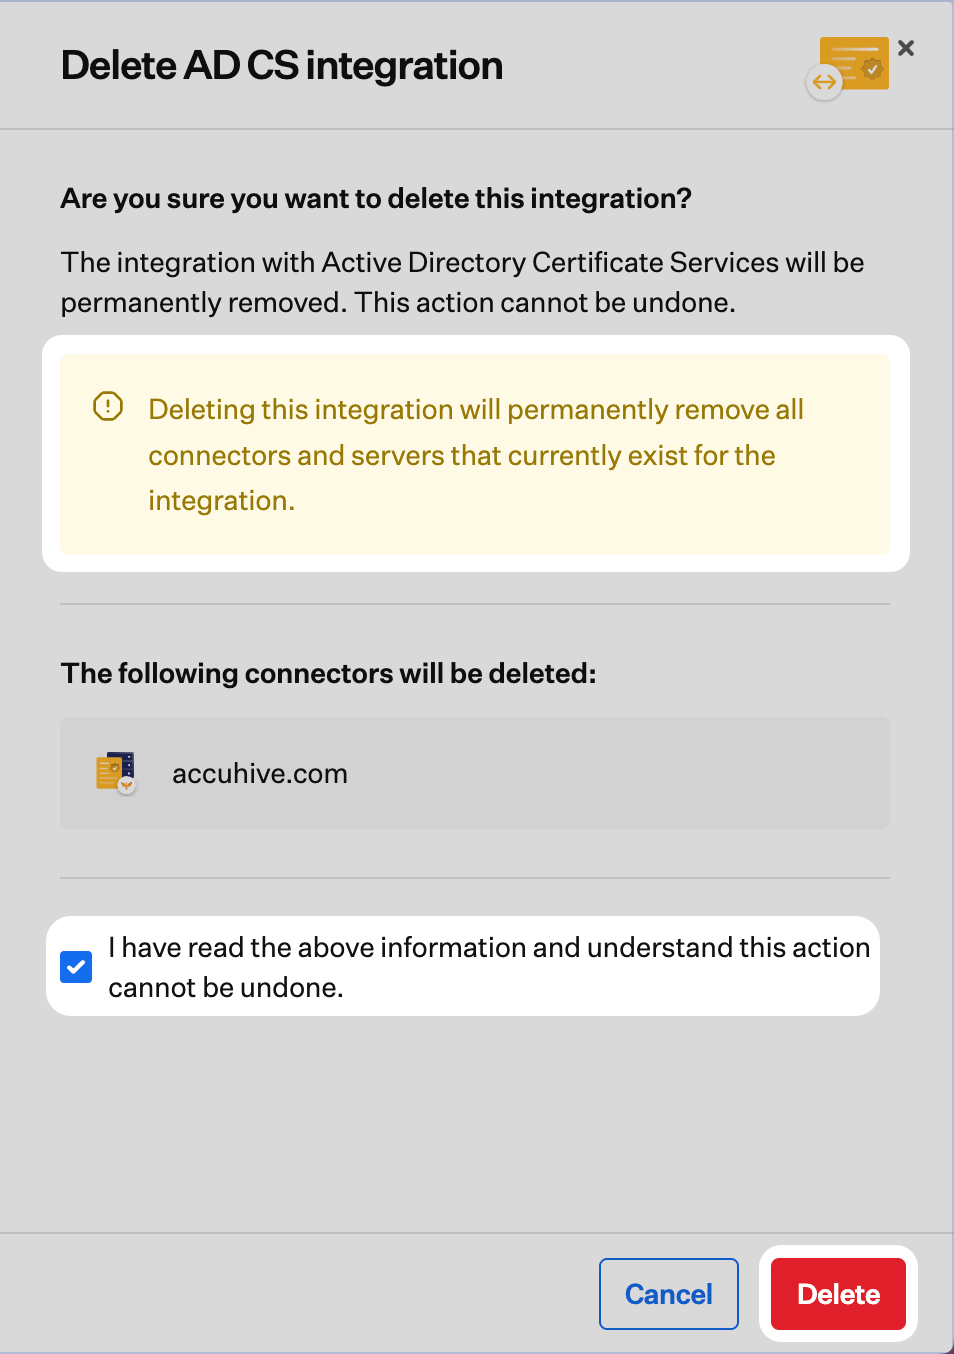 Removing the integration in Iru Endpoint does not uninstall **Iru Endpoint AD CS Connector** from your Windows Server; the app remains on the host until you remove it there. On each Connector server, open **Settings** > **Apps** > **Apps & features**, select **Iru Endpoint AD CS Connector**, then choose **Uninstall**. For other uninstall paths (for example **Control Panel** on older Windows Server versions), see [Uninstalling the AD CS Connector](/en/endpoint/integrations/certificate-services/active-directory-certificate-services/active-directory-certificate-services-ad-cs-integration-ad-cs-connector-installation#uninstalling-the-ad-cs-connector).