> ## Documentation Index
> Fetch the complete documentation index at: https://docs.iru.com/llms.txt
> Use this file to discover all available pages before exploring further.
# Apple Setup
> Set up Apple platform integrations in Iru Endpoint. Configure APNs, Apple Business Manager, Automated Device Enrollment, and Apps and Books.
This guide applies to Mac computers, iOS devices, iPadOS devices, Apple TV, and Apple Vision Pro
**Apple Business Manager** is now **Apple Business**. **Apple School Manager** is unchanged. For more information, see [Introducing Apple Business](https://www.apple.com/newsroom/2026/03/introducing-apple-business-a-new-all-in-one-platform-for-businesses-of-all-sizes/) and [Apple Business Manager is now Apple Business](https://support.apple.com/guide/apple-business-manager/apple-business-manager-is-now-apple-business-axmd79d79dea/web).
Set up Apple platform integrations to protect and manage Mac computers, iPhones, iPads, Apple TV, and Apple Vision Pro from one place. You'll configure Apple Push Notification service (APNs), Automated Device Enrollment (ADE), and Apps and Books in that order.
## Configure Apple Push Notification service (APNs)
APNs is required for communication with Apple devices. For best results, use a macOS computer.
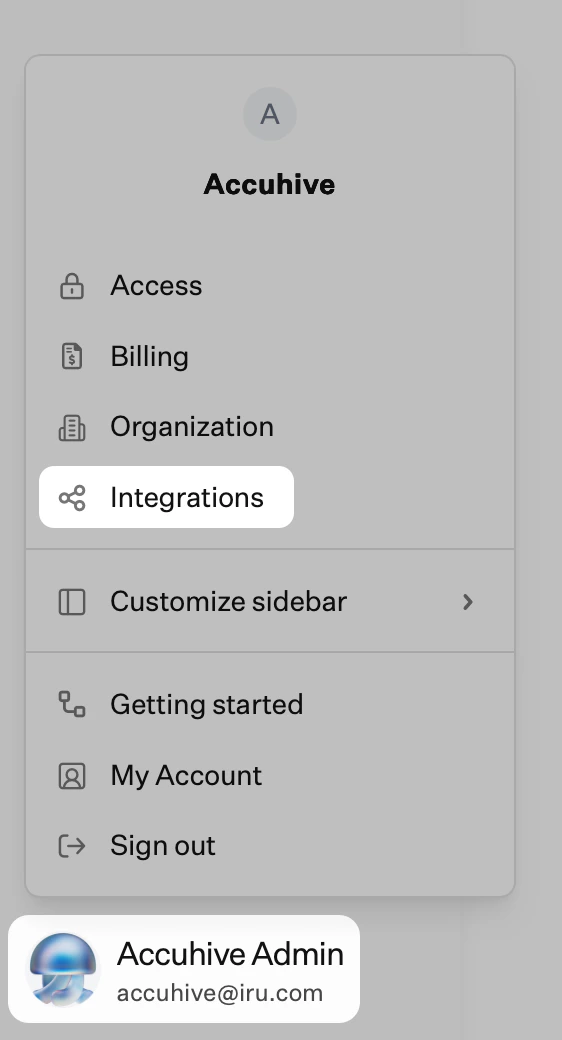
In Iru Endpoint, in the sidebar, click the [**Account Menu Button**](/en/iru/platform-overview/account-menu).
Click the **Integrations** option in the menu.
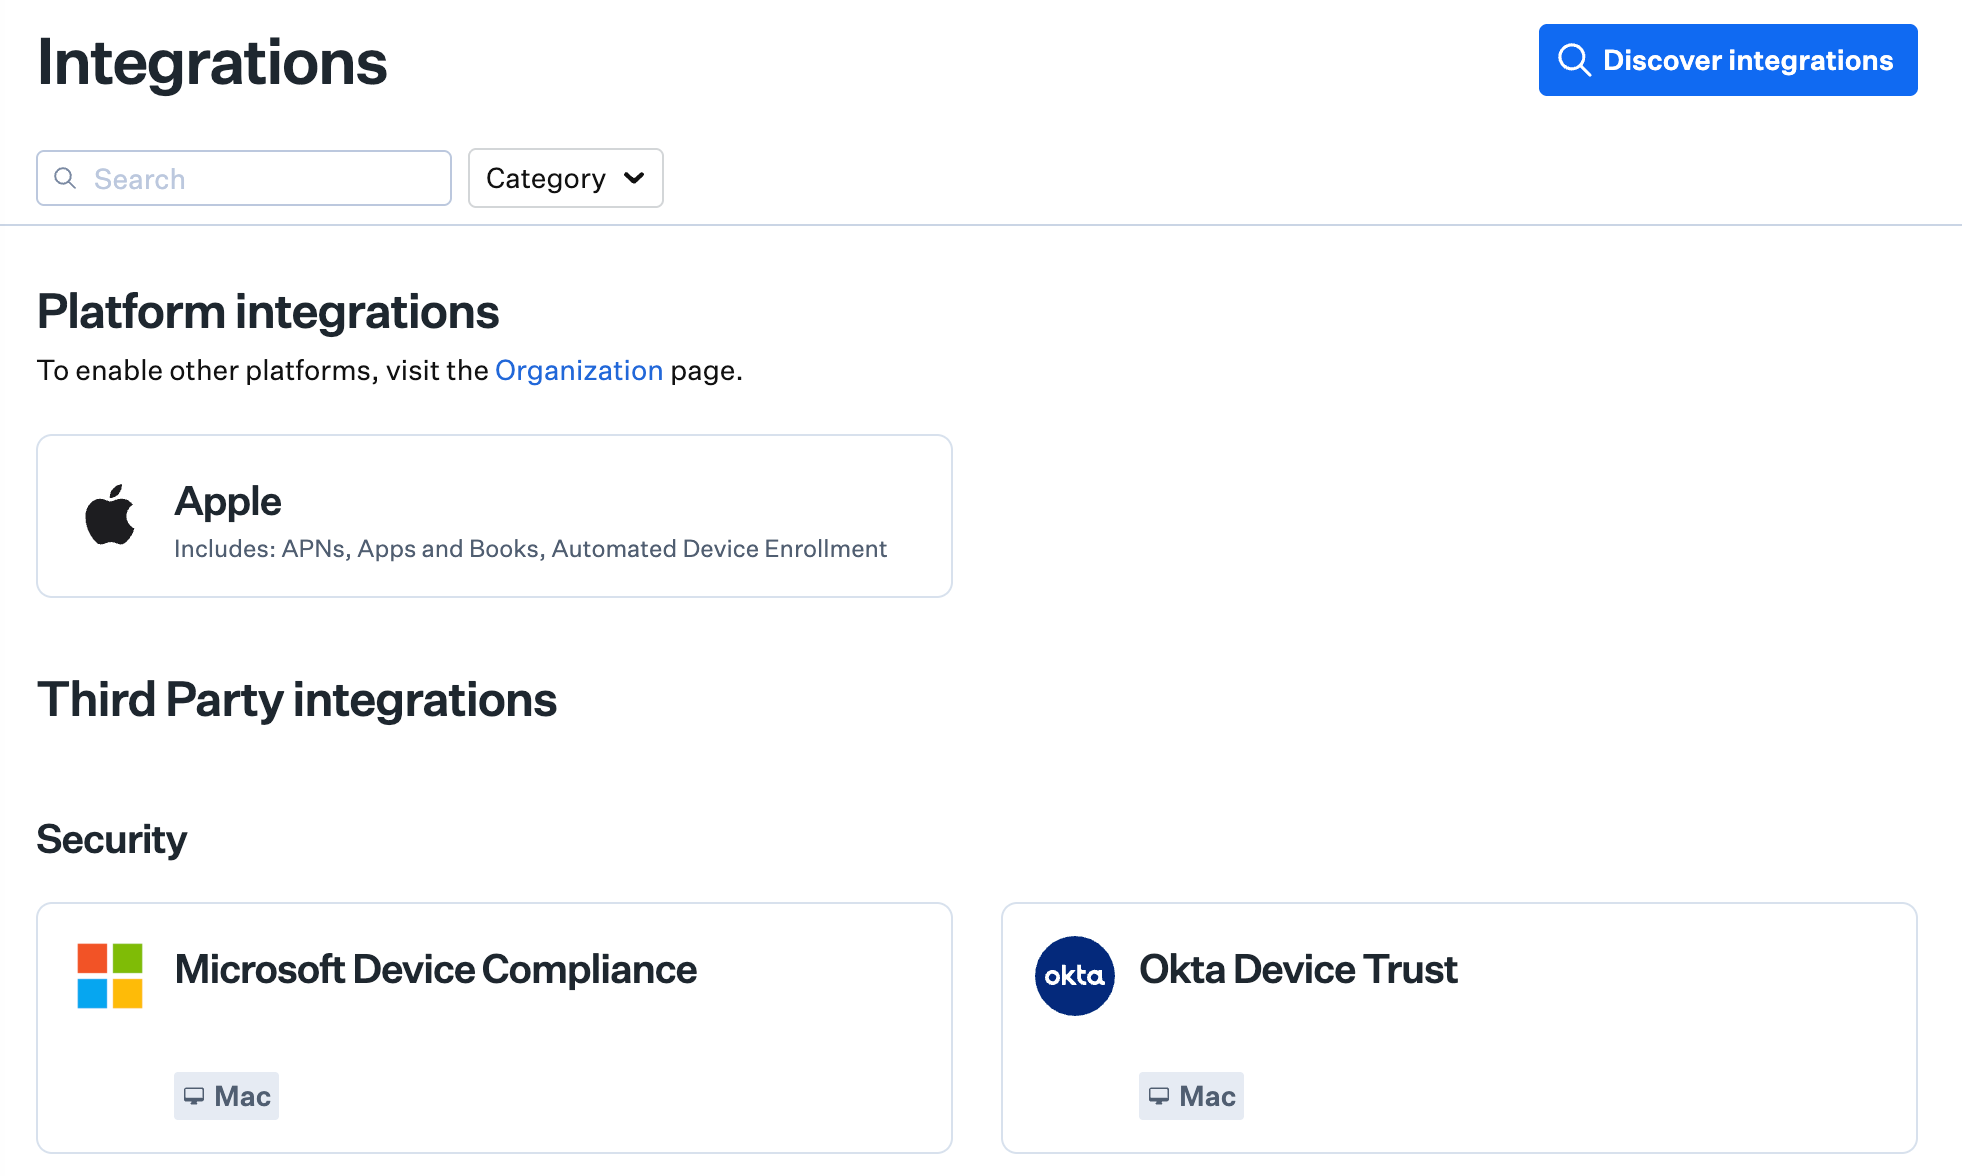
 Under **Platform integrations**, select **Apple**.
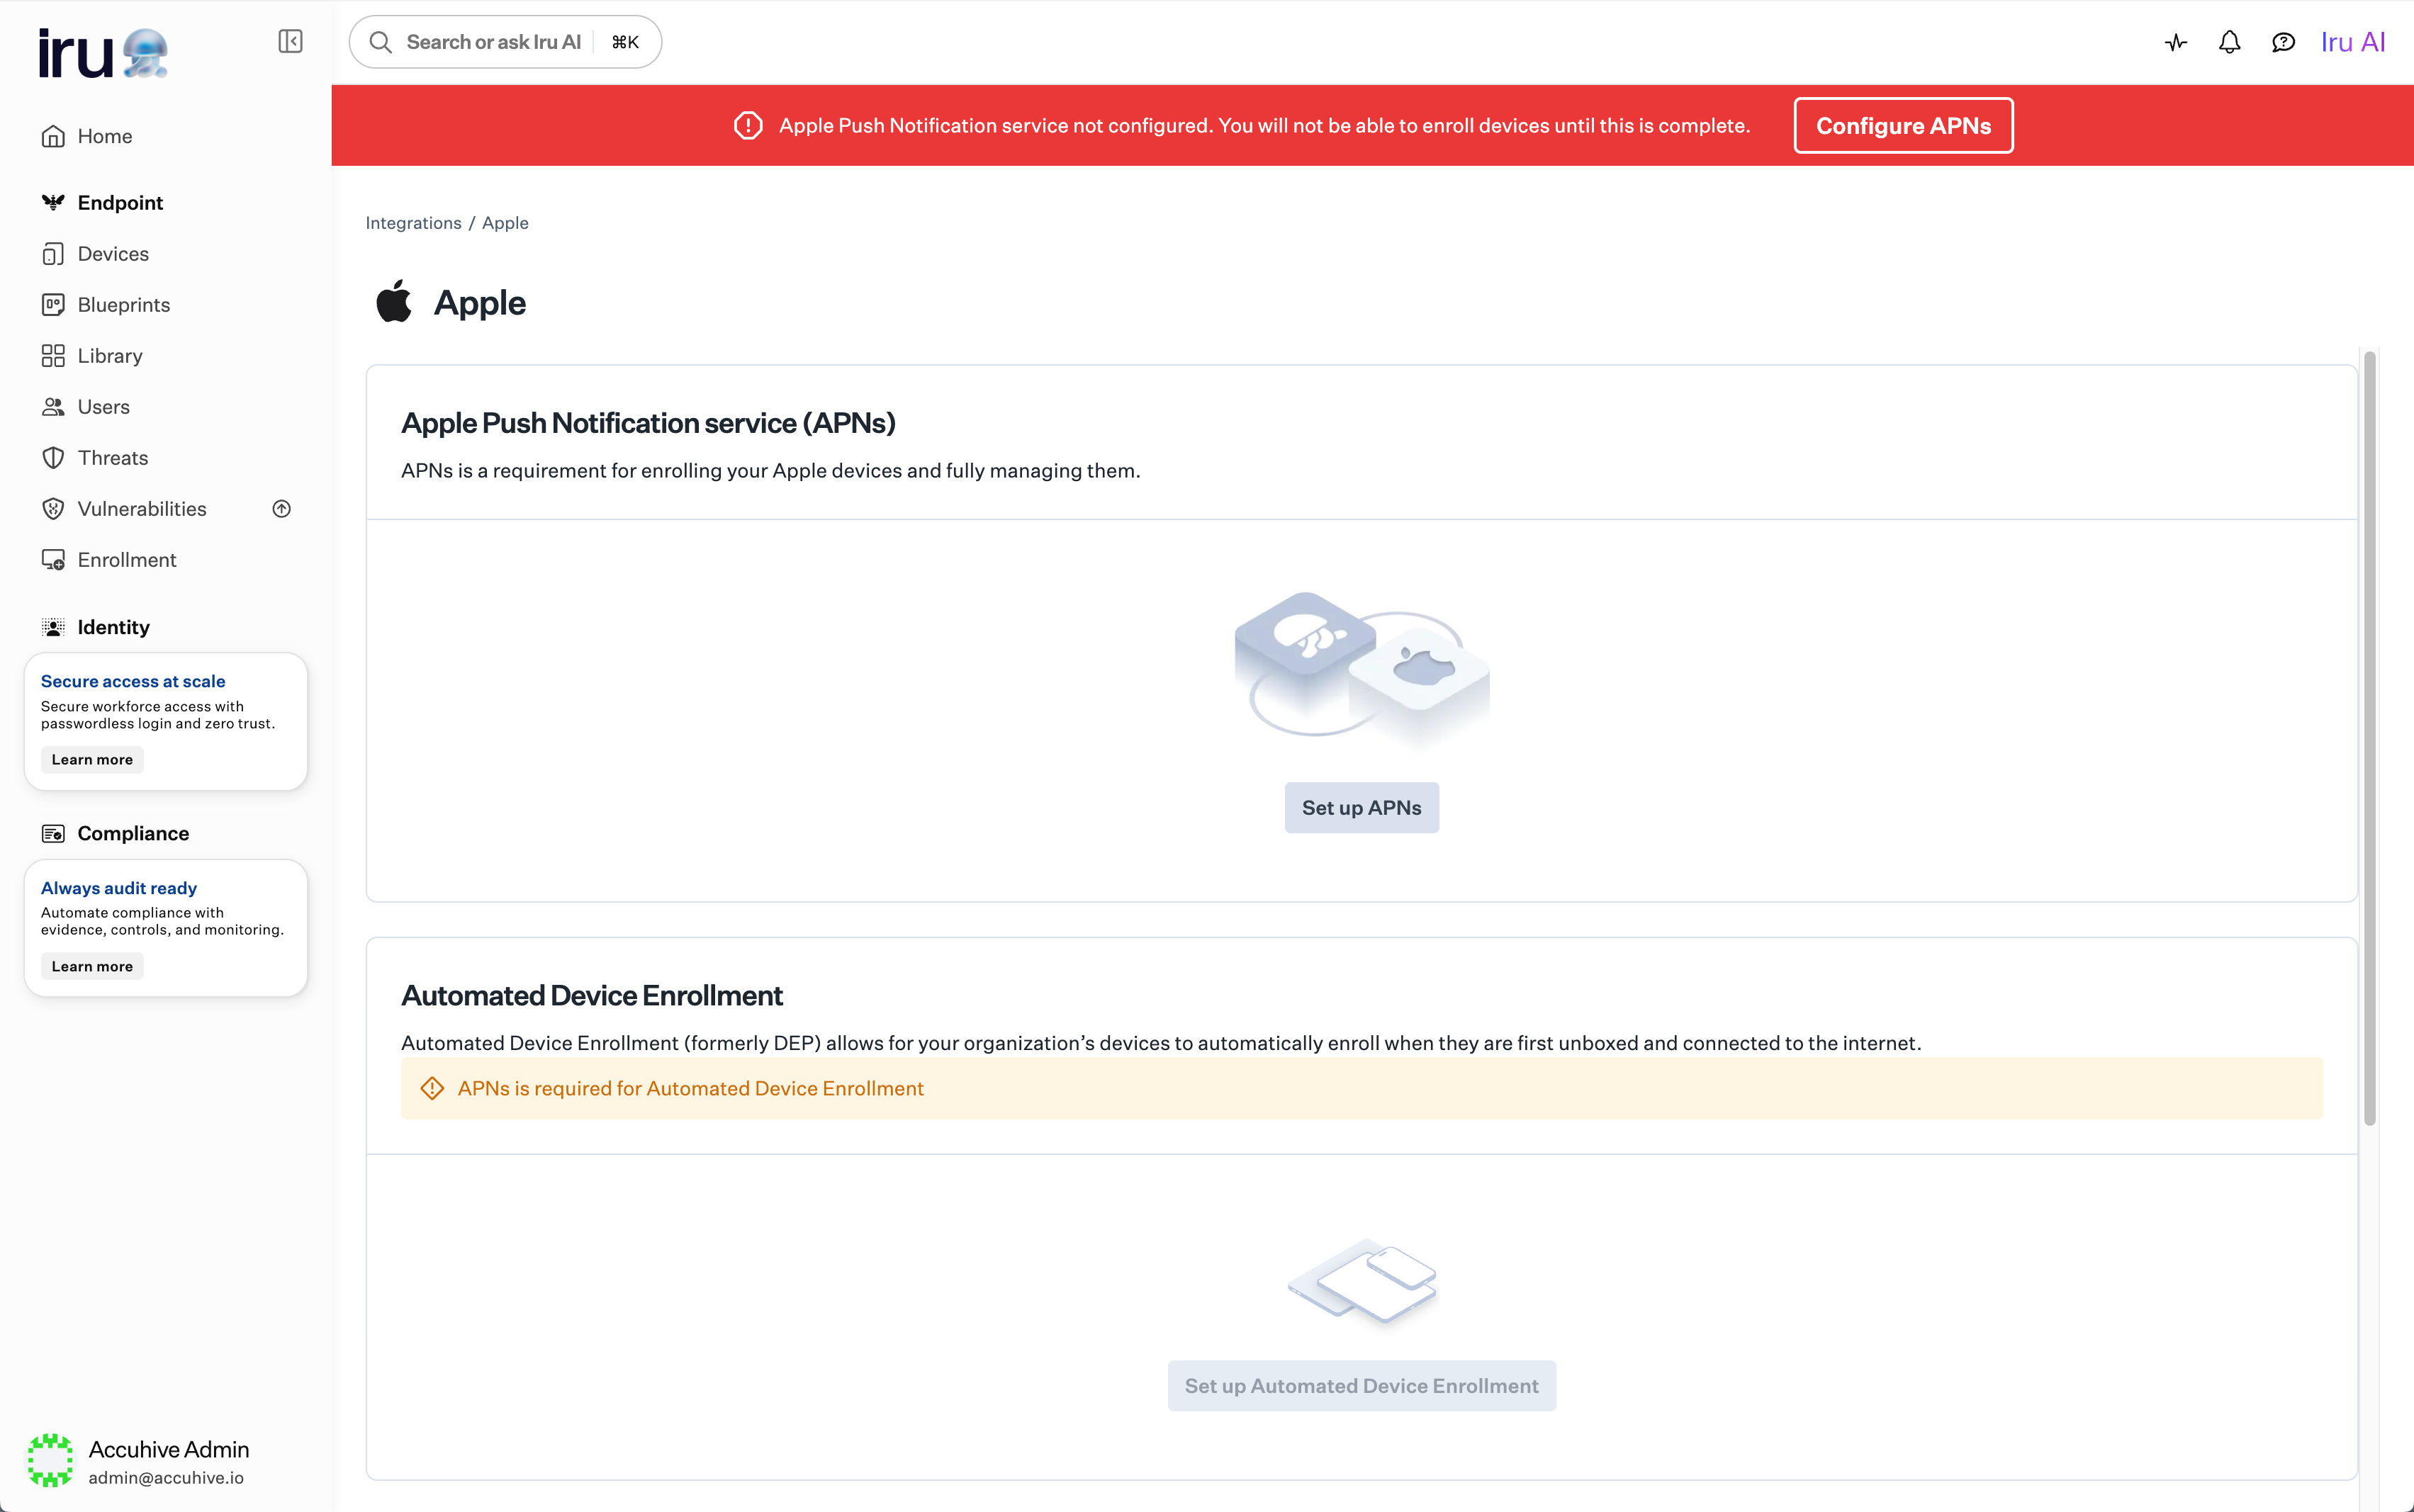
 Under **Apple Push Notifications service**, click **Set up APNs**.
 Follow the on-screen instructions to create a new APNs certificate. Use a [managed Apple account](/en/endpoint/enrollment/apple/apple-accounts-overview) that multiple team members can access.
Do not attempt to use an existing APNs certificate. Create a new one specifically for Iru Endpoint.
APNs certificates must be renewed annually. Iru Endpoint will send email reminders to Team Members with Administrator or Account Owner permissions starting 30 days before certificate expiry. For renewal and troubleshooting, see [Configure Apple Push Notification Service](/en/endpoint/settings/apple-integrations/configure-apple-push-notification-service).
## Configure Automated Device Enrollment
Automated Device Enrollment enables zero-touch deployment for corporate-owned Apple devices. [Apple Push Notification service](/en/endpoint/settings/apple-integrations/configure-apple-push-notification-service) must be configured in your tenant before you set up Automated Device Enrollment.
Organizations enroll in [Apple Business](https://business.apple.com/) or [Apple School Manager](https://school.apple.com/) (both are free; verification may take several days). Devices purchased from Apple or authorized resellers are automatically added to your account. To add existing devices, see [Adding Devices to Apple Business or Apple School Manager](/en/endpoint/settings/apple-integrations/adding-devices-to-apple-business-manager).
In Iru Endpoint, in the sidebar, click the **Account Menu Button**.
Click the **Integrations** option in the menu.
Under **Platform integrations**, select **Apple**.
Under **Automated Device Enrollment**, click **Set up Automated Device Enrollment**.
Follow the on-screen instructions to create a new APNs certificate. Use a [managed Apple account](/en/endpoint/enrollment/apple/apple-accounts-overview) that multiple team members can access.
Do not attempt to use an existing APNs certificate. Create a new one specifically for Iru Endpoint.
APNs certificates must be renewed annually. Iru Endpoint will send email reminders to Team Members with Administrator or Account Owner permissions starting 30 days before certificate expiry. For renewal and troubleshooting, see [Configure Apple Push Notification Service](/en/endpoint/settings/apple-integrations/configure-apple-push-notification-service).
## Configure Automated Device Enrollment
Automated Device Enrollment enables zero-touch deployment for corporate-owned Apple devices. [Apple Push Notification service](/en/endpoint/settings/apple-integrations/configure-apple-push-notification-service) must be configured in your tenant before you set up Automated Device Enrollment.
Organizations enroll in [Apple Business](https://business.apple.com/) or [Apple School Manager](https://school.apple.com/) (both are free; verification may take several days). Devices purchased from Apple or authorized resellers are automatically added to your account. To add existing devices, see [Adding Devices to Apple Business or Apple School Manager](/en/endpoint/settings/apple-integrations/adding-devices-to-apple-business-manager).
In Iru Endpoint, in the sidebar, click the **Account Menu Button**.
Click the **Integrations** option in the menu.
Under **Platform integrations**, select **Apple**.
Under **Automated Device Enrollment**, click **Set up Automated Device Enrollment**.
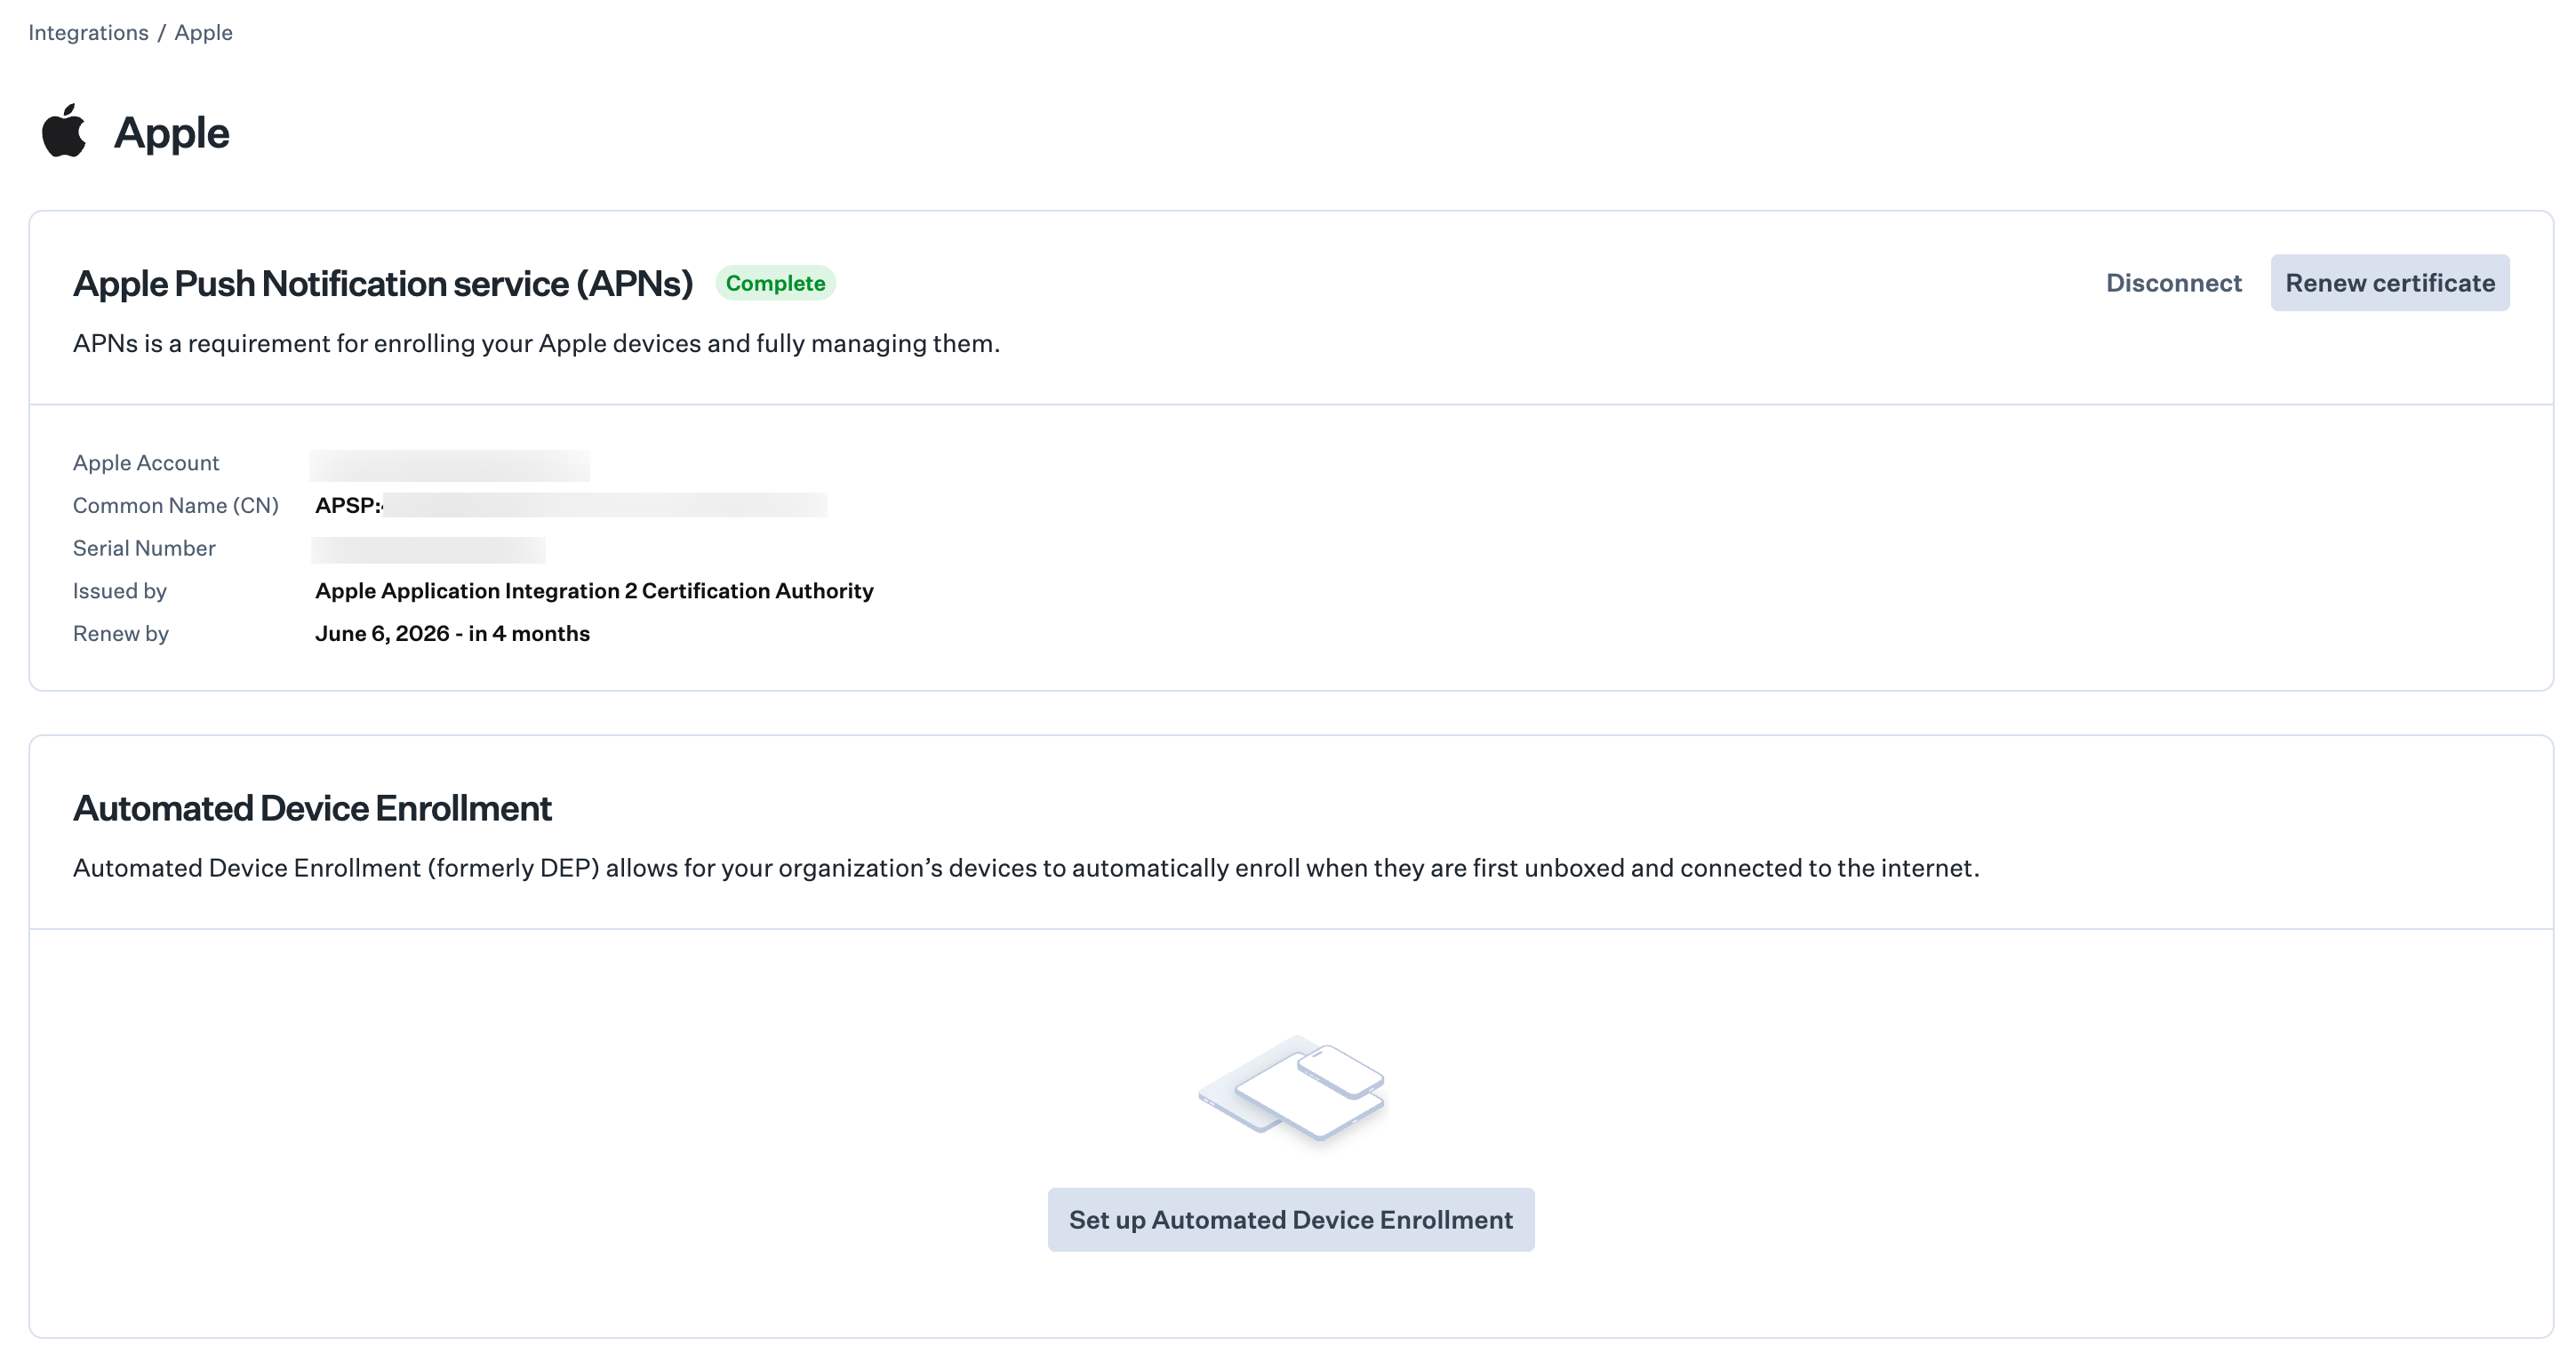 In the setup wizard, continue until Iru Endpoint provides a **PEM** public key file (download or save it when prompted). You will upload this file to Apple Business or Apple School Manager in the next steps.
Sign in to [Apple Business](https://business.apple.com) or [Apple School Manager](https://school.apple.com) with a Managed Apple Account that can manage device management services.
Click the **Devices** tab at the top of the page.
In the left sidebar, click **Management**.
Scroll to the bottom of the **Management Services** list and click **Add** next to **Add device management service**.
In the setup wizard, continue until Iru Endpoint provides a **PEM** public key file (download or save it when prompted). You will upload this file to Apple Business or Apple School Manager in the next steps.
Sign in to [Apple Business](https://business.apple.com) or [Apple School Manager](https://school.apple.com) with a Managed Apple Account that can manage device management services.
Click the **Devices** tab at the top of the page.
In the left sidebar, click **Management**.
Scroll to the bottom of the **Management Services** list and click **Add** next to **Add device management service**.
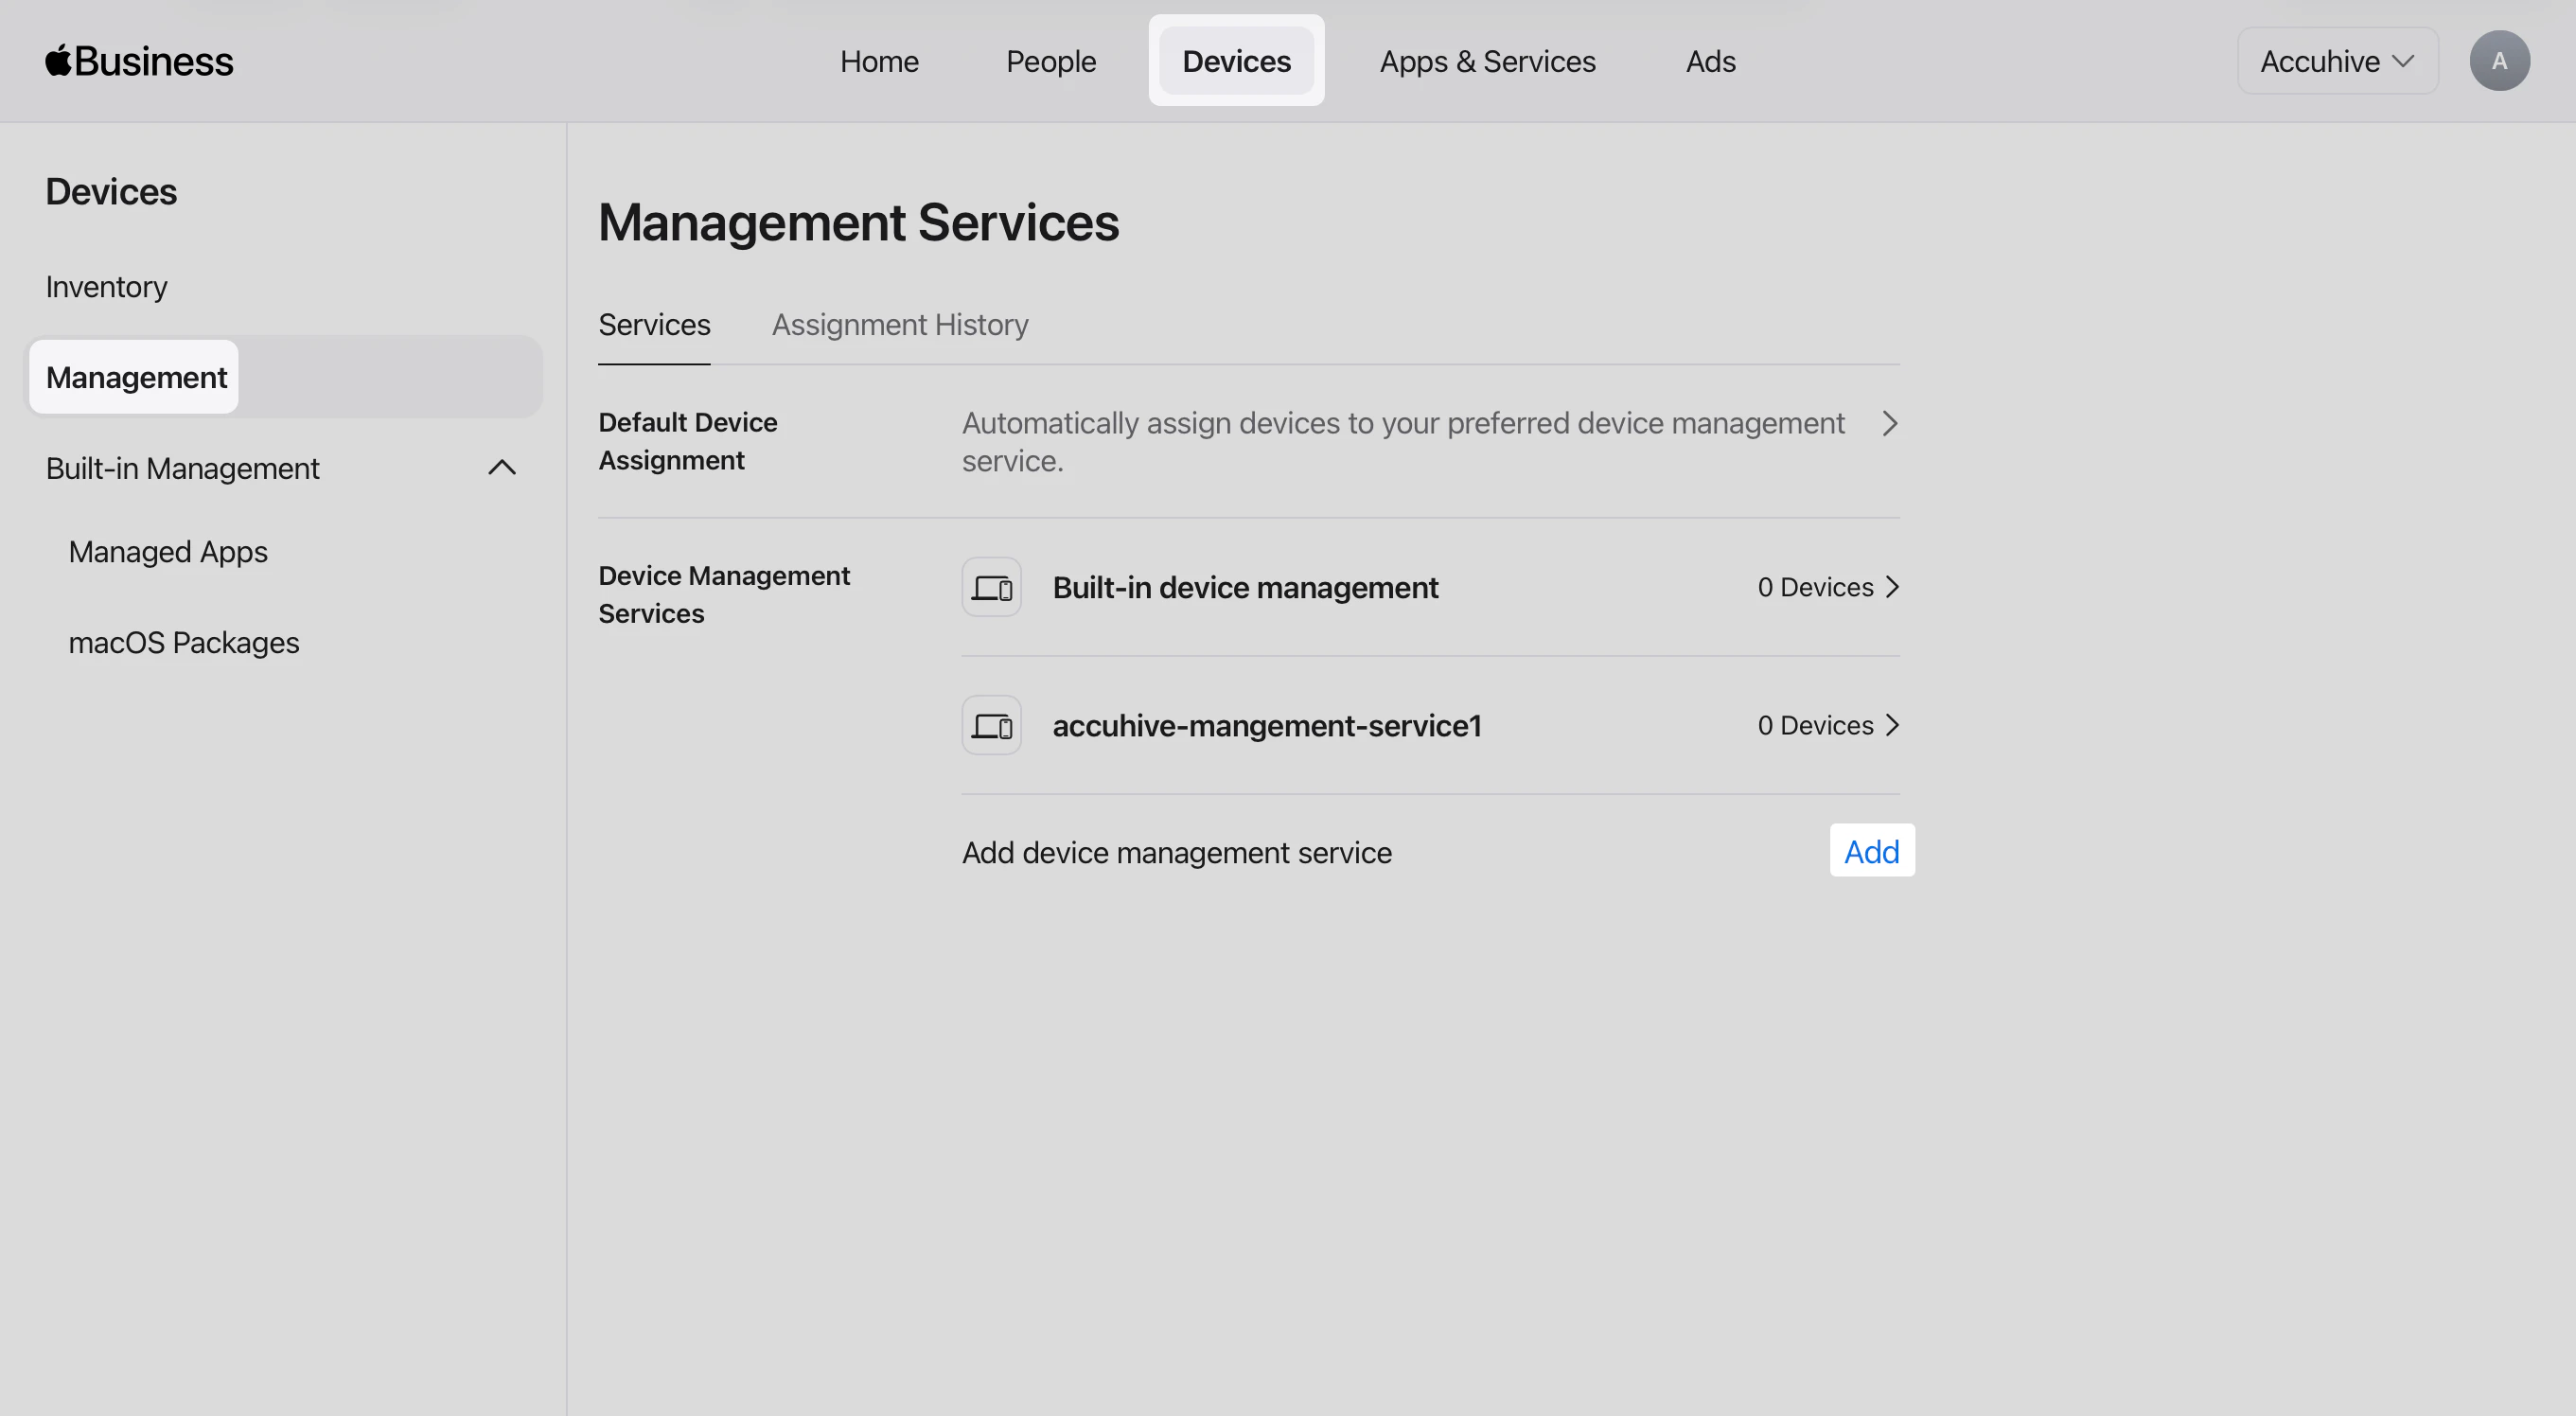 In the **Service Name** field, enter a name for this MDM integration (for example, **Iru Endpoint**).
If your organization needs it, select **Allow this service to release devices**.
Upload the **PEM** file from Iru Endpoint.
Click **Next**.
In the **Service Name** field, enter a name for this MDM integration (for example, **Iru Endpoint**).
If your organization needs it, select **Allow this service to release devices**.
Upload the **PEM** file from Iru Endpoint.
Click **Next**.
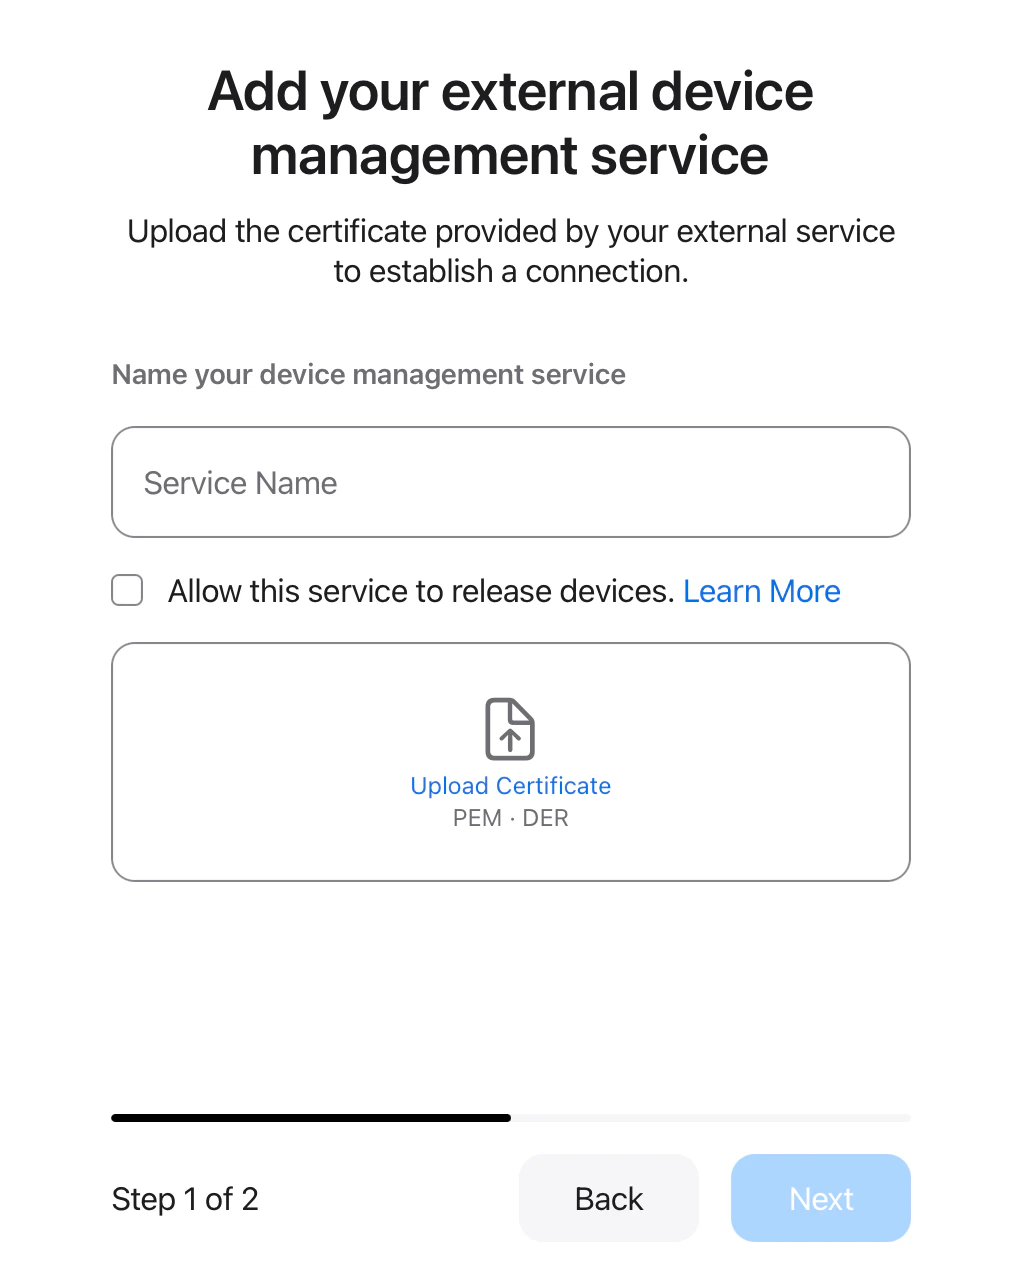 Click **Download Service Token**.
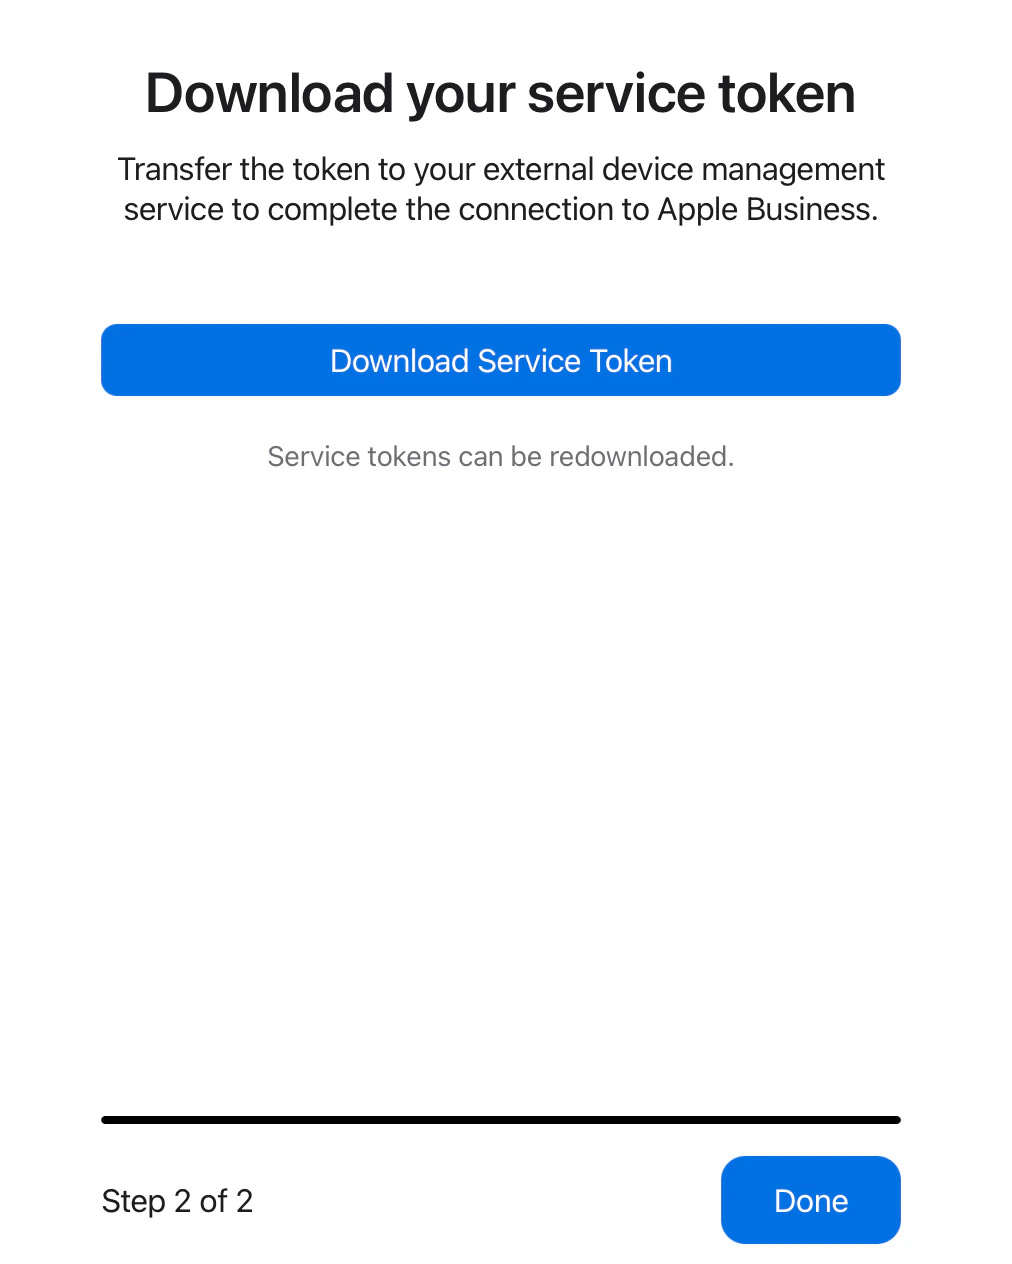 Click **Done**.
Return to Iru Endpoint and upload the **.p7m** service token file when prompted.
Complete any remaining steps in the wizard and click **Done**.
In Apple Business or Apple School Manager, add Iru Endpoint as your Mobile Device Management (MDM) server and assign devices. Assigned devices will appear in Iru Endpoint as **Awaiting Enrollment**.
## Configure Apps and Books
Apps and Books (formerly Volume Purchasing Program) lets you distribute App Store apps to devices. [Apple Push Notification service](/en/endpoint/settings/apple-integrations/configure-apple-push-notification-service) must be configured in your tenant before you set up Apps and Books.
You cannot share the same Apps and Books token across multiple MDM servers. [Create a new organizational unit](https://support.apple.com/guide/business/configure-organizational-units-axmfdbe2cb0d/web) in Apple Business or Apple School Manager specifically for your Iru Endpoint tenant and use a dedicated token.
[Create a new organizational unit](https://support.apple.com/guide/business/configure-organizational-units-axmfdbe2cb0d/web) in Apple Business or Apple School Manager for your Iru Endpoint tenant.
In Iru Endpoint, in the sidebar, click the **Account Menu Button**.
Click the **Integrations** option in the menu.
Under **Platform integrations**, select **Apple**.
Click the **Set up Apps and Books** button inside **Apps and Books**.
In the new window, sign in to [Apple Business](https://support.apple.com/guide/business/welcome/web) or [Apple School Manager](https://support.apple.com/guide/apple-school-manager/welcome/web) to complete the integration.
In Apple Business or Apple School Manager, click your **organization name** at the top right of the page.
Click **Settings**.
Click **Done**.
Return to Iru Endpoint and upload the **.p7m** service token file when prompted.
Complete any remaining steps in the wizard and click **Done**.
In Apple Business or Apple School Manager, add Iru Endpoint as your Mobile Device Management (MDM) server and assign devices. Assigned devices will appear in Iru Endpoint as **Awaiting Enrollment**.
## Configure Apps and Books
Apps and Books (formerly Volume Purchasing Program) lets you distribute App Store apps to devices. [Apple Push Notification service](/en/endpoint/settings/apple-integrations/configure-apple-push-notification-service) must be configured in your tenant before you set up Apps and Books.
You cannot share the same Apps and Books token across multiple MDM servers. [Create a new organizational unit](https://support.apple.com/guide/business/configure-organizational-units-axmfdbe2cb0d/web) in Apple Business or Apple School Manager specifically for your Iru Endpoint tenant and use a dedicated token.
[Create a new organizational unit](https://support.apple.com/guide/business/configure-organizational-units-axmfdbe2cb0d/web) in Apple Business or Apple School Manager for your Iru Endpoint tenant.
In Iru Endpoint, in the sidebar, click the **Account Menu Button**.
Click the **Integrations** option in the menu.
Under **Platform integrations**, select **Apple**.
Click the **Set up Apps and Books** button inside **Apps and Books**.
In the new window, sign in to [Apple Business](https://support.apple.com/guide/business/welcome/web) or [Apple School Manager](https://support.apple.com/guide/apple-school-manager/welcome/web) to complete the integration.
In Apple Business or Apple School Manager, click your **organization name** at the top right of the page.
Click **Settings**.
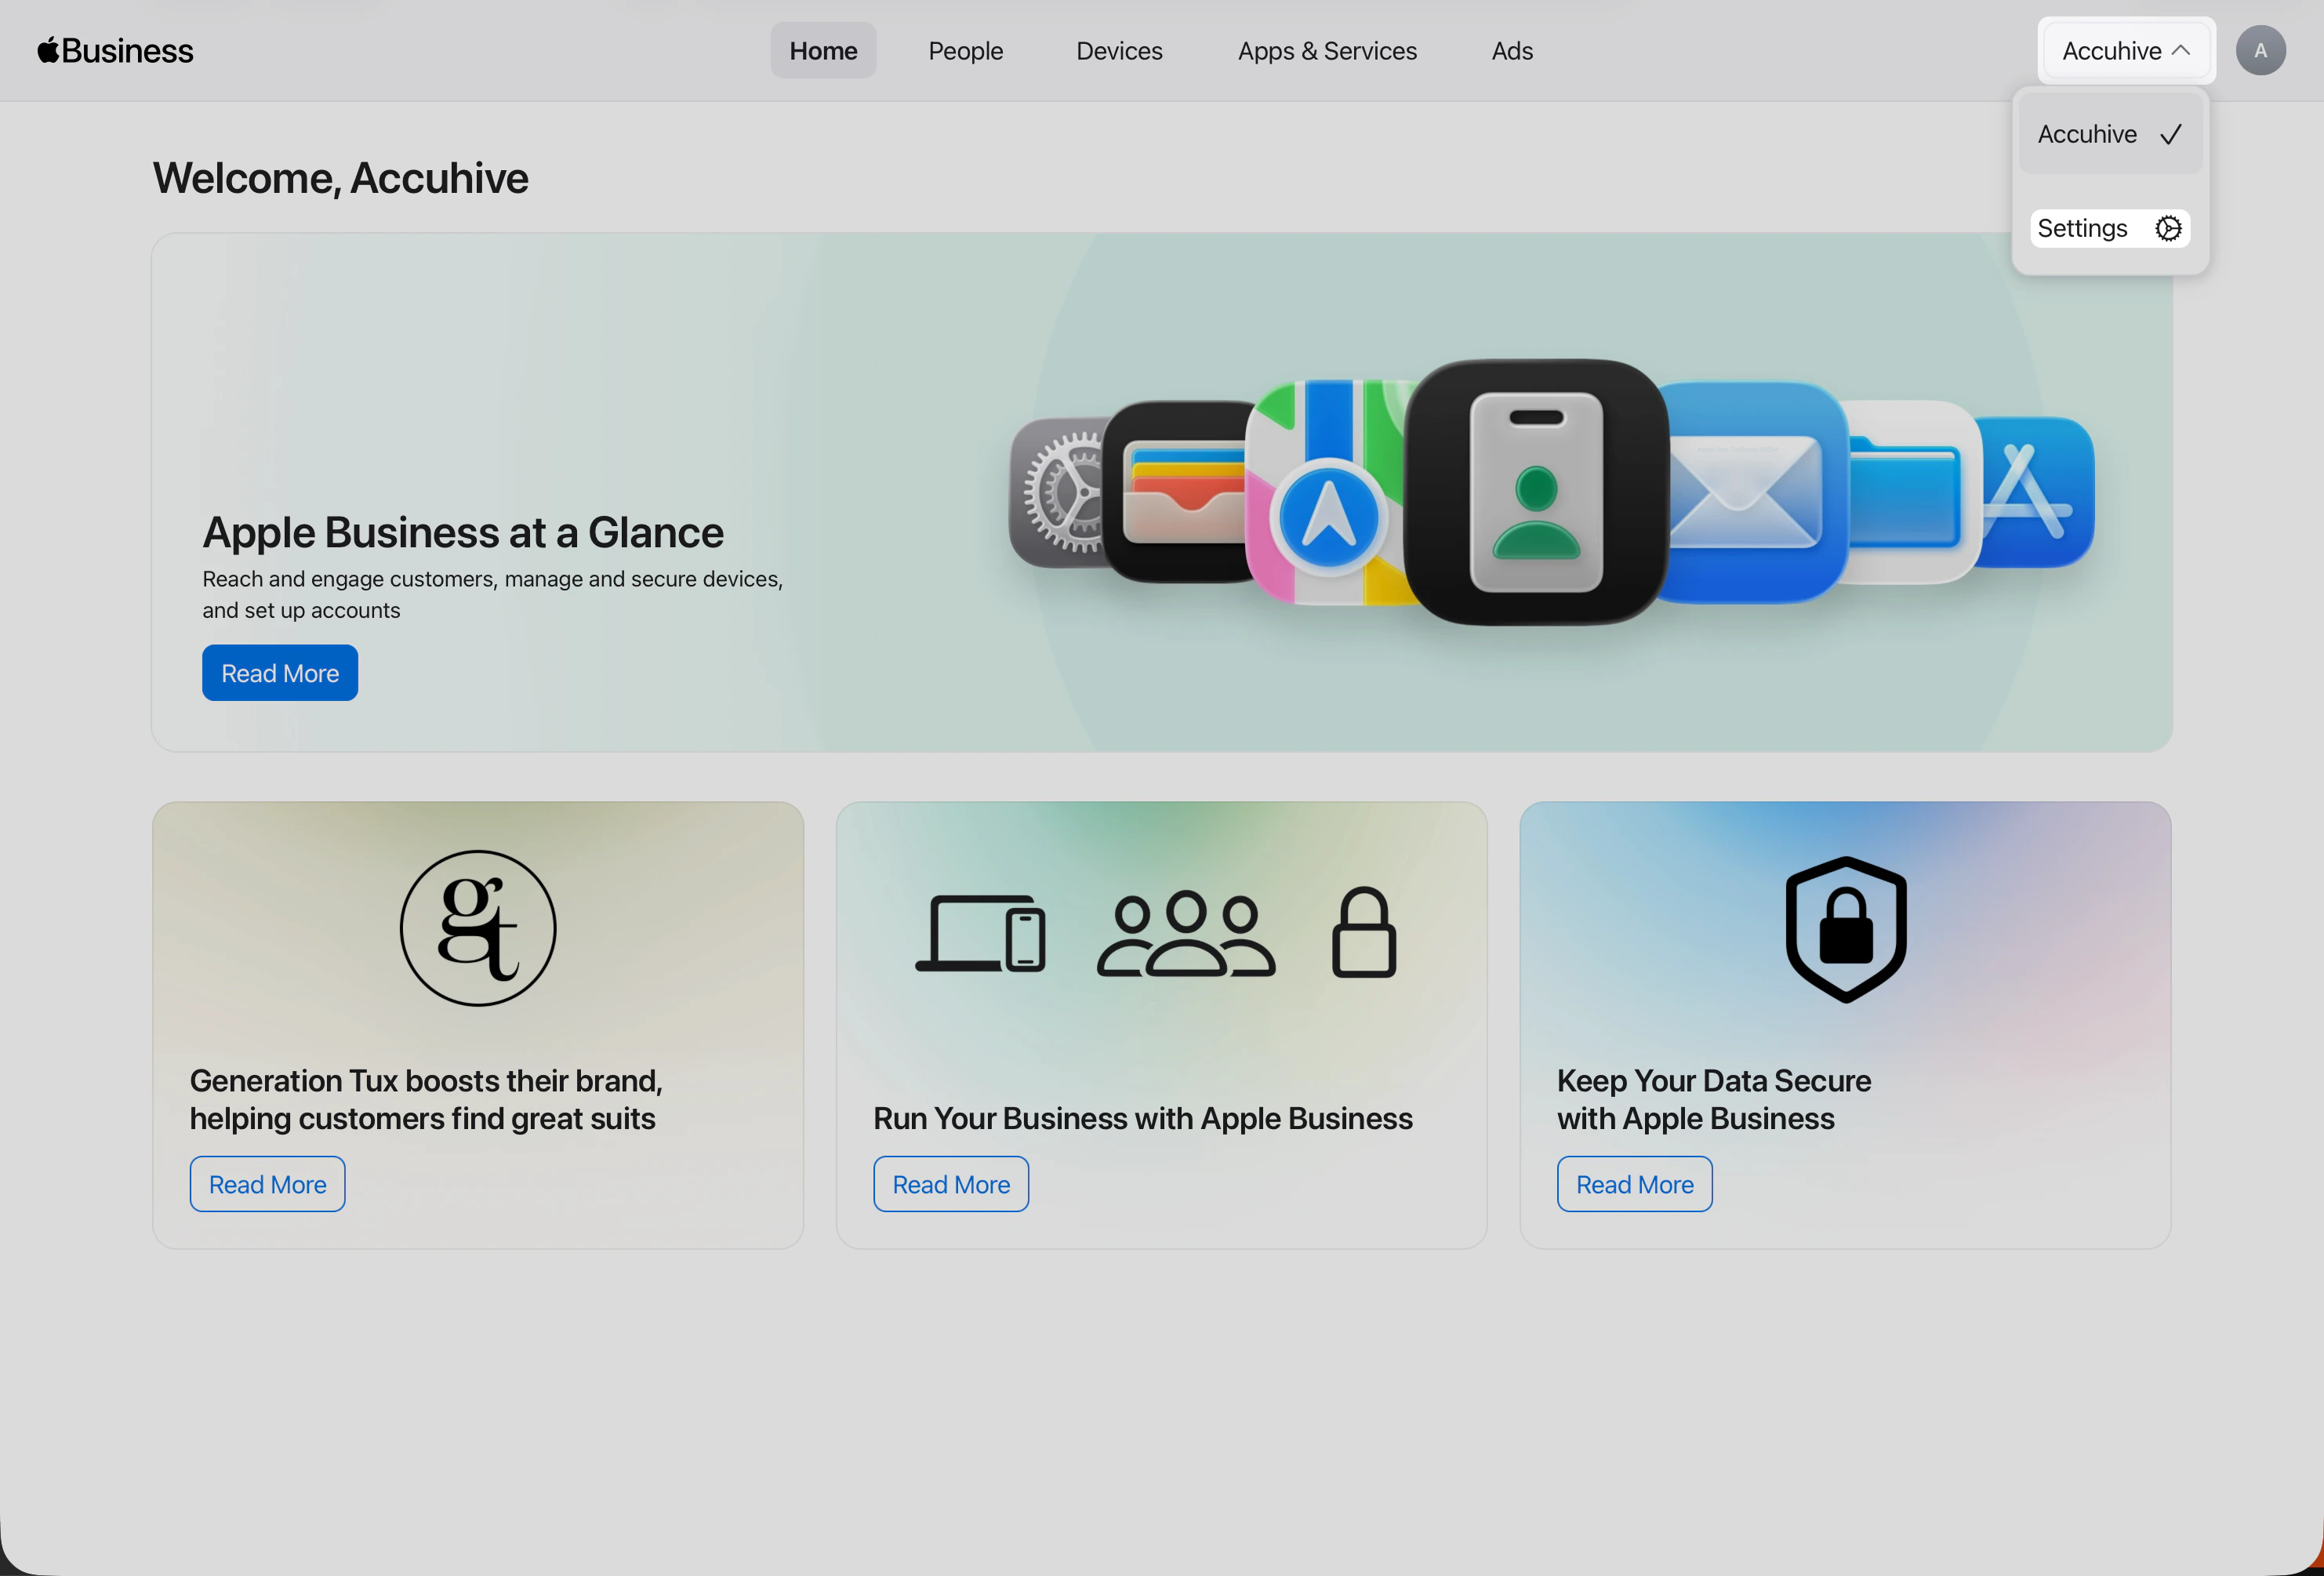 After you open **Settings**, you should already be on **Payments & Billing** → **Apps & Books**. This view is where your organization's Apps and Books content tokens appear.
Under **Content Tokens**, click **Download** next to the token you want to use with Iru Endpoint.
After you open **Settings**, you should already be on **Payments & Billing** → **Apps & Books**. This view is where your organization's Apps and Books content tokens appear.
Under **Content Tokens**, click **Download** next to the token you want to use with Iru Endpoint.
 Return to the Iru Endpoint Web App and upload your **token**.
Click **Complete Apps and Books setup**.
For detailed information about each integration, see [Configure Apple Push Notification Service](/en/endpoint/settings/apple-integrations/configure-apple-push-notification-service), [Configure Automated Device Enrollment](/en/endpoint/settings/apple-integrations/configure-automated-device-enrollment), [Configure Apps and Books](/en/endpoint/settings/apple-integrations/configure-apps-and-books), and [Apple Integrations Overview](/en/endpoint/settings/apple-integrations/apple-integrations-overview).
## Next Steps
After completing Apple setup:
Create and configure Blueprints so policies and apps are ready before enrollment. See [Configuring Blueprints](/en/endpoint/getting-started/blueprints-and-library/configuring-blueprints) and [Managing Library](/en/endpoint/getting-started/blueprints-and-library/managing-library).
To manage Android or Windows devices as well, see [Android Setup](/en/endpoint/getting-started/platform-setup/android-setup) or [Windows Setup](/en/endpoint/getting-started/platform-setup/windows-setup).
Once Blueprints are configured, set up enrollment: [Apple Enrollment](/en/endpoint/getting-started/enrollment/apple-enrollment), [Windows Enrollment](/en/endpoint/getting-started/enrollment/windows-enrollment), or [Android Enrollment](/en/endpoint/getting-started/enrollment/android-enrollment).
Return to the Iru Endpoint Web App and upload your **token**.
Click **Complete Apps and Books setup**.
For detailed information about each integration, see [Configure Apple Push Notification Service](/en/endpoint/settings/apple-integrations/configure-apple-push-notification-service), [Configure Automated Device Enrollment](/en/endpoint/settings/apple-integrations/configure-automated-device-enrollment), [Configure Apps and Books](/en/endpoint/settings/apple-integrations/configure-apps-and-books), and [Apple Integrations Overview](/en/endpoint/settings/apple-integrations/apple-integrations-overview).
## Next Steps
After completing Apple setup:
Create and configure Blueprints so policies and apps are ready before enrollment. See [Configuring Blueprints](/en/endpoint/getting-started/blueprints-and-library/configuring-blueprints) and [Managing Library](/en/endpoint/getting-started/blueprints-and-library/managing-library).
To manage Android or Windows devices as well, see [Android Setup](/en/endpoint/getting-started/platform-setup/android-setup) or [Windows Setup](/en/endpoint/getting-started/platform-setup/windows-setup).
Once Blueprints are configured, set up enrollment: [Apple Enrollment](/en/endpoint/getting-started/enrollment/apple-enrollment), [Windows Enrollment](/en/endpoint/getting-started/enrollment/windows-enrollment), or [Android Enrollment](/en/endpoint/getting-started/enrollment/android-enrollment).