> ## Documentation Index
> Fetch the complete documentation index at: https://docs.iru.com/llms.txt
> Use this file to discover all available pages before exploring further.
# Security Operations Actions in Endpoint Detection
> Manage threat detection status, apply tags, and take response actions in Iru EDR. Streamline security operations workflows for incident management.
This guide applies to Mac computers and Windows devices
### About Security Operations Actions
Security Operations (SecOps) actions are the controls available in an endpoint security or EDR workflow that let administrators review detections and take follow-up steps such as updating status, investigating details, isolating compromised devices, or performing other response tasks in the Iru Endpoint Web App. In Iru Endpoint Detection & Response, these actions are surfaced on the Detections page and include updating the detection's Status to track progress through review and remediation.
### How It Works
Security Operations actions provide a structured approach to threat management through status tracking and tagging systems. The **Status** action on the Detections page in Endpoint Detection lets you track and update detection events as you work through them. As an admin, you can manually mark detections as **Open** or **Closed**, while Iru Endpoint automatically assigns other statuses based on timing, such as when the detection first occurred or how long it's been resolved. This creates a consistent workflow that helps you see what's new, what needs attention, and what's been handled, making it easier to triage threats and track progress across your fleet.
The **Status** column is available in the detections table for file detections on all platforms. On Mac computers, it is also available for behavioral detections.
### Understanding Detection Status Types
Detection events can have one of four statuses:
* **New**: Occurred within the last 24 hours
* **Open**: Not yet marked as closed
* **Closed**: Resolved by manually marking as Closed
* **Archived**: Closed for more than 30 days
**Automatic management**: The **New** and **Archived** statuses are set automatically by Iru Endpoint. You can manually change a detection between **Open** and **Closed**.
### Filtering Detection Events by Status
You can filter detection events by status on the **Detections** page:
* **Event filter**: By default, shows **New**, **Open**, and **Closed** events. **Archived** events are hidden unless selected.
* **Device filter**: Located in the side panel, allows filtering devices by **Open** or **Closed** detections.
### Changing Detection Status
Updating statuses regularly helps keep detection lists accurate and improves filtering for active threats.
Select the detection(s) using the checkbox.
Click **Change Status** in the action bar.
Choose the new status from the dropdown menu.
Click **Change** to apply.
You can update detections individually or in bulk.
### Platform-Specific Response Actions
### Device Isolation
Device Isolation is a critical security operations capability that allows administrators to immediately quarantine a device from the network when it's suspected of being compromised or under active threat. The detections side panel provides access to [device isolation](/en/endpoint/endpoint-detection-response-edr/device-isolation) for Mac computers.
Device Isolation provides two isolation levels:
* **Partial Isolation**: Disconnects the device from the network while maintaining MDM agent connectivity for remote remediation actions
* **Complete Isolation**: Completely cuts off all network communication, with release from isolation being the only available remote action
Device Isolation can be performed on individual devices or in bulk across all devices affected by a specific threat detection. Isolation and release actions are recorded on the [Unified Activity](/en/iru/platform-overview/unified-activity). For detailed instructions on isolating and releasing devices, see the [Device Isolation](/en/endpoint/endpoint-detection-response-edr/device-isolation) article.
Status updates and tag management above apply to Windows file detections. Use **Change Status** and **Assign tags** to track and organize malware and PUP detections on enrolled Windows devices.
### About Detection Organization Tags
Tags provide a flexible way to organize, filter, and manage threats based on your team's specific operational needs. These admin-defined tags streamline threat management and enhance collaboration by allowing you to categorize detections with custom labels that align with your workflow.
The Detections page includes a Tags column, giving you visibility into which tags are associated with each threat. If a threat has multiple tags, you can hover over the column to see the full list.
### Managing Tags
#### Creating Tags
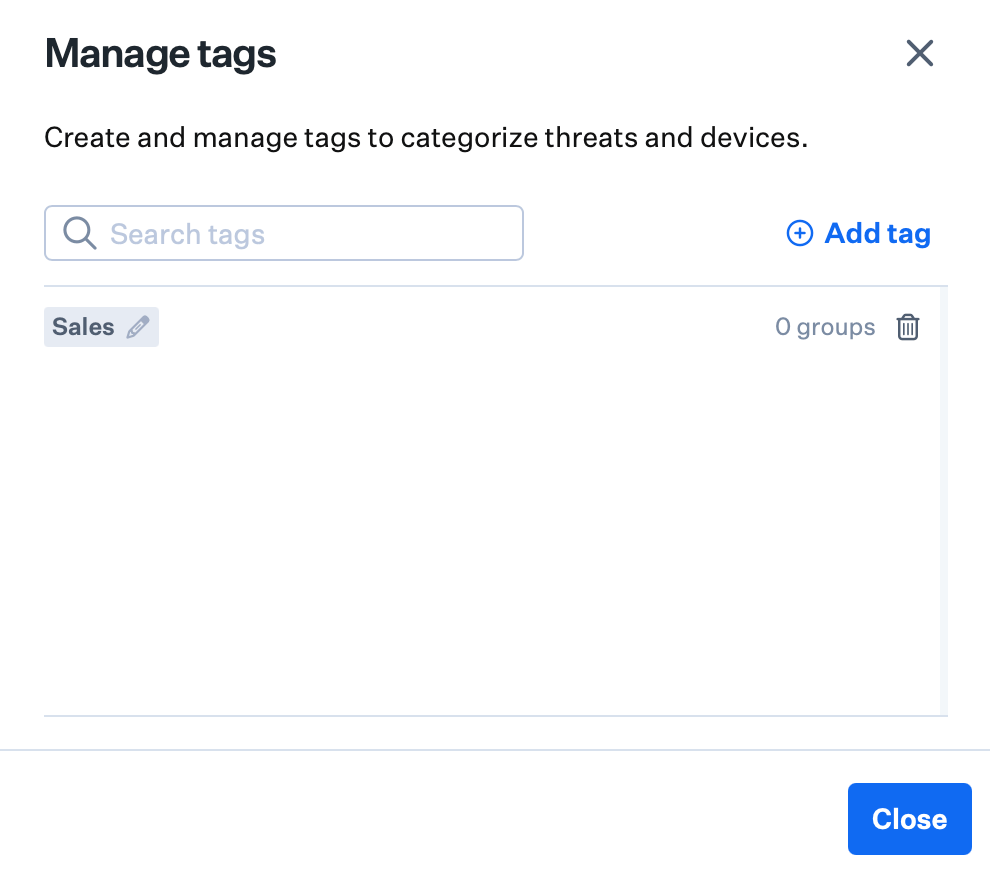
You have full control over your tags. To create, modify, or delete tags, click the **Manage Tags** button. This allows you to customize and maintain a tagging system that aligns with your team's operational needs.
Select the **Manage Tags** icon in the upper right-hand corner of the Detections page.
Click **Add Tag**.
Enter your desired **tag text**. Select the **checkmark** to save, and repeat as desired for the number of tags you want to add.
**Close** the modal.
 #### Updating Tags
Select the **Manage Tags** icon in the upper right-hand corner of the Detections page.
Click the **pencil icon** next to the tag you want to edit.
Update the **tag text**, then click the **check**.
**Close** the modal.
#### Deleting Tags
Select the **Manage Tags** icon in the upper right-hand corner of the Detections page.
Select the **Trash** icon to the right of the threat.
**Close** the modal.
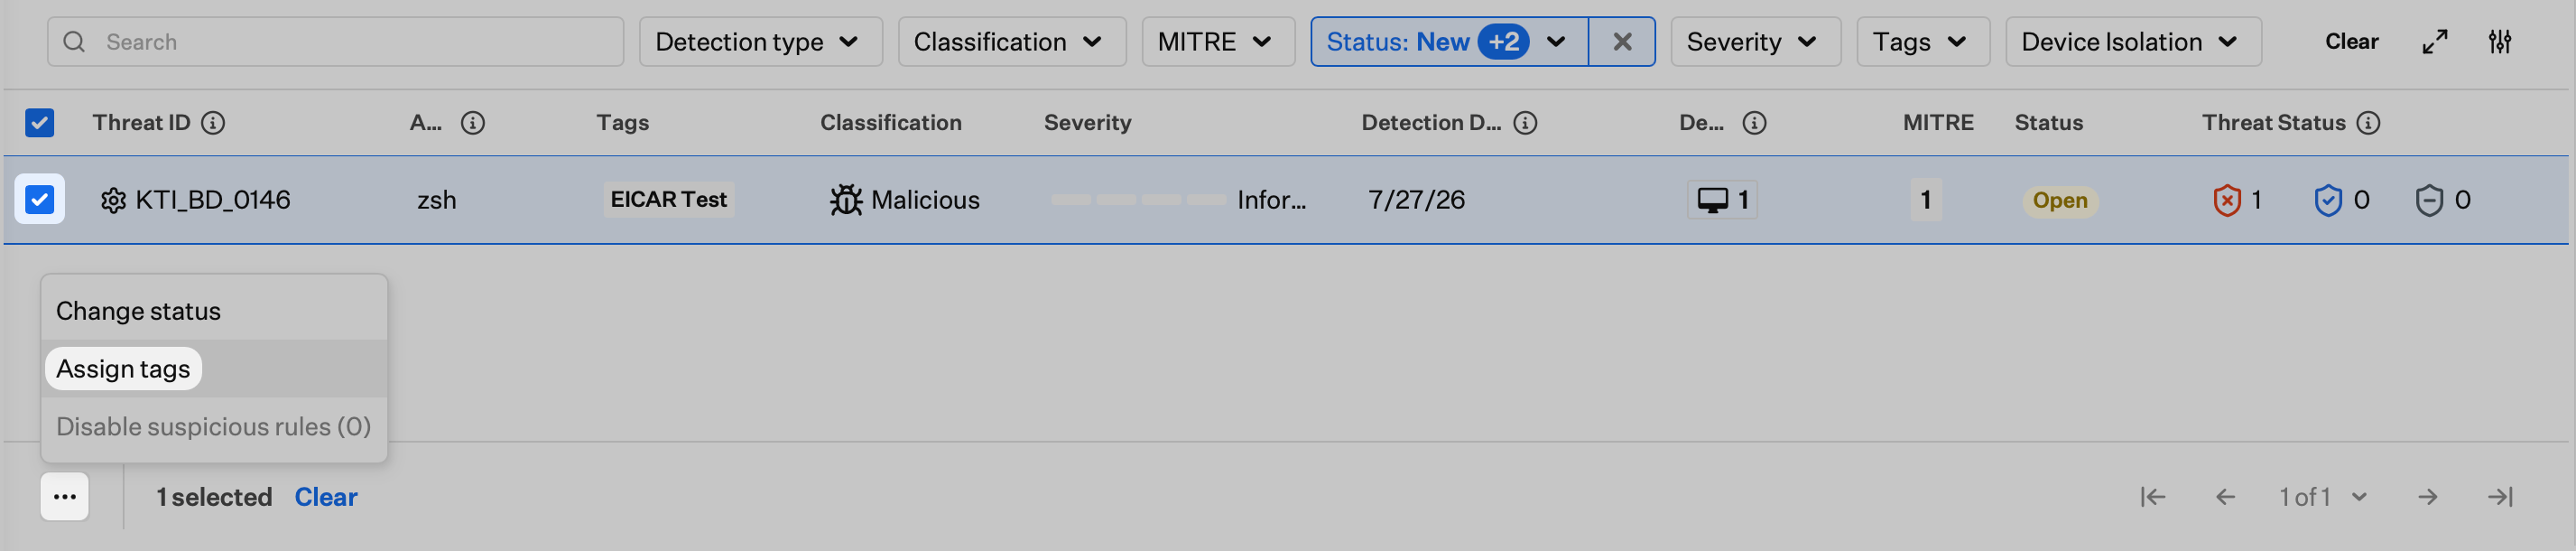
#### Assigning Tags to Detections
Select one or more **detections** from the list.
Click on the **ellipsis** in the lower left corner.
Select **Assign tags**, and select your tags from the list.
#### Updating Tags
Select the **Manage Tags** icon in the upper right-hand corner of the Detections page.
Click the **pencil icon** next to the tag you want to edit.
Update the **tag text**, then click the **check**.
**Close** the modal.
#### Deleting Tags
Select the **Manage Tags** icon in the upper right-hand corner of the Detections page.
Select the **Trash** icon to the right of the threat.
**Close** the modal.
#### Assigning Tags to Detections
Select one or more **detections** from the list.
Click on the **ellipsis** in the lower left corner.
Select **Assign tags**, and select your tags from the list.
 ### Filtering Detections by Tags
You can filter the detections table by selecting one or more tags from the top filter. This helps you focus on specific types of threats or tasks.
### Considerations
* **Status Management**: Regularly update detection statuses to maintain accurate threat tracking and improve filtering effectiveness
* **Tag Strategy**: Develop a consistent tagging strategy that aligns with your team's operational workflows and threat classification needs
* **Bulk Operations**: Use bulk status changes and tag assignments to efficiently manage multiple detections simultaneously
* **Filter Combinations**: Combine status and tag filters to create focused views for specific threat types or operational priorities
* **Team Collaboration**: Establish clear guidelines for status updates and tag usage to ensure consistent threat management across your security team
* **Automated Statuses**: Understand that **New** and **Archived** statuses are automatically managed by Iru Endpoint based on timing, while **Open** and **Closed** require manual intervention
* **Threat Prioritization**: Use status and tag combinations to prioritize threats that require immediate attention versus those that can be addressed later
### Filtering Detections by Tags
You can filter the detections table by selecting one or more tags from the top filter. This helps you focus on specific types of threats or tasks.
### Considerations
* **Status Management**: Regularly update detection statuses to maintain accurate threat tracking and improve filtering effectiveness
* **Tag Strategy**: Develop a consistent tagging strategy that aligns with your team's operational workflows and threat classification needs
* **Bulk Operations**: Use bulk status changes and tag assignments to efficiently manage multiple detections simultaneously
* **Filter Combinations**: Combine status and tag filters to create focused views for specific threat types or operational priorities
* **Team Collaboration**: Establish clear guidelines for status updates and tag usage to ensure consistent threat management across your security team
* **Automated Statuses**: Understand that **New** and **Archived** statuses are automatically managed by Iru Endpoint based on timing, while **Open** and **Closed** require manual intervention
* **Threat Prioritization**: Use status and tag combinations to prioritize threats that require immediate attention versus those that can be addressed later