> ## Documentation Index
> Fetch the complete documentation index at: https://docs.iru.com/llms.txt
> Use this file to discover all available pages before exploring further.
# Amazon Elastic Compute Cloud (EC2)
> Connect Amazon EC2 to Iru Compliance with a cross-account IAM role to collect instance inventory, security groups, and VPC network metadata as evidence.
### About Amazon Elastic Compute Cloud (EC2)
The **Amazon EC2** connector collects **instance inventory**, **security groups**, **VPC topology**, **AMI metadata**, and related **compute** details from your AWS account so you can attach them to controls in Iru Compliance. Iru calls AWS APIs using **`sts:AssumeRole`** into an **IAM role you create** in your account. The role trusts Iru’s AWS principal and enforces an **external ID** that the connector wizard shows you. Access is **read-only**, so Iru does not start, stop, or terminate instances through this source.
### How It Works
Iru runs in **Iru’s AWS account**. You create a **customer-managed IAM role** in **your** account that:
1. **Trusts** Iru’s role ARN (shown in the wizard) only when **`sts:ExternalId`** matches the value Iru displays.
2. **Allows** read-only EC2 and supporting calls, typically via **`AmazonEC2ReadOnlyAccess`**, or a tighter inline policy if your security team prefers least privilege.
You copy the role **ARN** back into the connector. Iru then assumes that role and reads regional EC2 data (Iru walks enabled Regions).
| Detail | Value |
| ------------------ | ------------------------------------------------------- |
| **Category** | Cloud compute |
| **Authentication** | Cross-account IAM role (`sts:AssumeRole` + external ID) |
References: [AmazonEC2ReadOnlyAccess](https://docs.aws.amazon.com/aws-managed-policy/latest/reference/AmazonEC2ReadOnlyAccess.html), [EC2 IAM](https://docs.aws.amazon.com/AWSEC2/latest/UserGuide/security-iam.html).
### Prerequisites
* IAM rights to **create roles** and attach policies (for example **`IAMFullAccess`** or a narrower admin role).
* The **Iru principal ARN** and **external ID** from **your** tenant’s connector screen (not the sample values in examples below unless they match what Iru shows you today).
### Connect Amazon EC2 to Iru
Start here: open the source wizard and review the **trust policy** (and note the **external ID**). When you are ready to create the role in AWS, switch to the [**AWS**](#aws) tab and follow [**Create the IAM role**](#create-the-iam-role). After you have the **Role ARN**, return to the [**Iru Compliance**](#iru-compliance) tab and complete [**Submit the role ARN in Iru**](#submit-the-role-arn-in-iru) below.
#### Get the trust policy from Iru
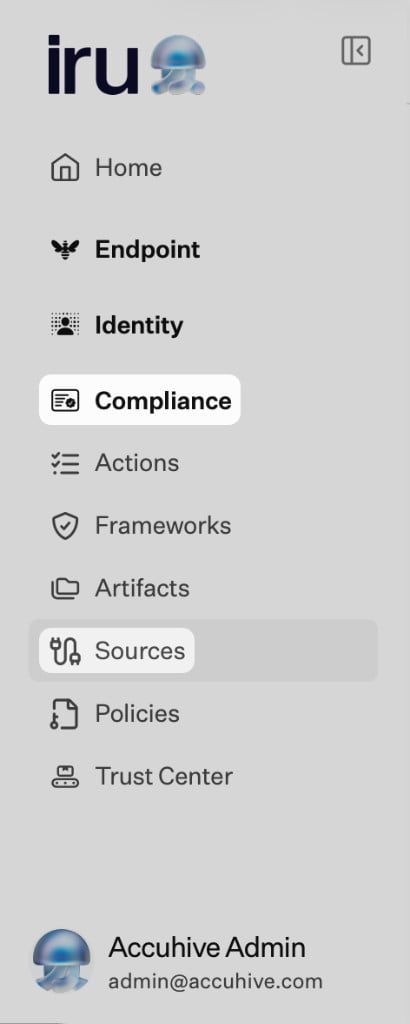
In Iru Compliance, on the left navigation bar, expand **Compliance** and select **Sources**.
 Find **AWS Elastic Compute Cloud (EC2)** (use **Category** or **Search by name or description**). On that card, turn on the **toggle**. Leave the **Iru is requesting access to external services** wizard tab open.
The wizard asks for a role ARN and displays the **trust policy** your IAM role must use (**Principal** and **sts:ExternalId**). Below is an **example** of the structure; **copy the live JSON from your wizard** so the account, principal ARN, and external ID match exactly.
```json copy=false lines theme={null}
{
"Version": "2012-10-17",
"Statement": [
{
"Effect": "Allow",
"Principal": {
"AWS": "arn:aws:iam::753695775620:role/IruConnect"
},
"Condition": {
"StringEquals": {
"sts:ExternalId": "YOUR_EXTERNAL_ID"
}
},
"Action": "sts:AssumeRole"
}
]
}
```
Keep the Iru wizard tab open for reference, then switch to the [**AWS**](#aws) tab and follow [**Create the IAM role**](#create-the-iam-role).
#### Submit the role ARN in Iru
Finish the [**AWS**](#aws) tab first (through [**Create the IAM role**](#create-the-iam-role)) so you have the **Role ARN** from the new role.
Return to the Iru wizard tab. Paste the **Role ARN** into the **Role ARN** field.
Click **Submit Role**. When the connection succeeds, the wizard shows **Connection Configured**.
Close the **Iru is requesting access to external services** browser tab, then return to **Compliance** → **Sources** and confirm the **EC2** card is **Active**.
Complete [**Get the trust policy from Iru**](#get-the-trust-policy-from-iru) on the [**Iru Compliance**](#iru-compliance) tab before you create this role. Use the **external ID** and trust policy from the live wizard when you configure **Trusted entity**.
#### Create the IAM role
Sign in to the AWS account that owns your EC2 workload. Open **IAM** → **Roles** → **Create role**.
Choose **AWS account** → **Another AWS account**. Enter Iru’s AWS account ID (**`753695775620`** unless the wizard shows a different value). Enable **Require external ID** and paste the **external ID** from the Iru wizard.
On **Permissions**, attach **`AmazonEC2ReadOnlyAccess`**.
If your security team does **not** use the managed policy, attach an **inline policy** with the JSON below instead. The JSON is an **example** least-privilege alternative; tighten or expand actions after your team’s review.
```json lines theme={null}
{
"Version": "2012-10-17",
"Statement": [
{
"Effect": "Allow",
"Action": [
"ec2:Describe*",
"ec2:Get*",
"elasticloadbalancing:Describe*",
"cloudwatch:ListMetrics",
"cloudwatch:GetMetricStatistics",
"cloudwatch:Describe*",
"autoscaling:Describe*"
],
"Resource": "*"
}
]
}
```
Finish the wizard and name the role (for example **`IruEC2ReadOnly`**). Open the new role and copy the **Role ARN** from the top of the summary page. Switch back to the [**Iru Compliance**](#iru-compliance) tab and complete [**Submit the role ARN in Iru**](#submit-the-role-arn-in-iru).
Open the role’s **Trust relationships** tab and confirm the JSON matches what Iru displayed. Typos in the external ID are the most common cause of **`AccessDenied`** on **`AssumeRole`**.
Continue on the [**Iru Compliance**](#iru-compliance) tab to paste the **Role ARN** and finish the wizard ([**Submit the role ARN in Iru**](#submit-the-role-arn-in-iru)).
### Troubleshooting
Check **pop-up blocker** settings for the Iru site and try again.
Verify the **external ID** and **principal** on the trust policy match Iru’s wizard character-for-character.
Confirm the role lives in the **same account** as your instances and that instances exist in Regions you expect.
Ensure `ec2:Describe*` coverage (managed policy already includes these). Custom policies need matching `Describe*` actions.
### Considerations
EC2 APIs are **Regional**, so first sync may take longer across many Regions.
`AmazonEC2ReadOnlyAccess` also covers related **ELB** and **Auto Scaling** reads for a fuller picture.
This integration never mutates instances; it only **describes** them.
### Related Articles
Browse and manage every Compliance source.
Frameworks, actions, and **Artifacts**.
How Endpoint, Compliance, and Identity fit together.
Upload, review, and organize evidence from sources and actions.
Find **AWS Elastic Compute Cloud (EC2)** (use **Category** or **Search by name or description**). On that card, turn on the **toggle**. Leave the **Iru is requesting access to external services** wizard tab open.
The wizard asks for a role ARN and displays the **trust policy** your IAM role must use (**Principal** and **sts:ExternalId**). Below is an **example** of the structure; **copy the live JSON from your wizard** so the account, principal ARN, and external ID match exactly.
```json copy=false lines theme={null}
{
"Version": "2012-10-17",
"Statement": [
{
"Effect": "Allow",
"Principal": {
"AWS": "arn:aws:iam::753695775620:role/IruConnect"
},
"Condition": {
"StringEquals": {
"sts:ExternalId": "YOUR_EXTERNAL_ID"
}
},
"Action": "sts:AssumeRole"
}
]
}
```
Keep the Iru wizard tab open for reference, then switch to the [**AWS**](#aws) tab and follow [**Create the IAM role**](#create-the-iam-role).
#### Submit the role ARN in Iru
Finish the [**AWS**](#aws) tab first (through [**Create the IAM role**](#create-the-iam-role)) so you have the **Role ARN** from the new role.
Return to the Iru wizard tab. Paste the **Role ARN** into the **Role ARN** field.
Click **Submit Role**. When the connection succeeds, the wizard shows **Connection Configured**.
Close the **Iru is requesting access to external services** browser tab, then return to **Compliance** → **Sources** and confirm the **EC2** card is **Active**.
Complete [**Get the trust policy from Iru**](#get-the-trust-policy-from-iru) on the [**Iru Compliance**](#iru-compliance) tab before you create this role. Use the **external ID** and trust policy from the live wizard when you configure **Trusted entity**.
#### Create the IAM role
Sign in to the AWS account that owns your EC2 workload. Open **IAM** → **Roles** → **Create role**.
Choose **AWS account** → **Another AWS account**. Enter Iru’s AWS account ID (**`753695775620`** unless the wizard shows a different value). Enable **Require external ID** and paste the **external ID** from the Iru wizard.
On **Permissions**, attach **`AmazonEC2ReadOnlyAccess`**.
If your security team does **not** use the managed policy, attach an **inline policy** with the JSON below instead. The JSON is an **example** least-privilege alternative; tighten or expand actions after your team’s review.
```json lines theme={null}
{
"Version": "2012-10-17",
"Statement": [
{
"Effect": "Allow",
"Action": [
"ec2:Describe*",
"ec2:Get*",
"elasticloadbalancing:Describe*",
"cloudwatch:ListMetrics",
"cloudwatch:GetMetricStatistics",
"cloudwatch:Describe*",
"autoscaling:Describe*"
],
"Resource": "*"
}
]
}
```
Finish the wizard and name the role (for example **`IruEC2ReadOnly`**). Open the new role and copy the **Role ARN** from the top of the summary page. Switch back to the [**Iru Compliance**](#iru-compliance) tab and complete [**Submit the role ARN in Iru**](#submit-the-role-arn-in-iru).
Open the role’s **Trust relationships** tab and confirm the JSON matches what Iru displayed. Typos in the external ID are the most common cause of **`AccessDenied`** on **`AssumeRole`**.
Continue on the [**Iru Compliance**](#iru-compliance) tab to paste the **Role ARN** and finish the wizard ([**Submit the role ARN in Iru**](#submit-the-role-arn-in-iru)).
### Troubleshooting
Check **pop-up blocker** settings for the Iru site and try again.
Verify the **external ID** and **principal** on the trust policy match Iru’s wizard character-for-character.
Confirm the role lives in the **same account** as your instances and that instances exist in Regions you expect.
Ensure `ec2:Describe*` coverage (managed policy already includes these). Custom policies need matching `Describe*` actions.
### Considerations
EC2 APIs are **Regional**, so first sync may take longer across many Regions.
`AmazonEC2ReadOnlyAccess` also covers related **ELB** and **Auto Scaling** reads for a fuller picture.
This integration never mutates instances; it only **describes** them.
### Related Articles
Browse and manage every Compliance source.
Frameworks, actions, and **Artifacts**.
How Endpoint, Compliance, and Identity fit together.
Upload, review, and organize evidence from sources and actions.