> ## Documentation Index
> Fetch the complete documentation index at: https://docs.iru.com/llms.txt
> Use this file to discover all available pages before exploring further.
# Policies Management
> Create, organize, and publish security and compliance policies in Iru, use the policy library and template generation, edit drafts, and track workforce acknowledgements.
The **Policies** page is where admins create, publish, and track acknowledgements for security and compliance policies.
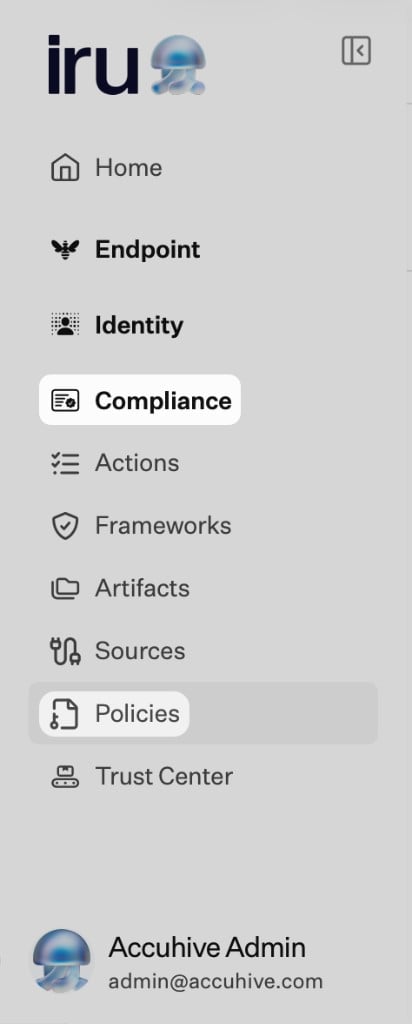
On the left navigation bar, expand **Compliance** and select **Policies**.
 Need help with a step? [Contact Iru Support](/en/iru/iru-support/access-to-iru-support).
## Policies Management
The **Policies** module manages your organization's security and compliance policy documents from draft through publication and workforce acknowledgement.
You can add a policy from the **Policy Library** (templates aligned to common frameworks), generate a first draft with **Iru AI** from a template using your organization profile and setup form, or upload an existing PDF or DOCX. Drafts stay editable until you publish. When you publish, the policy is assigned to every user in your tenant for acknowledgement.
Policies connect to your compliance program through **Actions**. Attach a published or uploaded policy to an Action to use it as framework evidence. See [How policies relate to frameworks](#how-policies-relate-to-frameworks).
Admins work on **Compliance → Policies** (**My policies** and **Users** tabs). Workforce users read and acknowledge assigned policies from **My assigned policies**, separate from the admin view. See [Policy Acknowledgements](#policy-acknowledgements).
Who can create, publish, or view policies depends on role. See [Compliance Permissions](/en/compliance/compliance-permissions).
### The Policies page
Open **Policies** from the left navigation. The page has two tabs:
* **My policies**: every policy in your organization, grouped by category.
* **Users**: acknowledgement progress by person. See [Policy Acknowledgements](#policy-acknowledgements).
The category sidebar filters policies by the same nine categories shown in the library: Governance & Risk, Access Control & Identity, Data Protection & Privacy, Security Operations, Vendor & Third-Party, Infrastructure & Network, Software Development, People & Workforce, and Business Continuity. Use **Search by policy name or filename...** to find a policy by name.
### Policy status
Every policy is either **Draft** or **Published**.
| Status | What it means |
| ------------- | ------------------------------------------------------------------------------------------------------------------------------------------------------------------------- |
| **Draft** | Work in progress. Editable, deletable, not visible to your workforce. |
| **Published** | Live. Auto-assigned to every user in your tenant and available for acknowledgement. Published policies may display as **Sent to recipients** on the **My policies** list. |
Use the **Audit log** on the policy detail page to see who changed the policy and when.
### What happens when you publish
When you click **Publish**, three things happen:
The policy status flips to Published. The current content becomes the canonical, citable version.
The policy is auto-assigned to every user in your tenant. Each user sees it under **Assigned** in **My assigned policies** until they acknowledge it.
A publish event is written to the audit log, recording who published and when.
Users see the new assignment the next time they open **My assigned policies**. Acknowledgement counts on the policy detail page and **My policies** cards update immediately (for example, 2 of 85 acknowledged).
Users added to your tenant after a policy is published are not automatically back-assigned to existing policies. To bring them in, publish the policy again the next time you make a change.
### Ways to add a policy
You can add a policy from the library, by uploading a file, or from **Artifacts**. Each path starts in a different place in the UI:
| Path | When to use it | Entry point |
| -------------------------- | ------------------------------------------------------------ | ------------------------------------------------------------------------------ |
| **Generate from template** | You want Iru to draft policy content from a library template | Policies → **+ Add a policy** → hover template card → **Use this template** |
| **Upload policy** | You already have the policy written as a PDF or DOCX | Policies → **+ Add a policy** → hover template card → **Upload policy** |
| **Upload a custom policy** | Your document doesn't match any library template | Policies → **+ Add a policy** → **+ Start custom policy** (bottom of the page) |
| **Upload from Artifacts** | You are adding a policy while uploading other evidence | Artifacts → **+ Add artifact(s)** |
#### Complete the setup form and generate
Before you can generate a policy from a template:
* **Organization Profile** must be filled in. Iru uses it to pre-populate the setup form. If required fields are missing, you'll be prompted to complete them before generation starts.
* You need permission to create and edit draft policies. See [Compliance Permissions](/en/compliance/compliance-permissions).
### Generate from template
The Policy Library has pre-built templates for topics common in SOC 2, ISO 27001, GDPR, HIPAA, CIS, and other frameworks. From **Policies → My policies**, click **+ Add a policy** in the top-right. The library opens in place of the policy list.
The category sidebar filters templates: **All**, Governance & Risk, Access Control & Identity, Data Protection & Privacy, Security Operations, Vendor & Third-Party, Infrastructure & Network, Software Development, People & Workforce, and Business Continuity.
Use **Search by policy template name...** to find a template by name (for example, "Incident Response" or "Encryption").
Each template card shows the policy name, a short description, framework labels, and **In use** or **Not used**. Hover over a card to see **Use this template** and **Upload policy**:
* Framework labels, for example, SOC 2 • ISO 27001. They show which frameworks the template was written for. They don't link your policy to those frameworks. Attach the published policy to Actions after publishing.
* **In use** or **Not used**: whether your organization already has a policy from this template. Iru doesn't block duplicates; **In use** means a policy from this template already exists.
Open **Policies → + Add a policy**, find the template you want in the library, hover over it, and click **Use this template**.
In **Policy settings**, confirm or update the fields for this template. Toggle **Optional sections to include in generation** if you want extra sections in the draft.
Review **Policy type settings** and **All policies settings**. Change anything that doesn't match your org.
Click **Generate policy**.
Click **Load all**, or use **Load next section** and **Finish** after the last section loads.
Review the draft, edit as needed (see [Edit a generated draft](#edit-a-generated-draft)), then click **Publish**.
#### About the generated draft
| It does | It does not |
| ----------------------------------------------------------------------------------- | -------------------------------------------------------------------------------------------------------------- |
| Assemble a structured first draft from your profile data and setup inputs. | Publish automatically. Generated policies stay in Draft until you click **Publish**. |
| Tag each paragraph with the input that produced it. | Map the policy to framework controls automatically. Attach to Actions after publishing. |
| Keep generation inputs on the draft so you can re-generate with different settings. | Generate content outside the template library. Use [Upload a custom policy](#upload-a-custom-policy) for that. |
#### Edit a generated draft
After you load every section, review the draft before you publish. Check that roles and tooling match your org and that the exception process reflects your defaults.
The policy detail page shows **Generating policy...** until sections are ready. The **Generation inputs** card lists the setup form answers used for this draft. Use the up and down arrows at the top right to move between policies without returning to **My policies**.
You can edit a generated draft in two ways:
**Inline intake swaps.** Spans from your setup form selections (scope, classification, owner, review frequency, and similar fields) appear with a gradient highlight. Hover or click a highlighted span to open a popover where you can swap to a different option from the same intake field (e.g. Quarterly → Annual) or see which intake field the text came from (e.g. "Review frequency"). Each swap is recorded to the policy's audit log.
**Free-text editing.** Click anywhere in a paragraph, heading, or list item and start typing. Editing a highlighted span removes the gradient. Once you've rewritten generated text in your own words, it becomes regular body text. Free-text edits are recorded to the audit log.
After the first section loads, a toolbar appears above the editor:
| Control | What it does |
| --------------------------------- | ----------------------------------------------- |
| **H1, H2, H3** | Apply heading levels. |
| **Bold, Italic, Strikethrough** | Inline text styles. |
| **Bulleted list / Numbered list** | Convert the current block to a list. |
| **Undo / Redo** | Step backward or forward through your edits. |
| **Zoom** | Shrink or enlarge the document preview (− / +). |
When your cursor is in a paragraph or heading, an insert button appears in the left margin next to the block. Click it to add a paragraph, heading, or list below the current block.
Drafts auto-save as you edit. When every section is loaded and the draft is ready, click **Publish**. See [What happens when you publish](#what-happens-when-you-publish).
### Upload policy
Use this path when your policy is already written and saved as a PDF or DOCX. You upload the finished file; Iru does not generate content from the template. Pick a template card in the same category as your document so Iru files the policy under the right topic.
Open **Policies → + Add a policy**.
Hover over a template card in the same category as your policy and click **Upload policy**.
In the upload panel, set **Artifact type** to **Policy**, choose **Policy type** if needed, review **Mapped action(s)**, then click **Add policy**.
The upload creates a **Draft** policy (see [Policy status](#policy-status)). The file opens as a read-only preview on the policy detail page.
To change the content later, edit the source file in your authoring tool, then add a new policy with the updated file. You cannot re-upload on an existing record—when the new version is ready, **Unpublish policy** or **Delete upload** on the original.
### Upload a custom policy
Use this path when your document doesn't match any library template. A custom policy is a policy you upload that isn't based on a Policy Library template. You can still file it under any policy category (or **Custom**).
At the bottom of **Add a policy**, below the template categories, is an **Upload a custom policy** tile. Click **+ Start custom policy** to open the upload panel. The result is a policy with category **Custom** unless you choose another category on the policy detail page.
The upload creates a **Draft** policy. It appears in both places at once:
* **Artifacts tab**: filterable by Type = Policy.
* **Policies → My policies**: shows the policy with category **Custom** (or whichever category you chose). If you didn't pick one of the nine sidebar categories, use **All** or search to find it.
Edits in either view update the same record.
**Category**: editable from the policy detail page while the policy is in Draft. Admins can pick any category or move it back to Custom. The dropdown is hidden once the policy is Published.
**Type**: changeable from the Artifacts tab after upload:
* Demoting to another type (Procedure, Register, Other) removes the Policy record and hides it from the Policies tab.
* Promoting a non-policy artifact to a policy is only allowed if the file is a PDF or DOCX. Other formats must be replaced first.
To update the file, edit it locally, upload it as a new policy, then **Unpublish policy** or **Delete upload** on the original.
### Upload from Artifacts
From **Artifacts**, click **+ Add artifact(s)**, attach a PDF or DOCX, and set **Artifact type** to **Policy**. Choose **Policy type** (any library category or **Custom**), review **Mapped action(s)**, then click **Add artifact**.
* **Pick a category**: the policy is filed under that category.
* **Leave it blank or pick Custom**: Iru files the policy under the Custom category.
The upload creates a **Draft** policy and appears on **Policies → My policies** and the **Artifacts** tab, the same as [Upload a custom policy](#upload-a-custom-policy). See [Artifacts Management](/en/compliance/artifacts-management) for general artifact uploads.
### The policy detail page
Open any policy from **My policies**.
At the top of the page you'll see the policy name, status (**Draft** or **Published**), category, description, and badges for attached Actions. Change the category while the policy is still in **Draft**; click a badge to open that Action. **Publish** appears on drafts. Open the **ellipsis** (⋯) menu for draft actions: **Delete** on a generated draft, **Delete upload** on an uploaded or custom draft. On a published policy, choose **Unpublish generated policy** or **Unpublish policy** to return it to draft. The up and down arrows move to the previous or next policy in the list without returning to **My policies**.
The policy document sits below that header. Uploaded PDFs and DOCX files open as read-only previews. Policies generated from a template open in the editor; see [Edit a generated draft](#edit-a-generated-draft).
On the right, **Policy lifecycle** tracks generation or draft status, then acknowledgement progress after publish (for example, 2 of 85 acknowledged). **Owner** shows who maintains the policy. **Audit log** records who changed the policy and when. On generated drafts, the **Generation inputs** card shows the setup form answers used to create the policy.
### How policies relate to frameworks
A policy isn't linked to a framework directly. The link runs through Actions:
Policy → attached to → Action → belongs to → Control → belongs to → Framework
For a policy to count toward a framework, attach it to one or more Actions in that framework. Attached policies show up as evidence on each Action's detail page. Those Actions appear as badges on the policy detail page.
#### How attachments get created
Iru creates these attachments in two ways:
* **Automatically, on upload.** When you upload a file as a policy (from **Artifacts**, **Upload policy** on a template card in the library, or **Upload a custom policy**), Iru matches the file against Actions in your active frameworks and attaches it where it fits. Review attachments on the upload panel or policy detail page; remove any that don't apply or add more manually.
* **Manually, at any time.** From any Action's detail page, attach an existing policy (or other artifact) as evidence. Use this for Actions Iru missed, or for policies that weren't uploaded through Iru.
Generated policies don't auto-attach to Actions when you publish yet. Attach them manually from each Action's detail page after publishing. Auto-attach for generated policies is expected to follow.
#### Where frameworks show up
* In the Policy Library, each template card shows "SOC 2 • ISO 27001" or similar. That's catalog metadata. It describes which frameworks the template was written for, not a link to your active frameworks.
* In the setup form, the **Compliance frameworks** step shapes generated content (for example, GDPR-specific clauses when GDPR is selected) and saves a snapshot on the draft. It doesn't link the published policy to those frameworks.
* On the policy detail page, the framework link is the row of Action badges. Each badge shows an attached Action and its framework.
### Deleting a policy
Deleting a policy is permanent. Open the **ellipsis** (⋯) menu and choose **Delete** on a generated draft or **Delete upload** on an uploaded or custom draft. That removes the file, the policy record, and any audit history for that artifact. There's no undo.
To revert a published policy to draft, open the **ellipsis** (⋯) menu and choose **Unpublish generated policy** or **Unpublish policy**.
## Policy Acknowledgements
When you publish a policy, Iru assigns it to every user in your tenant and records who acknowledges it and when. Track progress on **Policies → Users** and on each published policy's detail page.
### The Users tab
Every published policy is assigned to **every user in your tenant** when you publish. There's no per-policy recipient picker.
Users added to your tenant after a policy is published are not automatically back-assigned. To bring them in, publish the policy again the next time you make a change.
Open **Policies → Users** (the second tab). The table lists each user with acknowledgement progress:
| Column | What's in it |
| ---------------- | ------------------------------------------------------------------------ |
| **Name** | User display name. |
| **Email** | User email address. |
| **Acknowledged** | Ratio of acknowledged policies to assigned policies (for example, 0/10). |
| **Policies** | Color-coded chips for each assigned policy. |
Use **Search by name or email** to filter the table. Two dropdown filters sit next to the search bar:
* **Role**: filter by tenant role (**Admin**, **Auditor**, **Collaborator**, or **Employee**). Open the dropdown, select one or more roles, and use **Clear** to reset the filter.
* **Policy**: filter to users assigned a specific policy. Open the dropdown, search or select one or more policies by name, and use **Clear** to reset the filter.
You can combine search, role, and policy filters. Click **Export** to download a CSV of the current filtered list:
* **Export by user**: one row per user. Columns include **Name**, **Email**, **Acknowledged**, **Total assigned**, and one column per assigned policy. A policy column shows the acknowledgement date when the user has acknowledged that policy; it is blank otherwise.
* **Export by policy**: one row per policy. Columns include **Policy**, **Total users assigned**, **Total users acknowledged**, and **Acknowledged users** (name and email of each user who acknowledged).
The **Acknowledged** column shows how many assigned policies each user has completed (N / total). The acknowledgement summary also appears on each published policy's detail page, in the **Lifecycle** card on the right sidebar (for example, 7 of 10 acknowledged).
Click **My assigned policies →** in the top-right of **Policies** to preview the workforce view. Click **← Back to admin view** to return.
### My assigned policies
When a policy is assigned to you, it appears here the next time you open the view. Open **My assigned policies** from the **Policies** page (**My assigned policies →**) or from your workforce navigation entry point, if your tenant exposes one.
| Group | What's in it |
| ---------------- | ------------------------------------------------ |
| **All** | Every policy assigned to you, in any state. |
| **Assigned** | Policies you still need to read and acknowledge. |
| **Acknowledged** | Policies you've already signed off on. |
#### Acknowledging a policy
Click an assigned policy to open it.
Read the full document. The Acknowledge button is disabled until you've scrolled to the end.
Click Acknowledge. The policy moves to your Acknowledged group and Iru records the timestamp.
If multiple policies are waiting, Iru takes you to the next one automatically after each acknowledgement.
## Related Articles
Who can create, publish, and view policies by role.
Upload custom policies and other evidence from the Artifacts tab.
Attach published policies to Actions as framework evidence.
Active frameworks that Actions and controls belong to.
Recommended setup order for Compliance.
Need help with a step? [Contact Iru Support](/en/iru/iru-support/access-to-iru-support).
## Policies Management
The **Policies** module manages your organization's security and compliance policy documents from draft through publication and workforce acknowledgement.
You can add a policy from the **Policy Library** (templates aligned to common frameworks), generate a first draft with **Iru AI** from a template using your organization profile and setup form, or upload an existing PDF or DOCX. Drafts stay editable until you publish. When you publish, the policy is assigned to every user in your tenant for acknowledgement.
Policies connect to your compliance program through **Actions**. Attach a published or uploaded policy to an Action to use it as framework evidence. See [How policies relate to frameworks](#how-policies-relate-to-frameworks).
Admins work on **Compliance → Policies** (**My policies** and **Users** tabs). Workforce users read and acknowledge assigned policies from **My assigned policies**, separate from the admin view. See [Policy Acknowledgements](#policy-acknowledgements).
Who can create, publish, or view policies depends on role. See [Compliance Permissions](/en/compliance/compliance-permissions).
### The Policies page
Open **Policies** from the left navigation. The page has two tabs:
* **My policies**: every policy in your organization, grouped by category.
* **Users**: acknowledgement progress by person. See [Policy Acknowledgements](#policy-acknowledgements).
The category sidebar filters policies by the same nine categories shown in the library: Governance & Risk, Access Control & Identity, Data Protection & Privacy, Security Operations, Vendor & Third-Party, Infrastructure & Network, Software Development, People & Workforce, and Business Continuity. Use **Search by policy name or filename...** to find a policy by name.
### Policy status
Every policy is either **Draft** or **Published**.
| Status | What it means |
| ------------- | ------------------------------------------------------------------------------------------------------------------------------------------------------------------------- |
| **Draft** | Work in progress. Editable, deletable, not visible to your workforce. |
| **Published** | Live. Auto-assigned to every user in your tenant and available for acknowledgement. Published policies may display as **Sent to recipients** on the **My policies** list. |
Use the **Audit log** on the policy detail page to see who changed the policy and when.
### What happens when you publish
When you click **Publish**, three things happen:
The policy status flips to Published. The current content becomes the canonical, citable version.
The policy is auto-assigned to every user in your tenant. Each user sees it under **Assigned** in **My assigned policies** until they acknowledge it.
A publish event is written to the audit log, recording who published and when.
Users see the new assignment the next time they open **My assigned policies**. Acknowledgement counts on the policy detail page and **My policies** cards update immediately (for example, 2 of 85 acknowledged).
Users added to your tenant after a policy is published are not automatically back-assigned to existing policies. To bring them in, publish the policy again the next time you make a change.
### Ways to add a policy
You can add a policy from the library, by uploading a file, or from **Artifacts**. Each path starts in a different place in the UI:
| Path | When to use it | Entry point |
| -------------------------- | ------------------------------------------------------------ | ------------------------------------------------------------------------------ |
| **Generate from template** | You want Iru to draft policy content from a library template | Policies → **+ Add a policy** → hover template card → **Use this template** |
| **Upload policy** | You already have the policy written as a PDF or DOCX | Policies → **+ Add a policy** → hover template card → **Upload policy** |
| **Upload a custom policy** | Your document doesn't match any library template | Policies → **+ Add a policy** → **+ Start custom policy** (bottom of the page) |
| **Upload from Artifacts** | You are adding a policy while uploading other evidence | Artifacts → **+ Add artifact(s)** |
#### Complete the setup form and generate
Before you can generate a policy from a template:
* **Organization Profile** must be filled in. Iru uses it to pre-populate the setup form. If required fields are missing, you'll be prompted to complete them before generation starts.
* You need permission to create and edit draft policies. See [Compliance Permissions](/en/compliance/compliance-permissions).
### Generate from template
The Policy Library has pre-built templates for topics common in SOC 2, ISO 27001, GDPR, HIPAA, CIS, and other frameworks. From **Policies → My policies**, click **+ Add a policy** in the top-right. The library opens in place of the policy list.
The category sidebar filters templates: **All**, Governance & Risk, Access Control & Identity, Data Protection & Privacy, Security Operations, Vendor & Third-Party, Infrastructure & Network, Software Development, People & Workforce, and Business Continuity.
Use **Search by policy template name...** to find a template by name (for example, "Incident Response" or "Encryption").
Each template card shows the policy name, a short description, framework labels, and **In use** or **Not used**. Hover over a card to see **Use this template** and **Upload policy**:
* Framework labels, for example, SOC 2 • ISO 27001. They show which frameworks the template was written for. They don't link your policy to those frameworks. Attach the published policy to Actions after publishing.
* **In use** or **Not used**: whether your organization already has a policy from this template. Iru doesn't block duplicates; **In use** means a policy from this template already exists.
Open **Policies → + Add a policy**, find the template you want in the library, hover over it, and click **Use this template**.
In **Policy settings**, confirm or update the fields for this template. Toggle **Optional sections to include in generation** if you want extra sections in the draft.
Review **Policy type settings** and **All policies settings**. Change anything that doesn't match your org.
Click **Generate policy**.
Click **Load all**, or use **Load next section** and **Finish** after the last section loads.
Review the draft, edit as needed (see [Edit a generated draft](#edit-a-generated-draft)), then click **Publish**.
#### About the generated draft
| It does | It does not |
| ----------------------------------------------------------------------------------- | -------------------------------------------------------------------------------------------------------------- |
| Assemble a structured first draft from your profile data and setup inputs. | Publish automatically. Generated policies stay in Draft until you click **Publish**. |
| Tag each paragraph with the input that produced it. | Map the policy to framework controls automatically. Attach to Actions after publishing. |
| Keep generation inputs on the draft so you can re-generate with different settings. | Generate content outside the template library. Use [Upload a custom policy](#upload-a-custom-policy) for that. |
#### Edit a generated draft
After you load every section, review the draft before you publish. Check that roles and tooling match your org and that the exception process reflects your defaults.
The policy detail page shows **Generating policy...** until sections are ready. The **Generation inputs** card lists the setup form answers used for this draft. Use the up and down arrows at the top right to move between policies without returning to **My policies**.
You can edit a generated draft in two ways:
**Inline intake swaps.** Spans from your setup form selections (scope, classification, owner, review frequency, and similar fields) appear with a gradient highlight. Hover or click a highlighted span to open a popover where you can swap to a different option from the same intake field (e.g. Quarterly → Annual) or see which intake field the text came from (e.g. "Review frequency"). Each swap is recorded to the policy's audit log.
**Free-text editing.** Click anywhere in a paragraph, heading, or list item and start typing. Editing a highlighted span removes the gradient. Once you've rewritten generated text in your own words, it becomes regular body text. Free-text edits are recorded to the audit log.
After the first section loads, a toolbar appears above the editor:
| Control | What it does |
| --------------------------------- | ----------------------------------------------- |
| **H1, H2, H3** | Apply heading levels. |
| **Bold, Italic, Strikethrough** | Inline text styles. |
| **Bulleted list / Numbered list** | Convert the current block to a list. |
| **Undo / Redo** | Step backward or forward through your edits. |
| **Zoom** | Shrink or enlarge the document preview (− / +). |
When your cursor is in a paragraph or heading, an insert button appears in the left margin next to the block. Click it to add a paragraph, heading, or list below the current block.
Drafts auto-save as you edit. When every section is loaded and the draft is ready, click **Publish**. See [What happens when you publish](#what-happens-when-you-publish).
### Upload policy
Use this path when your policy is already written and saved as a PDF or DOCX. You upload the finished file; Iru does not generate content from the template. Pick a template card in the same category as your document so Iru files the policy under the right topic.
Open **Policies → + Add a policy**.
Hover over a template card in the same category as your policy and click **Upload policy**.
In the upload panel, set **Artifact type** to **Policy**, choose **Policy type** if needed, review **Mapped action(s)**, then click **Add policy**.
The upload creates a **Draft** policy (see [Policy status](#policy-status)). The file opens as a read-only preview on the policy detail page.
To change the content later, edit the source file in your authoring tool, then add a new policy with the updated file. You cannot re-upload on an existing record—when the new version is ready, **Unpublish policy** or **Delete upload** on the original.
### Upload a custom policy
Use this path when your document doesn't match any library template. A custom policy is a policy you upload that isn't based on a Policy Library template. You can still file it under any policy category (or **Custom**).
At the bottom of **Add a policy**, below the template categories, is an **Upload a custom policy** tile. Click **+ Start custom policy** to open the upload panel. The result is a policy with category **Custom** unless you choose another category on the policy detail page.
The upload creates a **Draft** policy. It appears in both places at once:
* **Artifacts tab**: filterable by Type = Policy.
* **Policies → My policies**: shows the policy with category **Custom** (or whichever category you chose). If you didn't pick one of the nine sidebar categories, use **All** or search to find it.
Edits in either view update the same record.
**Category**: editable from the policy detail page while the policy is in Draft. Admins can pick any category or move it back to Custom. The dropdown is hidden once the policy is Published.
**Type**: changeable from the Artifacts tab after upload:
* Demoting to another type (Procedure, Register, Other) removes the Policy record and hides it from the Policies tab.
* Promoting a non-policy artifact to a policy is only allowed if the file is a PDF or DOCX. Other formats must be replaced first.
To update the file, edit it locally, upload it as a new policy, then **Unpublish policy** or **Delete upload** on the original.
### Upload from Artifacts
From **Artifacts**, click **+ Add artifact(s)**, attach a PDF or DOCX, and set **Artifact type** to **Policy**. Choose **Policy type** (any library category or **Custom**), review **Mapped action(s)**, then click **Add artifact**.
* **Pick a category**: the policy is filed under that category.
* **Leave it blank or pick Custom**: Iru files the policy under the Custom category.
The upload creates a **Draft** policy and appears on **Policies → My policies** and the **Artifacts** tab, the same as [Upload a custom policy](#upload-a-custom-policy). See [Artifacts Management](/en/compliance/artifacts-management) for general artifact uploads.
### The policy detail page
Open any policy from **My policies**.
At the top of the page you'll see the policy name, status (**Draft** or **Published**), category, description, and badges for attached Actions. Change the category while the policy is still in **Draft**; click a badge to open that Action. **Publish** appears on drafts. Open the **ellipsis** (⋯) menu for draft actions: **Delete** on a generated draft, **Delete upload** on an uploaded or custom draft. On a published policy, choose **Unpublish generated policy** or **Unpublish policy** to return it to draft. The up and down arrows move to the previous or next policy in the list without returning to **My policies**.
The policy document sits below that header. Uploaded PDFs and DOCX files open as read-only previews. Policies generated from a template open in the editor; see [Edit a generated draft](#edit-a-generated-draft).
On the right, **Policy lifecycle** tracks generation or draft status, then acknowledgement progress after publish (for example, 2 of 85 acknowledged). **Owner** shows who maintains the policy. **Audit log** records who changed the policy and when. On generated drafts, the **Generation inputs** card shows the setup form answers used to create the policy.
### How policies relate to frameworks
A policy isn't linked to a framework directly. The link runs through Actions:
Policy → attached to → Action → belongs to → Control → belongs to → Framework
For a policy to count toward a framework, attach it to one or more Actions in that framework. Attached policies show up as evidence on each Action's detail page. Those Actions appear as badges on the policy detail page.
#### How attachments get created
Iru creates these attachments in two ways:
* **Automatically, on upload.** When you upload a file as a policy (from **Artifacts**, **Upload policy** on a template card in the library, or **Upload a custom policy**), Iru matches the file against Actions in your active frameworks and attaches it where it fits. Review attachments on the upload panel or policy detail page; remove any that don't apply or add more manually.
* **Manually, at any time.** From any Action's detail page, attach an existing policy (or other artifact) as evidence. Use this for Actions Iru missed, or for policies that weren't uploaded through Iru.
Generated policies don't auto-attach to Actions when you publish yet. Attach them manually from each Action's detail page after publishing. Auto-attach for generated policies is expected to follow.
#### Where frameworks show up
* In the Policy Library, each template card shows "SOC 2 • ISO 27001" or similar. That's catalog metadata. It describes which frameworks the template was written for, not a link to your active frameworks.
* In the setup form, the **Compliance frameworks** step shapes generated content (for example, GDPR-specific clauses when GDPR is selected) and saves a snapshot on the draft. It doesn't link the published policy to those frameworks.
* On the policy detail page, the framework link is the row of Action badges. Each badge shows an attached Action and its framework.
### Deleting a policy
Deleting a policy is permanent. Open the **ellipsis** (⋯) menu and choose **Delete** on a generated draft or **Delete upload** on an uploaded or custom draft. That removes the file, the policy record, and any audit history for that artifact. There's no undo.
To revert a published policy to draft, open the **ellipsis** (⋯) menu and choose **Unpublish generated policy** or **Unpublish policy**.
## Policy Acknowledgements
When you publish a policy, Iru assigns it to every user in your tenant and records who acknowledges it and when. Track progress on **Policies → Users** and on each published policy's detail page.
### The Users tab
Every published policy is assigned to **every user in your tenant** when you publish. There's no per-policy recipient picker.
Users added to your tenant after a policy is published are not automatically back-assigned. To bring them in, publish the policy again the next time you make a change.
Open **Policies → Users** (the second tab). The table lists each user with acknowledgement progress:
| Column | What's in it |
| ---------------- | ------------------------------------------------------------------------ |
| **Name** | User display name. |
| **Email** | User email address. |
| **Acknowledged** | Ratio of acknowledged policies to assigned policies (for example, 0/10). |
| **Policies** | Color-coded chips for each assigned policy. |
Use **Search by name or email** to filter the table. Two dropdown filters sit next to the search bar:
* **Role**: filter by tenant role (**Admin**, **Auditor**, **Collaborator**, or **Employee**). Open the dropdown, select one or more roles, and use **Clear** to reset the filter.
* **Policy**: filter to users assigned a specific policy. Open the dropdown, search or select one or more policies by name, and use **Clear** to reset the filter.
You can combine search, role, and policy filters. Click **Export** to download a CSV of the current filtered list:
* **Export by user**: one row per user. Columns include **Name**, **Email**, **Acknowledged**, **Total assigned**, and one column per assigned policy. A policy column shows the acknowledgement date when the user has acknowledged that policy; it is blank otherwise.
* **Export by policy**: one row per policy. Columns include **Policy**, **Total users assigned**, **Total users acknowledged**, and **Acknowledged users** (name and email of each user who acknowledged).
The **Acknowledged** column shows how many assigned policies each user has completed (N / total). The acknowledgement summary also appears on each published policy's detail page, in the **Lifecycle** card on the right sidebar (for example, 7 of 10 acknowledged).
Click **My assigned policies →** in the top-right of **Policies** to preview the workforce view. Click **← Back to admin view** to return.
### My assigned policies
When a policy is assigned to you, it appears here the next time you open the view. Open **My assigned policies** from the **Policies** page (**My assigned policies →**) or from your workforce navigation entry point, if your tenant exposes one.
| Group | What's in it |
| ---------------- | ------------------------------------------------ |
| **All** | Every policy assigned to you, in any state. |
| **Assigned** | Policies you still need to read and acknowledge. |
| **Acknowledged** | Policies you've already signed off on. |
#### Acknowledging a policy
Click an assigned policy to open it.
Read the full document. The Acknowledge button is disabled until you've scrolled to the end.
Click Acknowledge. The policy moves to your Acknowledged group and Iru records the timestamp.
If multiple policies are waiting, Iru takes you to the next one automatically after each acknowledgement.
## Related Articles
Who can create, publish, and view policies by role.
Upload custom policies and other evidence from the Artifacts tab.
Attach published policies to Actions as framework evidence.
Active frameworks that Actions and controls belong to.
Recommended setup order for Compliance.